


Solite Glove Review 2023
The only thing preventing me from spending more time on the water in the winter has been my gloves. When I saw the Solite surf boots advertised and then saw they make 5mm gloves, I wondered if surf gloves might be the answer. What followed was a months-long journey into ordering numerous pairs from different manufacturers and finally deciding that, yes, the Solite glove completes my winter gear. I’ve gone from 20 minutes of paddling, when discomfort really starts to set in on a cold day, to a full hour+ with discomfort never setting in - and in some pretty brutal conditions. I even tested the Solite split-mitt 5:3s in 10º F (-12.22º C), on a morning that started out as -4º F (-20º C). Though after 30 minutes I decided to call it good. Water freeze on you instantly in those conditions.
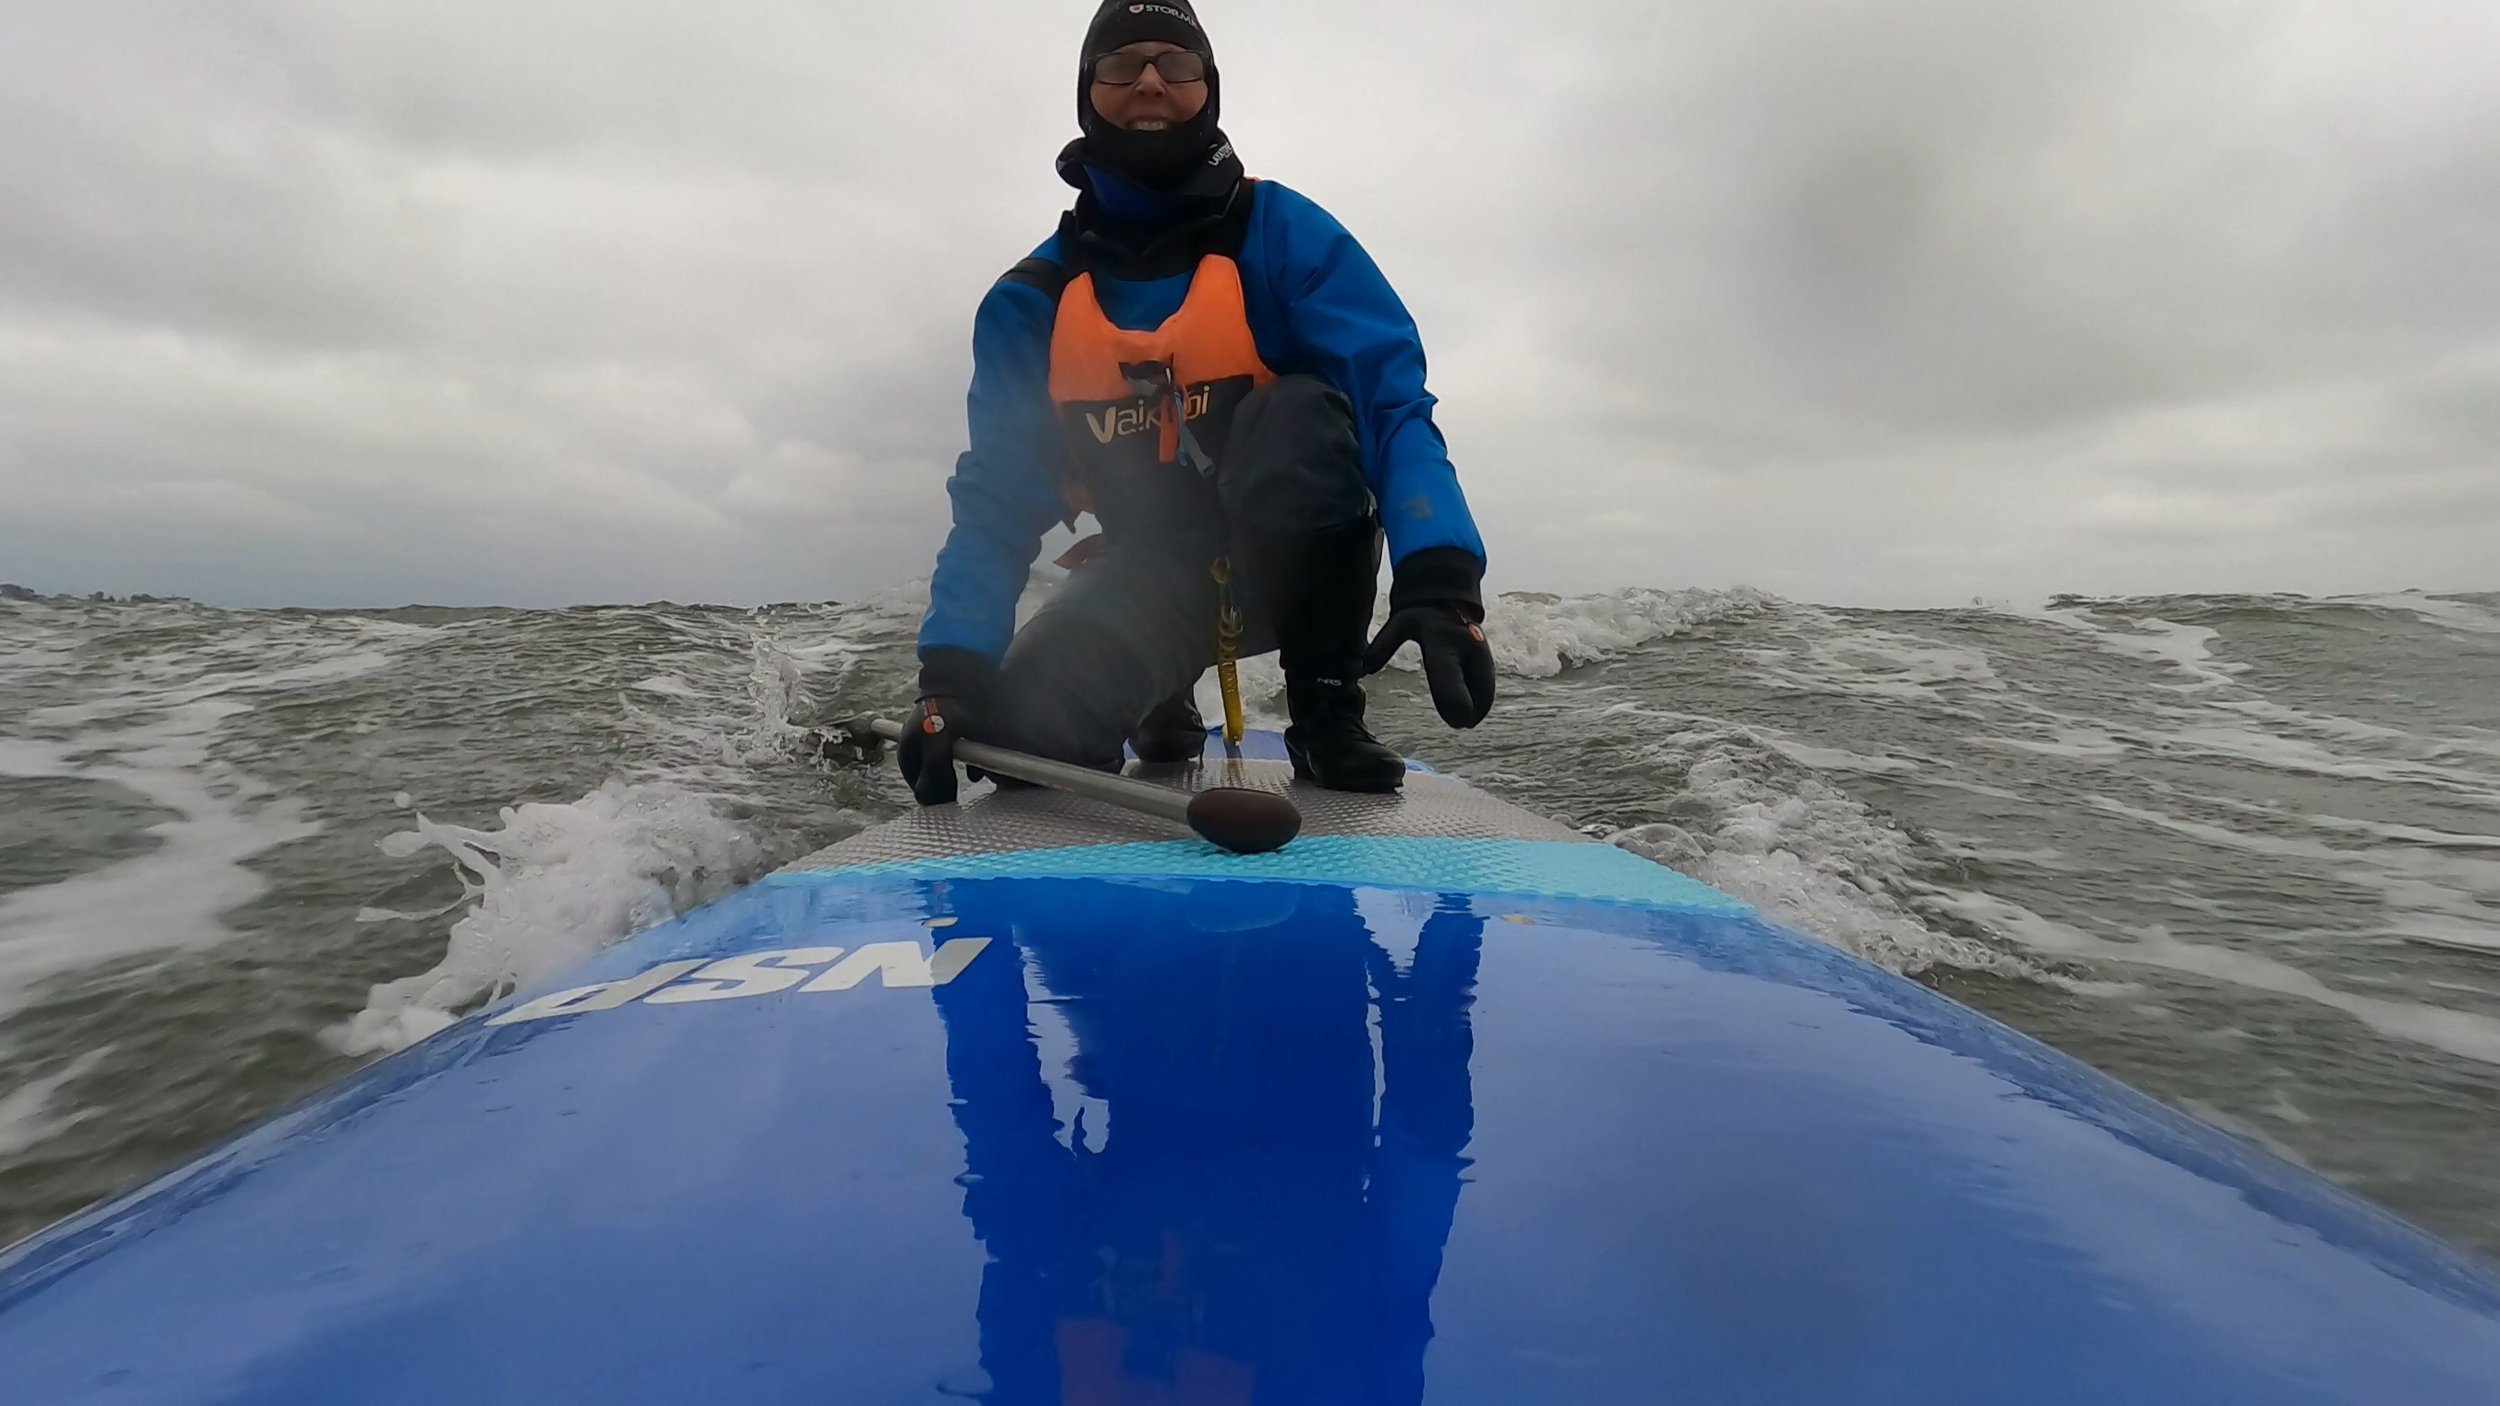
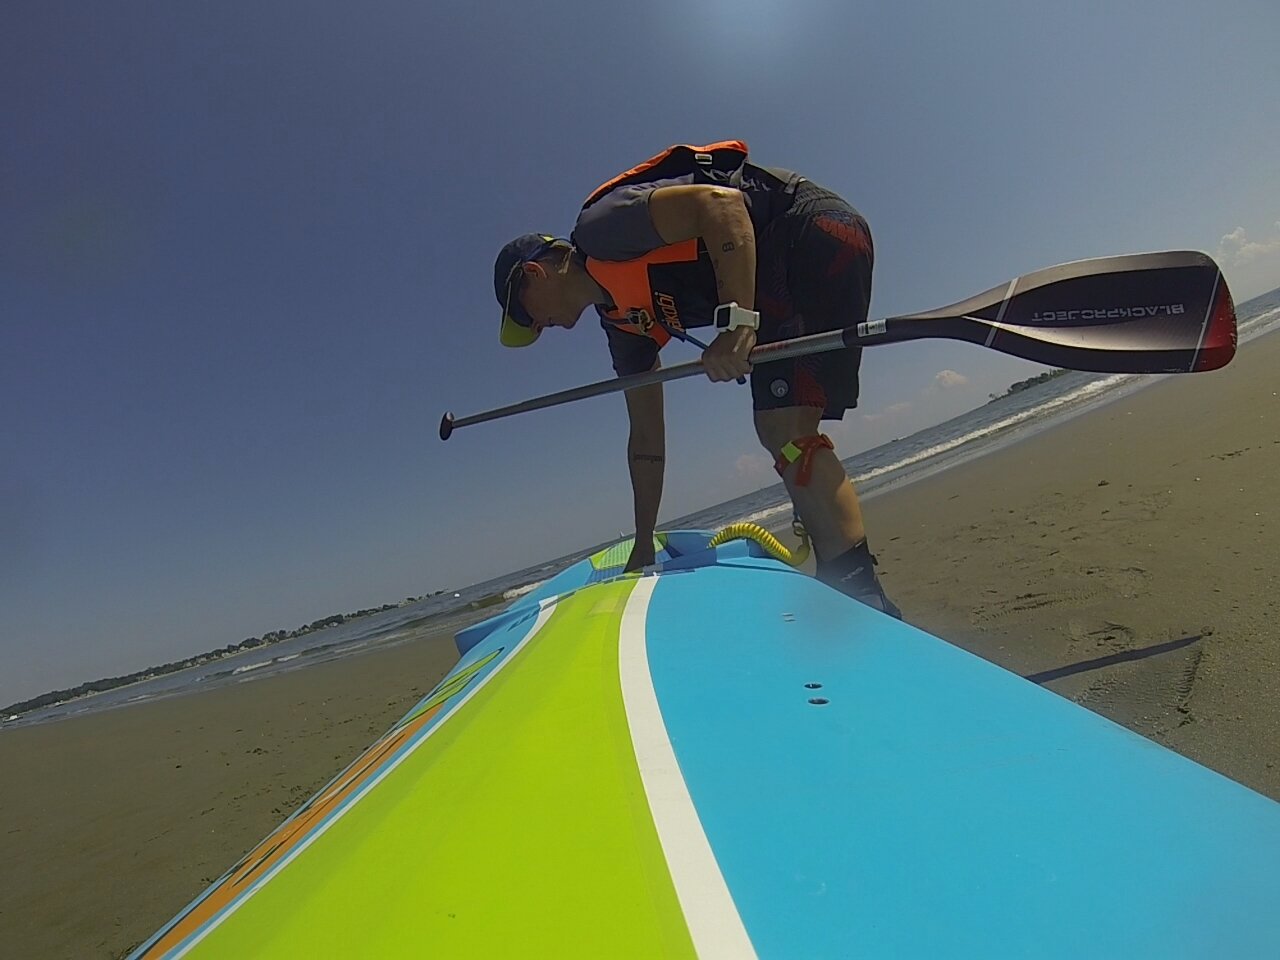
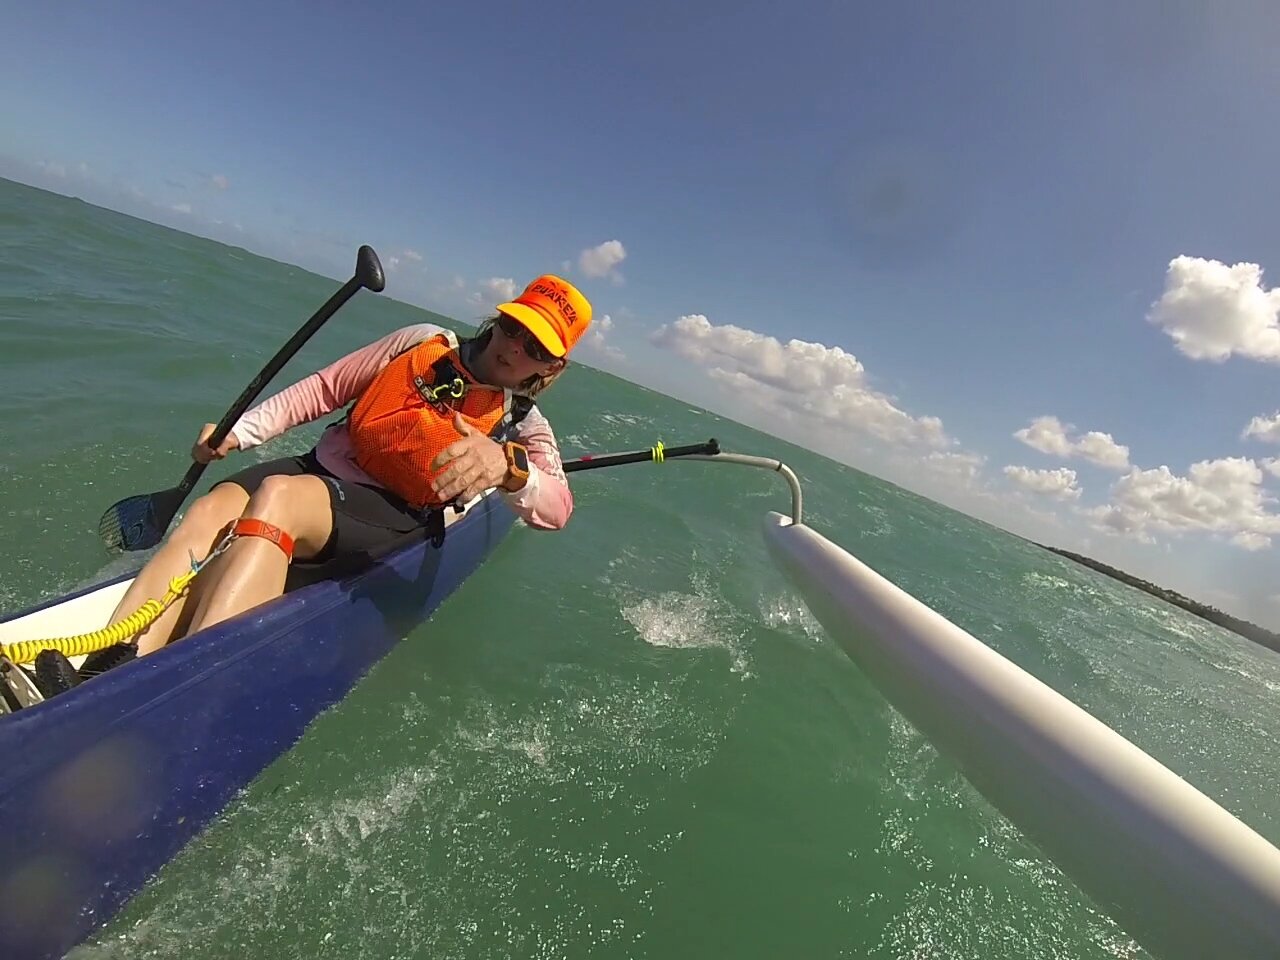
35 knot winds. I took a beating getting out of the surf zone, so I kept my gravity low coming in. I frequently paddle and surf by myself. Having the right gear means getting out for fun and getting home safe! Also going to plug the MetaLeash belt I’m wearing here, with yellow leash, my preferred leash for boards. Link at the end of the article.
Solite sells through its own website primarily and has a chat window. I clicked on it, and at first I was underwhelmed by the response, which basically was from someone who SUP surfs in San Diego and does not need 5mm gloves in the winter. They didn’t even think it was a great idea because the gloves at 5mm are stiff. A surfer friend in my local waters said the same thing. I was also advised by Solite to buy multiple pairs and just send back what didn’t fit. It turned out they were wrong about the gloves being too stiff for a SUP paddle, and it turned out I was wrong about their service. It proved to be great. I did some more research and found Xcel lobster gloves highly recommended. I ended up buying two pairs of Xcel and two of Solite. After all, if a glove does not fit, it won’t be any fun trying to wear it in the surf. It is important that neoprene gloves fit snug. Too much room and they glove could fill with water, cold water. Just right and if any water gets in, it should warm to your body.

NRS gloves, Solite and Xcel. These are all the same “size.” You can see the variation. Notably you see how tight the wrist section is on the split-mitt.
I am a big fan of my three pairs of NRS gloves. But all three are 3mm, and all allow water inside. 3mm is fine for transitional spring weather. At first I really liked the Xcel, which accommodated my wide but small hands. While I could get the Soilte on, they were uncomfortably tight. These were last year’s Solite, and I went back to chat. I was told that a manufacturing issue had made last year’s model come out too small, and that they were reduced in price consequently. I decided to buy two of the 2023 model and send back what didn’t fit. I also decided to send back the Xcel and get a smaller size. When I asked for customer service from the Xcel dealer, they said they could not help with sizing because everything was in a distribution center. They had no inventory to look at themselves. So… the Solite chat window started seeming better and better to me.

Xcel lobster mitt 5mm and 5 finger comparison. These are both smalls. You can see how different they are by looking at the thumb. The sizing was way off per style.
What is really unique about the Solite is the true split mitt, which keeps two fingers together on either side versus 1 and 3 in the traditional lobster glove. At this point I was about $600.00 USD into glove purchases. This is not how I like to make purchases, and I was really worried about my carbon footprint, sending gloves back and forth. So I really urge the manufacturers to do a better job showing actual sizing. On the other hand, everyone’s hands are unique. Xcel may end up being your first choice because they simply fit you better. However, when I down-sized to get a better fit, what showed up was so small it seemed only a very young child could ever get the Xcel glove on.

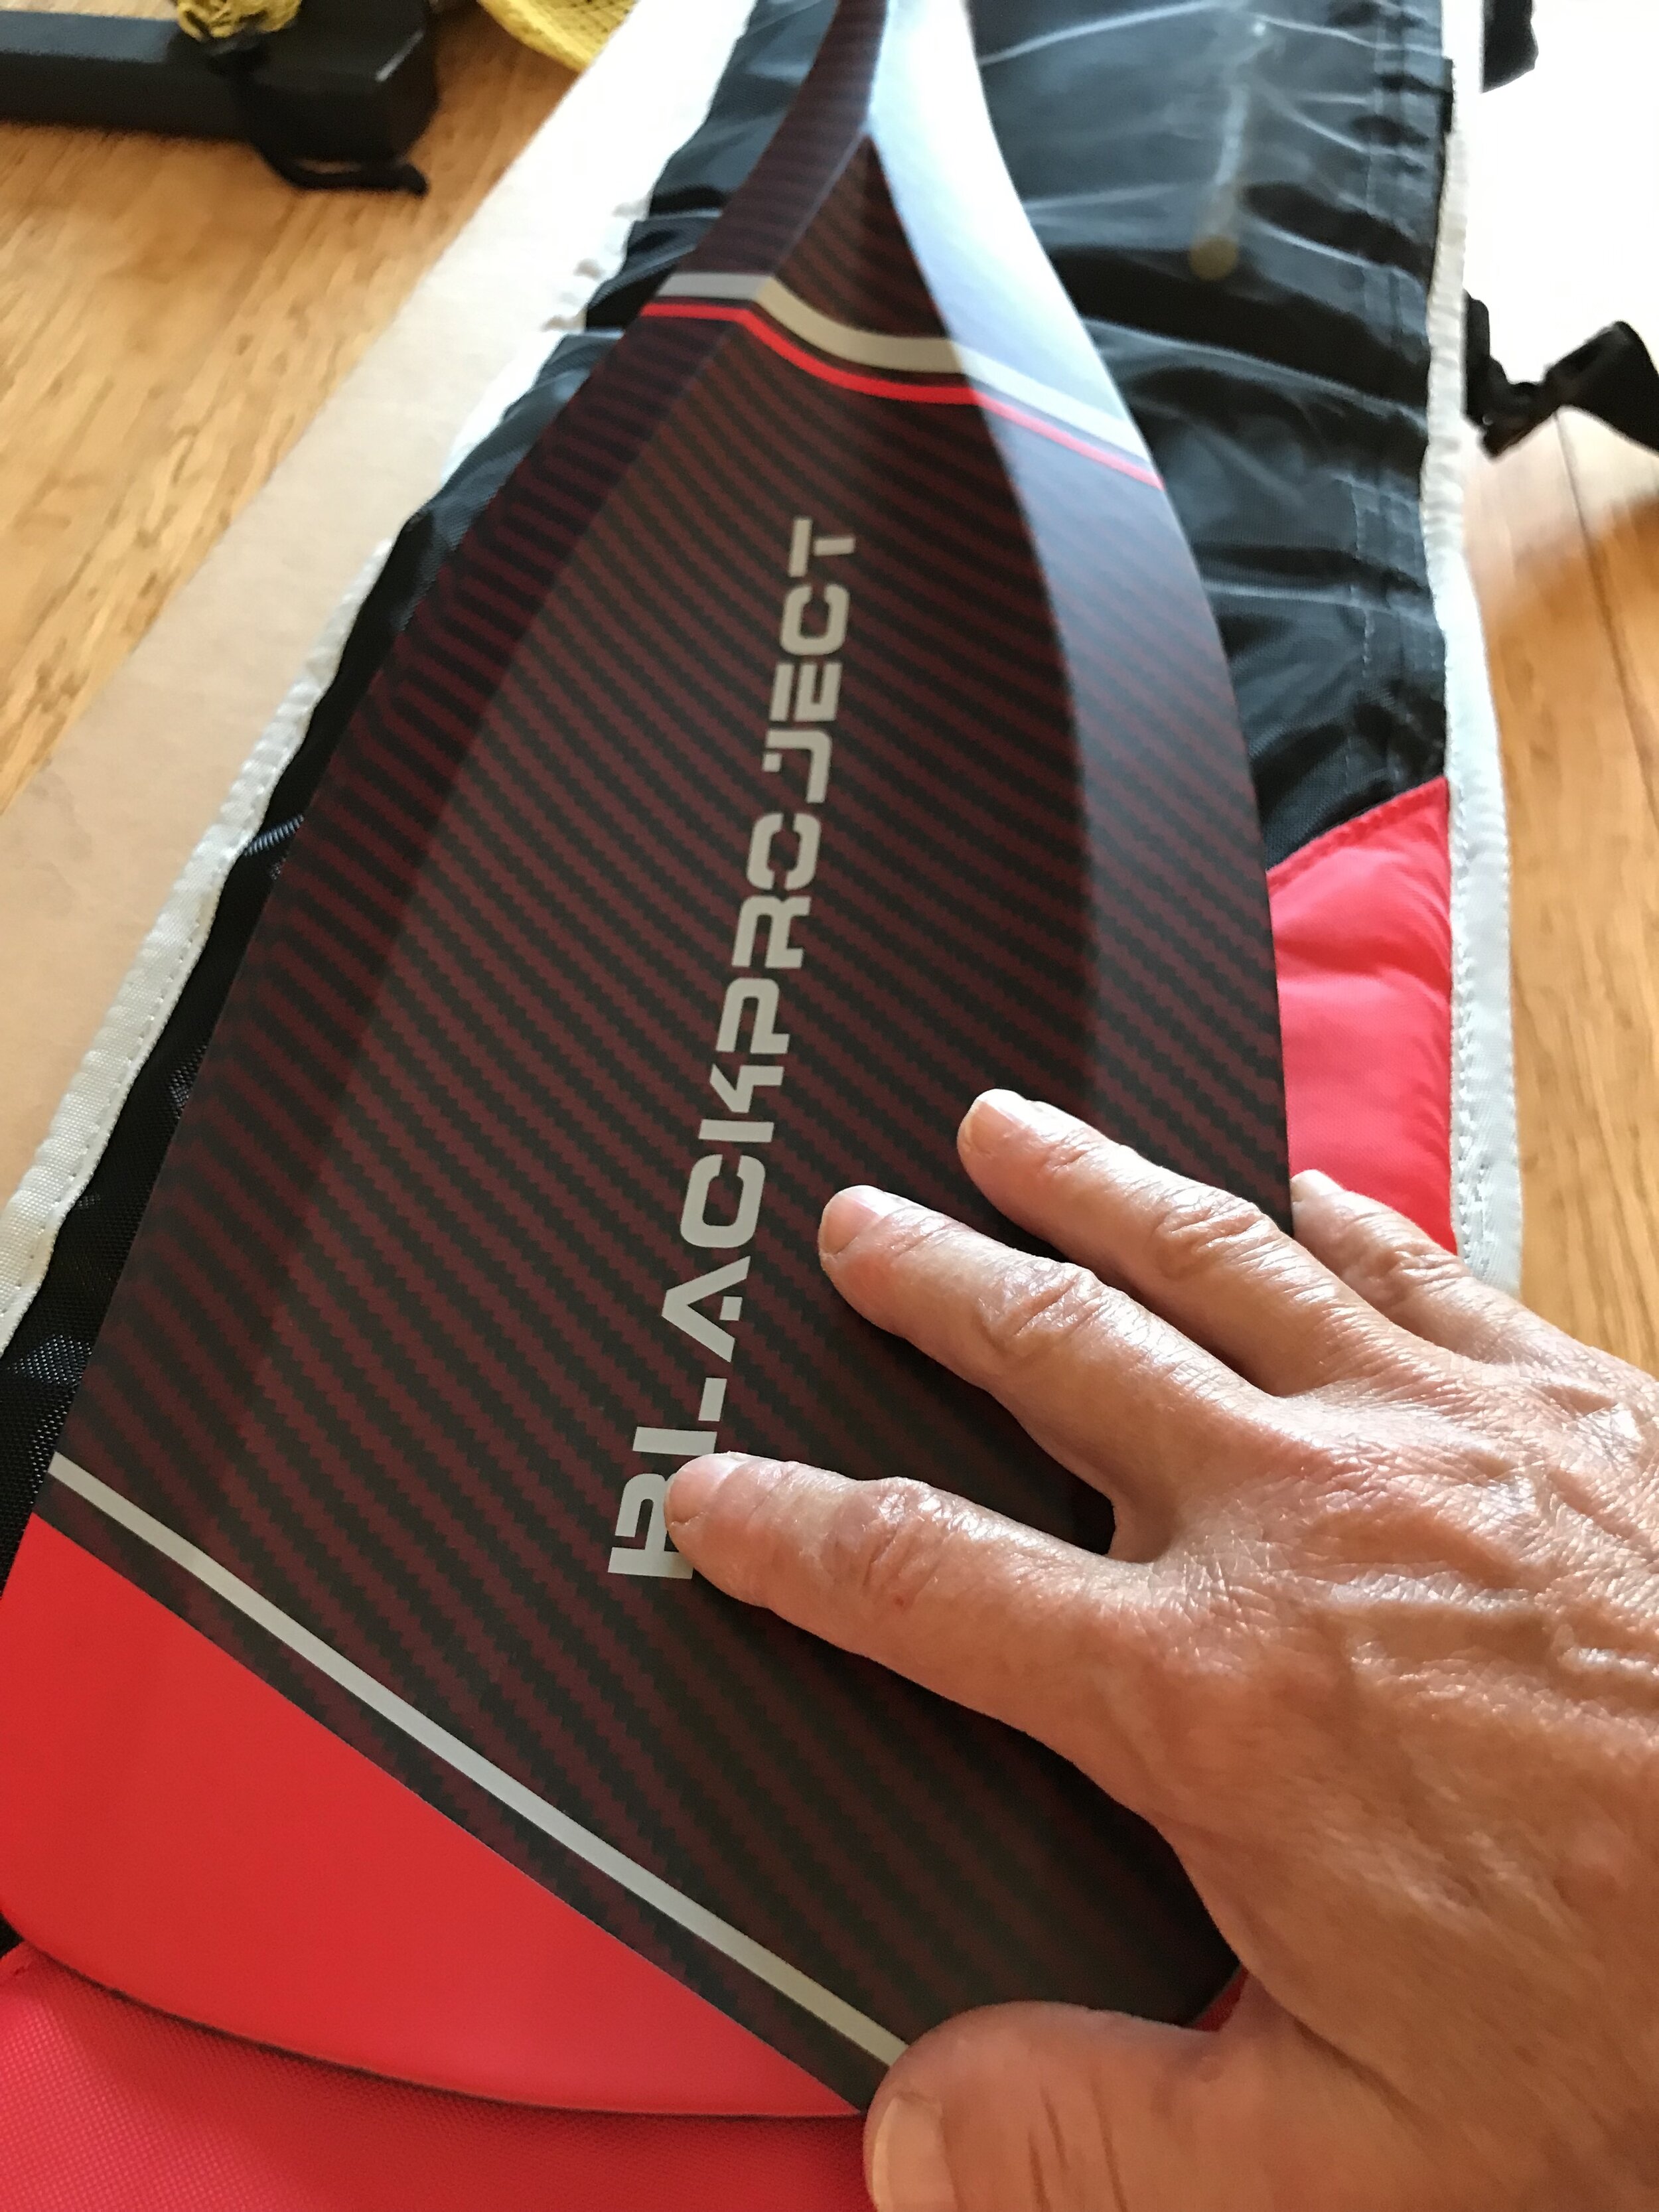
You want to fold over the cuff to squeeze your hand in. You can see the width of my palm compared to this glove. When it is on it is snug without being constrictive.
Solite has a little video where they show you how to roll over the cuff to make getting them on easier. The first glove is pretty easy, as you hook your fingers under the rolled cuff and pull it up. The second glove can be a challenge. I found that after a few paddles, the gloves gave just enough to make getting them on and off a little easier. I found the split-mitt very natural for my fingers and the 1 and 3 finger Xcel to be uncomfortable, with too much thumb and way too much room in the 3 finger pocket. The gloves are not so stiff that I can’t do things like put on my leash. I can even put my Apple watch on over the cuff.
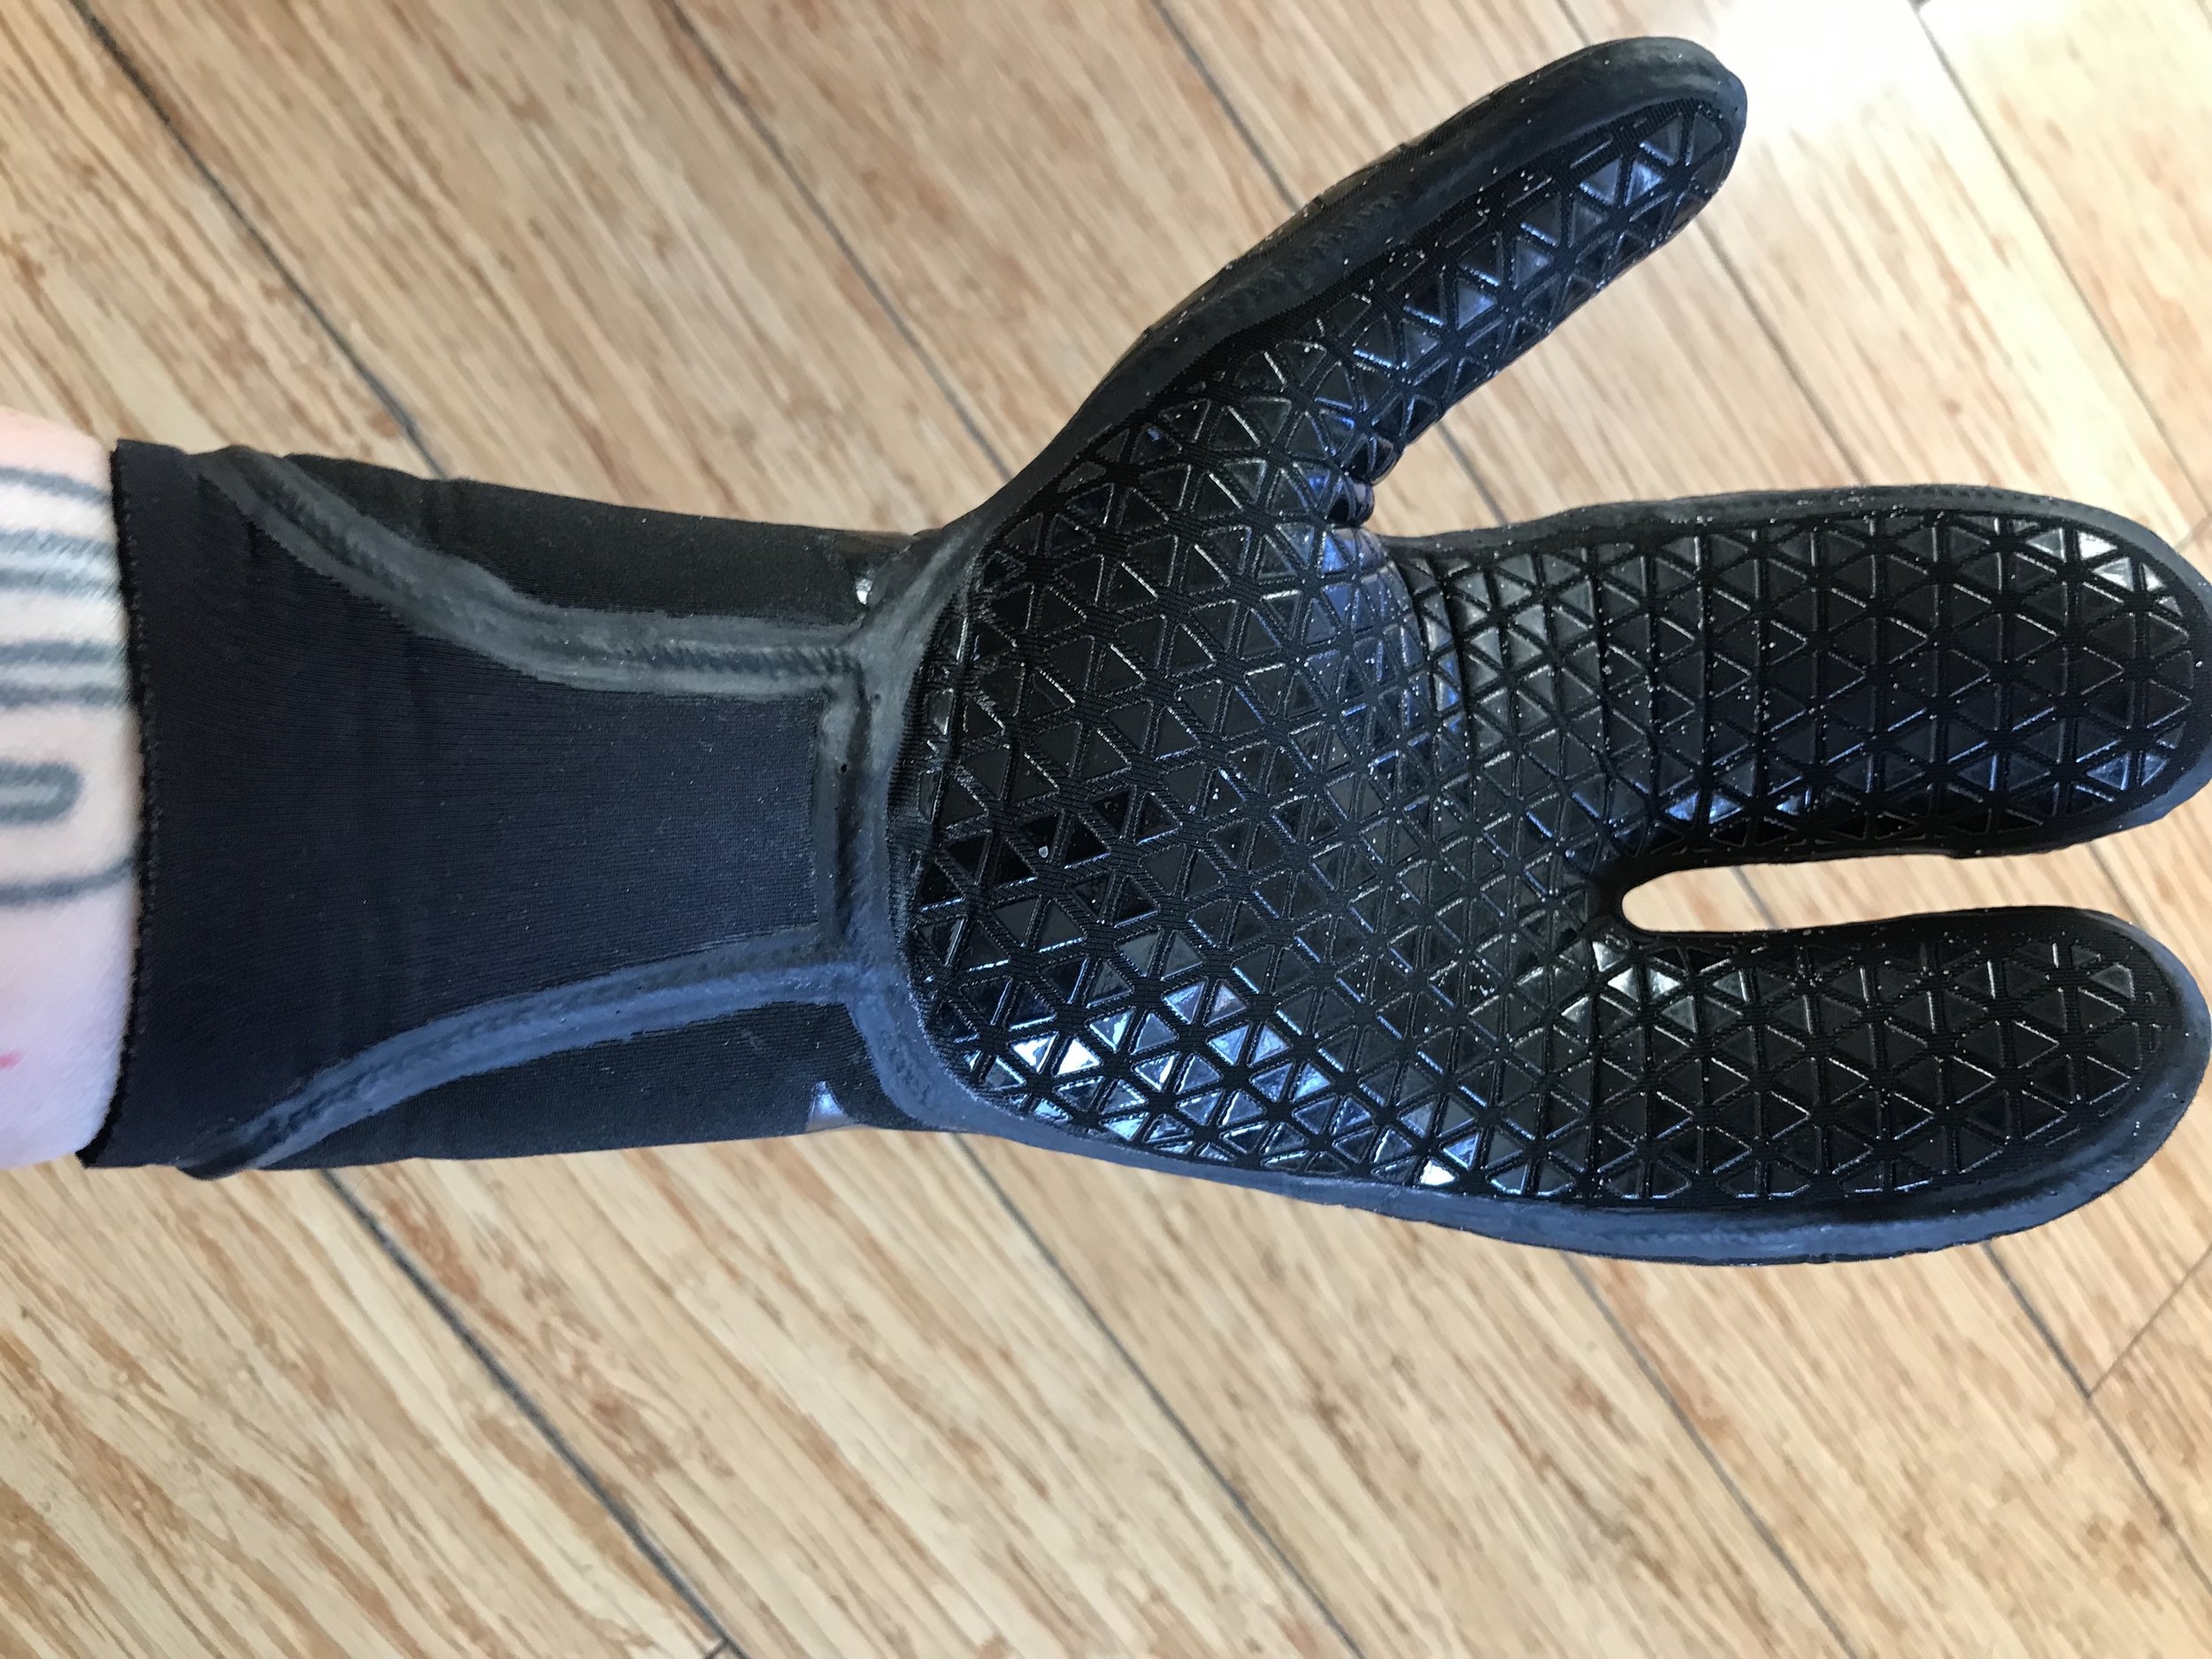
The 3mm neoprene wrist seals tight over my latex gasket on my drysuit. To date, even in brutal surf, no water has gotten in. The 2023 version has the tacky triangle surface.
Both Xcel and Solite feature tacky rubber palms that make gripping your board easy. Even the NRS surface allows for some grippiness, but this coating is superior. Neither my board nor my paddle have a chance of slipping out of my grip. Though on the 10º paddle of course I could not grip the icy edge of my board. It’s February as I write this, with winter half way over. If you live in a cold region like I do in the winter and have $100 for an upgrade, I recommend you check out either glove. My personal favorite is of course the Solite. Returns were a breeze and shipping was faster than Amazon. I recommend you do buy more than one size and send whatever you don’t need back. I expect I will get the five finger 3mm Solite gloves to replace my NRS, specifically for the wrist seal. Also, if you don’t paddle in the dead of winter, I still recommend any NRS glove as they cost half the price. With the Solite at twice the cost, you do end up with more than twice the fun. Because who doesn’t want to test their gear out in gale force winter surf? :) I should also mention that this is year three of paddling and surfing through the winter in my Kokotat dry suit. And it has not leaked a drop.

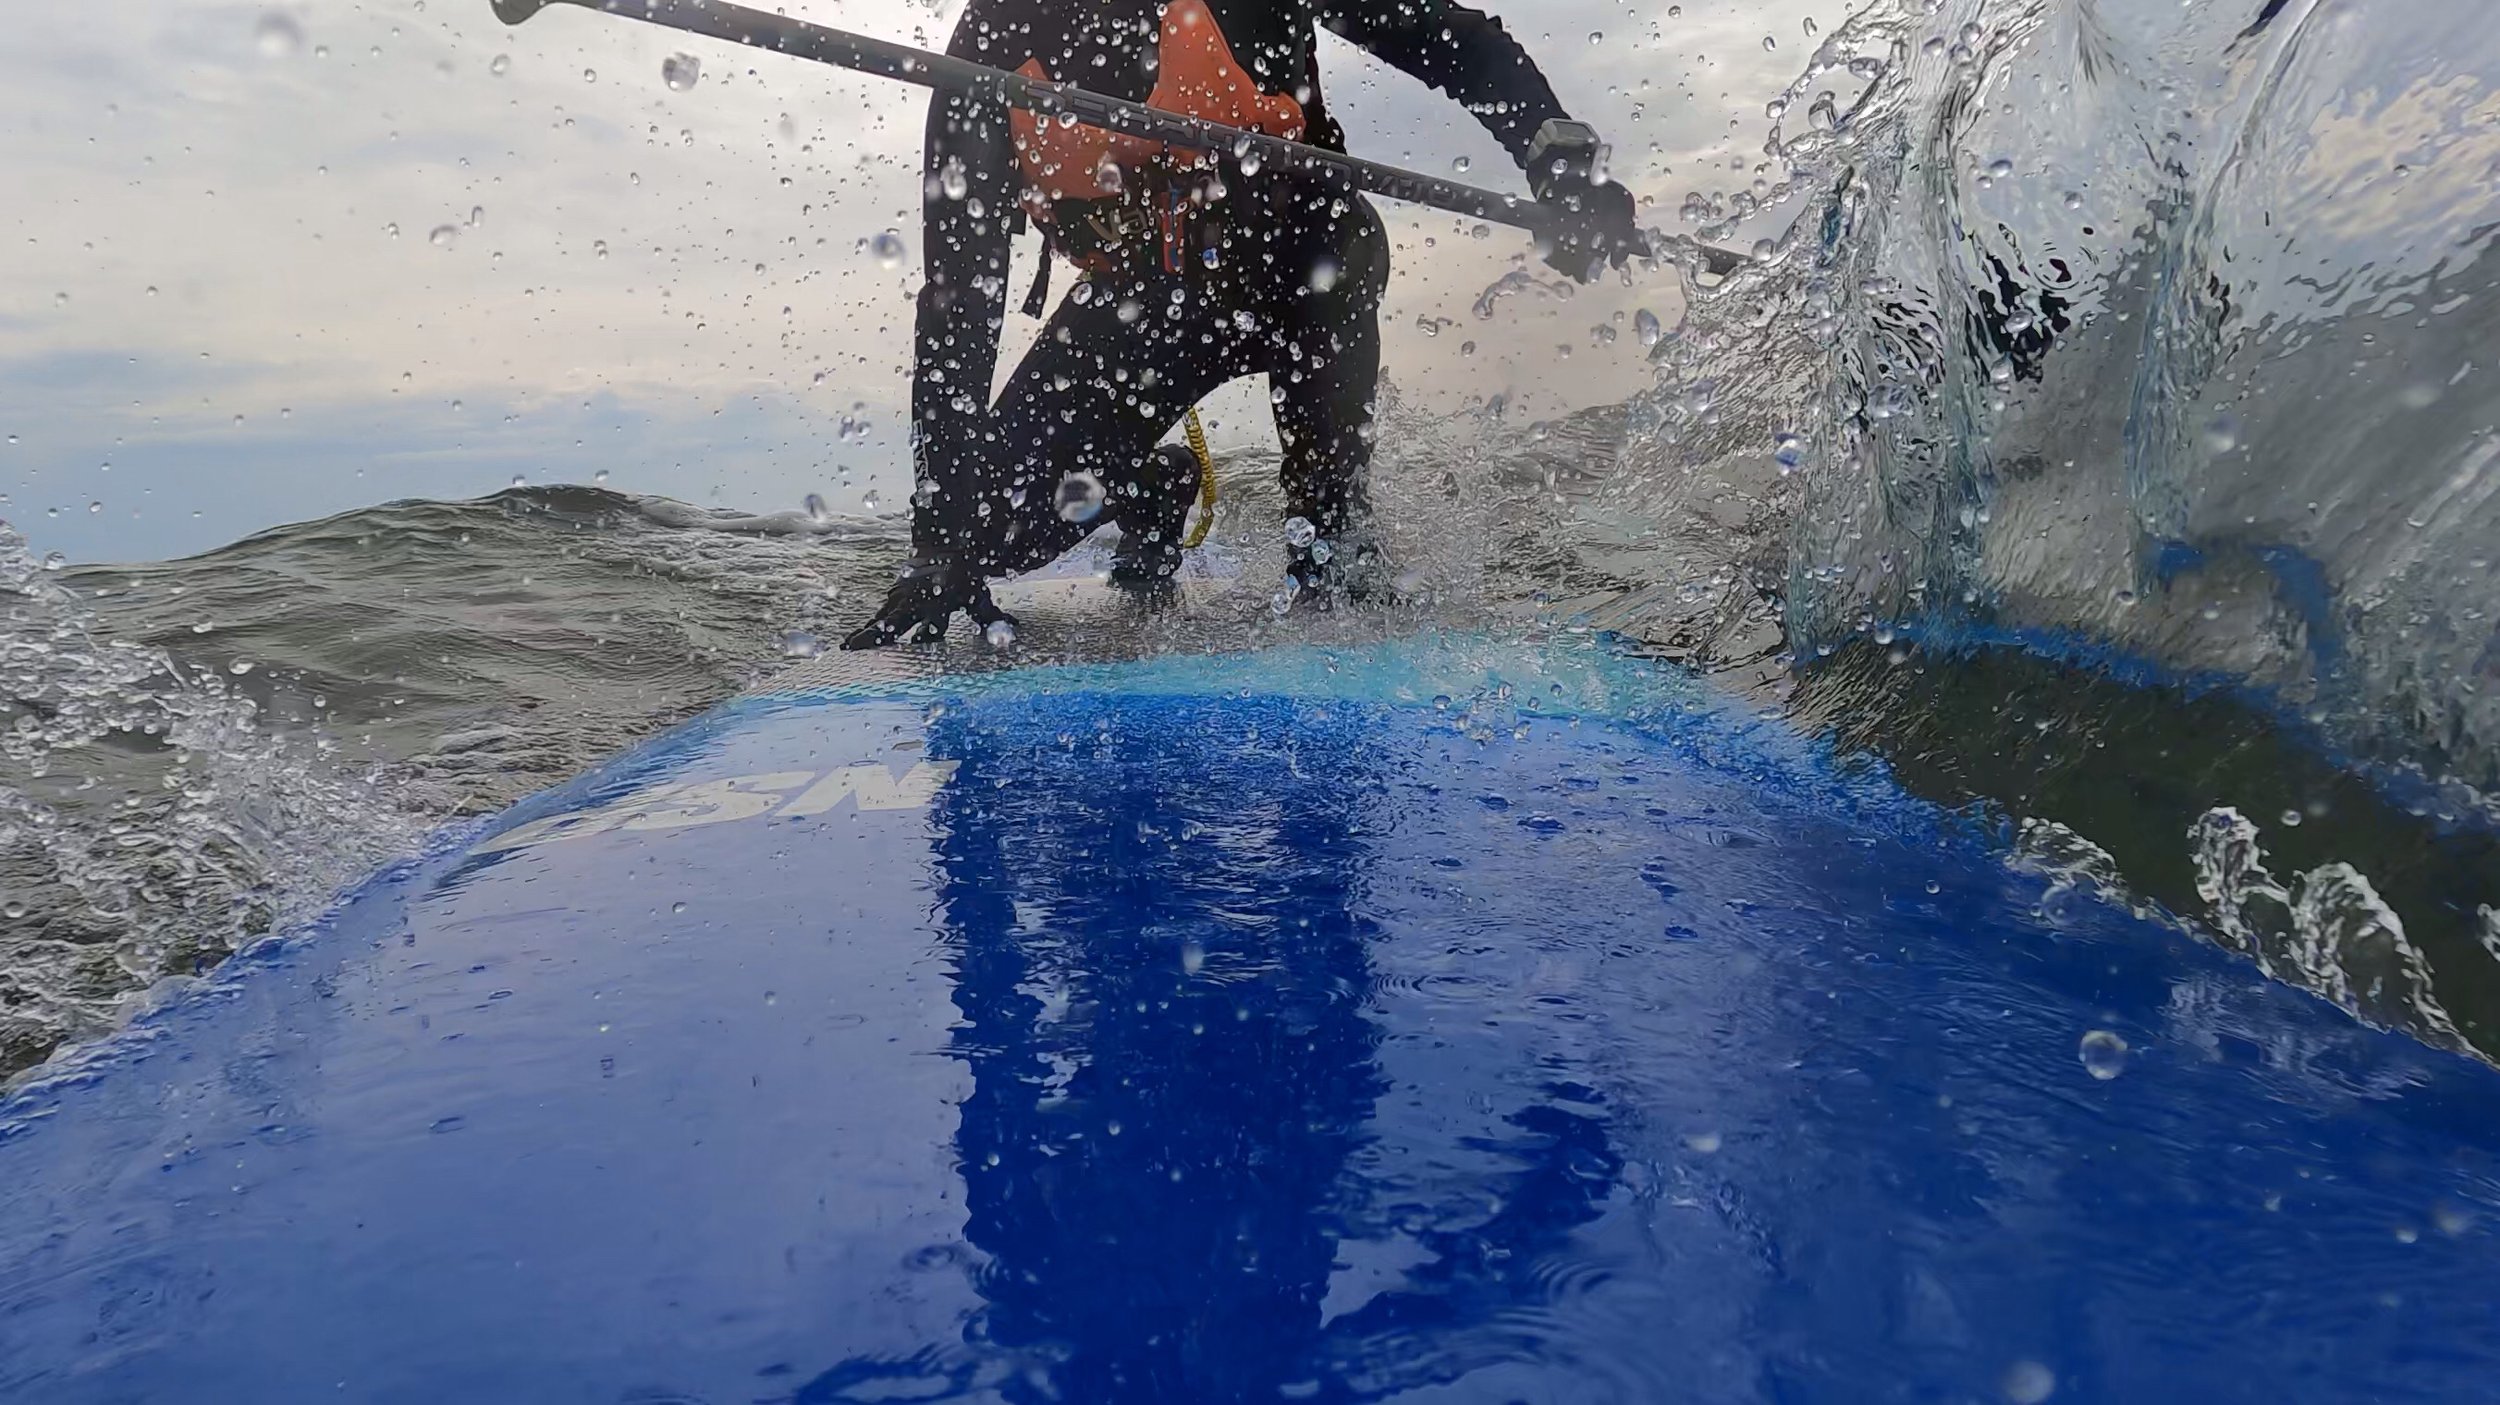
Solite split-mitt 5:3 test.
I was not thinking about my gloves at this moment. When you have good gear, you’re just focused on the wave.

Dry hands.

MetaLeash Quick Release Paddling Belt for SUP, surfski, outrigger, foil, prone, surf
from $34.95
FASTEN YOUR METABELT!
Introducing the 2024 MetaLeash Belt Leash, perfect for surf, SUP, and all paddle sports. Our upgraded design features bold, brightly colored belts that are two ounces lighter yet just as strong, with a 2800 lbs breaking force. Made of durable seatbelt polyester, the new MetaLeash belt ensures top performance and reliability.
PLEASE NOTE: Belt selection is yellow, lime, pink, orange, red or blue with three large water drops. The small water drop designs are SOLD OUT. We appreciate your patience while we update the inventory photos. The leash colors remain the same.
Cross Training: SUP, SUP Surf, Surfski and Outrigger
Cross training in ocean paddle sports is expensive. When I catch a wave on the ocean, any wave, I could not be more present and engaged, and every dollar I’ve put into my quiver is the investment in the highest quality of life. There’s no substitute for euphoria, except more euphoria. I found this NSP SUP surf board for $750 in the winter of 2021. It was an absolute bargain comparatively, and I ended up spending the entire winter on it.
Catching a shoulder high wave on an NSP All Rounder SUP surf board.
I bought two boards in the winter of 2021, after an outrigger race in 25-30kt winds, where the course was at odds with the wind, and I’d found myself heavily leaning left on my Puakea Kahele. At the time I wasn’t cursing the ama, the pontoon that makes a canoe an outrigger, as much as cursing out the race organizers for doing everything they could to turn optimal downwind conditions into a brutal up and sidewind race. A couple months later, as I settled into my new routine on boards, I discovered that favoring one side of the board over the other was impossible. Oscar Chalupsky’s chiding I remember well, about all outrigger paddlers leaning left. I think his chiding, during an immersion surfski clinic with him, was what made me work so hard NOT to lean left. And for the most part I don’t. Or I think I don’t. And I always say to people you don’t have to lean left, because the ama does it for you. But as a matter of fact, frequently you DO. Why? Because at 3-4’+, extended off the main hull, the ama and iakos act as a fulcrum pivoting the canoe on a wave. If you really want to learn to fly the ama, my advice is to get rid of it. The ama is a training wheel. Get rid of it by trying a less stable paddle sport like surfski or SUP. Both surfski and SUP respond much more to incremental changes in your body pressure, and you will learn a lot more about the cone of wave momentum immediately surrounding you. Then go back to the outrigger, and see if your sense of it has changed.

Ama Free
Learning to fly the ama on the surfski! :)
I know that buying all of these vessels isn’t realistic for most, so how can you realistically go about cross-training? 1: Join clubs that offer access to the vessels. 2: Sign up for clinics or lessons on other vessels. 3: Make friends! 4: Share! 5: Teach!
SUP is harder than surfski. Surfski is harder than outrigger. (And running is harder than all because you’ll need your knees replaced). Why do I choose 1: SUP, 2: Surfski, 3: Outrigger in this order?

Surfski Wipeout
Wave tossed the surfski over my head.
The answer is gravity. Your center of gravity is high above the water surface, so you are managing balance from a fairly awkward position. Surfski offers the lowest center of gravity, as the bucket seat essentially positions you at the water surface if not in it, but the cigar shaped vessels can easily roll if you are in line with the wave peak. That’s what happened to me in the above image. Outrigger is most stable because the training wheel ama spreads your buoyancy out over a larger area. Your seated center of gravity is higher, but some designs are placing the legs deeper into a cockpit, providing more comfort and gravitational stability. However, due to the friction or what is called “drag” on the water from the combined hull and ama, it is impossible for you to ever paddle as fast when you stroke on the right as it is on the left. Your right hand paddling is not just pulling you forward, it’s dragging the ama. If you’re wondering why your left arm paddle feels stronger than your right, it is exactly because your stroke is more centered in the drag and as such is better positioned to pull you forward. Learning to fly the ama, or momentarily get rid of the drag, will score you lots of enthusiasm on Instagram, but whatever you think you’ve gained you’ve lost by dragging the side of the hull in the water. It’s really popping the wheelie. I prefer the ama that isn’t there! My fastest speed this year has been on my rather stout NSP.

The Fanatic Bee is at a 60 degree angle to the horizon. I pushed on my right hand and knee and leveled out for a surf ride.
SUP surf boards like the Fanatic Bee have rails, just like surfboards. The rail is the rounded edge that allows you to cut into the water by adjusting your feet, body weight, body pressure. In the image above I knew I was going to wipe out because I’d cut into the breaking white water, but in a split moment I decided to push with all I had on the right. Wave momentum changes so quickly that no sooner did I apply pressure, I pulled the submerged edge out and completed a nice little surf (surfing being a sport that achieves it’s high points in a matter of seconds). Only board sports will get you this in tune with what waves are actually doing, and I highly recommend taking some lessons so that you can translate how subtle shifts in your body pressure and position will also make great though subtler changes in surfski and outrigger.
The surfski is pivoting downward to the left and I counteract the roll by intuitively leaning a little right and continuing to paddle.
In the image above I’d just turned on breaking waves. Winds were the end of Hurricane Nicole and crossing the incoming tidal swell. Surfkis allow you to paddle in any direction, regardless of swell and wind direction. A subtle lean into or away from any condition gives the momentary assist required to stay upright and on track. While SUPs also allow you to paddle in any direction, you become a mast and have to work much harder against the wind.

Stabilizing going upwind on an NSP Sonic downwind board.
In the image above I am paddling out over incoming swell. There is about .5 mile of rocks extending from the shore behind me, so I ducked, lowering to stabilize over this 5’ wave. While some of these boards are rather rocky and rolly, and you will develop strong leg muscles, spending time on one makes getting onto a 32” board all the easier.
In conclusion, I don’t win races, and I don’t even really race. But I am always up for getting a gold medal for having a good time. Any cross-training at all will make your time on the water more enjoyable. When strong winds almost repeated the race conditions that handicapped my left side the year before, and several racers dropped out after one course, I turned the buoy and headed back out alone, managing the wind and the ama and my center of gravity with considerably more mastery than I had the year before. And it was not because I’d spent more time on my Kahele. It was because I’d face the same conditions on a surfski ond on boards. In this case, echoing Oscar Chalupsky, stability breeds confidence, and confidence breeds stability.
If you have not yet read his book, No Return, No Surrender, I highly recommend it.
Apple Watch Review for Paddlers
I was coming up on logging 200 miles of paddling on an OC1, and with a brand new Kahele replacing my vintage Puakea Kaku, I knew I was not going to improve without the better canoe and hard metrics. It was time for a smartwatch. I had spent the last year using a $12.99 knockoff G-Shock. That could tell me how long I had paddled, and I could get a decent idea of my per Km rate, per mile, what have you. What it also told me is that I could paddle comfortably with a watch. The obvious upgrade was a Garmin, and the stars pointed to the Fenix 5.0, top of the line, etc. What had put me off about the Garmin was that it really isn’t for paddlers. It’s a runners watch. Then a mishap at Woo downwind camp in January 2019 really made me rethink the Garmin. This was in fact a failure of the watch band. Witness this great downwind video, with Adam showing off his style; however there is a subplot. Witness that the video starts with him wearing the Garmin watch, but soon it vanishes, never to be seen again. Adam was able to pinpoint the exact video frames showing the failure of the watch band and the watch dropping into the sea, hardly what you want a GoPro for. Goodbye expensive watch!
So, I put serious time into researching watch bands. Due to the numerous Apple watch bands on the market, this placed the Apple watch onto my radar, which I had never entertained because I don’t know any serious paddlers who use it. More research proved that apps had been developed for the Apple watch that were expressly for paddlers, and when I discovered that the Apple watch 4.0 is virtually a standalone PHONE, I took it seriously. That is, after I did a fair amount of research on sport watch bands and apps. A visit to the Apple store involved some hard questions for the salesperson, who showed me how to put apps on the watch, showed me the Nike sport band - which has a similar quick release button that resulted in the failure of Adam’s Garmin. I was also shown the Walkie-Talkie feature and, most critical, the Phone and SOS features. The salesperson advised me to go to Amazon to look for any number of third party watch bands that would suit my purposes. I bought the Apple watch 7.0 44mm (Nike), and let’s just say I’m thrilled.
UPDATE 2022: I upgraded to the Apple watch 7, GPS/Cellular 45mm. The battery life of the 4.0 was still decent (85%), after very hard daily use and over 1000km a year paddling, but my main interest is in the SOS phone option, so it seemed wise to upgrade. In addition the larger face with an ALWAYS ON option makes a difference, especially on the water where a quick glance at the face is all you have before you get hit with a wave.

I chose the Nike face because I want a bright large screen. You’re stuck with the Nike app (which I don’t use) but you can choose the others. I added Waterspeed, weather and at the bottom a stop watch. Choose whatever face you want. You may want to do this via your iPhone.

SUPcase does not stand for stand up paddling. Anyhow this is what I purchased, a SUPcase watch band for around $23 on Amazon. UPDATE 2022: These cases hold up. I am on my third because they do fade and get dirty. I buy the lighter colors for contrast in the water. I wear it all day long, ocean, yardwork, rough activities - and the Apple watch itself remains pristine. Just wish they had more sport, bright colors!
The Apple watch has excellent water resistance. Please know this is not a review for divers but for people like me, who get wet a lot but do not submerge to any depth unless of course we fall in the waves, where a waterproof band is not required. The Apple watch has high water resistance AND a water lock feature, which you can manually turn on OR your water sport app will turn it on. This feature is built into the two apps I will review, Waterspeed and Paddle Logger. I will go into this water lock feature in a little more detail because I didn’t know about it and thought the app was frozen after I first used it.

Credit goes to iDB for this image and you can read more about how to care for your Apple watch here.
When you swipe up from your home watch face (there are many you can choose from), you get the layout on the left. The water drop icon activates water lock and also makes it so you can’t swipe the screen. When you’re on dry land and you want to deactivate the water lock, turn the digital crown per the directions and some mystery function ejects water. Don’t ask me exactly how this works; suffice it to say my Apple watch spends a lot of time in salt water and everything is good. No need for a waterproof model such as is manufactured for divers for us paddlers. The SUPcase I chose protects the edges and face of the watch as a “bump guard.” Most importantly to me it does not have a little quick release button that could fail, and it has a traditional clasp, so it is easy to take on and off. There are no pins where the band connects to the central section snugging the Apple watch proper. I did add a screen protector film as well. I use a cleaning solution such as I use for my electronics once I get off the water. You have to insert the watch in a sequence and it is next to impossible to push it out when you are wearing it. Many competitor watch bands have some negative reviews for failed pins. This one just doesn’t have them at all.

MetaLeash Quick Release Paddling Leash - SUP, surfski, outrigger, foil, prone
from $64.95
LIGHTER: at 4.5 ounces weighs half of other leashes, floats
SMALLER: 50% smaller than other leashes but still extends just as long
STRONGER: heavy duty webbing, stitching and YKK buckle system, 1600lb jacketed Samson Dyneema retractable leash, stainless steel clasp system (no hidden mystery hardware or plasticware like other leashes). Can be used with included Dyneema loops, without hardware, for greatest strength.
SAFER: easy to inspect, high contrast (red, orange, hot pink, lime, yellow or black cuff), red, yellow, orange or pink leash, dual quick release/connect for either race start or getting out of tricky situations
SIZING FOR OUTRIGGER, SUP, SURFSKI, FOIL, PRONE: Retractable leash comes in 9’ or 6’ length. Hardware comes in different sizes for conditions or hands.
SIZING FOR FIT ABOVE CALF: Leash cuff is to be worn above the calf or connected to waist strap.

Waterspeed
My first choice app for paddling
Waterspeed bundles a lot of data into their app. You can choose your water sport and go from there. You are best off going to their site to check out all of the features. (UPDATE 2022: The app is constantly upgraded, so that just when you have everything set on your watch, it goes away and you may have to tweak settings all over again. It is a nuisance to reset the watch to keep the APP face active during use. However, it is still a better app for the price. Go to settings, RETURN TO CLOCK and set it for After 1 Hour. This is the max you can show an app on the watch face, which runs the battery low, so it is not a default.)
I will summarize why this is great for me: as a novice who is transitioning to intermediate paddler I need to know more than just where I paddled, how long and how far. I elected to review my data in kilometers, mostly because my goal is to train for a 50k open ocean race. I now train in the ocean and practice 1 kilometer sprints and various techniques. Later when I review, Waterspeed breaks the data up into 1 kilometer splits. Heart rate data is included as is some basic wind speed data. You can replay the mapping as a video and you can also edit out the pieces that are not relevant. For example if I forget to turn the app off, and it shows my path walking around the beach - that can be removed. I can edit out my time on the water prior to race or sprint start and edit out the end. Etc. I paid for the pro version, which costs about $4 per quarter. You can see some data on your watch, and when you are paddling you can see your actual speed, distance etc. But for analysis, you want to use your iPhone or iPad to see everything on a bigger screen. So, just sync the app’s diary and it will only take a few moments for the data to appear on your other devices.
UPDATE: I’m not a novice paddler anymore. I use the watch for surfski, SUP and SUP surf. In SUP surf I am in the waves a lot, and the watch holds up just fine. I also paddle all season. In the winter I have to wear the watch over my dry suit, which prohibits some of the tracking features, like heart beat.

I don’t think about my Apple watch at all in any conditions. It just works, and especially well in the SUP case.
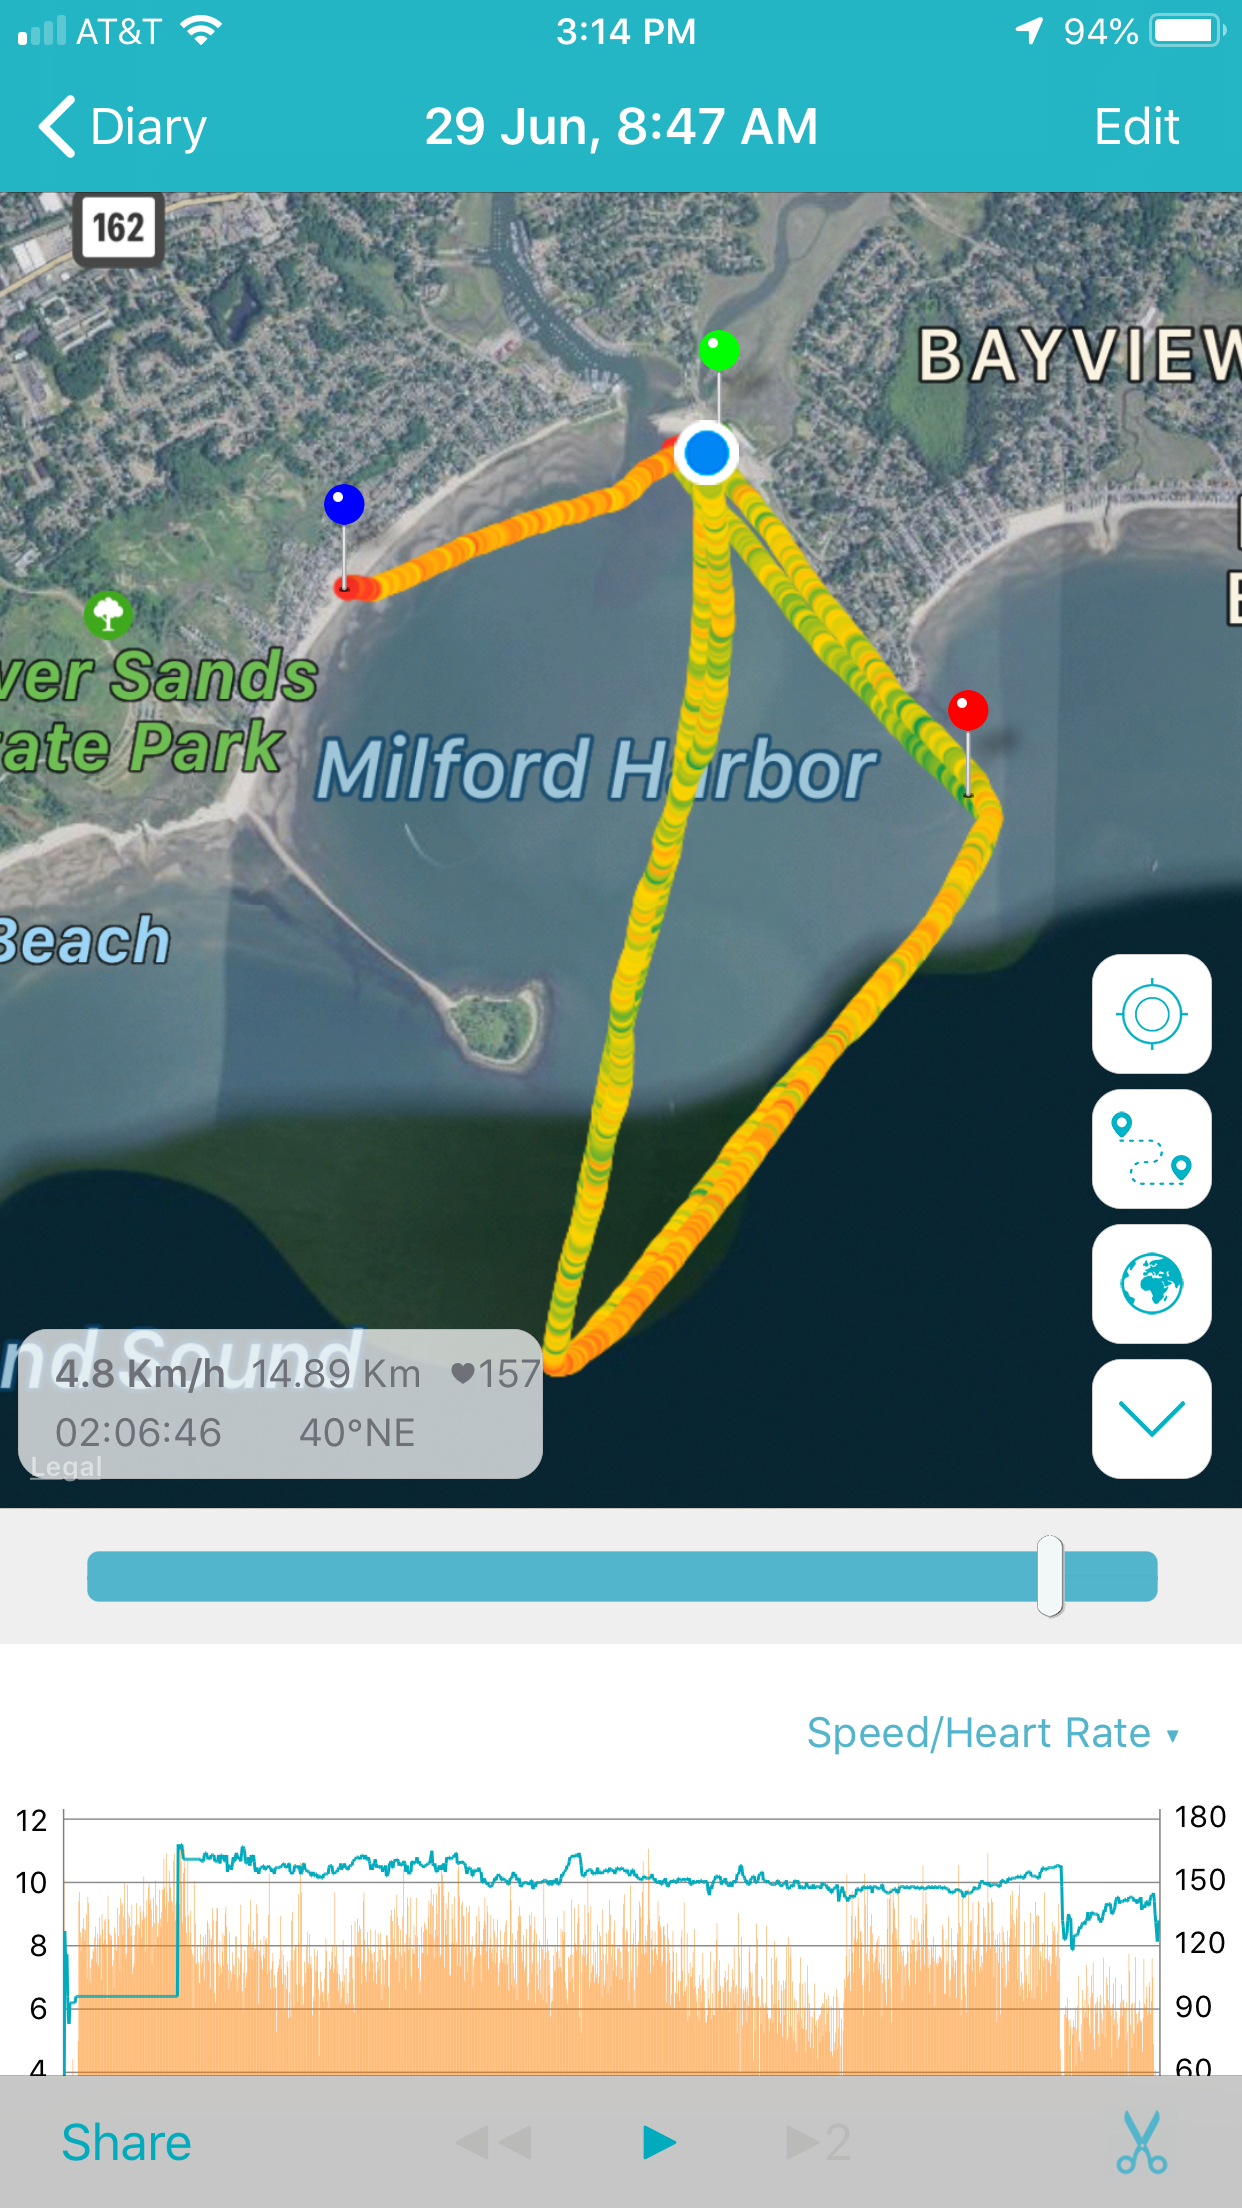
The scissors are the edit icon. This is a race log. So the slower parts of this log (waiting for the race to start and a slow paddle afterwards), can be edited out and the actual km/hour rate recalculated. Or you can use the slider button and scroll through the visual data, zoom in and even play it back. Lots of data!

This is an overview. Here you see the play button, which allows you to watch the visual log. Here you also see the export button. Not only can you export images you can export DATA as a CSV file. This is really nitty gritty, and I have not needed to use this data just yet. But it’s there.

This is the editing screen with its options.
Let’s take a look at the other app on the Apple Watch market for paddlers, Paddle Logger. A novice friend of mine uses this, and this fits her needs. She basically just wants to see where she has paddled, how long and how far. I tried this then paid to “unlock” the pro features, which turned out not to include and heart data, no splits, etc. This costs about $3 or $4 per month, and when I really could not find improved data, I emailed the developers, who told me it did not have what I was looking for, so I cancelled the subscription.

Let’s get down to what is really awesome about the Apple Watch 4.0: it really is a phone. Granted you must already have an iPhone and using this as a phone will cost you another $10 per month on your data plan. BUT you do not need to carry both at the same time. I have an iPhone 7 plus which is basically a phablet and way too big to carry in my PFD along with my radio and my emergency beacon. Since I always paddle reasonably close to shore in the US, there’s a good chance I can make a call from out on the water if need be. If friends also have Apple watches, we can use the built in Walkie Talkie feature. Then it comes down to the fact that your contacts, music, etc. are all on it. You can ask Siri to start Waterspeed, order a pizza, talk to Mom, text your boss you’re “sick” because there is an awesome swell - whatever you want and expect from an Apple product. I am beyond sold on the Apple watch. The paddling apps will only get better. In closing I’m going to plug the app that I don’t use for a feature that Waterspeed SHOULD have. This is called PIT - paddler in trouble.

Don’t paddle if you can’t make it back to dry land. If you get into trouble, have a plan. PIT might be one of those plans that works for you.
PIT is a function of this app (yet to be released) which allows you to set a timer for the duration of your expected paddle. If you don’t shut it off before the timer counts down, it will ask you if you’re ok and if it gets no response it will text whomever you have set it up to dial. There are other guardian type apps out their that do this as well. This is a GREAT idea. But greater even still is knowing the weather, knowing where you are paddling, paddling with others and ALWAYS inspecting your gear for possible failure (leg leash, my friends) before you head out. As much as I love this feature I will text a buddy I’m going to be out for an hour than end up paddling for three. So, I’m going to do my final wrap up on this by THANKING PADDLE LOGGER for showing me the workaround. This is the built-in SOS function on the Apple watch. So, if you have an app running and your phone is in water lock mode, how do you make an emergency call? You press the lower button and HOLD IT down. An emergency call will be placed. The short video shows how the SOS feature overrides the Waterspeed app (or Paddle Logger or whatever). The long video is me going over my watch. It’s a little long and tedious, but if you’re going to drop $500, worth the time. I did not find any videos on the Apple Watch for paddlers when I looked, and so I write this entry not to sell watches but to make paddling SAFER and spread the good vibes. This watch not only makes me safer, but I have to say I’m already a minute faster per Km from the data feedback. So there you go. Stay safe people. The water is a blast, but the return to the beach is always our goal so that we can do it all over again.
Slow motion footage of SOS activation.
MetaLeash Belt for SUP and all other Paddle Sports
It has been three years since I first developed a leash but only about one year where I have spent more time on a SUP (stand up paddleboard) than a boat. Getting a SUP out on the water is a lot easier than taking a boat. There’s no set up, no gear fuss - and when it is windy a board is ideal for getting in and out of the surf. I’d developed a belt early on in the process of trying out what was comfortable. To my surprise we sold a lot of belts, mostly to the surfski paddlers. I used my belt during the winter for everything I paddle, outrigger, surfski, SUP and recently my hybrid Fanatic Bee with foil capacity. Why? It’s safer. If you fall off your boat or board it is a lot easier to reach the leash at your waist, should you need to. You definitely don’t want your leash getting tangled in a buoy mooring line or anything else that would be hard to get to, especially in cold water. On a SUP the belt proved to be ideal. Why? Because when you move, the leash rotates around the belt with you. It is the ultimate experience in comfort, versatility and safety.

And believe me, I fall off the Bee a lot! ;)

MetaLeash with Rail Saver for Foil
MetaLeash Quick Release Paddling Belt for SUP, surfski, outrigger, foil, prone, surf
from $34.95
FASTEN YOUR METABELT!
Introducing the 2024 MetaLeash Belt Leash, perfect for surf, SUP, and all paddle sports. Our upgraded design features bold, brightly colored belts that are two ounces lighter yet just as strong, with a 2800 lbs breaking force. Made of durable seatbelt polyester, the new MetaLeash belt ensures top performance and reliability.
PLEASE NOTE: Belt selection is yellow, lime, pink, orange, red or blue with three large water drops. The small water drop designs are SOLD OUT. We appreciate your patience while we update the inventory photos. The leash colors remain the same.
XOSS G/G+ Speedometer and Strava for Paddlers: an affordable speed coach
A $56 USD speed coach for paddling.

The Xoss G/G+ is an affordable solution for live technical feedback during training. Other options marketed to paddlers tend to cost around $400 and are marketed independently for surfski, SUP and outrigger - meaning if you paddle all three you would have to spend around $1200 for standalone units. I spent $37 USD on the Xoss G/G+ and $19 USD for a standalone cadence sensor, which I can use with all of my vessels.
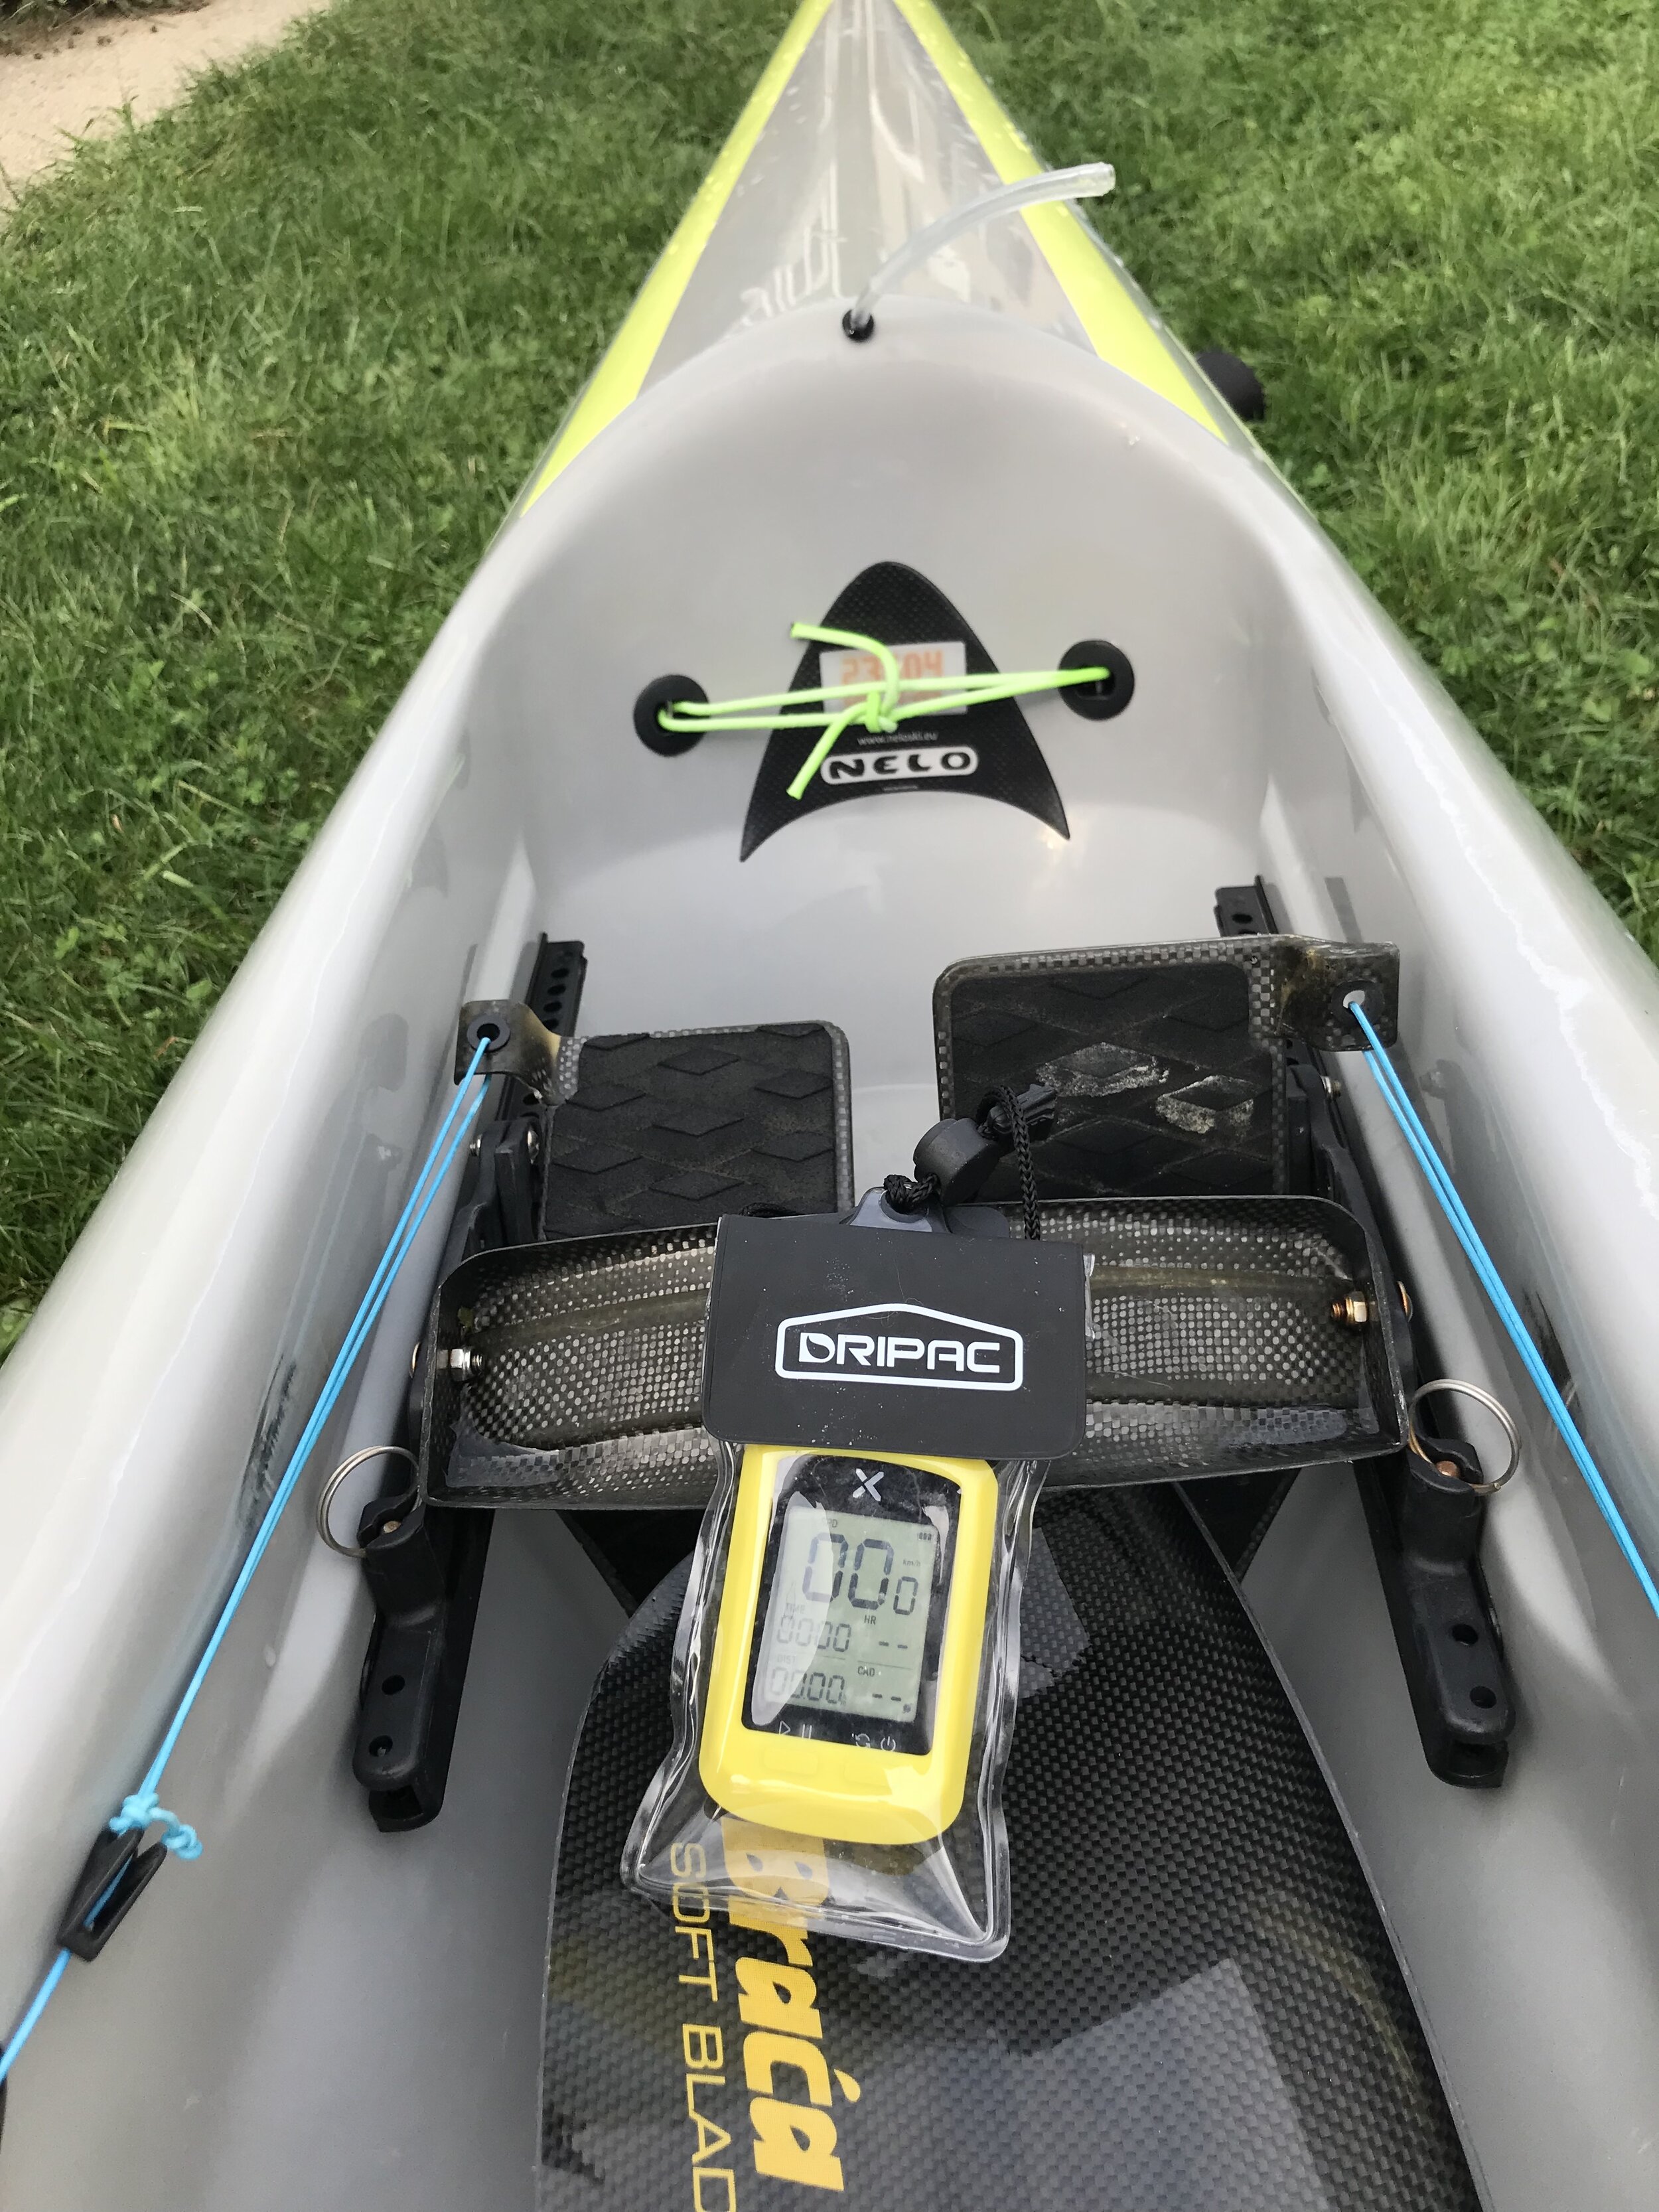
Connected to the foot brace on my Nelo 520.
The XOSS G/G+ is waterproof rated to IPX7, meaning it can withstand heavy water droplets and be submerged to one meter for 30 minutes. I still put it inside a $10 USD Dripac because the rubber plug that covers the USB charger connection could fail. Cheap insurance. (I had this type of USB plug fail on a Standard Horizon marine radio).
The battery life is 25 days with use at 1 hour a day. In other words, take it out for a long paddle and it will last all day.
HOW TO SET IT UP FOR PADDLING:
1: Charge the included lithium battery with the USB cord provided.
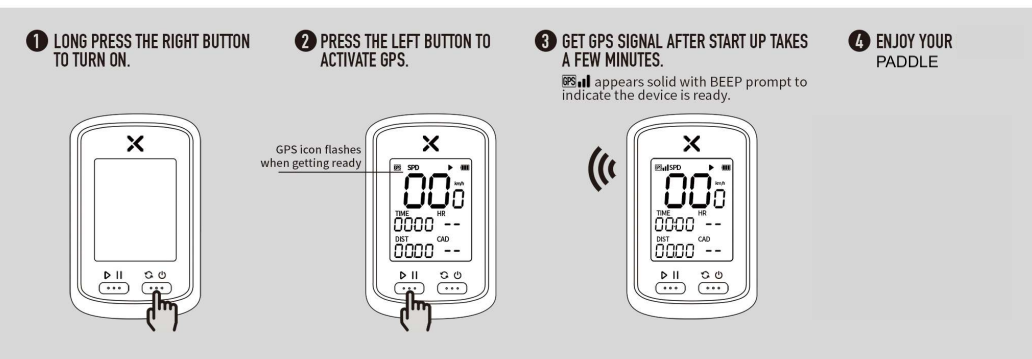
2: Turn it on with the right button. Wait for the initial screen to come up showing 00:00 in the data fields.
3: Press the left button once. This initiates the GPS, which scans for a satellite signal. You should be under a clear sky. If you try it inside or under a covering, you might not pick up the signal. While it searches it will flash a little GPS icon on the upper left. It will beep when it locks in and the GPS signal will become steady.
4: Go paddling.
Yes, that’s it. That is all there is to using it as a real time speedometer. The speedometer data is the largest data and pretty easy to read. I prefer km for speed and distance, which is the default setting. If you need to change defaults do this before you go out for a paddle. You can get the pdf manual here: Xoss G/G+ manual.
I was able to adjust my surfski stroke for immediate improvements and gain .5km in speed overall very quickly. I’m fairly new to surfski, which is tremendously technical, so figuring out how to position the wing blade and press down in the water as I rotate to gain speed was very satisfying. It was also very satisfying to have only spent $37 USD to get a speedometer. What I did not realize is that Xoss also has its own app which connects to Strava (and other software). If you want to review your data on your smartphone follow these steps:
1: Download the Xoss app. (You can use the QR code that comes with the instructions to connect to it).
2: Download the Strava app.
3: You will need to have a Strava account and a Xoss account confirmed through an email. Once confirmed you are ready to connect the Xoss G/G+ to your phone via Bluetooth.

CONNECTING THE XOSS to your phone and Strava via Bluetooth.
1: Open the Xoss app. Click on your device. (Bluetooth must be on). It will bring up your device. Click on that, and it will load a page where it syncs to the Xoss. Here you also have to connect to Strava. Be patient. It took me a few tries. VERY IMPORTANT: You can’t sync data if the Xoss is still recording. To stop recording LONG PRESS the left button once.
2: It will recognize the data but there is a little button you have to click for the full sync to Strava.
3: Once synced you can click the Workouts icon and it will open the Strava data inside the Xoss app. Here you can review data and also watch a video of your paddle.
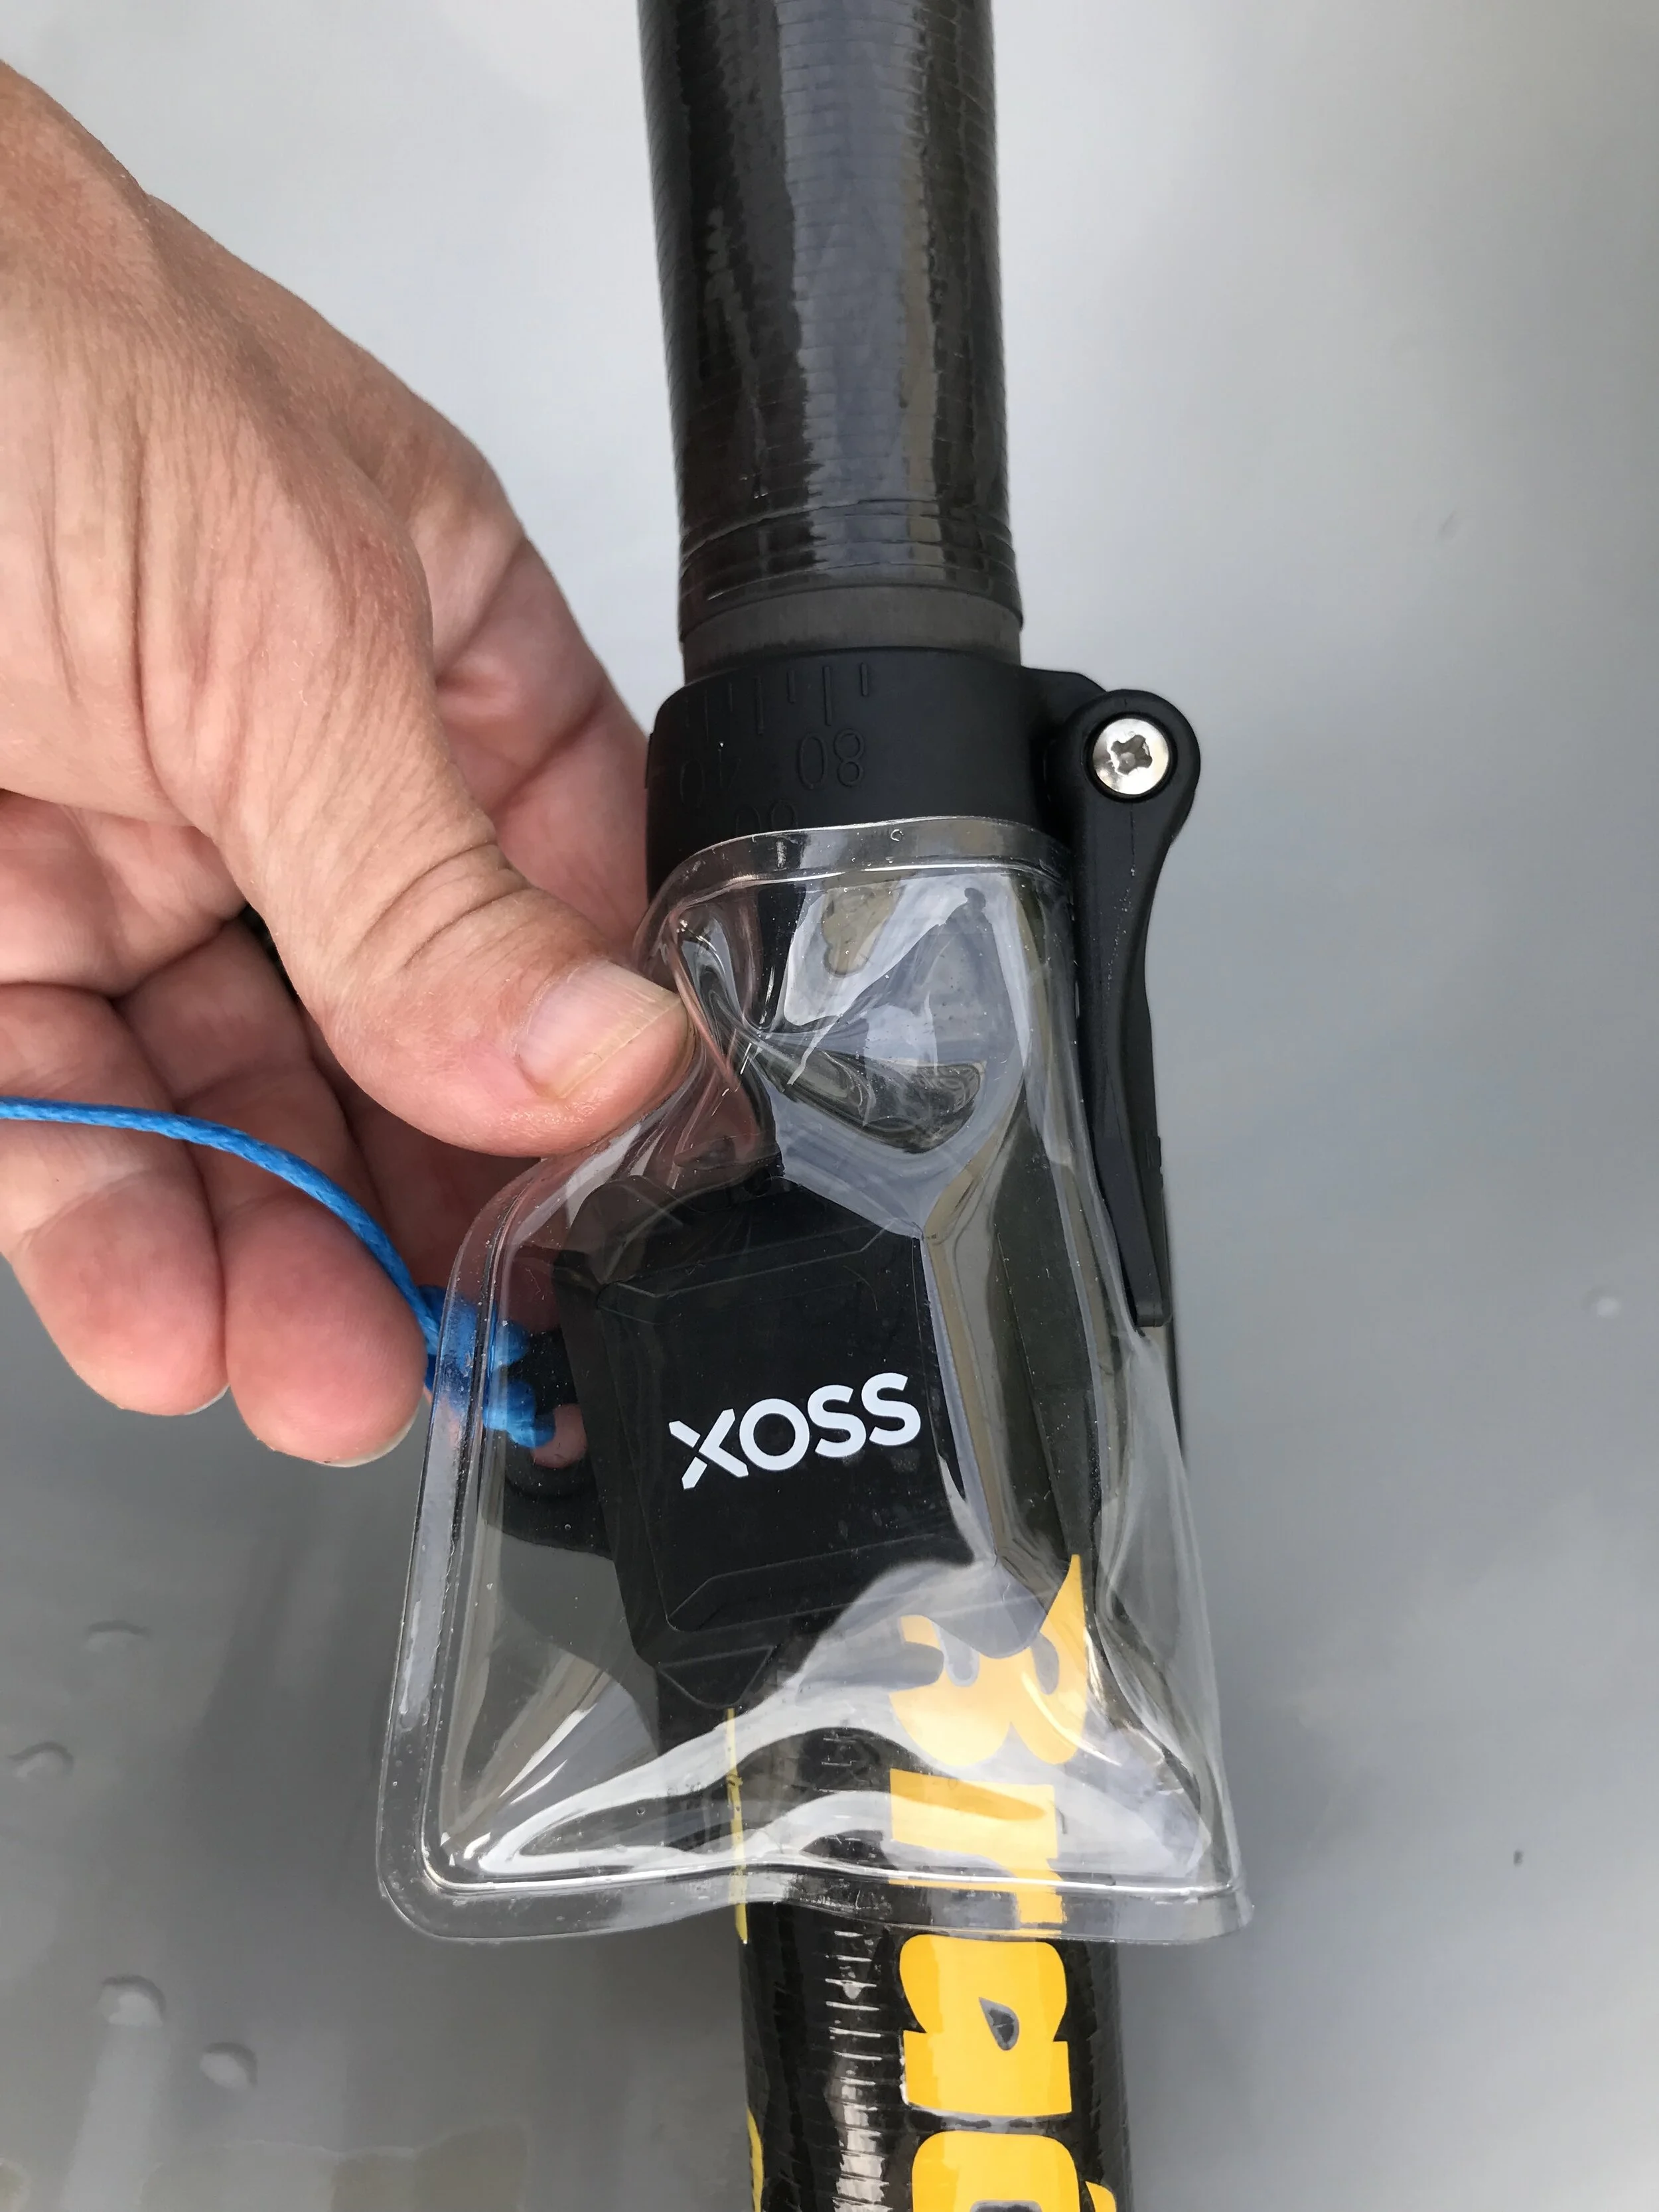
After poking around on the internet and looking at the instructions I soon realized there are add-on sensors. The Xoss G/G+ unit is a speed sensor but you can add a cadence sensor to it. This is what you see in the image above. It can be confusing because they are also sold in 2 packs as speed and cadence sensors. These are standalone sensors that can be synced to your phone, if you were just using your phone as the data screen. They are also identical sensors and each sensor can be used for speed or for cadence based on a setting. I only wanted cadence because the Xoss G/G+ is my speed sensor and screen.
If you want a cadence sensor buy a single unit, remove the battery and reinstall. If a blue light comes on it has been switched to cadence sensor. Yes, that is correct, merely by taking out the battery then putting it back in, you change the function of the sensor. You can use the Bluetooth connect screen in Xoss to find the sensor, and if you swing your arm around in a circle it will start registering the “cadence.”
The cadence sensor instructions show you how to mount it on a bicycle pedal. It put mine into another Dripac bag and just clipped it to the center of my Braca paddle. For outrigger I would tape it to the base of the handle. For SUP tape it below your lower hand on the shaft.
Follow the Xoss directions for pairing your sensor to the Xoss G/G+, and in less than a minute you will be able to see your cadence data while you paddle also. The display for this data is small, so I just review it after I paddle on my iPhone.
You may not care why the sensor works just as well for paddling as it does cycling, but I will explain anyway: the same sensor that knows whether your phone is “up” or “sideways” for changing the display is called an accelerometer. These are used for XYZ positioning. The computer program then uses this data to perform the next step. In the case of the cadence sensor it basically takes a rotation and calls it an RPM. As long as the sensor can pick up your paddle rotation, it will log the motion.

Read RPM as stroke per minute. This is surfski stroke data. This will work for any paddling sport.
Ocean conditions change all of the time, so stroke rate varies considerably. Here I tried a high rate upwind and a low rate downwind. I expect to vary my cadence during race conditions and will use the speedomter as my guide during the race.
Have fun, stay safe, and see you on the water!
ARDUINO ADDENDUM: I make small electronics and have all of the parts I need for around $25 USD to make a speed coach type of computer using Arduino programming language. The biggest issue is getting a good readable screen in a watertight housing. Apps are also available for iPhone and Android that accomplish the same thing, but the phone battery life struggles during a long race, and the phone overheats in a waterproof case. If you want to make your own Arduino speed coach, you can link to that kind of project here: Arduino.
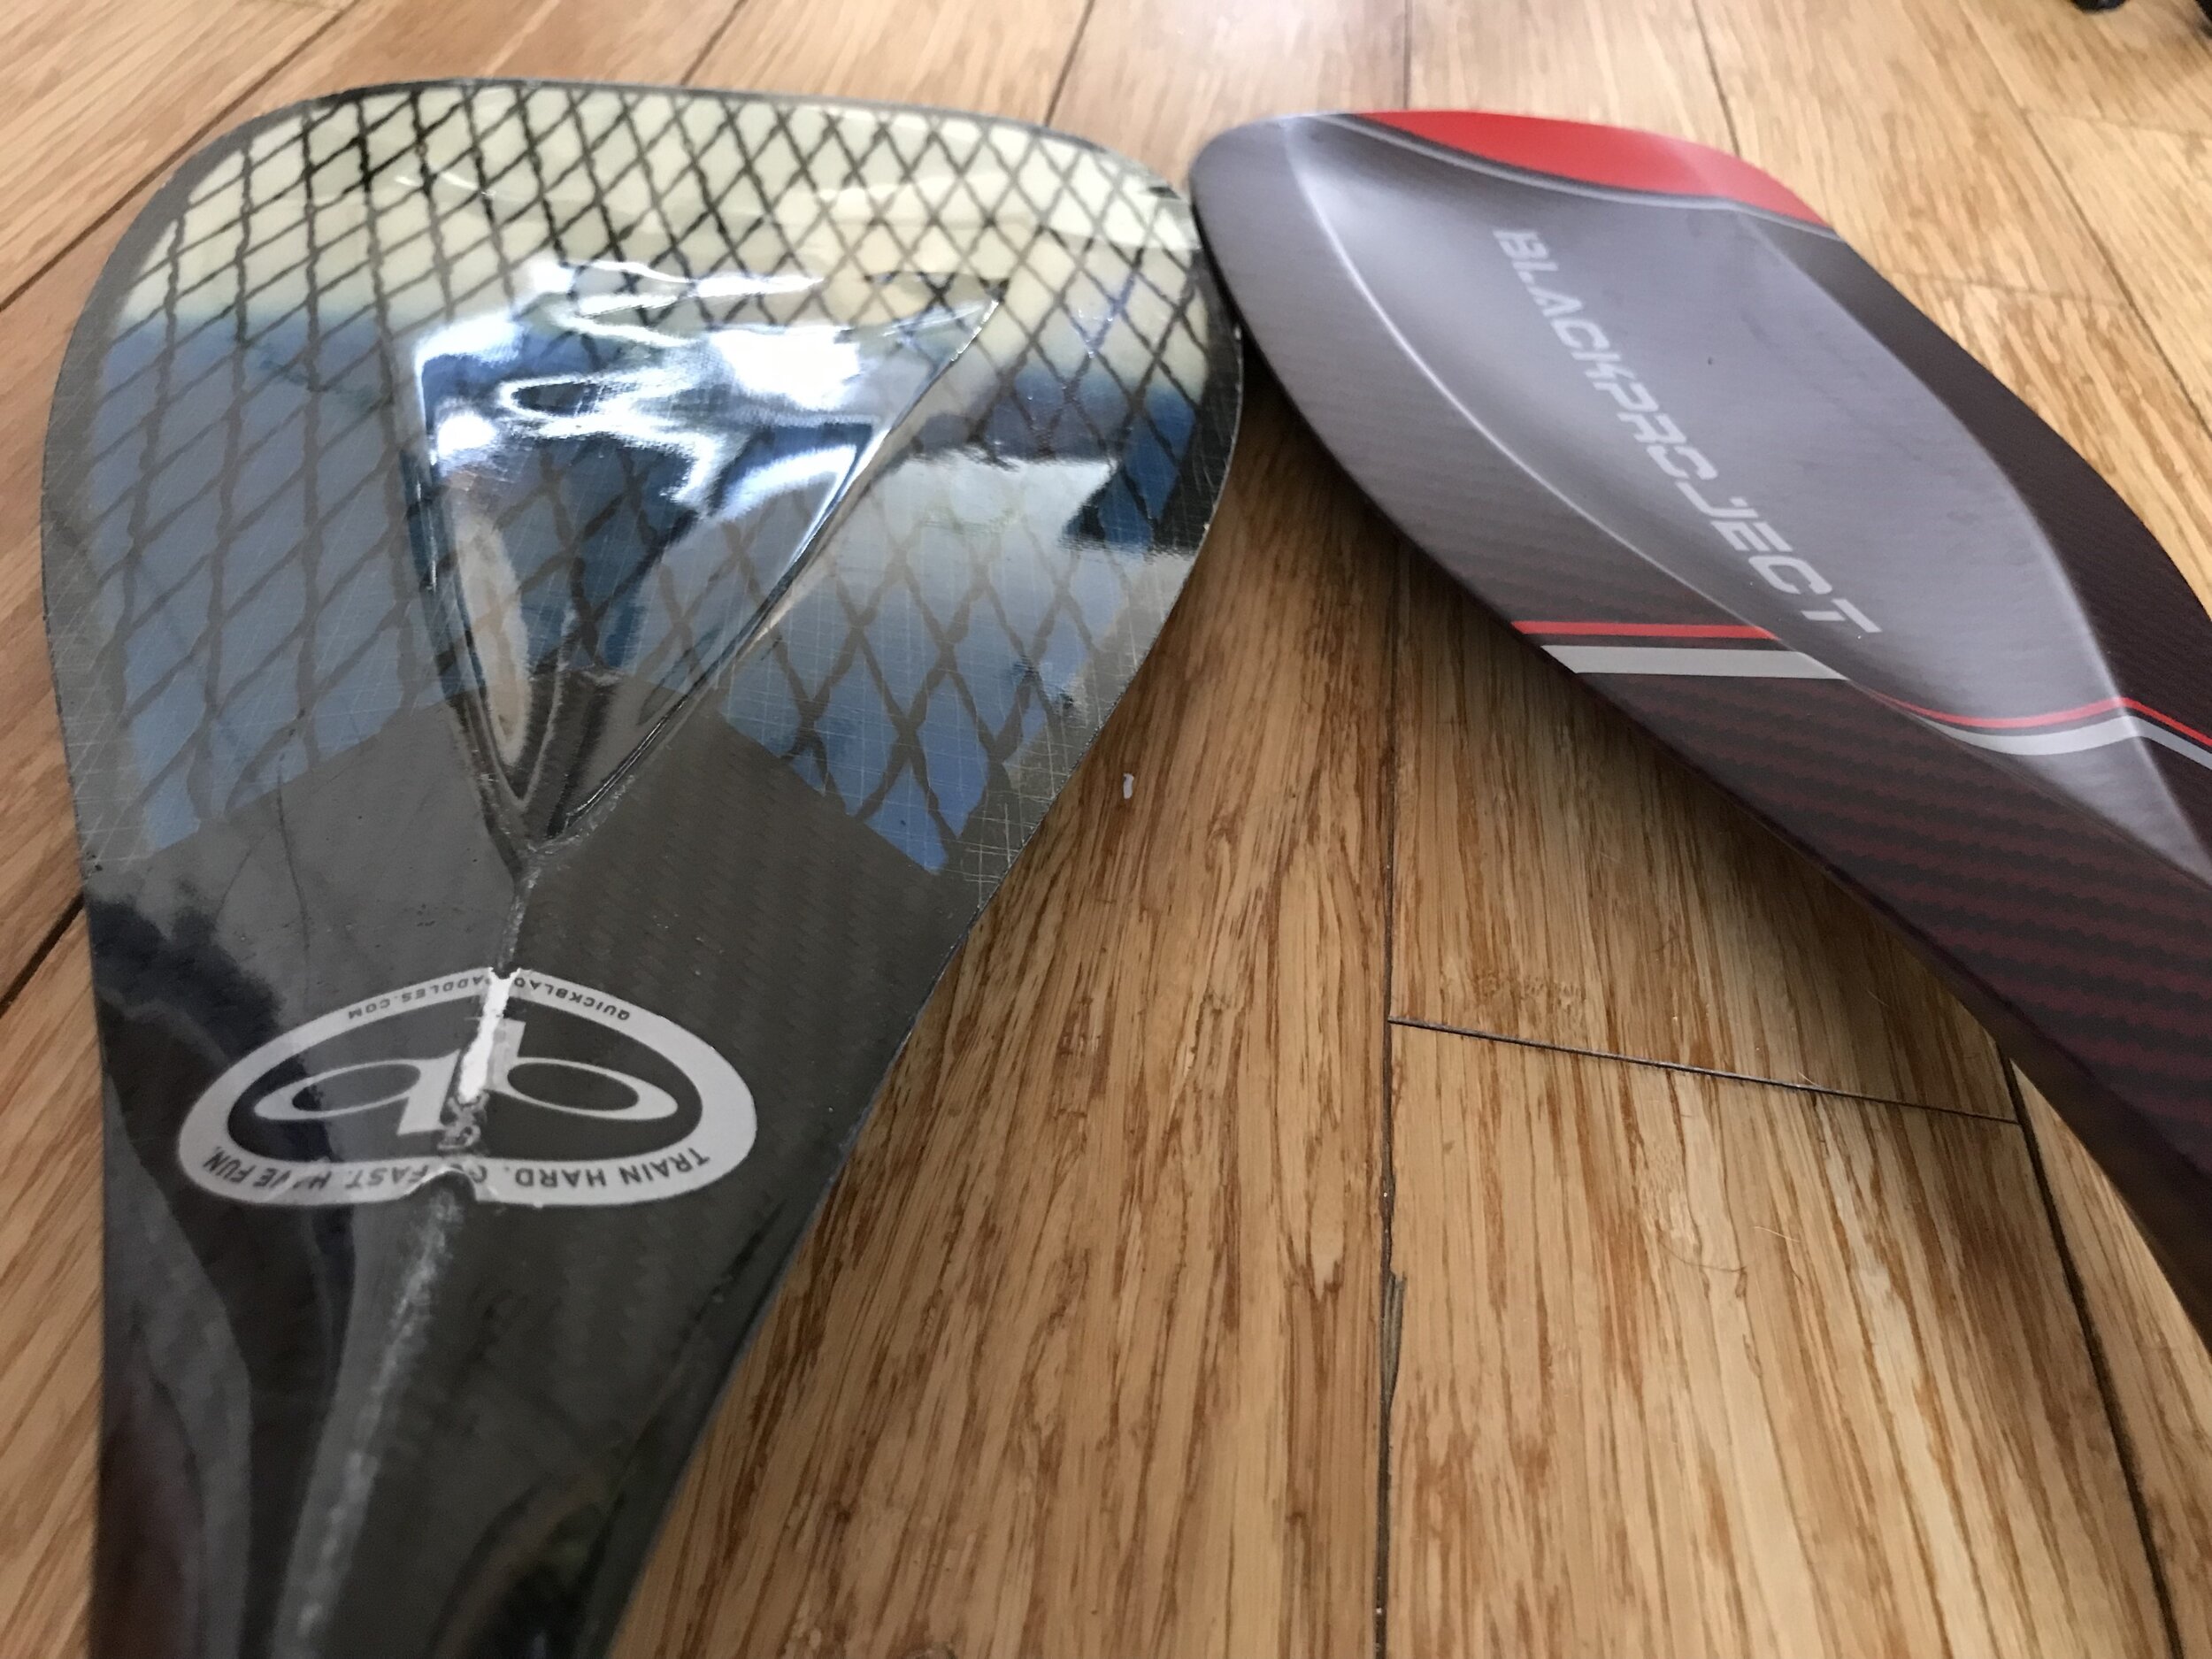
Black Project Hydro FlowX: Review
IT CAME FROM MAUI!
The Black Project Hydro FlowX sounds like a name for rocket fuel. It looks like it fell to the ocean from a rocket launch and also looks like a paddle within a paddle. I had purchased my NSP Sonic SUP last summer as an alternate to spending money on travel during the pandemic, but was only able to purchase a very cheap and very heavy adjustable paddle from a sporting good chain to get me started. I was also spending more time in my Nelo Surfski and my go to Puakea Kahele outrigger canoe, and the SUP was getting neglected. So, I decided to sign up for a clinic with April Zilg at the Cayuga Lake Cup Race in the finger lakes region of upstate New York in August. Nothing like knowing you will spend a couple of hours with a world pro to get a paddler salivating for personal improvement on the water. But was I really going to go with a paddle that weighed as much as my SUP? (At least that’s how it felt to my shoulders).
I downwind paddle as much as possible. I picked up the brace stroke from Oscar Chalupsky for surfski in 2018 and immediately applied it to outrigger paddling. Spending more time on the surfski this year, the brace came automatically, and when I got back on the SUP this summer, I found myself throwing the paddle out to brace in the surf for stability. My NSP Sonic is a downwind board, and usually I paddle against the wind or surf then turn around to zoom back to shore. Not that I have much of an idea what I’m doing, but my local waters do get considerable medium sized surf and breakers, which are fairly optimal for a novice surfer such as myself. This is a long preamble to how I discovered Black Project paddles in the first place.

Yes, I’d followed Quickblade’s SUP series and also Hippostick’s, but these are made by crossover athletes who also make outrigger paddles. I own a QuickBlade V111 that I absolutely love, especially for downwind (and upwind). I was also familiar with ZRE’s SUP, and I also own a 10oz ZRE outrigger paddle. But when I searched for SUP surf paddle, I was coming up empty. With all price points at $500 USD, which of these carbon beauties was I going to buy? After a series of searches I came upon some minimalist SUP thread where someone suggested Black Project for surf. Since Black Project does not make paddles for outrigger, the brand was not on my radar. Well, it is now. There isn’t any spectacular footage in the video, it’s just my first time out with it. What a difference. If your eyes are glazing here, and you just want to know if the Hydro FlowX shaved a minute off my paddle time, then the answer is yes. Sure. This paddle feels like it weighs nothing, the side to side transfer is a weightless breeze, the power is incredible, and the steering agility was surprising. Love it.
The rest of this article will get rather technical and speculative. Read on if you dare…
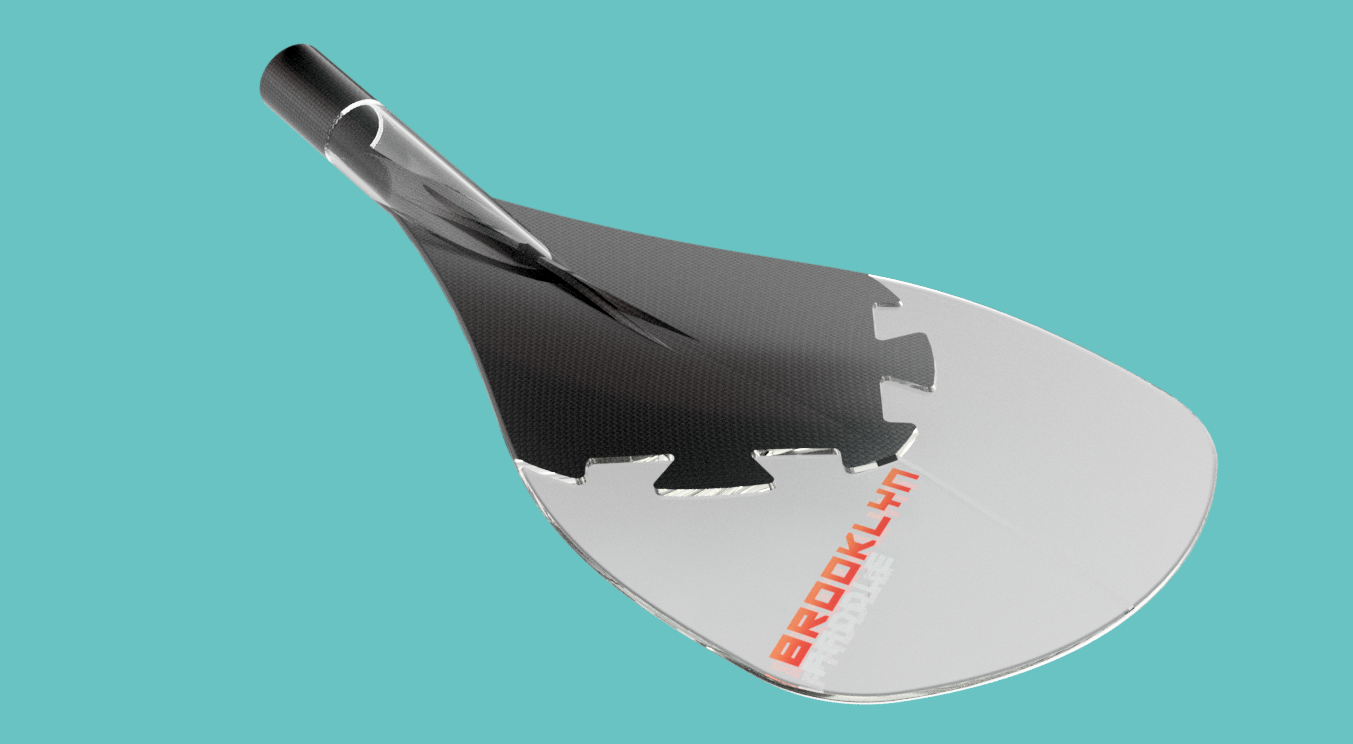
A few years ago I decided to 3D print a paddle blade. Or 1190 days ago according to the internet record on SimScale, where I uploaded a model of my blade design and attempted to simulate what happens to water flow around the paddle blade. I’m a better technician than I am a paddler, and while overthinking water flow can certainly distract from the beauty of paddling in my local ocean, we wouldn’t have rockets if people didn’t overthink how to technically overcome gravity. I had not set out 1190 days ago to invent a rocket paddle. I was actually curious about how much of a spoon shape could be incorporated into a paddle. I was thinking about webbed feet and wondering if a webbed paddle might be a logical solution. I also think the days of carbon lay-up are in the sunset and 3D prototyping and printing on a larger scale will be here faster than you can say “internet.” And I did indeed 3D print my paddle, which was called, 1190 days ago, the Brooklyn Paddle, since I lived in Brooklyn and paddled on the Hudson River and in the New York Harbor.
I spent countless hours learning to model the complex inner and outer curves of a paddle blade (using Fusion360 if you’re interested). And this is where the technical design of a paddle really gets into, let’s call it, flow. As a downwind paddler, I spend a lot of time paddling upwind also, so I need a blade that can really pull the boat (or SUP or surfski) past the blade. The blade must also be very quick in and out of the water on the downwind attacks. (Ducks are no longer my model here because as much as they might upwind, I’ve yet to see one actively surfing). Yet it was the ducky V-indentation on the QuickBlade V111 that first got me interested in that paddle, along with its flatter bottom.
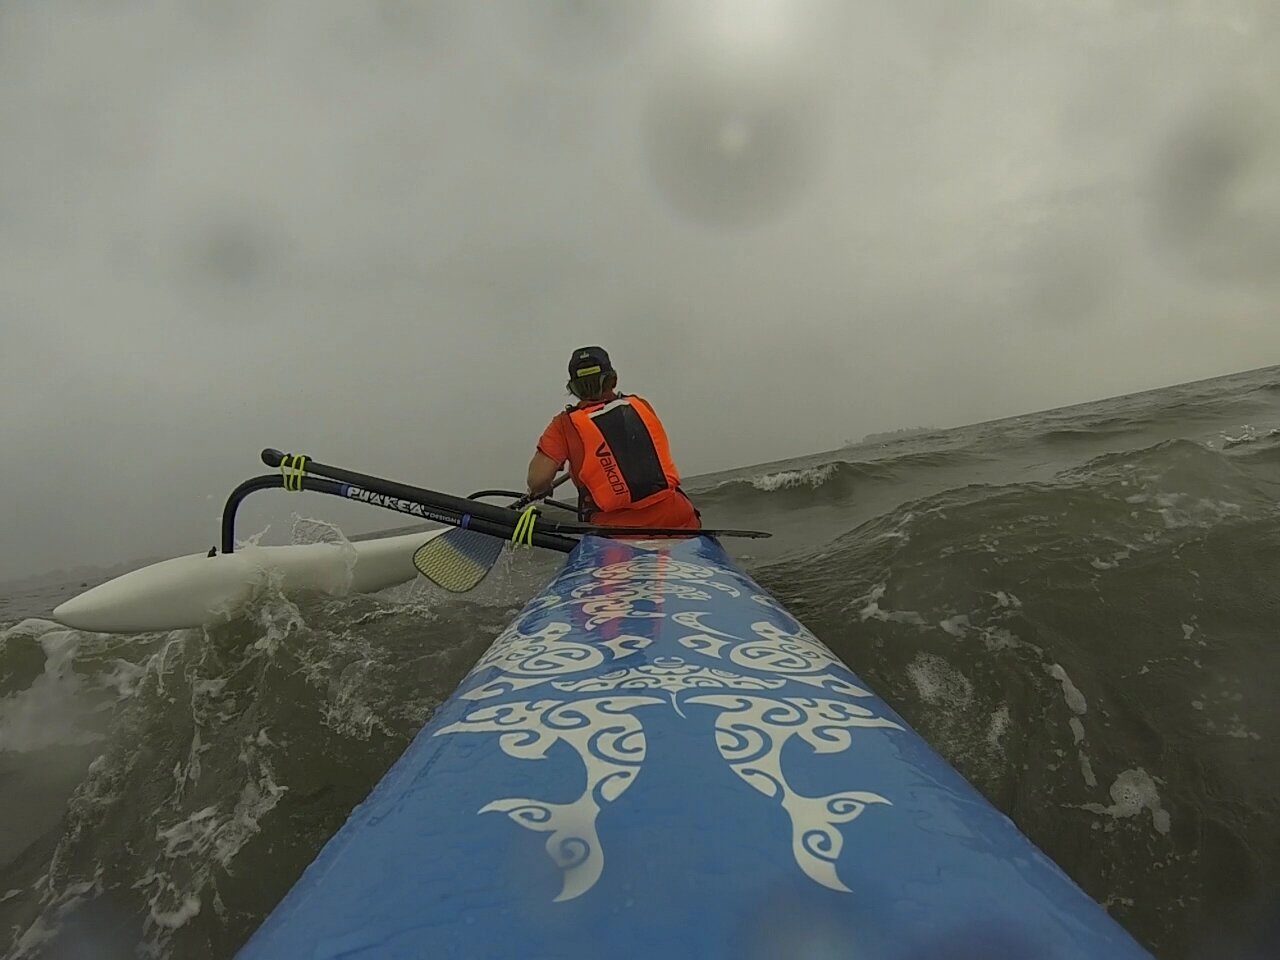
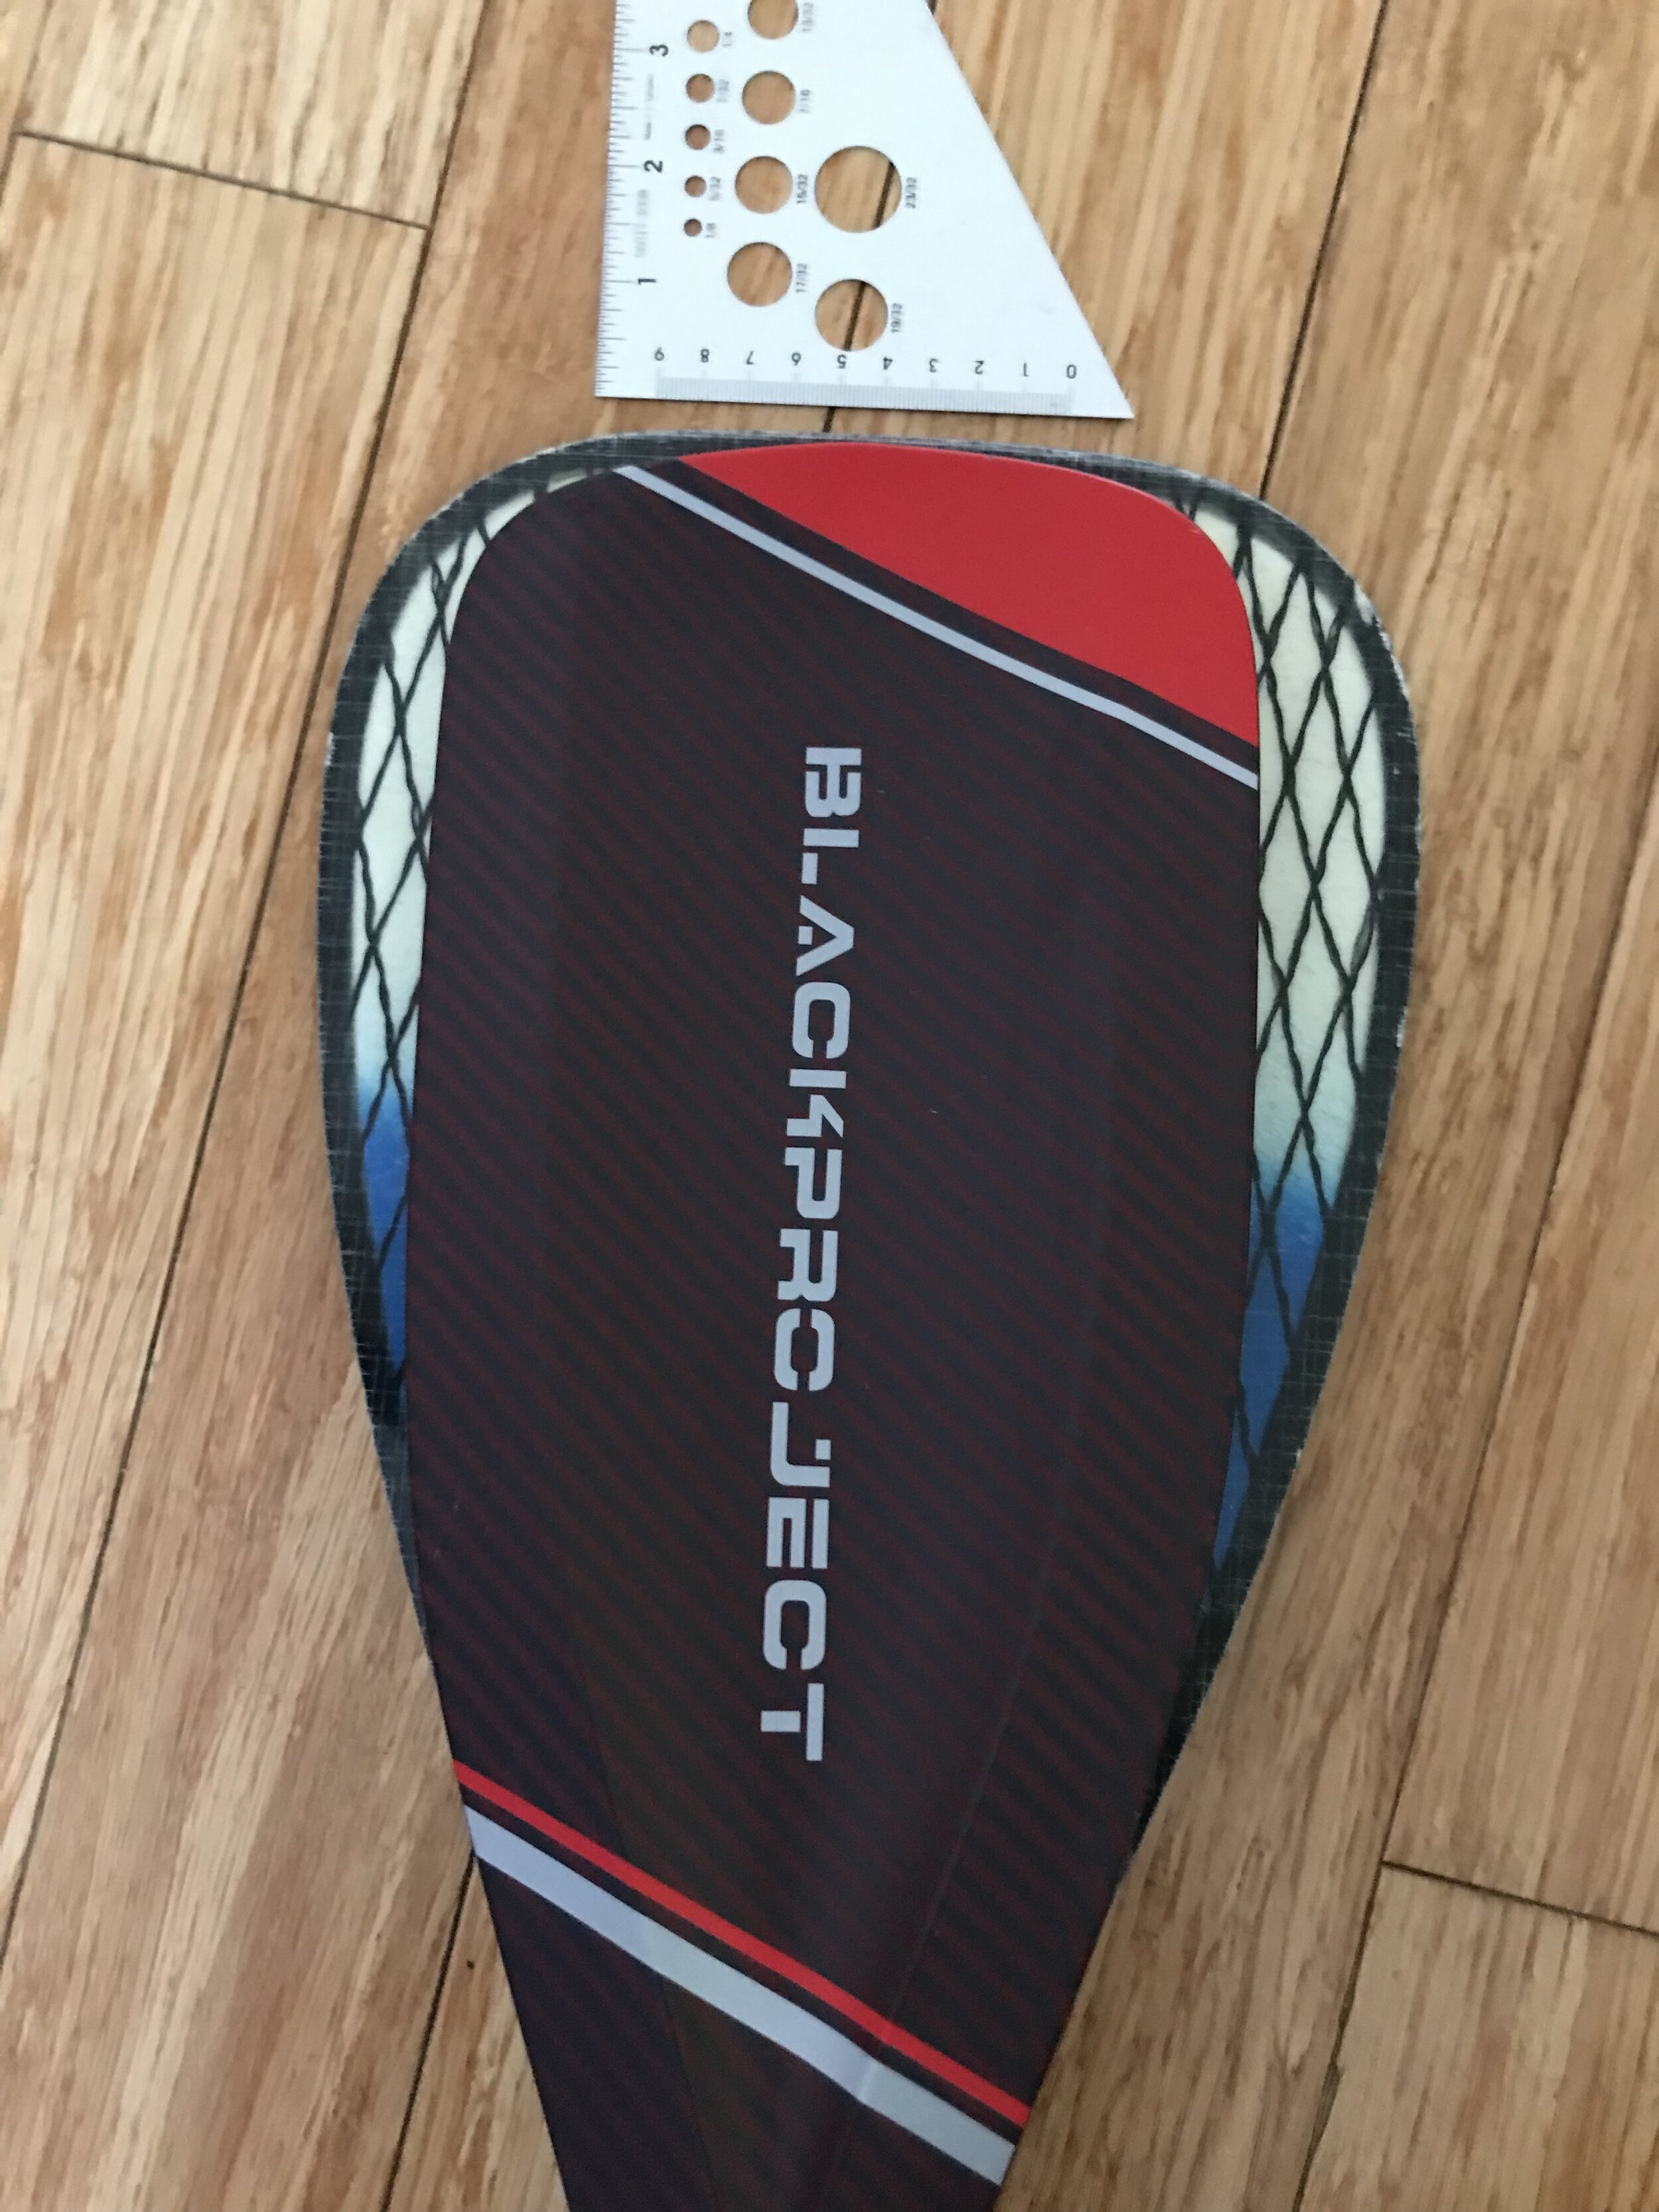
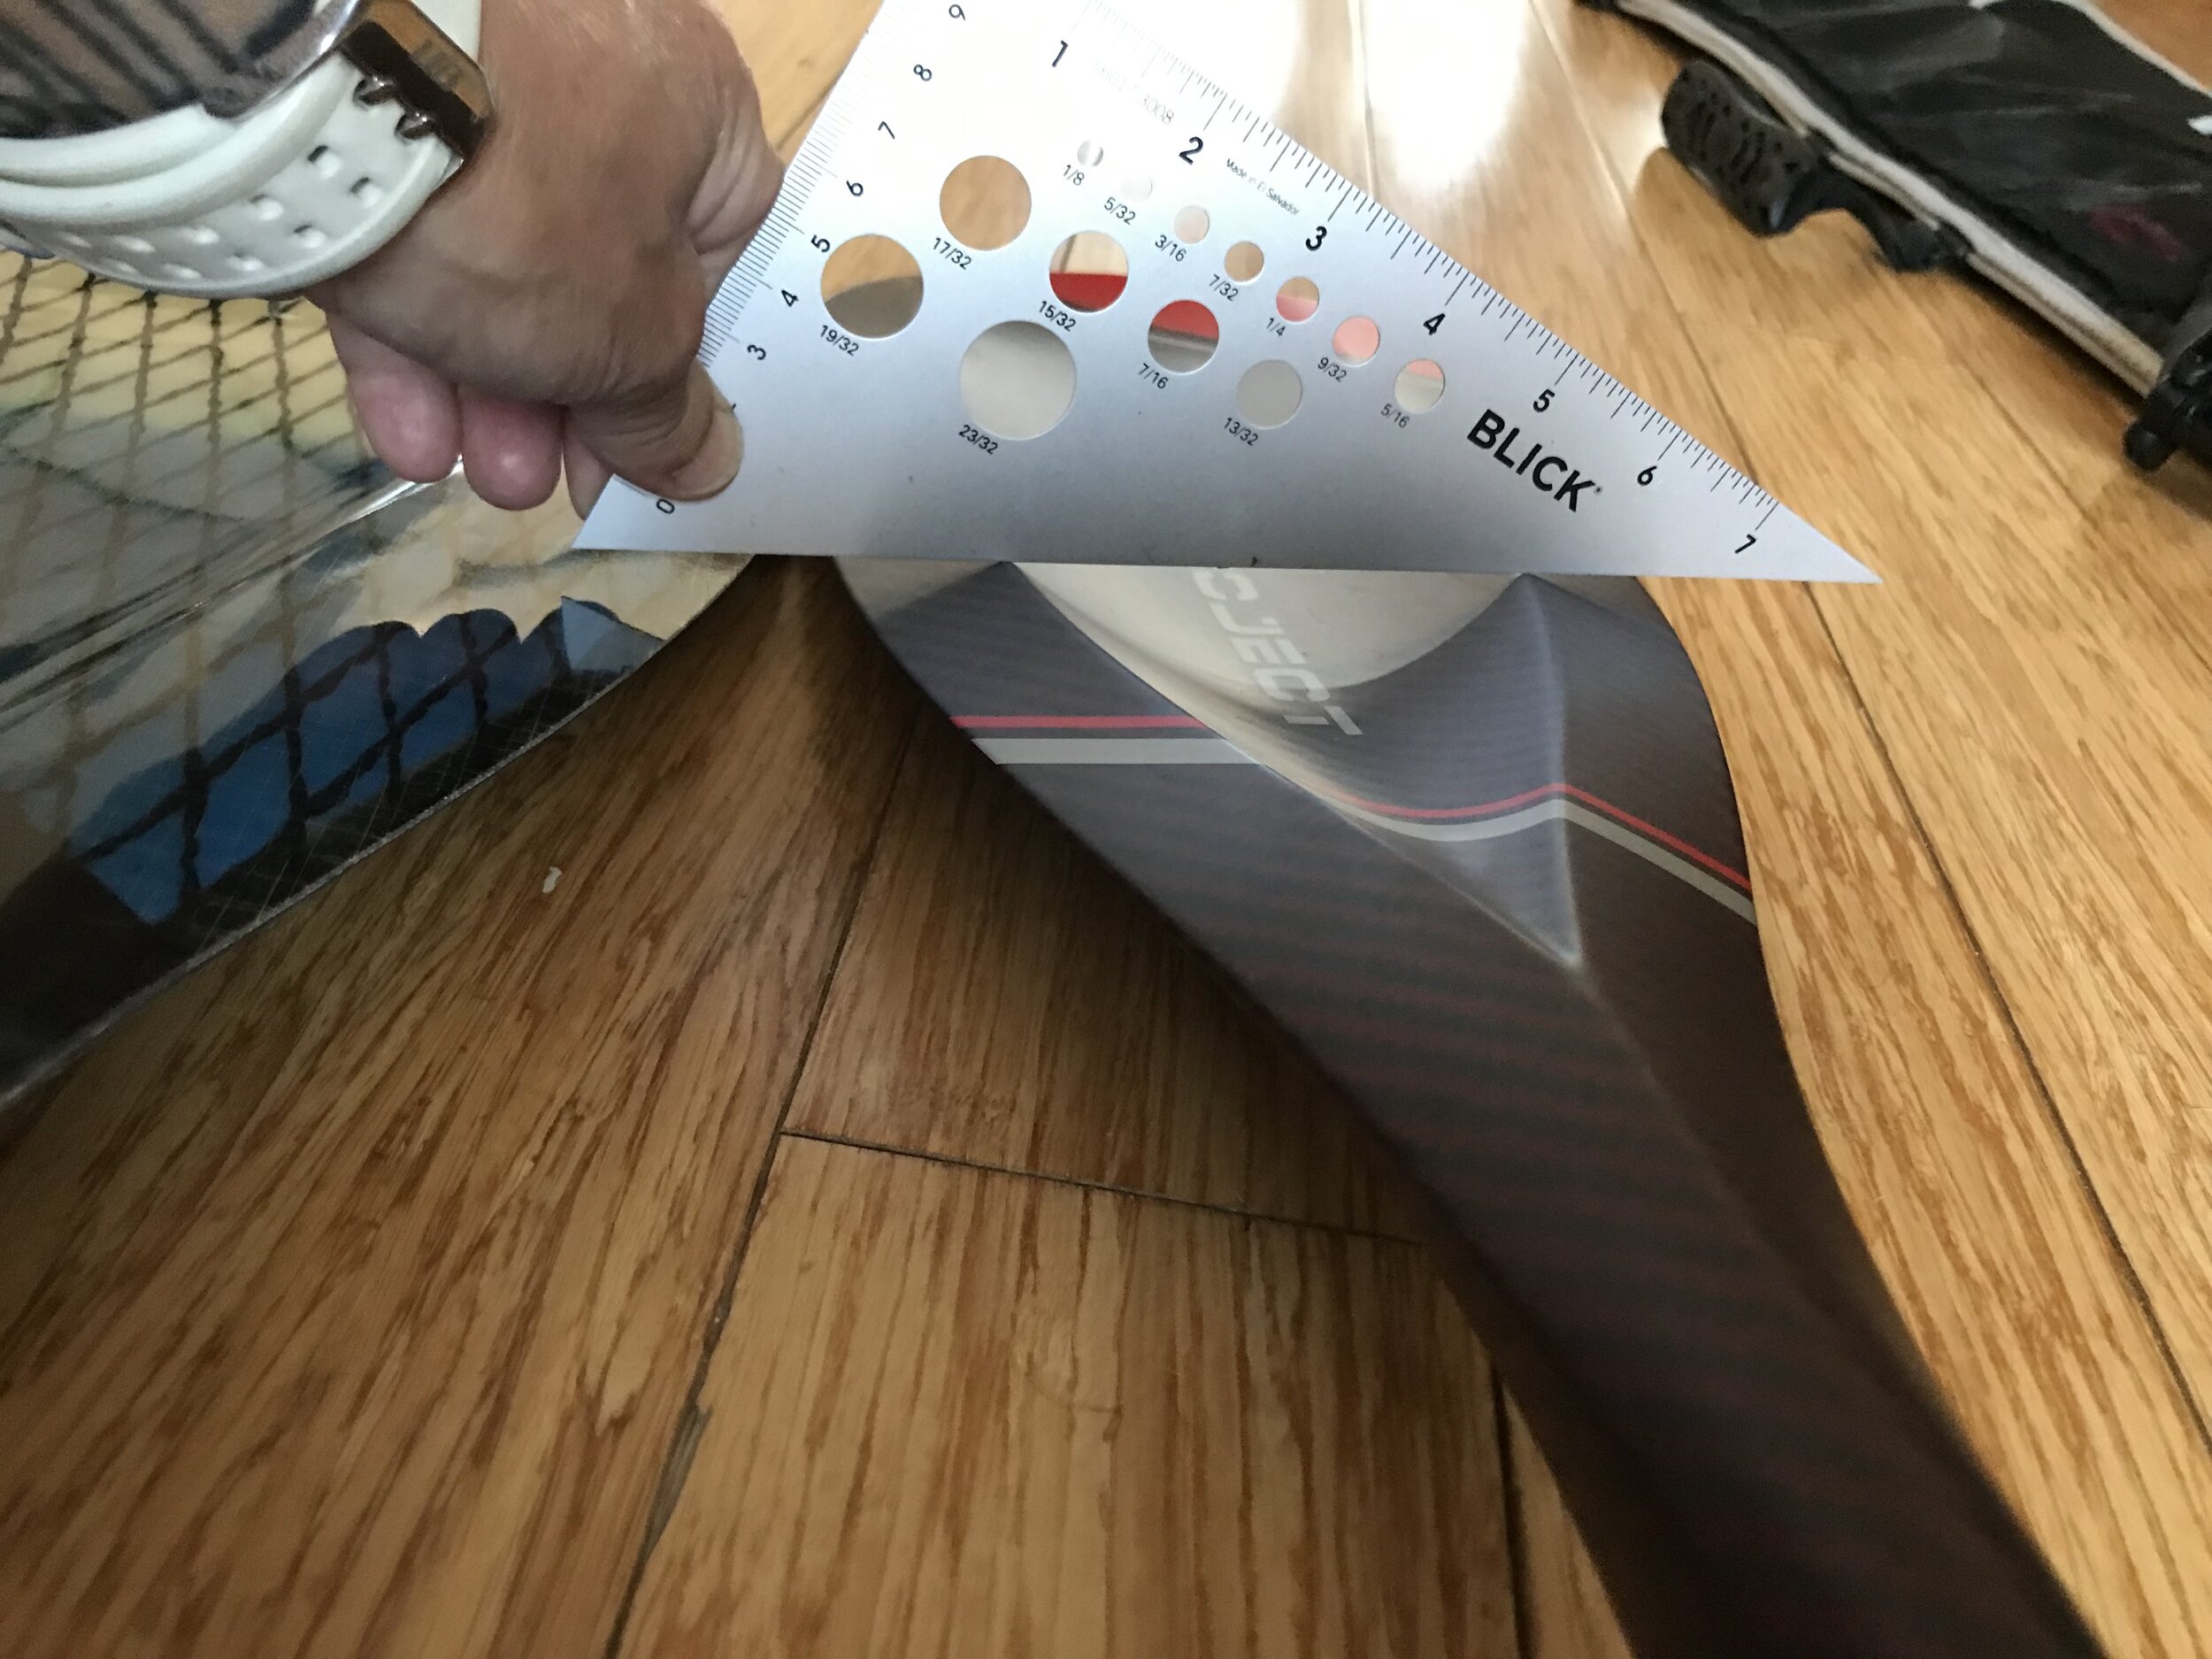
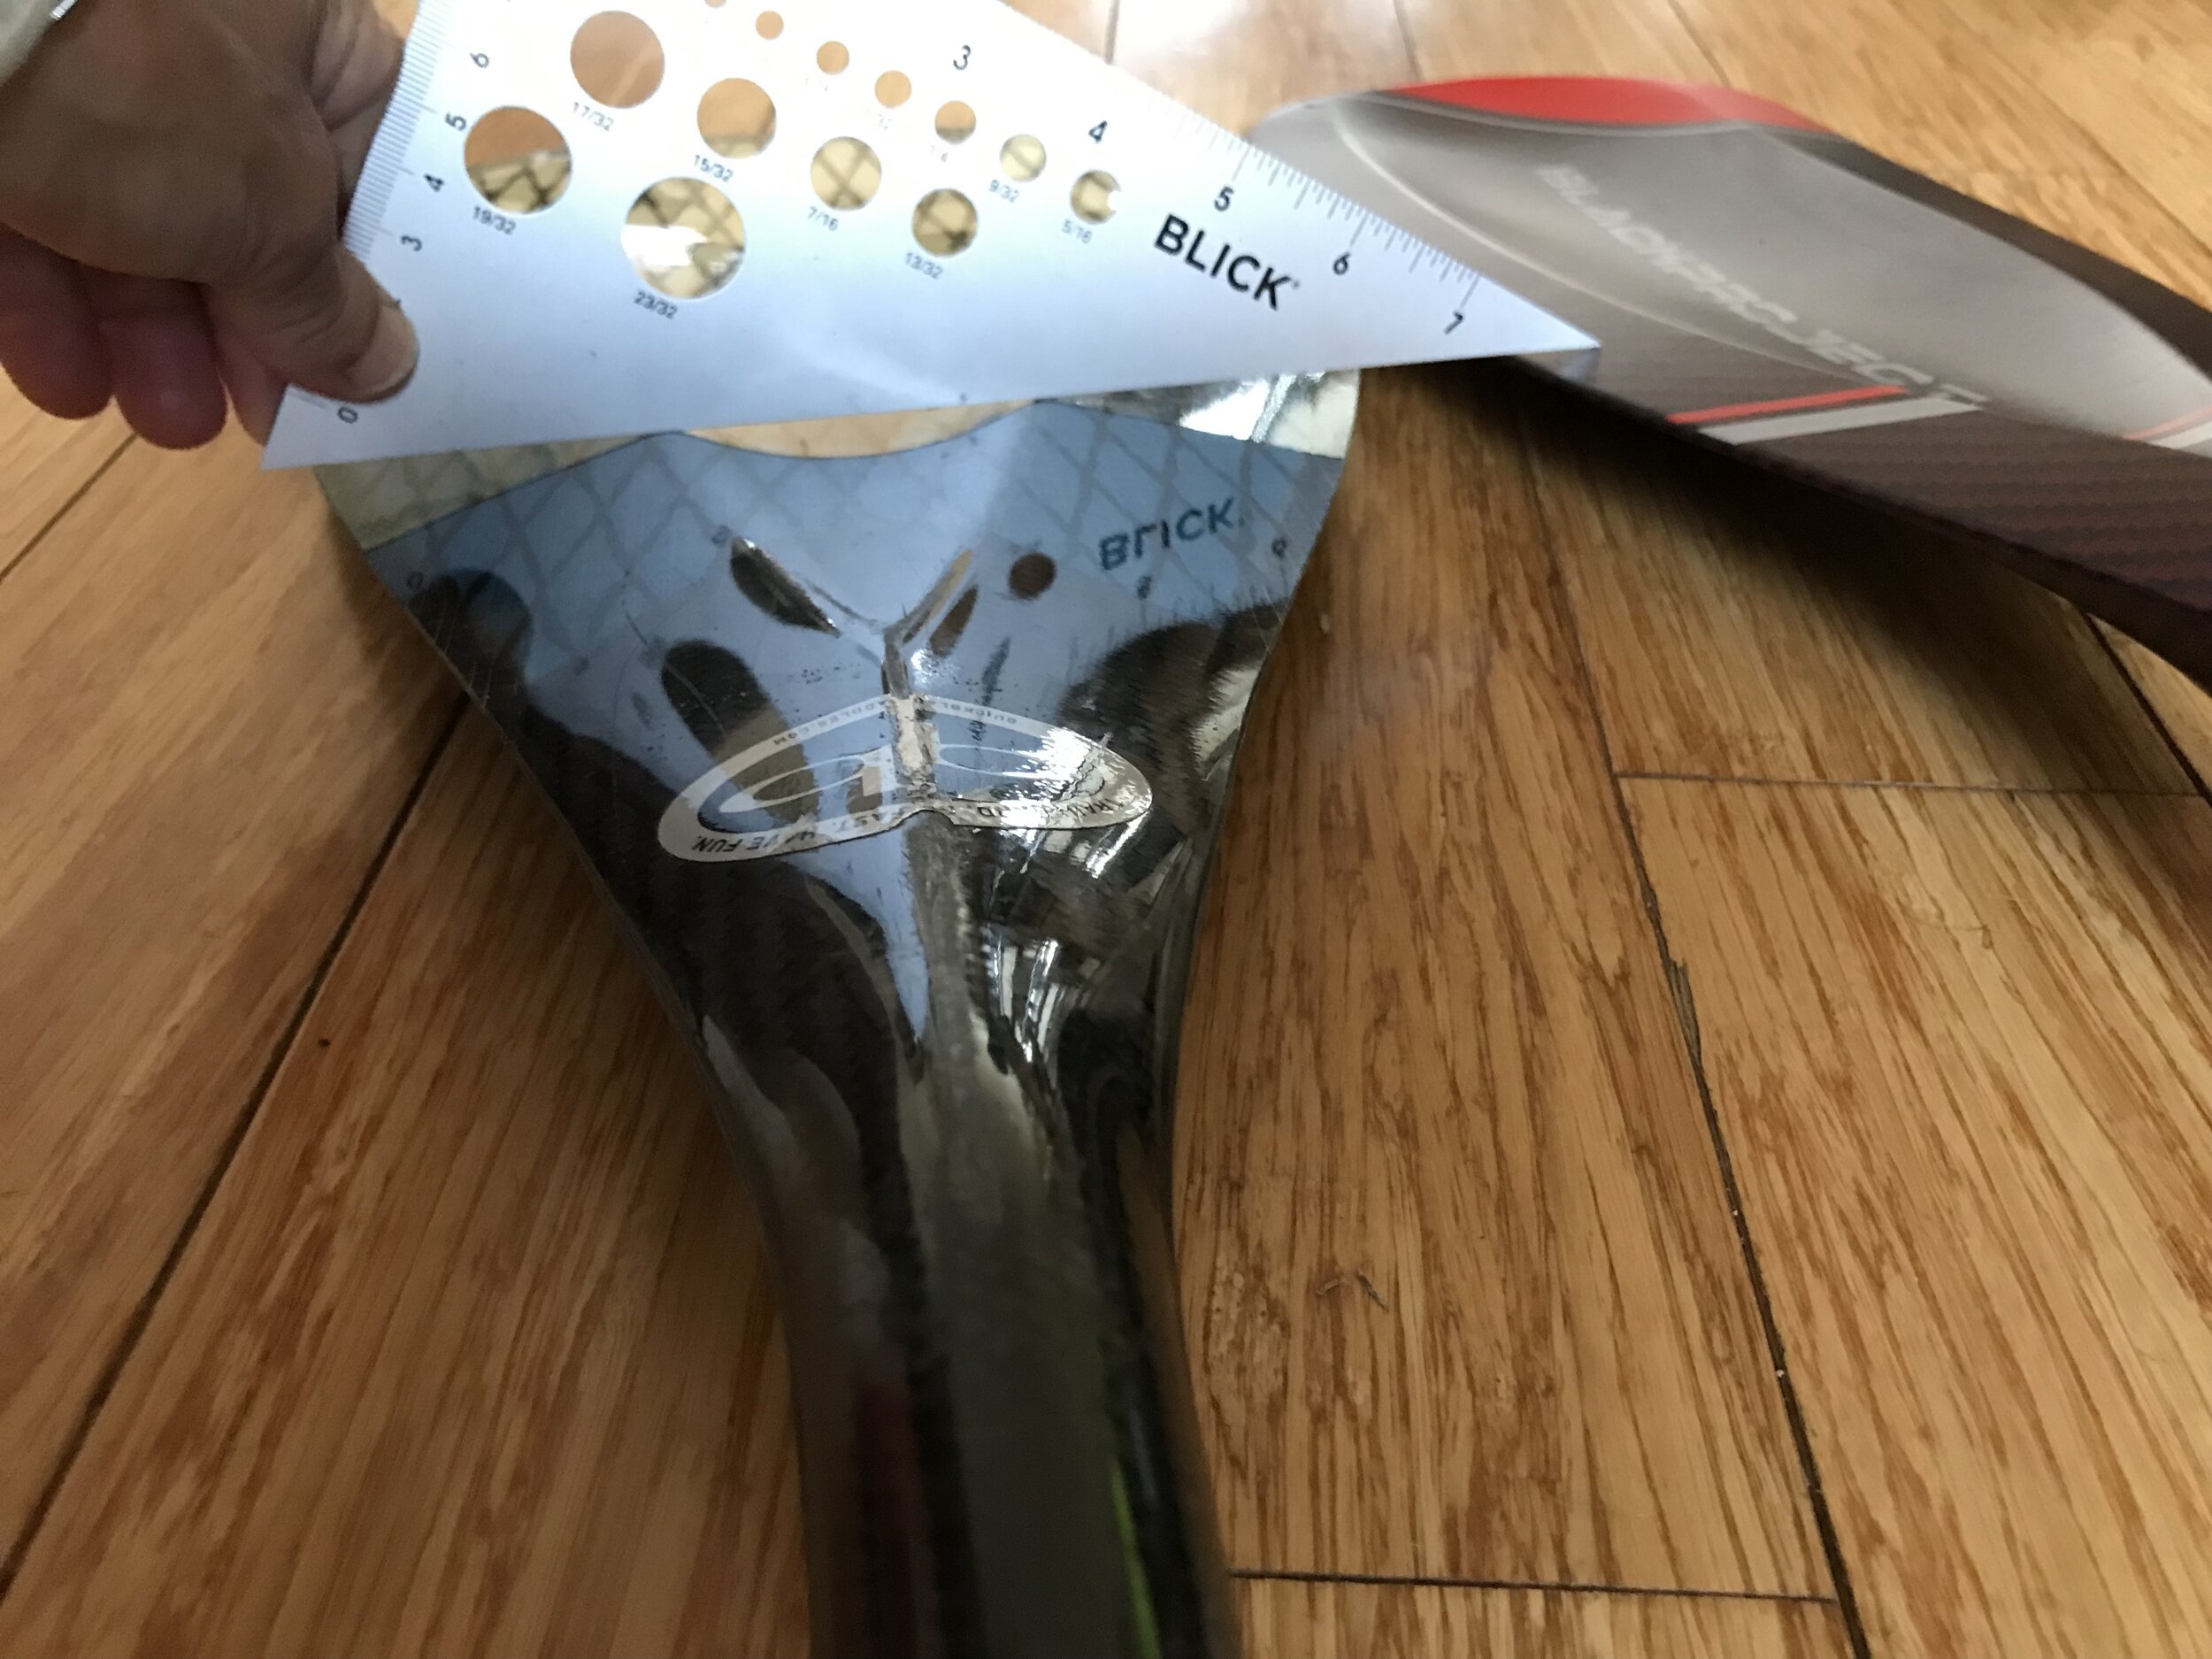
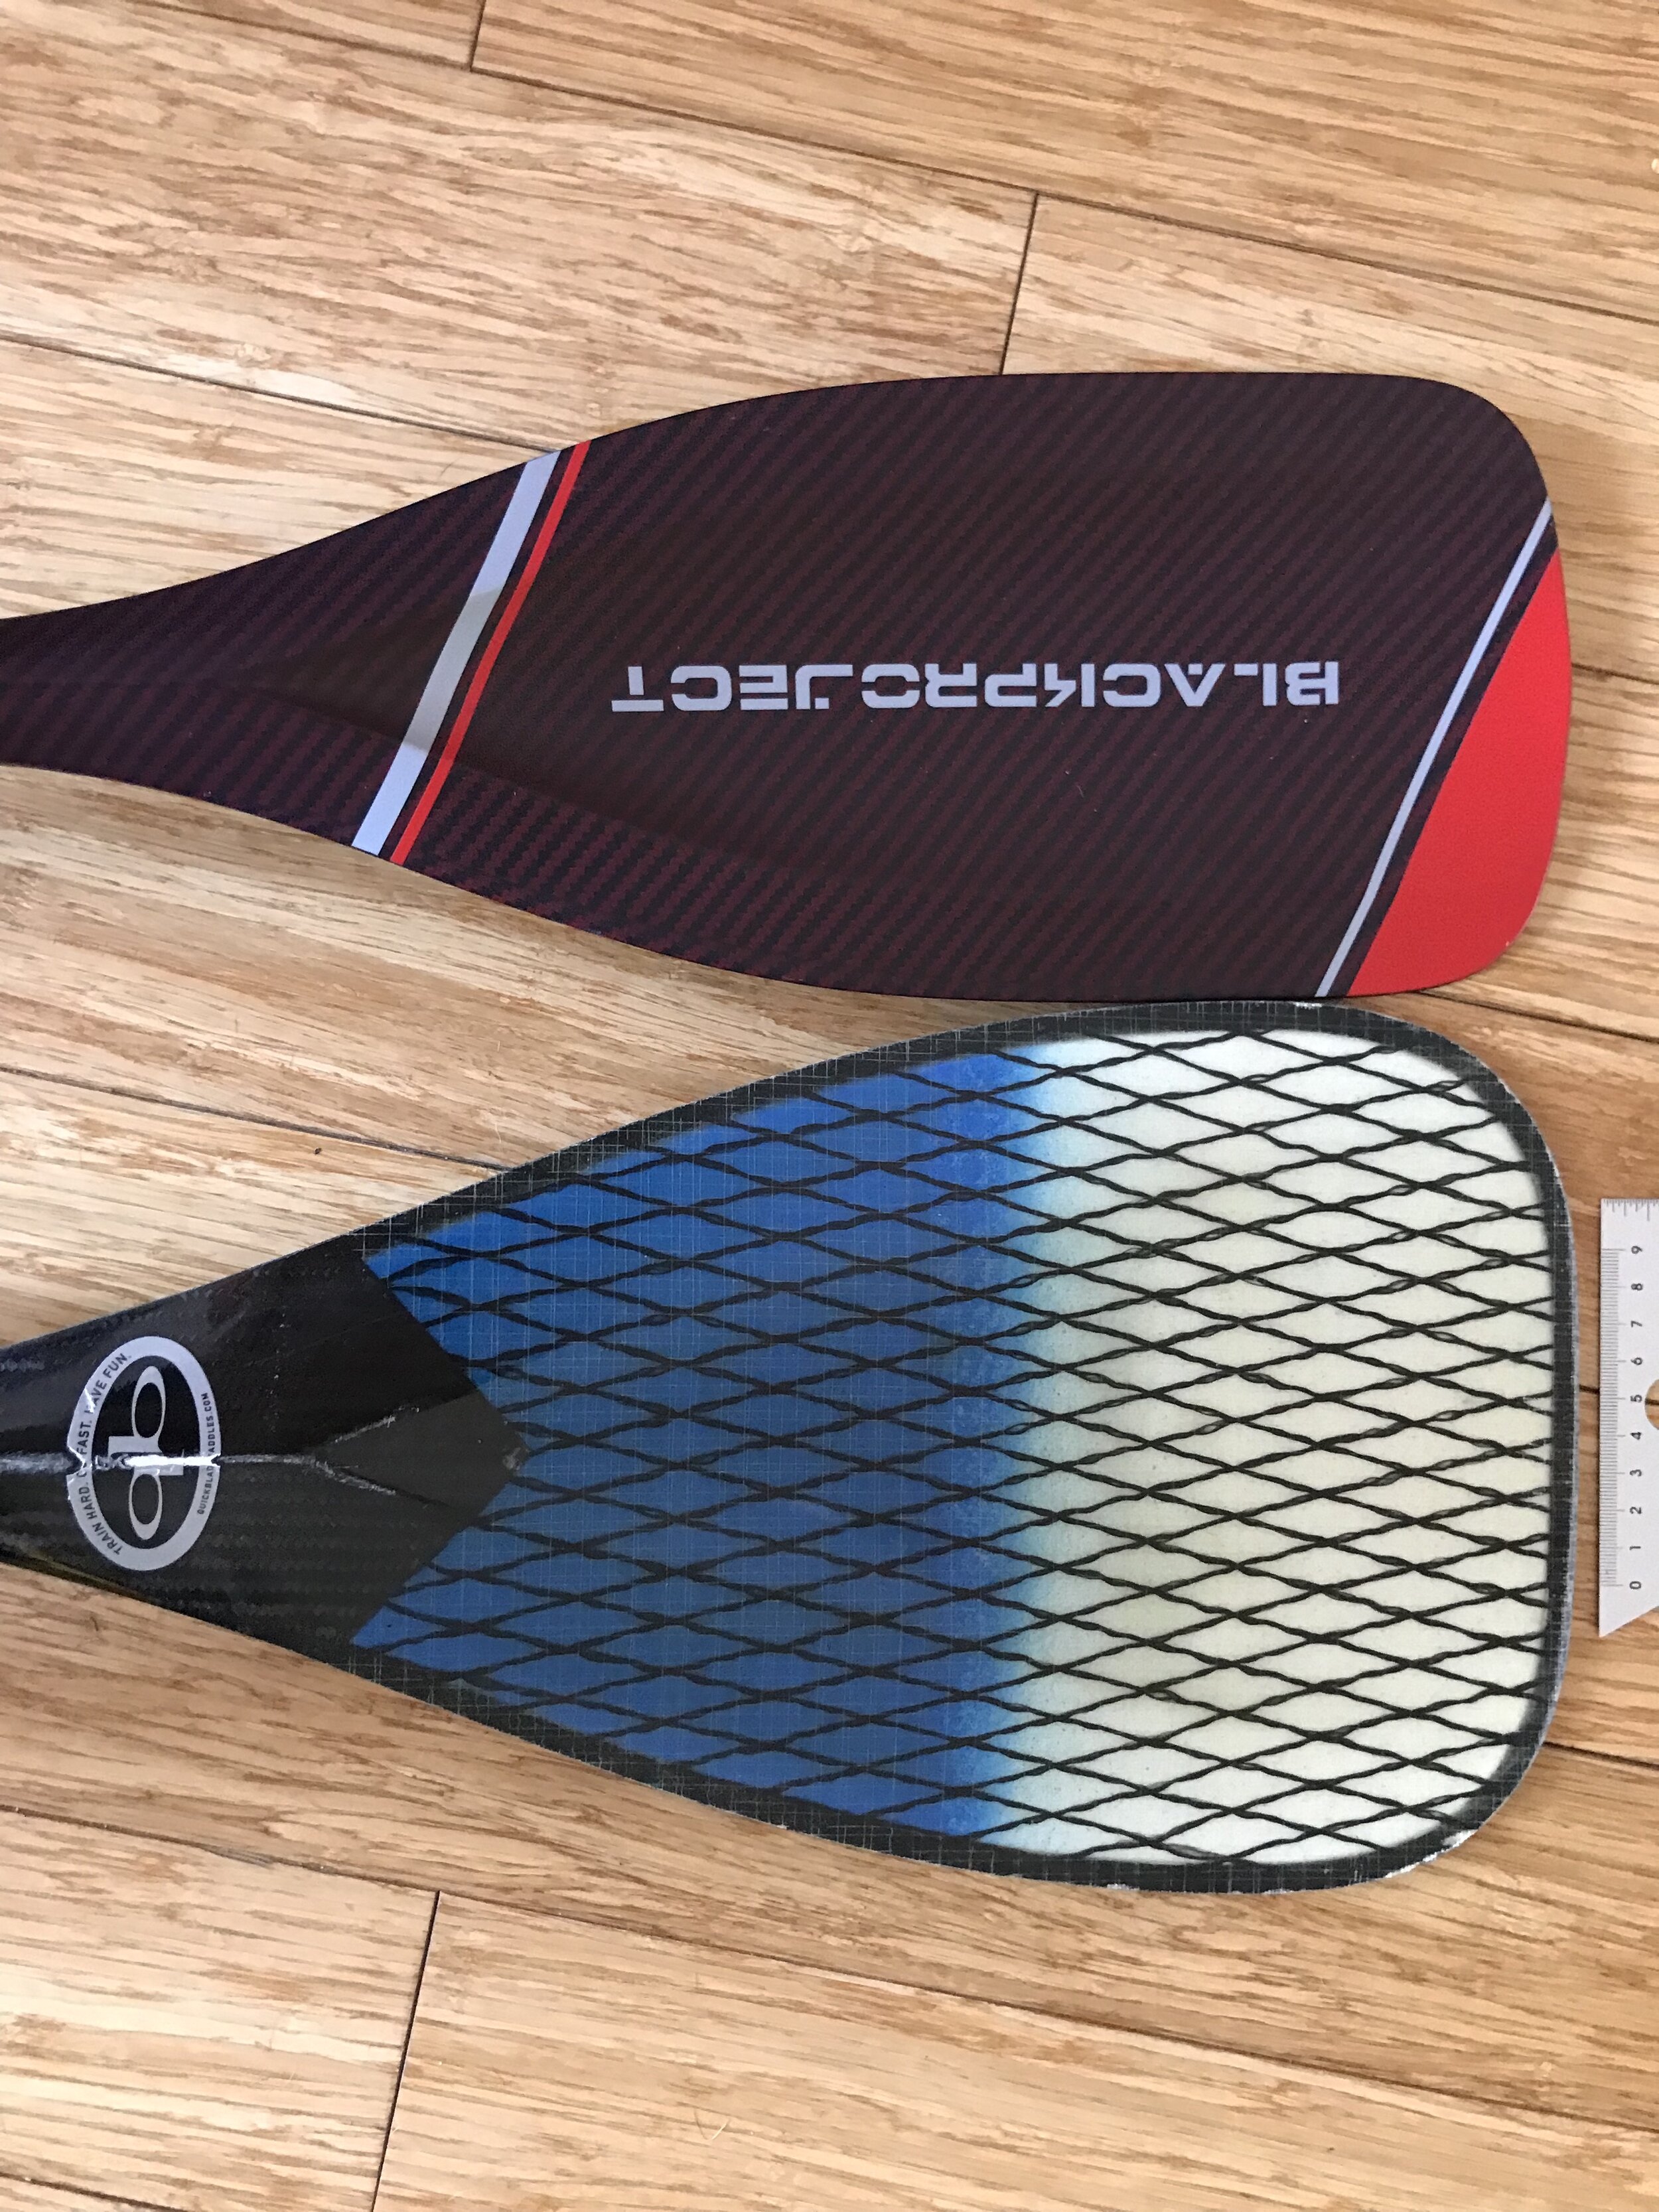
Pictured above are the conditions I love, and the ones I aim to graduate to with my SUP. The indentation in the Hydro FlowX (or DPS “deep power scoop” as Black Project calls it), immediately reminded me of the QB V111 indentation as well as my early attempts to make a paddle with a flatter bottom edge and deeper spoon. But what is really amazing is how small the blade is. How in the world can I be so far from the blade and get so much power out of it? How in the world did I suddenly get a steering paddle in such a small package? Enter the paddling and engineering duo behind Black Project of Chris Freeman and Tom Hammerton. As soon as I landed on their website and was able to scroll through line after line of technical data about the different paddles, I was hooked. I went through their step-by-step how to choose a SUP paddle guide and really felt I had the information I needed for sizing. However, at this point, since SUP is what I spend the least of my paddle time on, I thought I would go with the Lava, an all around paddle with a slightly lower price point. However, the clinic with April Zilg was pending, and I knew I had the option either to relegate SUP to hobby or to take it to where I take the rest of my paddling: the surf!
“Paddle=Board. Both are equal.”
Really, why have a fancy downwind SUP and not go all in with the paddle? The paddle is half the sport isn’t it? I read every single review I could find of the Hydro FlowX (which were maybe two total) and reread them. The more I scrolled through the data on the Black Project website, the more I realized this was a truly engineered project. These were geeks like me, in love with the ocean and willing to apply math and physics to it. Below is an image I got trying to model flow around my 3D paddle concept before I printed it.

You can basically see how the paddle slices into the water and some volume flows up past the blade and over the top. The hole is where the handle connects. If you add the ridge and peak onto the top of the handle, like Black Project did with the Hydro FlowX, that is going to change. The water is both going to flow up and also be held like ice cream in the scoop. Does any of this, stroke by stroke, need to be visualized to make us faster paddlers? Maybe. Like nature we need to be master adapters. If, when we put the blade in the water, our body is more comfortable, we have more power and more steering agility, then the technical analysis pays off.

Black Project hails the Hydro FlowX as the first 3D paddle. Of course all paddles are 3D, but this one has volume, which means the water is getting displaced while the blade slices in, and the water is flowing into the scoop in that instant of forward thrust. And this is great food for thought, but as I ran my credit card through for the Hydro FlowX, I thought it best to send a query to Black Project. After all, what do I know about SUP paddles? I was also anxious that the paddle get to me on time for the clinic with April Zilg. I got a call from Maui not long afterwards, and the next day Chris Freeman and I spoke. He suggested I take a look at his article Smaller, Softer, Shorter, which you can read by clicking on that link. I was already aware that downwinders could benefit from a smaller paddle, and Woo had a small paddle for us to try at downwind camp in 2020, just before everything got shut down due to the pandemic. I think we may have tried this one, which they sell as an emergency paddle. Let’s focus now on smaller. How small could we get?
SMALLER
So how is it that I am so far from the blade on a SUP, yet have so much power with such a small blade? Why are SUP blades smaller? Possibly there remains the mentality that bigger is better. I can definitely state that my coaches are all in principle agreement (that is the ones like Guy Ringrave and, as I’d find out, April Zilg) that a long stroke is not necessary. And yet you hear the chant all the time in outrigger paddling: long and strong! I’ve literally had a SUP paddler call out to me I should try a bigger blade. As I paddle more and more downwind, blessed by conditions from tropical Atlantic Ocean storms, my QuickBlade V111 starts to feel sluggish on the catch. The waves are moving so fast, I can literally feel the canoe slowing down when the blade enters the water. Subsequently I don’t bother trying to bury the blade or even stroke from my toes to my hips. It’s more of a knee to thigh explosion to position the bow at the bottom of the wave trough. This same explosion comes naturally with the Hydro FlowX. For surfski, with its two-blade wing-spoon, a couple of quick powerful grabs are required (and I’ve a long way to go at that!). But the surfski blades are also small. Why is the outrigger blade so big by comparison? All I can say is I wish I had another $500 to gamble and to have Black Project make me a super short, outrigger length version of the Hydro FlowX so I could find out.
Be safe, and see you on the water!
MetaLeash Quick Release Paddling Leash - SUP, surfski, outrigger, foil, prone
from $64.95
LIGHTER: at 4.5 ounces weighs half of other leashes, floats
SMALLER: 50% smaller than other leashes but still extends just as long
STRONGER: heavy duty webbing, stitching and YKK buckle system, 1600lb jacketed Samson Dyneema retractable leash, stainless steel clasp system (no hidden mystery hardware or plasticware like other leashes). Can be used with included Dyneema loops, without hardware, for greatest strength.
SAFER: easy to inspect, high contrast (red, orange, hot pink, lime, yellow or black cuff), red, yellow, orange or pink leash, dual quick release/connect for either race start or getting out of tricky situations
SIZING FOR OUTRIGGER, SUP, SURFSKI, FOIL, PRONE: Retractable leash comes in 9’ or 6’ length. Hardware comes in different sizes for conditions or hands.
SIZING FOR FIT ABOVE CALF: Leash cuff is to be worn above the calf or connected to waist strap.
Kahele Gelcoat Scratch Repairs
I love my Kahale. She is a beauty. I have put a few thousand kilometers on her, and I have easily put a hundred paddle scratches on the hull. The bow has some scrapes because I carry the Kahele on my shoulder upside down when entering and leaving the ocean, so the bow gets rotated in the sand when I set her down. Before I put another 1000 km on the Kahele, it is time for some maintenance. This is how I am taking care of the gelcoat scratches.


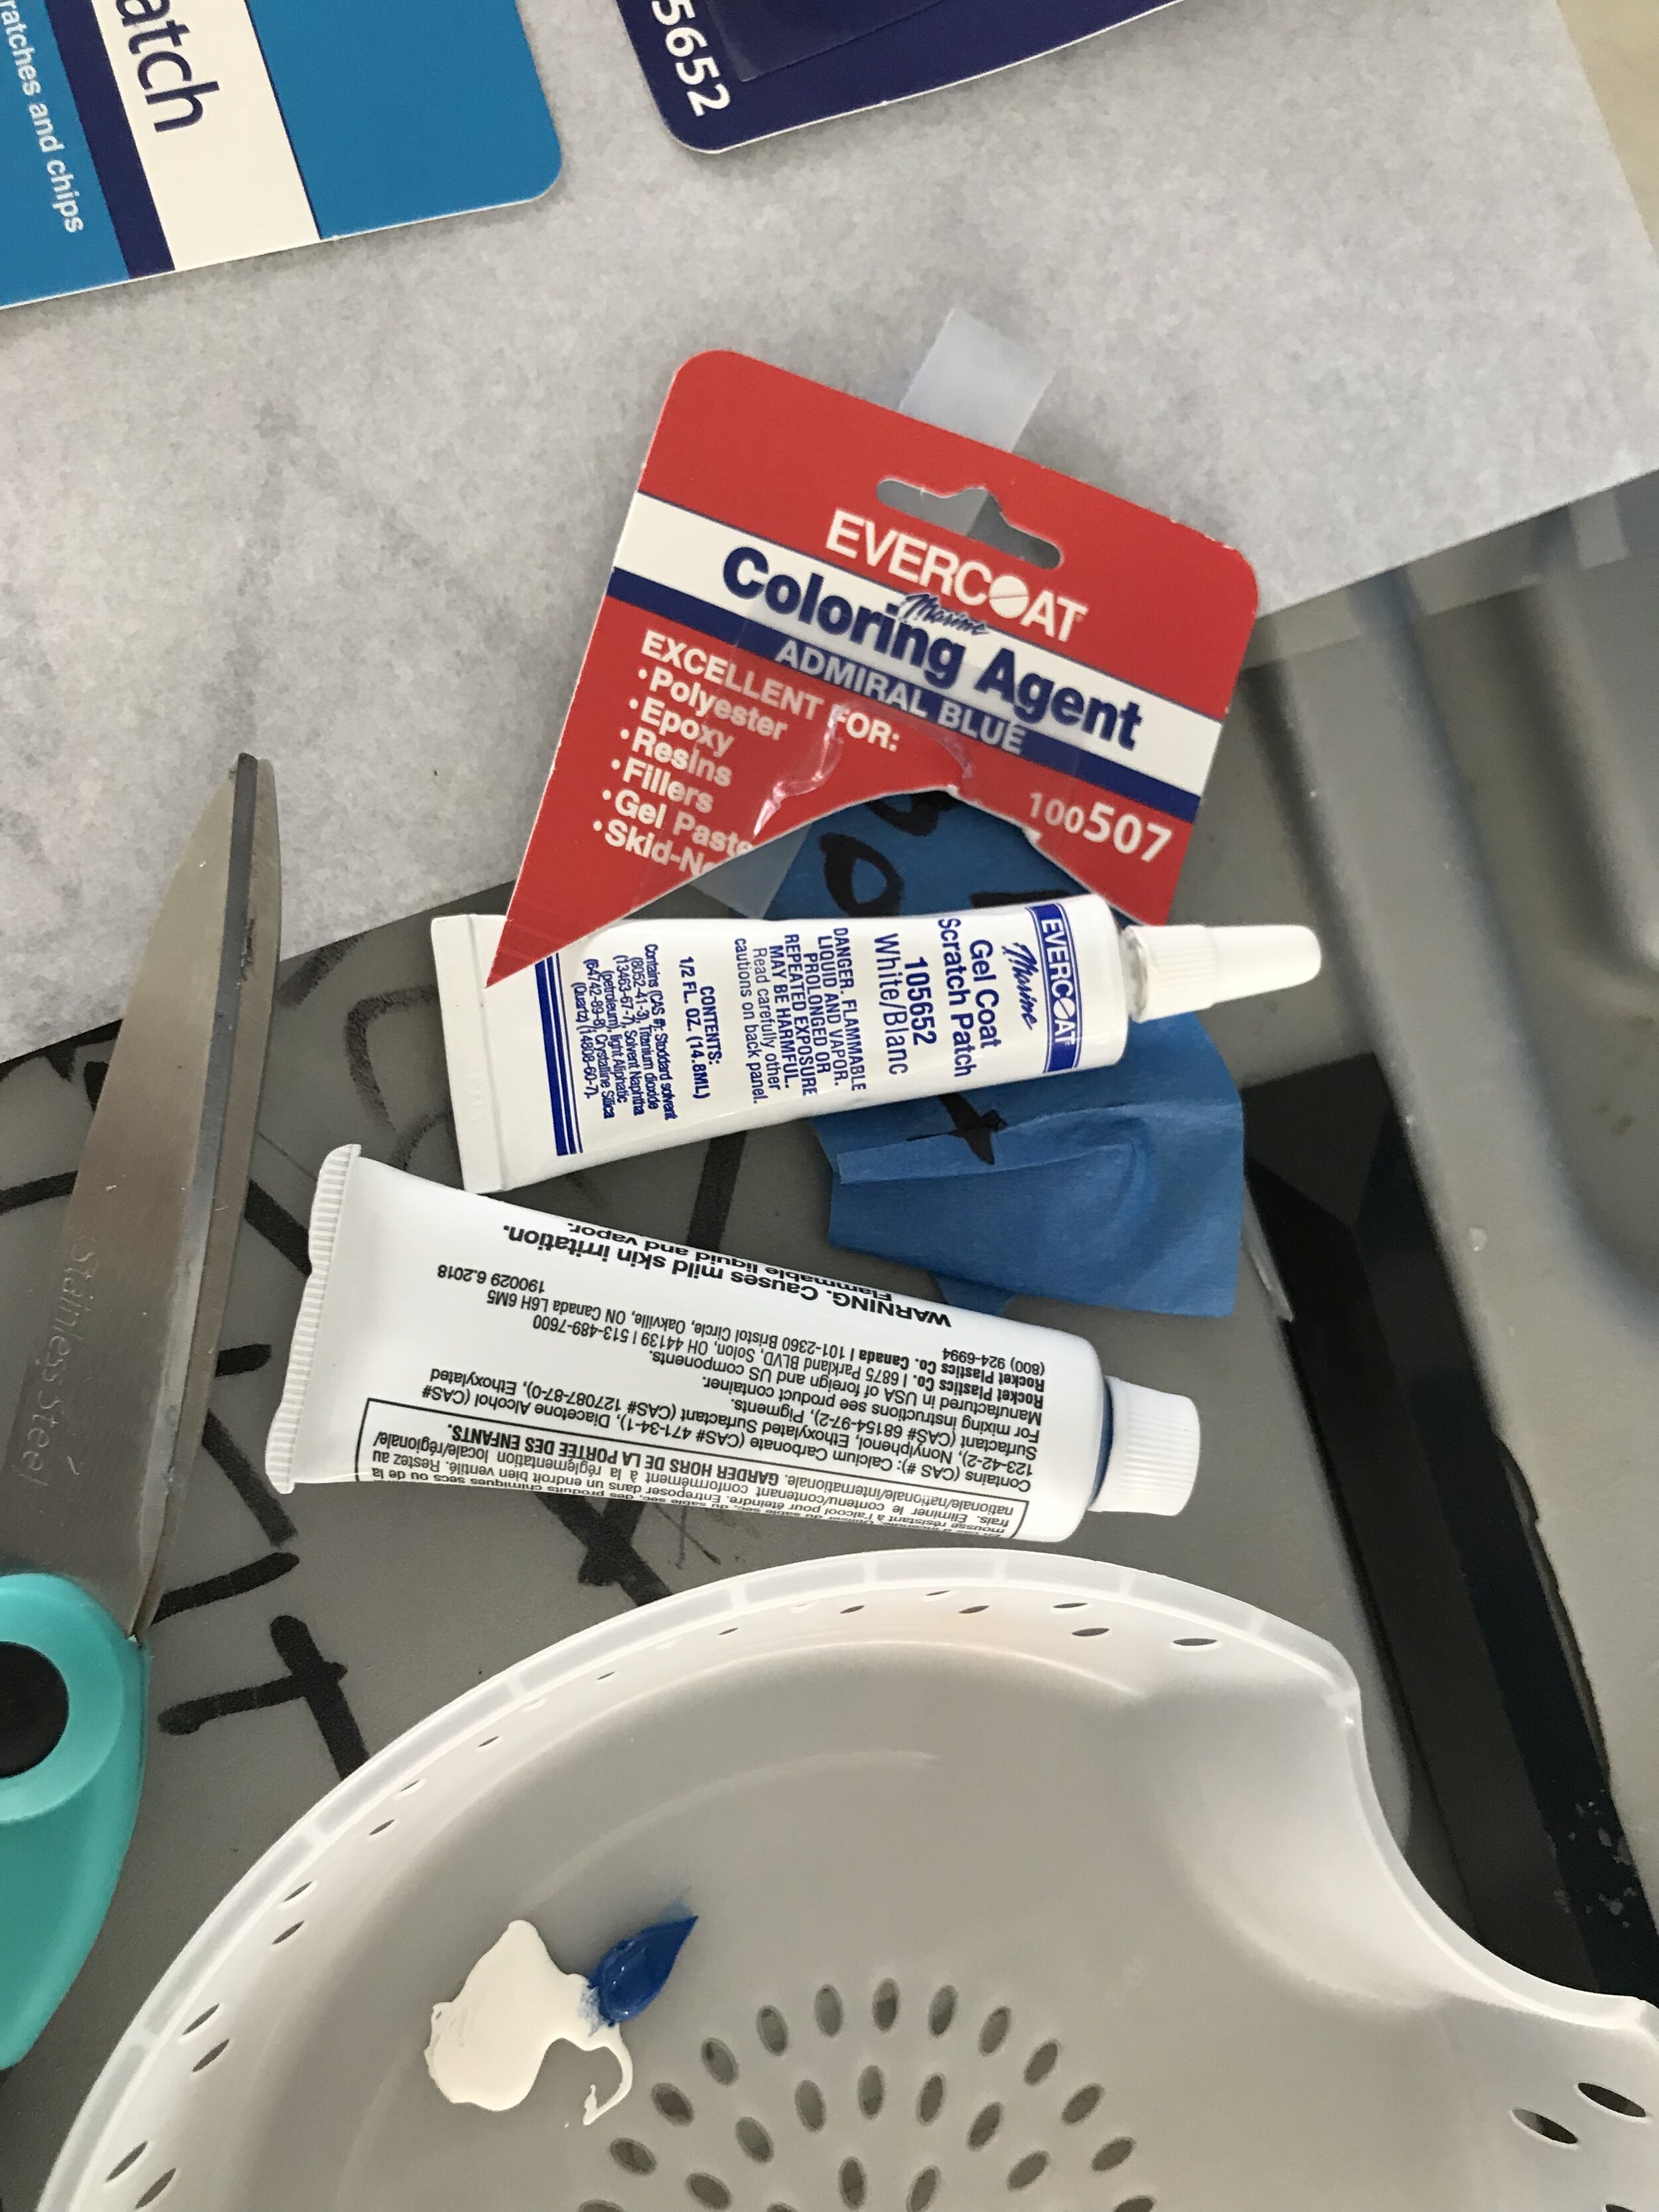
I had worked with gelcoat before, And I know a little goes a long way. I found this at my local West Marine, and I knew I would have to do some tests with the blue to get this Kahele blue. This isn’t like the gel coat that comes in a can as it does not need a catalyst and does not stink, etc. The end result seems pretty soft but seems just fine for scratches.

Turns out a small tube of white gelcoat scratch patch and a tube of blue coloring agent, along with acetone and a little mixing spatula, were all I really needed. First wipe down the hull area to be worked on with acetone to clean it, essentially to make sure it does not have wax on it. Then mix the color with the white. My first mix was too dark, so I lightened it a little.

I followed the directions, which was to load the repair area with the mix then wait fifteen minutes and scrape off the excess. I was not happy with this solution, so while removing the first trial I made a discovery: you can simply stroke the area with a rag wet with acetone and buff the gelcoat down to a satisfactory level.

Leave the gelcoat high because as it cures it will shrink in, then buff it out. I plan on doing a light sand touch up with around 1000 grit sandpaper on the areas where I fixed a couple of dings.


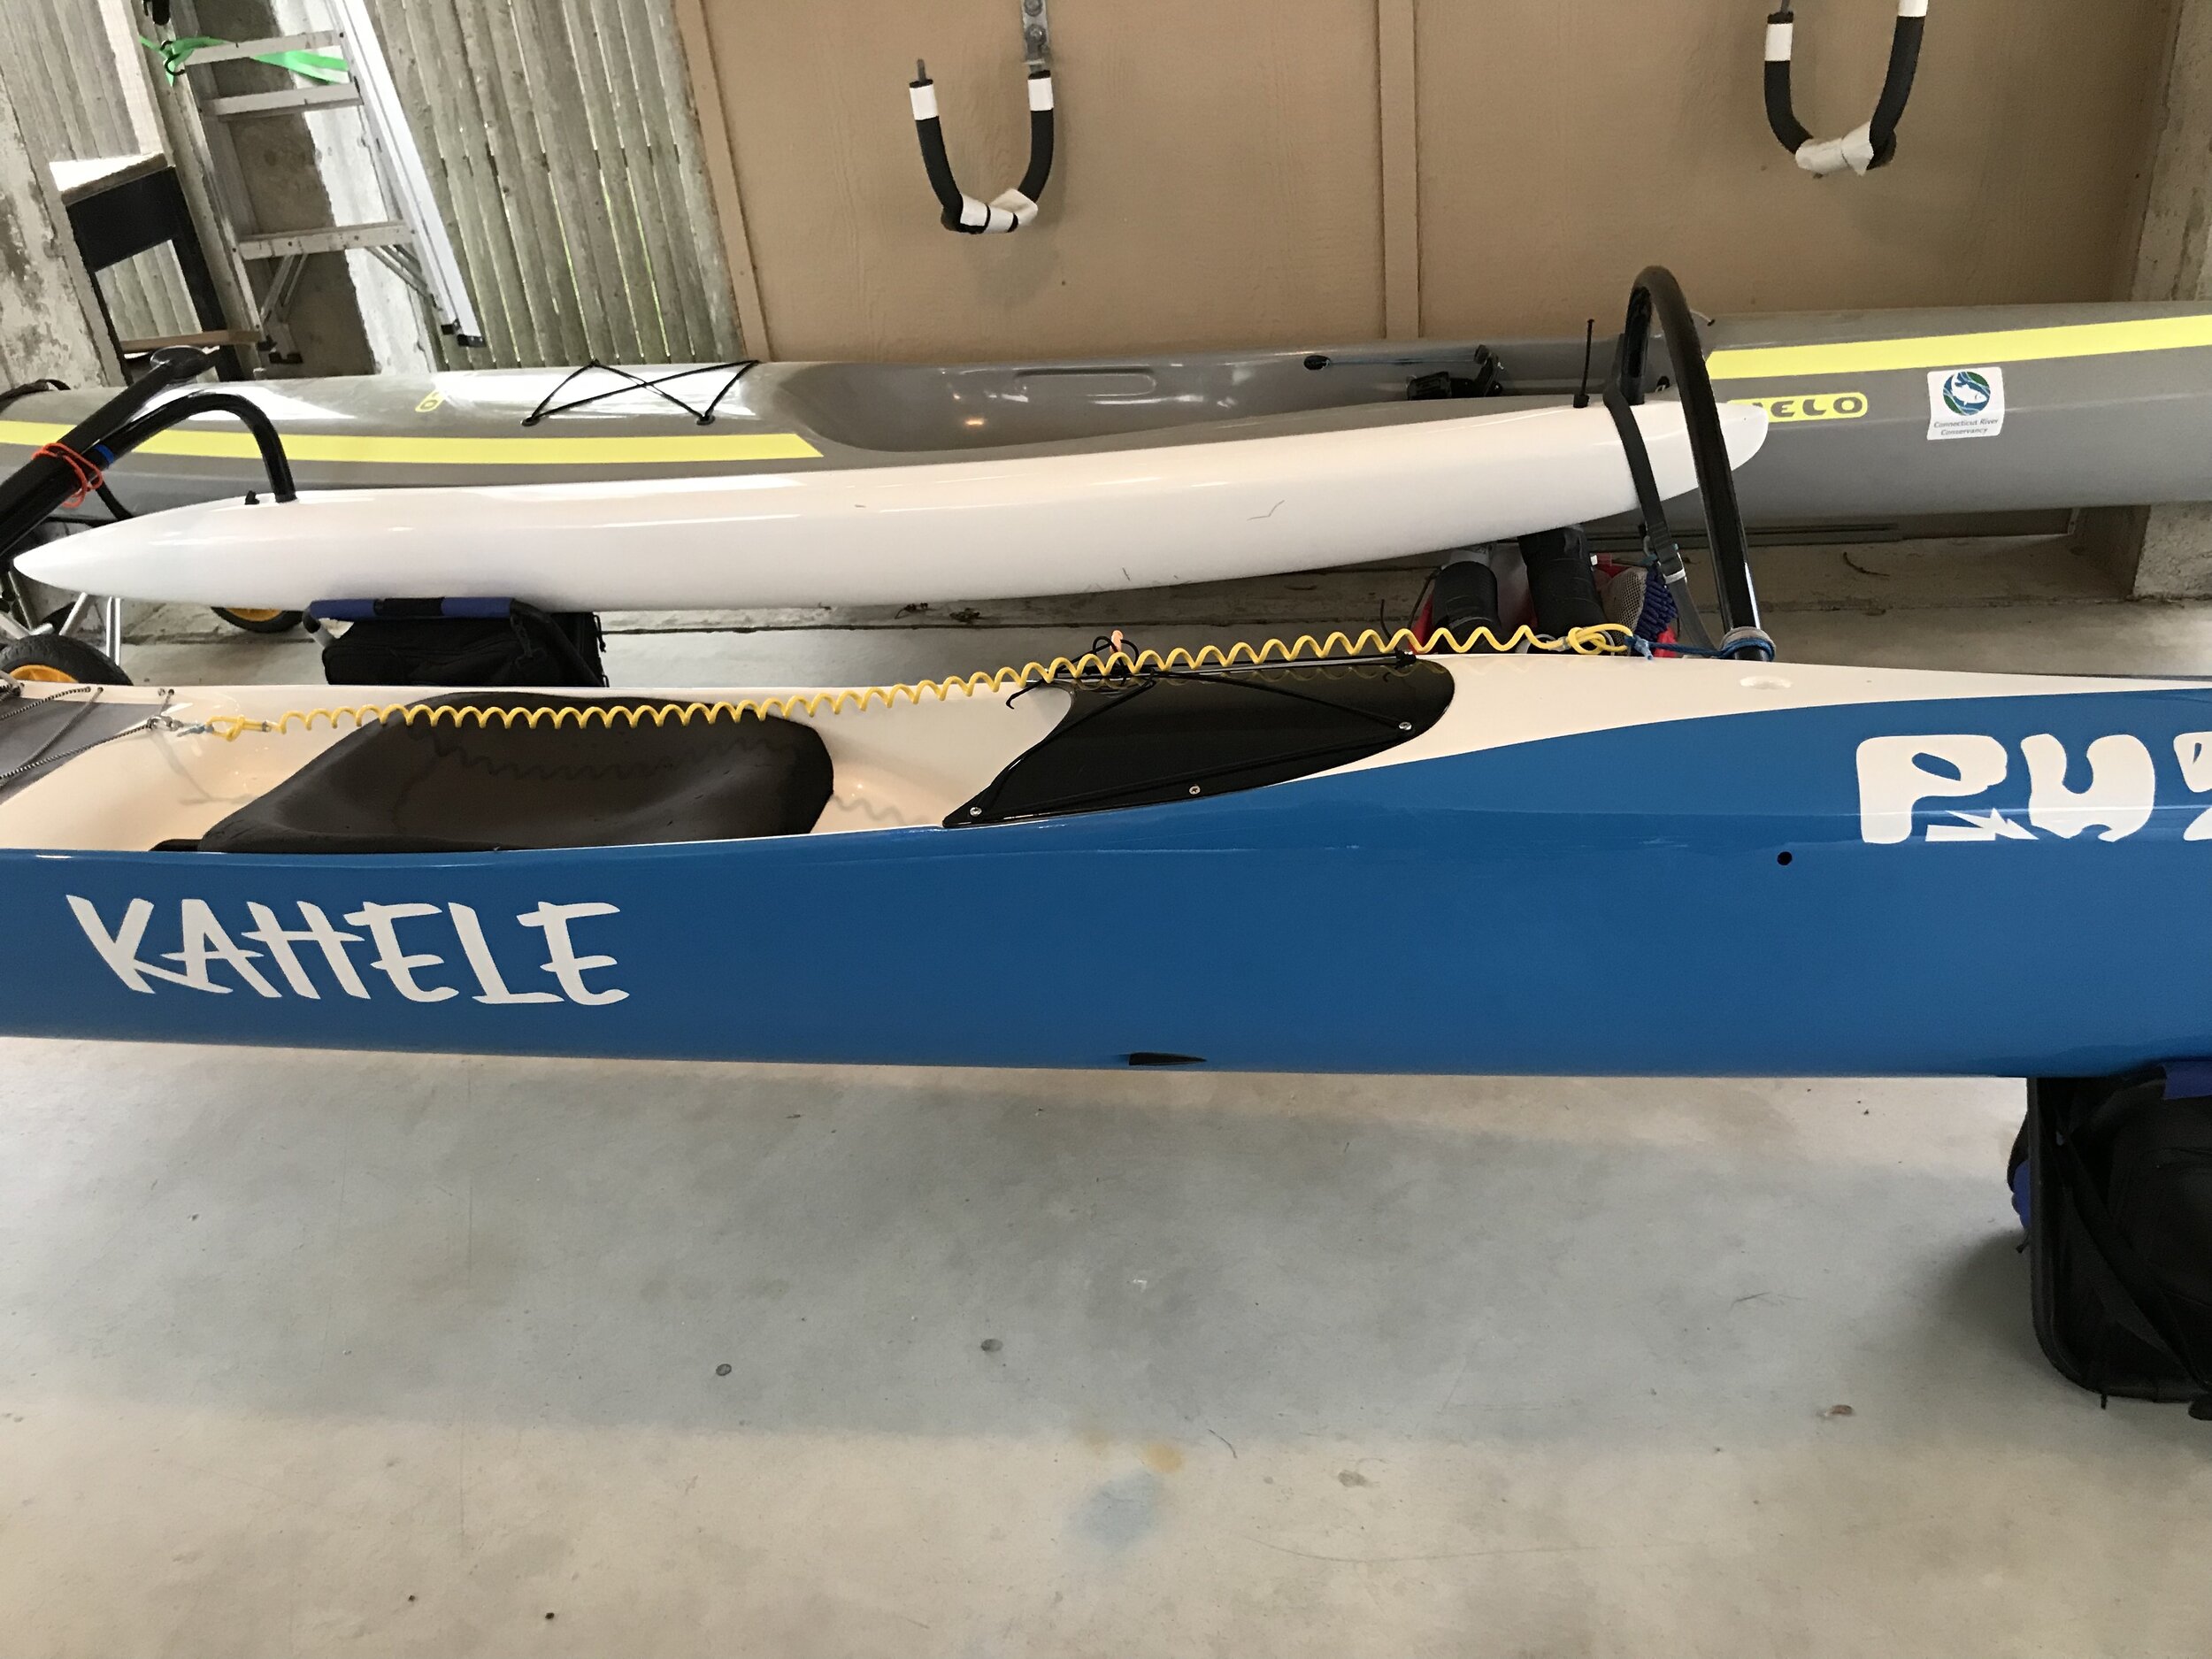
Kahele is looking good! I will let the gel cure overnight then wax the repair areas. I only did the right side of the Kahele as my first test. If all goes well after I take her for the next paddle, I will complete the ama side. This was surprisingly easy. Images with the final wax are in the video. I am super happy with this, *NOTE I was not happy using this product for larger chips and will try to mix some of the coloring agent with epoxy to obtain better adherence and a sandable surface. So, update forthcoming.
MetaLeash Quick Release Paddling Leash - SUP, surfski, outrigger, foil, prone
from $64.95
LIGHTER: at 4.5 ounces weighs half of other leashes, floats
SMALLER: 50% smaller than other leashes but still extends just as long
STRONGER: heavy duty webbing, stitching and YKK buckle system, 1600lb jacketed Samson Dyneema retractable leash, stainless steel clasp system (no hidden mystery hardware or plasticware like other leashes). Can be used with included Dyneema loops, without hardware, for greatest strength.
SAFER: easy to inspect, high contrast (red, orange, hot pink, lime, yellow or black cuff), red, yellow, orange or pink leash, dual quick release/connect for either race start or getting out of tricky situations
SIZING FOR OUTRIGGER, SUP, SURFSKI, FOIL, PRONE: Retractable leash comes in 9’ or 6’ length. Hardware comes in different sizes for conditions or hands.
SIZING FOR FIT ABOVE CALF: Leash cuff is to be worn above the calf or connected to waist strap.
Downwind Paddling: On Becoming a Downwind Paddler
It is March 2021, and I have spent more seat time in my Puakea Kahale than ever, in large part due to the need for social distancing. My local club started going out in our 6-man canoes late last summer, and several of us had been going out together in the smaller 1 and 2 seaters, but for a number of reasons I am still adhering to strict social distancing guidelines and not participating in any group sport activities or races. And while I miss the camaraderie of the big boats, the wind and waves and I have gotten quite close during the pandemic. If you want to get good at downwind, you have to paddle downwind. Solo. As much as possible.
In January 2020 I attended the Woo downwnd camp for the third year in a row. My skills had improved greatly, and I paddled the Woo Outrigger, French-made Feline as much as possible, as it was similar to the Kahele in length and volume. I did not huli once, no matter how tempted the Feline was to flip me, and I found some considerable speed and reasonable consistency on our daily runs.
My French coach Alain remarked that both my paddling and my French language had improved. There is no better way to stroke a paddler’s ego than to notice something they suspect: improvement. I recognized, however, that I would do much better on a Kahale, principally because it is lighter and has the improved steering with spring return rudder.
At the airport in Pointe-de-pietre in February 2020, as paddle camp wound down and we all returned to our home countries via this small international airport, I saw my first notices about travel restrictions into the USA due to coronavirus. A flight headed toward Miami earlier in the day returned a passenger who would not be allowed to depart there. Passengers who had been to inland China had to get rerouted onto New York bound planes, like mine. By the end of February I felt like I had a virus, though the news was not very clear as yet, and while I noticed the strange symptoms of the virus, I thought little of it until later. Within a few weeks restrictions increased, and the local club’s future went into limbo. I went out into the Atlantic Ocean by myself and started getting to know it quite well. For the duration of 2020 until now, my local waters are my university.
It had been a couple of years since I had started reading and then rereading WAVES by Fredric Raichlen, and while I got the basics I had not ever really seen my local waters as a system I could study. Having always paddled along with the bigger boats in the club, where surfing was seldom our focus, I tagged along regardless of wind conditions. But on my own I began to study the wind direction and tides. Soon I recognized the telltale signs of downwind runs, the curling horsehead waves running in the same direction. In my local waters sometimes these wave train patterns are only a couple of hundred feet wide or even less. Within these conveyor belt systems I discovered I could do 1 kilometer runs over and over again.

There are about seven small breakers in this image. A dark line behind me and closer to the horizon is another breaker. The further out I go, the bigger the swell. Closer in, the waves bunch up on the shallow sand.
I live on Long Island Sound, where on any given day, as long as I have 10 knots or better wind, I can downwind north, south or west. 16 knots is optimal for solo downwind. But approaching 20 knots, solo paddling is ill-advised. East directed waves will push me out to open water, so despite the temptation, I never downwind away from the shore even if the windspeed is below 15 knots. One of the key insights to downwind is that the waves actually don’t need to be big. As long as wave trains are moving in generally the same direction, even small bumps are surfable. In the video below, I am teaching a friend how to catch the swell rolling to the north. I can see the low bumps ahead, and I know more are coming behind me. So I keep a steady pace, and when I feel the stern lifting behind me, I pick up my stroke to match the speed of the wave. When they are the same, which is something you basically can both see and feel, you can let the momentum of the wave puch you. In this way, downwind paddling technique is more of a high intensity sport. You will cycle through speeds with intermittent bursts of power. This might look like flat water to you, but it is not. The swell bumps have a direction and a speed.
In the next video, from 2019, I have stronger swell, which a decent app like Windy will give you in Kj or kilojoules. At this stage in my paddling I knew the basics of what to look for and my timing was improving. Later in 2020, however, I found I had the ability to really hammer the paddle blade in and pull myself onto the face of a wave just so, to drop ono the incline like a surfer on a surfboard. The only way to get the feel for this is to go out in any kind of swell, even if it seems tiny, and try to ride it.
To close out this brief blog on downwind, the power is in the wave, the ability to catch that power takes immersion. Study your local waters for the telltale signs of downwind conditions, and even if they are small, go after them. It will make catching waves of all sizes easier. And once you really get to know your local conditions, you will know what to look for in other conditions, as well as what the bathymetry suggests by the waves above it. Basically, the top waves are travelling in circles, like a conveyor belt rollers, with their patterns often suggestive of what the sea floor looks like beneath them, as they roll against the sea floor and bunch up. These patterns will change with tidal height and flow. In this last video, the water is brownish from the silt churned up by a storm. The swell was quite strong, and I timed it just right to ride a single wave for about 30 seconds.
So, how do you know you’re going from beginner to intermediate downwind paddler? Maybe when you go from not even knowing what downwind is, to having your friends remark they are amazed at your ability to catch a 6” (15 cm) tall wave. Mostly it comes from the first person point of view, where you are running with the wave trains, feeling it - and seeing your average speeds creep up over time. A smartwatch helps with that. I use the Apple watch. Stay safe, and see you on the water!
Paddle Board Leashes (and How to Stand Up)
Maiden voyages of NSP Sonic paddle board and VESL prone board with MetaLeash.

Paddle board leashes are essentially the same leash as an outrigger or surfski leash. This means the inexpensive leashes (and even some of the expensive leashes) marketed for boards have most of the same problems as the cheaper leashes on the market: breakage, slippage, UV rot, heaviness, etc. The stand up paddle board (SUP) paddler has some unique issues, mostly having to do with how you fall. When I bought my NSP 24” Sonic surf paddle board, the seller (Vermont Surf and Ski) had hoped to take me out to a river and give me a few lessons near Brattleboro, Vermont, where I had to drive to pick it up. My first thoughts, as a safety geek, were: how deep is the water, how rocky, how fast is the current… But he was limited on his time as NSP boards were in hot demand that day. He bought four MetaLeashes and told me if I fall off my board, to basically dive sideways so I don’t come down on it and crush the carbon hull with the paddle. Obviously, other crushable things are bones… Luckily when I took the board out on my maiden voyage, I ran into this fellow, below, who got me standing up in five minutes.

Most people would not buy a race board before getting cozy on a wider, shorter board first. As an experienced ocean outrigger paddler, my comfort level was high enough to bypass entry level boards. The price was right on this used board, which only had a couple of dings I had to repair. Compared to my outrigger canoe, the NSP Sonic looks really wide, but I am in a sitting position with a low center of gravity in the canoe. Shifting that weight upwards was going to be a challenge. This is how we met that challenge: my stand up coach stood at the back of the board and basically used his hands to steady me. He told me to get into a crouched position and start paddling. So, he walked behind me, and after a minute he told me to come up on one foot and (KEY PART HERE) WHILE TAKING A STROKE come up on the other foot into a standing position. Just like that, I was standing. Let’s cover this again: crouch on your knees, come up on one foot, stick blade in water, stroke, come up to standing position with the other foot.
Aha! A brace stroke! What is a brace stroke you ask? There are variations on it, but basically when you see a paddle board surfer leaning on a wave, on the paddle, they are bracing the paddle. When you see someone flying the ama on an outrigger, they are bracing the paddle. And I am lucky that Oscar Chalupsky taught me the brace stroke for surfski, which is the most important one: the one that keeps you from rolling over. In this case, standing up on a paddle board, the board is more stable because you have the paddle blade planted in the water, momentarily “locking” you into a stable position just like a rudder does, while you mess with gravity.
The fellow continued to hold the rear of the board while I stood and paddled (my legs shaking like mad), and I really have no idea when he let go. So, try this with a friend or family member, and make sure they don’t tell you when you’re on your own. The psychology of BELIEVING someone was stabilizing me, even if they were not, meant my brain could not tell the difference between him being there and when he let go. In fact he made it a point to let me know he would not tell me when he was not holding the board. So, I got my first “downwind” paddle on the Sonic my first day out. And in all subsequent paddles, I did not fall off.
Back to leashes. What happens when I do fall? It is more dramatic than a fall off an outrigger or surfki, where you mostly just roll into the water. Your bouyancy is such that you usually don’t go under. Not a lot of countering forces here. But a plunge? You really don’t want to smack the board, with hands, legs, head… And when you do leap sideways, you will submerge further, which means there will be more stress on the leash.

The first thing I noticed while on my knees on the paddle board, was the cuff of my leash. You have to position the cuff so the attachment to the leash is on the back of the leg, otherwise you will squat on the hardware. Issue number one solved, just position the hardware to the back of your leg. But there are other solutions. I have seen a lot of social media images of stand up paddle board paddlers preferring to connect the leash at the waist. While I do make a belt, on my first day out I just connected my leg cuff to my PFD, similar to what I’ve seen others do. I have been selling more and more of the belts lately, so it is worth considering what is comfortable for you. Link to MetaLeash shop: www.metaleash.com.
A note about prone paddling, foil, surf: the MetaLeash also works well for prone, or for any other board activity like foil. A surf leash is in development with a different set of fall parameters, because falling off a surfboard involves very complex forces, similar to paddle board surfing, with a lot of fancy footwork, and surfers prefer straight leashes. Stay tuned or hit me up with suggestions, comments, feedback, concerns, customizations, you name it, I will leash it for you. metaleash@gmail.com
And now for a video of some truly amatuer standup paddle board surfing and some speedy prone paddling. Here we ended up sharing a leash, another upside of a quick release, which is critical for getting out of trouble, possibly critical for a race start or critical if you are sharing! Have fun and stay safe. It is February 28, 2021, 39 degrees F in my local Atlantic Ocean, and that is paddling weather to me. See you on the water!
MetaLeash Quick Release Paddling Leash - SUP, surfski, outrigger, foil, prone
from $64.95
LIGHTER: at 4.5 ounces weighs half of other leashes, floats
SMALLER: 50% smaller than other leashes but still extends just as long
STRONGER: heavy duty webbing, stitching and YKK buckle system, 1600lb jacketed Samson Dyneema retractable leash, stainless steel clasp system (no hidden mystery hardware or plasticware like other leashes). Can be used with included Dyneema loops, without hardware, for greatest strength.
SAFER: easy to inspect, high contrast (red, orange, hot pink, lime, yellow or black cuff), red, yellow, orange or pink leash, dual quick release/connect for either race start or getting out of tricky situations
SIZING FOR OUTRIGGER, SUP, SURFSKI, FOIL, PRONE: Retractable leash comes in 9’ or 6’ length. Hardware comes in different sizes for conditions or hands.
SIZING FOR FIT ABOVE CALF: Leash cuff is to be worn above the calf or connected to waist strap.

MetaLeash Straight Leash with Rail Saver
$74.95
Straight Leash 6’ with Shock Coil and Quick Release (for surf, SUP, foil, your choice!) Comes with yellow or orange rail saver.
Dry Suits: Top Picks for Winter Paddling Gear, a review of Kokatat, NRS and Vaikobi
The ocean as winter wonderland.

I have been researching dry suits for the past two years. Each winter I have opted to spend money on travelling to the tropics instead, usually to downwind camp. This winter, as I stay at home due to the corona virus, I decided it was time to take the polar bear plunge and invest in gear good enough to carry me through a long, socially distant winter, in my local ocean. I do not make the decision lightly, as paddling in cold water drastically increases risk in our sport.
Every time I thought I was heading toward a bona fide review of winter paddling gear, I ended up on one of those websites that is really a shopping channel. After reading every seemingly real paddler’s review on storefront websites and watching the few videos out there, I really had my heart set on a Stohlquist with a built in jacket. Alas, there wasn’t one in my size available anywhere. Inventory is also scarce in this winter of 2020, and there seem to be a lot of newer brands out there I am not familiar with. As much as I looked and looked, I also was not able to find a high-visibility, preferably orange or partially orange suit in my size. Ultimately I defaulted to a color that really is not a good idea in winter water gear - blue - because it was one of the only ones out there in my size and made by the brand I finally decided was my top choice, even beyond Stohlquist. And though I did not prefer blue, the body of the suit is light colored, which is a lot better than black. But it is still sandy colored, so it would be impossible for a rescuer to pick you out of the waves or off the shore in bad conditions.
Kokatat.
UPDATE: Winter of 2022 approaches, which will be winter three in the dry suit. Not only has it held up with frequent winter use (December-April), I also took up SUP surf last winter. This means I submerge every time I go out, as a wipe out in surf is generally guaranteed. The great upshot of the dry suit investment is that the ocean sports do not come to a seasonal end. My fitness level remains high all year round.

I finally rejected the idea of a drysuit with built in jacket, because I can always add layers. I knew that for the freedom to move fully, to rotate through all of my paddling motions, less was going to be more. Stohlquist does not offer a lifetime warranty and Kokatat does. Kokatat also has nice videos on how to maintain and repair your dry suit. The price point on the one I selected was $620 USD and is a Hydrus Swift Entry. When it takes just as long to gear up as you plan to spend on the water, putting gear on can be a bummer. Believe me, it takes longer to put my NRS winter gloves on that it takes to get the Swift Entry suit on. You will be in and out of this in a jiffy.
When I first tried it on, the choking tightness of the latex neck was terrifying. After some internet research, I discovered that Kokatat recommends you just put up with it for your first few paddles. I couldn’t wear it for three minutes let alone three hours, so I defaulted to their other suggestion, which is to use cans to stretch the gaskets in the neck and wrist for 12 hours. I did not need to stretch the wrists, and after an overnight of stretching the neck around a small paint can, the difference was just enough to make the first paddle tolerable. After a few more paddles, the latex remains ever so slightly uncomfortable when I first put it on, then I don’t notice it. TIP: measure your neck then make sure whatever you use to stretch the gasket is a little smaller than your neck, so that you don’t overstretch.

There are considerably more expensive drysuits out there, but as a novice winter gear consumer with a fairly advanced understanding of how much I paddle, under what conditions and also a commitment to taking care of my gear, I figured I would get enough wear and tear out of an entry level priced Kokatat and know enough in 2023-2024 to upgrade if required. But since this suit is repairable, even that may not come into play. But let’s say I wear it 100 times over the next three seasons: that come out to $6.20 per use, which is a far cry from a $620 single use plane ticket to the tropics. Ok, so the reality is, I will use any math to justify my paddling addiction. But in reality that $6.20 is my ticket to a safe paddling in an ocean that would otherwise kill me. Almost every winter someone goes out in my local ocean in blue jeans on a kayak and doesn’t come back. A dry suit is an investment in your life. Never second guess the temperatures. If getting too hot is your worst case scenario (because you literally are sealed inside the suit) then you’re in luck.
The Kokatat Hydrus performs very well while paddling, as it does submerged in water. This suit has built in feet or socks. For me, the key to staying warm is keeping my extremities dry. You will find that air gets trapped in the suit. I realized after a couple of uses I could open up the easy access zipper and bleed out the air, then rezip. I bought “waterproof” socks, which have about a 1mm fleecy neoprene texture and outer seal of some sort. They look like socks and feel like thick socks. Of course you don’t need waterproof socks inside a drysuit, but for me these socks are gear and are not bulky like full neoprene socks. The ones I bought are no-name “Randy Sun” socks I bought on Amazon.

UNDERLAYERS: Look like socks. Feel like thick, cozy socks but waterproof or at least water resistant. Along with Vaikobi cold gear and an NRS hydroskin top.
These are my underlayers: I don’t plan on swimming with these socks, but I can say that after getting out of my drysuit I can walk through puddles into my house and no water is absorbed by the socks. $24-$29 USD. As I already have a hard time with the ankle zippers on my NRS farmer John wetsuit, I figured I needed tapering gear to get into my winter paddle boots, so I bought Vaikobi Vcold Flex tights. My legs don’t tend to get cold, and inside the watertight and airtight drysuit, I don’t think I will need thicker neoprene this winter. These tights are a light neoprene like material with fleece and have the uni-rear end to keep you from chafing on seams. They are pretty much the same thickness and softness as the no-name socks. The NRS hydroskin top has lasted me many seasons and still looks brand new.

OUTER GEAR:: I selected NRS Boundary boots and ordered a size up so I could fit my socks and excess drysuit socks (they run puffy big) into them. These boots are waterproof up to the ankle. It is impossible for me not to get water into them, so when I was done and portaging my Kahale across the beach, I was not happy with the water sloshing inside. Water runs out of regular NRS paddle boots, so no sloshing. But before I discounted them entirely, I decided to try them with my NRS farmer john wetsuit on a warmer day. Water still gets in over the top, but once your body warms up that water, that is the water that stays in your boot. With regular, ankle high paddling boots, cold water is constantly exchanging. So, ultimately, the boundary boot offers a significant advantage in keeping the extremities from getting too cold. Since they are mostly neoprene, they are very flexible and do not get in the way of my leg pushes, which is a major factor in paddling power. I love them. $80-$100 USD.

I have owned the NRS Mavericks for a few years, and my first pair has taken on some small holes. The latest versions are thicker or tougher and were very difficult to get on. But this I suspect is part of their newness. I had never experienced them as waterproof. My hands always seem wet. But once the new liquid seam wrists were sealed over the latex gaskets in my Kokatat dry suit sleeves, my hands were indeed dry. The dampness I felt afterwards is the dampness you will feel from paddling in your drysuit: from sweat. As for headgear, I have a neoprene beanie that always rides up, so I don’t use it anymore. I’m sure I will need a full hood at some point this winter, but for now a skimask will be topped by my neon orange Puakea trucker hat. I would still prefer an orange suit, but I’m staying hi-visability with my neon orange PFDs (Vaikobi for now, my more buoyant and thicker Mocke for the cooler winter), and I have switched to my MetaLeash belt. The MetaLeash cuff still easily fits around a drysuit, but the higher the quick-release is, the less you will have to submerge in cold water if you get into trouble.

Your smartch watch will not pick up your heart rate through the neoprene.
My Apple watch still connects to GPS and gives me my paddling app features, but without heart rate. You can’t have everything! And you can’t use the touch screen etc. But the upshot is, with the right investment, you can paddle all winter long. Please remember to study the weather and do not go out if there is risk. I can comfortably carry my compact Standard Horizon radio and my bulky ACR beacon in my Vaikobi race PFD. I hope I never use them! Be safe and see you on the water,
MetaLeash Quick Release Paddling Leash - SUP, surfski, outrigger, foil, prone
from $64.95
LIGHTER: at 4.5 ounces weighs half of other leashes, floats
SMALLER: 50% smaller than other leashes but still extends just as long
STRONGER: heavy duty webbing, stitching and YKK buckle system, 1600lb jacketed Samson Dyneema retractable leash, stainless steel clasp system (no hidden mystery hardware or plasticware like other leashes). Can be used with included Dyneema loops, without hardware, for greatest strength.
SAFER: easy to inspect, high contrast (red, orange, hot pink, lime, yellow or black cuff), red, yellow, orange or pink leash, dual quick release/connect for either race start or getting out of tricky situations
SIZING FOR OUTRIGGER, SUP, SURFSKI, FOIL, PRONE: Retractable leash comes in 9’ or 6’ length. Hardware comes in different sizes for conditions or hands.
SIZING FOR FIT ABOVE CALF: Leash cuff is to be worn above the calf or connected to waist strap.
MetaLeash Quick Release Paddling Belt for SUP, surfski, outrigger, foil, prone, surf
from $34.95
FASTEN YOUR METABELT!
Introducing the 2024 MetaLeash Belt Leash, perfect for surf, SUP, and all paddle sports. Our upgraded design features bold, brightly colored belts that are two ounces lighter yet just as strong, with a 2800 lbs breaking force. Made of durable seatbelt polyester, the new MetaLeash belt ensures top performance and reliability.
PLEASE NOTE: Belt selection is yellow, lime, pink, orange, red or blue with three large water drops. The small water drop designs are SOLD OUT. We appreciate your patience while we update the inventory photos. The leash colors remain the same.
Leg Leashes!

Generic leg leash worn loosely around the ankle. Too loosely.
In January 2019 I had a leg leash fail on me in big water. It was a short leash, like the length made for surfski. Trying to move around a 21’ canoe I did not have enough length to maneuver, and the tension pulled the leash off my leg. It shot off like a giant rubber band. In that instant I witnessed how quickly a technical failure could lead to dire circumstances in the ocean. I knew if my canoe and I separated by one meter the wind could take it away. I would not be able to swim to catch it on its westward journey perhaps a thousand miles to the next land. I also would not be able to swim to the beach. I could see the beach. It was upwind from me. I raised my paddle to alert the other paddlers in my group I had a problem. I waited until they were close enough so if I lost contact with the canoe they were right there to help. We got the canoe back over. The last kilometer I paddled then to our destination was the longest ever mentally for me. Why? Two days earlier I had learned of a drowning death of a paddler in my circle. Someone who should have been paddling with us.
When I stepped onto the beach my goal as a paddler had shifted: to stay alive. As long as we are alive, we can paddle. One cubic meter of water weighs around a ton. We will never be stronger. We have to be smarter. We have to be wise. When in doubt about the conditions, just don’t paddle. The ocean will be there tomorrow, and we should be too.
That night at the villa, I pondered two problems: (1) how to resolve the leash wrapping around the hull that makes us outrigger paddlers take a leash off after a huli and (2) resolve the loose, slippery cuff problem.
105 days later my downwind coach Guy Ringrave was separated from his OC1 in big water in southwest France, and he also drowned.
It is at once horrifying and unacceptable to see my friends lose their lives paddling in the oceans we love. We must change our culture and include safety training as invaluable.
I had not feared drowning because it had not been real to me. I started my season this year by using a rope I trusted as my leash. I sewed webbing by hand. I stopped using the cheap leashes for good. I don’t know how Guy was separated from his canoe, but there are only so many scenarios. I just can’t believe he’s gone. This should never happen to any of us. Guy’s family posted through Woo that they would continue his outrigger business in his spirit.
in this spirit I continue to paddle with the deepest respect for the ocean and wind. I want to make this increasingly popular sport safer for all.
And finally I found someone who could help take my rope (Dyneema) and jacket it into a retractable cord. I’ve spent months agonizing over details to make a superior leash. It is not meant to save your life. It is made to keep you with your boat, which is a flotation device that at all times is functioning to keep you alive while you enjoy the wonders of our water world. Pay attention to the weather report and always keep communication on your person. Don’t attach it to your boat.
I present to you the Meta Leash. It is smaller, lighter and stronger than any other leash on the market. It has continuous engineered strength and is stronger than steel, outlasting it in a marine environment 3:1. It’s core is Dyneema, jacketed in rubber (1600 pound, 730 kg average strength). It fits better above the calf and can also be worn at the waist. It is superior in every way to any other leash. The second video shows you how to recover from a huli WITHOUT having to remove the leash.
The Meta Leash is for sale on my website shop. If you have any custom needs or concerns, email me.
MetaLeash Quick Release Paddling Leash - SUP, surfski, outrigger, foil, prone
from $64.95
LIGHTER: at 4.5 ounces weighs half of other leashes, floats
SMALLER: 50% smaller than other leashes but still extends just as long
STRONGER: heavy duty webbing, stitching and YKK buckle system, 1600lb jacketed Samson Dyneema retractable leash, stainless steel clasp system (no hidden mystery hardware or plasticware like other leashes). Can be used with included Dyneema loops, without hardware, for greatest strength.
SAFER: easy to inspect, high contrast (red, orange, hot pink, lime, yellow or black cuff), red, yellow, orange or pink leash, dual quick release/connect for either race start or getting out of tricky situations
SIZING FOR OUTRIGGER, SUP, SURFSKI, FOIL, PRONE: Retractable leash comes in 9’ or 6’ length. Hardware comes in different sizes for conditions or hands.
SIZING FOR FIT ABOVE CALF: Leash cuff is to be worn above the calf or connected to waist strap.
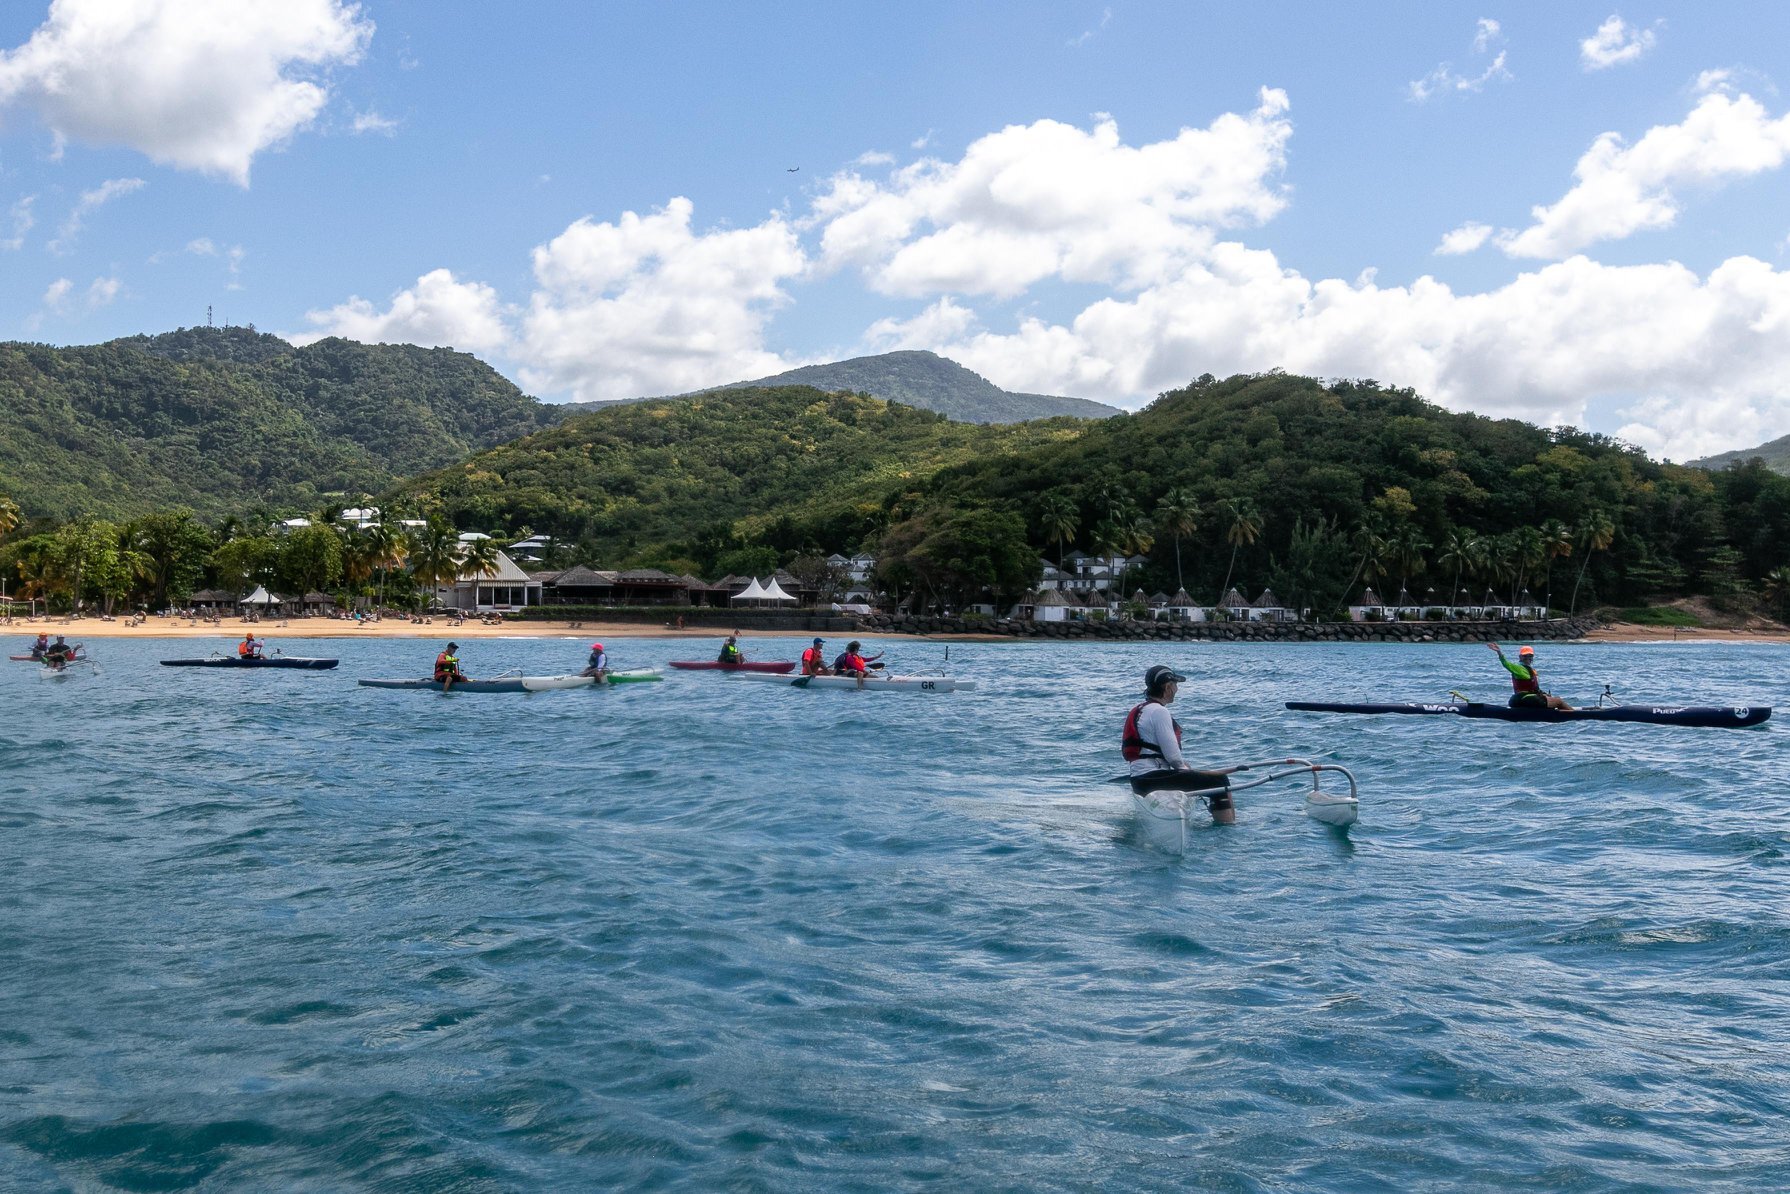
Honaunau: an ode to the place of refuge, visionaries and the Queen Lili race

Honaunau is heaven.
Honaunau is a sacred place. I first went there maybe 20 years ago, when I had first visited Kona. A friend of mine owned a coffee farm in the region, and I recall the grand canopy of an avocado tree abundant with endless fruit above his home. At night, the tree was sheltered under a sky scintillating with stars. I first saw outrigger paddling in Kailua-Kona, and the visions have stayed with me. It looked like so much fun. Unbelievably, it was in New York City where I learned outrigger paddling and the NYO club that took me back to Kona and Honaunau, to the Queen Lili’uokalani race. In the morning, the women race the canoes from Kailua-Kona to Honaunau, where the men receive the canoes and race them back. My canoe was greeted by dolphins as we entered the bay and finished our race. It was an exhilarating return.
Unfortunately, my Makapo paddler friends, who had been scheduled to race with the Makapo team based at NAC in California, had stayed in New York. This was due to the fact two hurricanes were heading to the Big Island. No one knew whether, when we caught our flights, we would be able to race at all. So, while some of us took the risk, why did the Makapo paddlers stay behind? “Makapo” means dark-eye in Hawaiian. Our Makapo paddlers are visually impaired, and it had been deemed too risky to place these paddlers between two hurricanes. I felt bad for my friend because as fate would have it both hurricanes swerved right before the races, and the US Coast Guard announced the race would go on. Ultimately I decided to find some gifts for my New York Makapo friends. Here I encountered a difficulty: how do you give a gift to someone who can’t see it?
What follows is the amazing story of how I met Will, the visually impaired, paddler-coffee-farmer of Kona. A link to the Lehualani farm, where you can buy his coffee, is here: Lehualani Coffee.


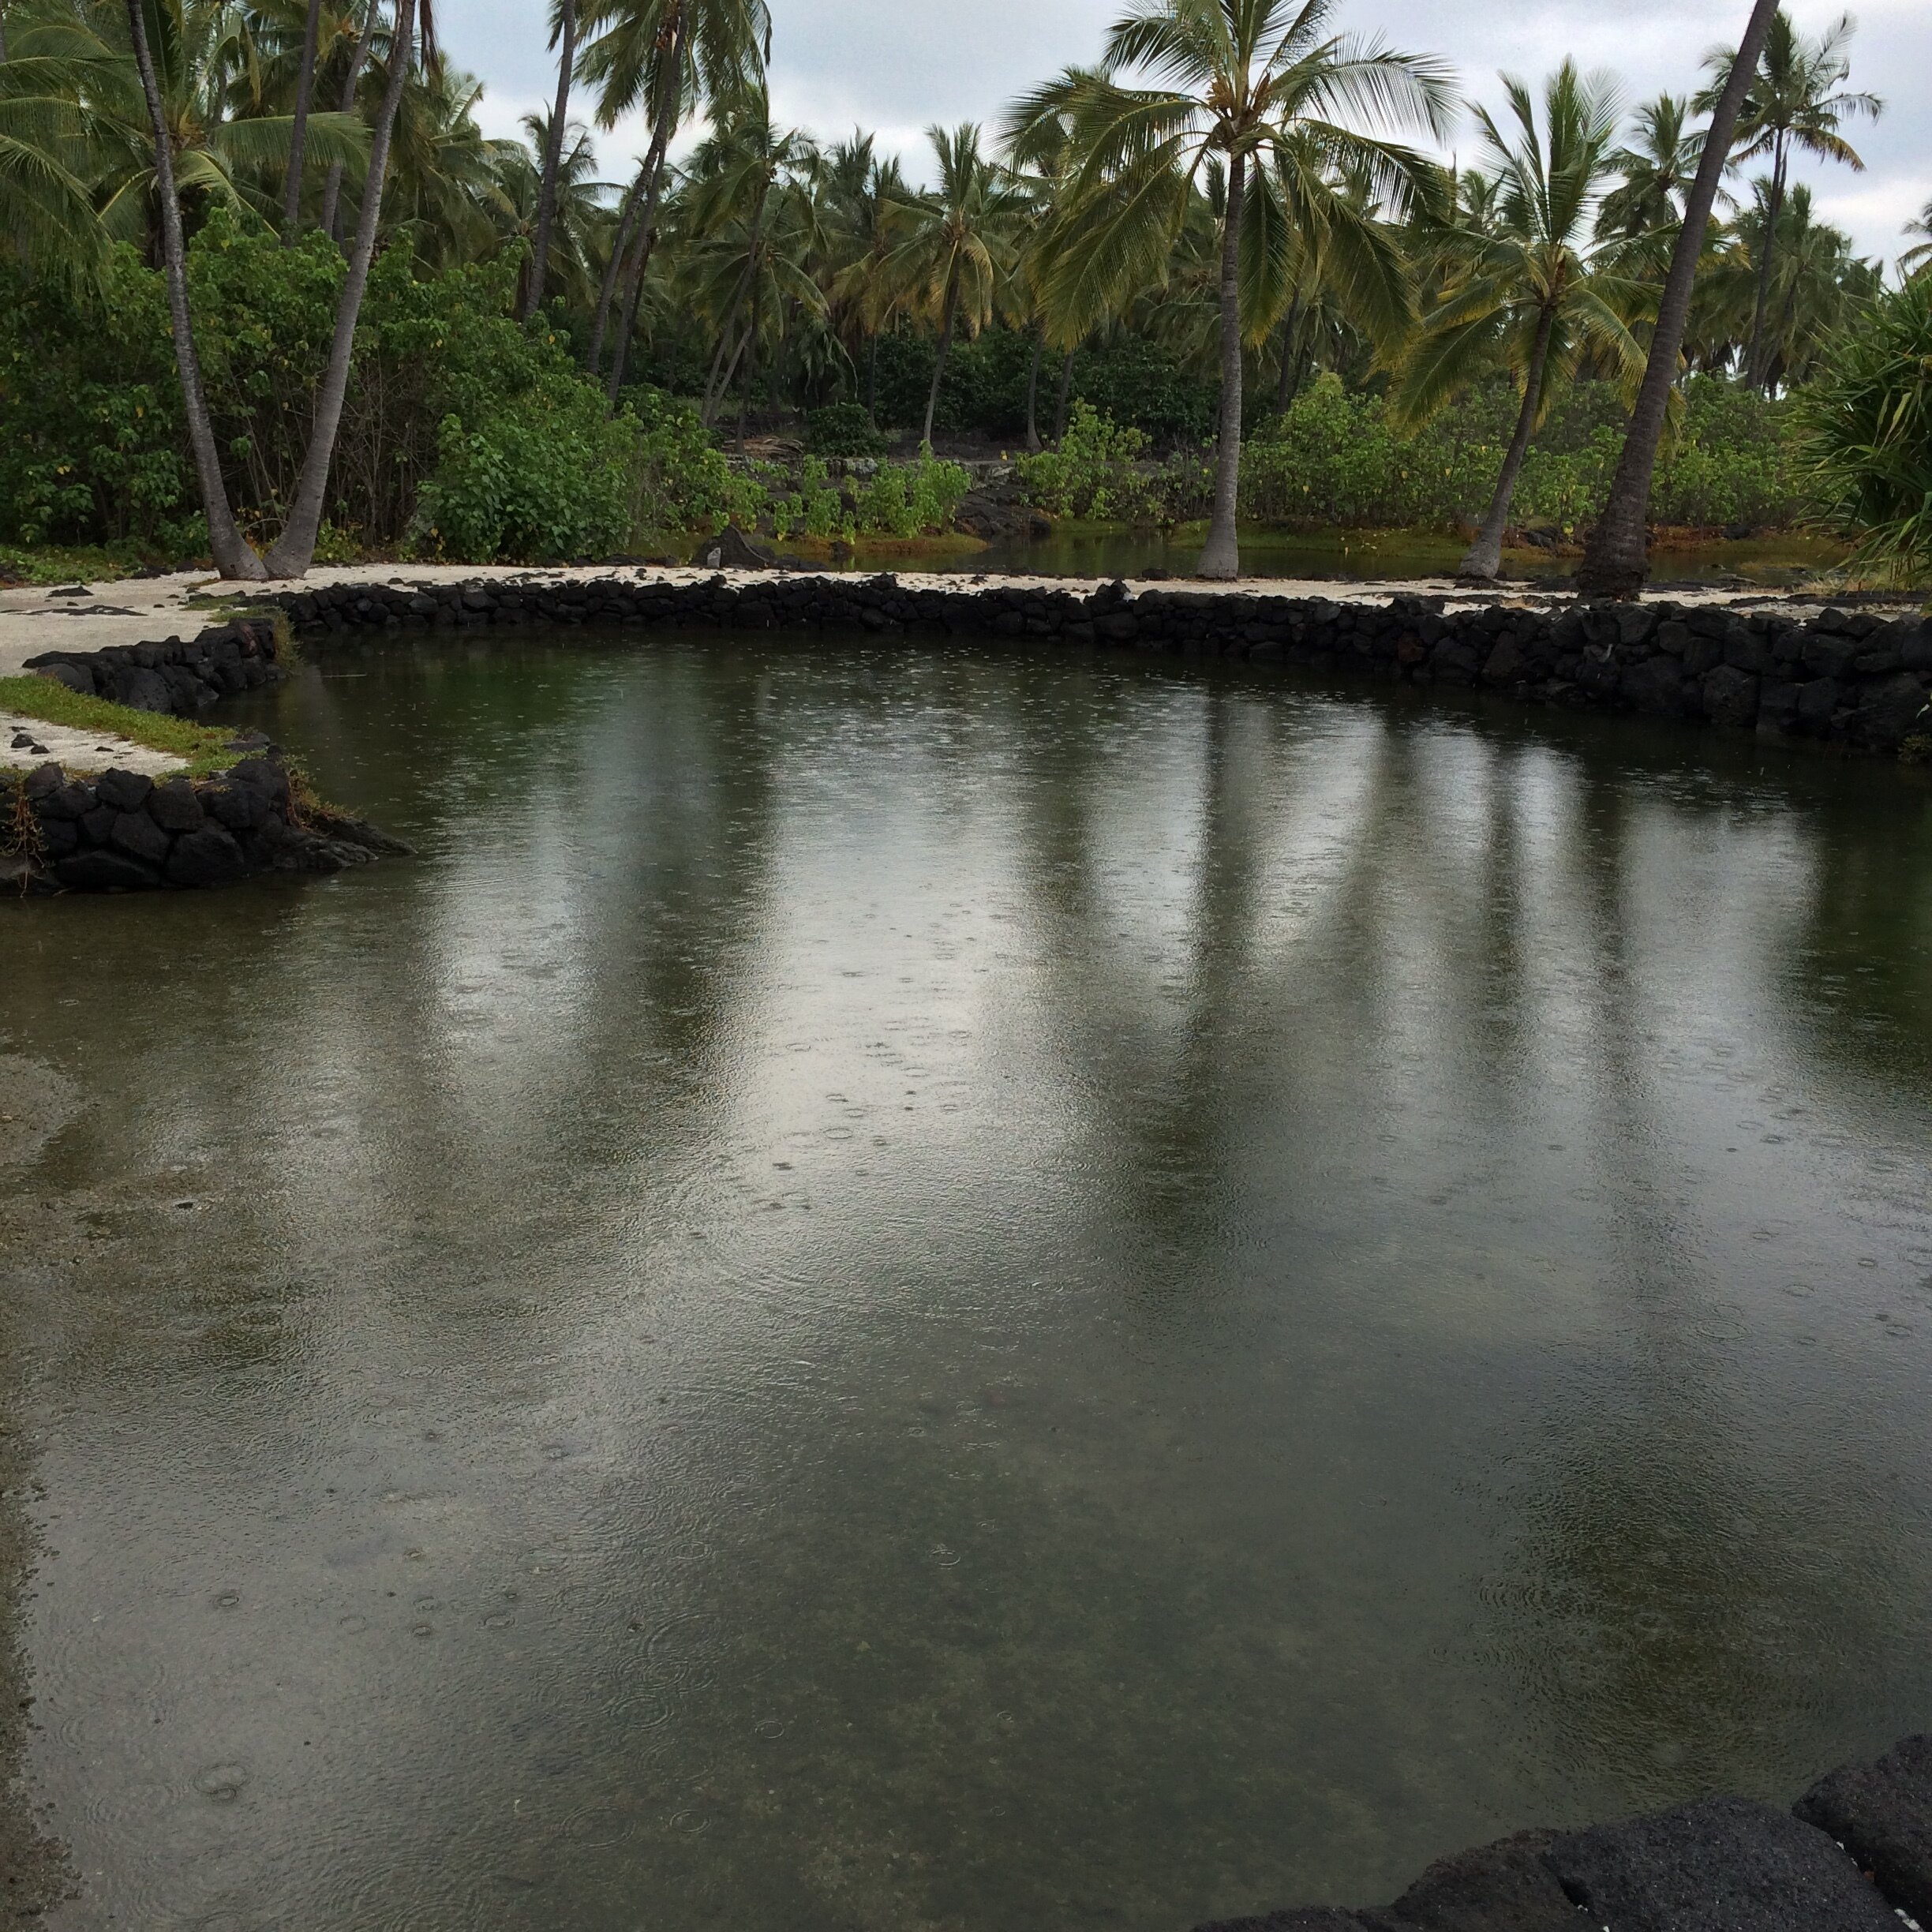
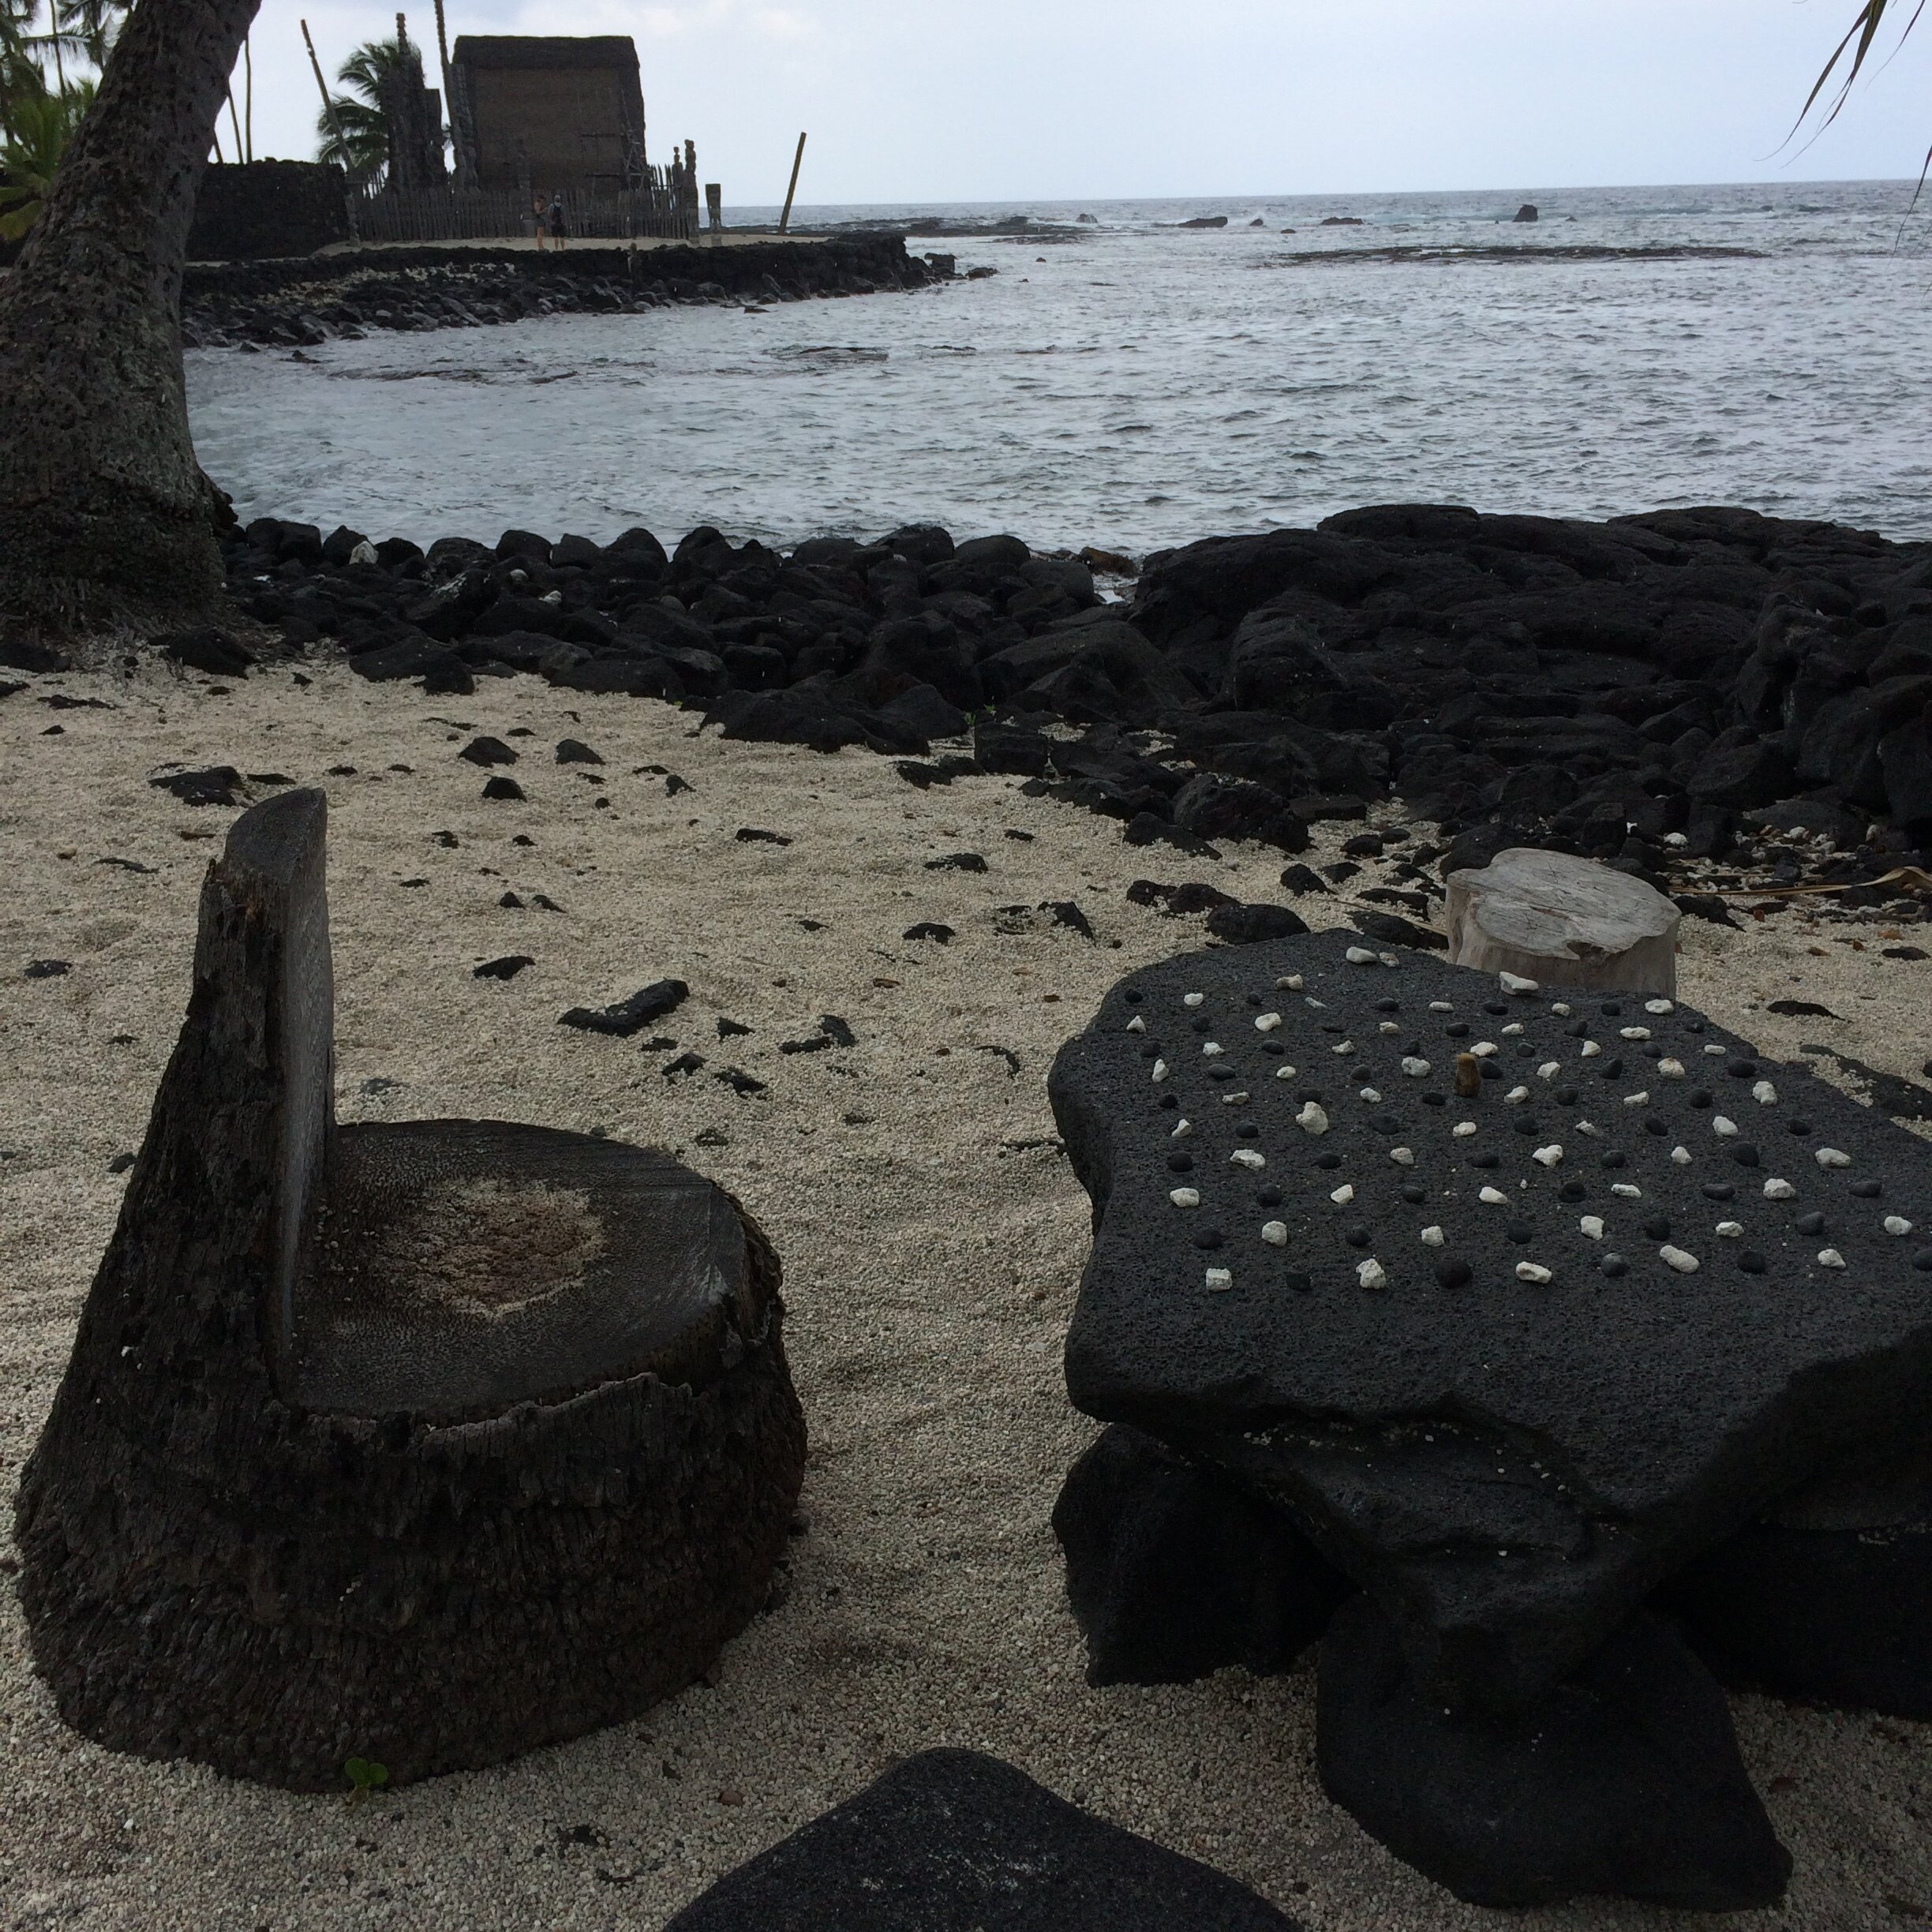
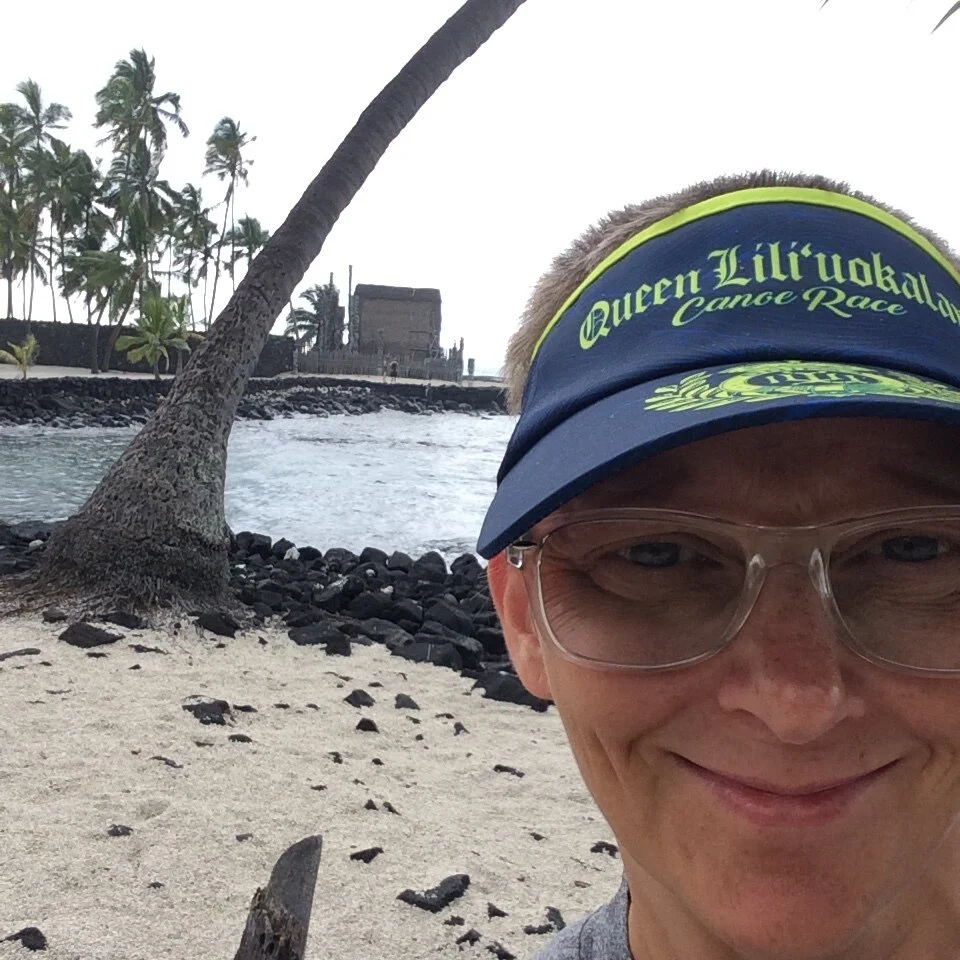
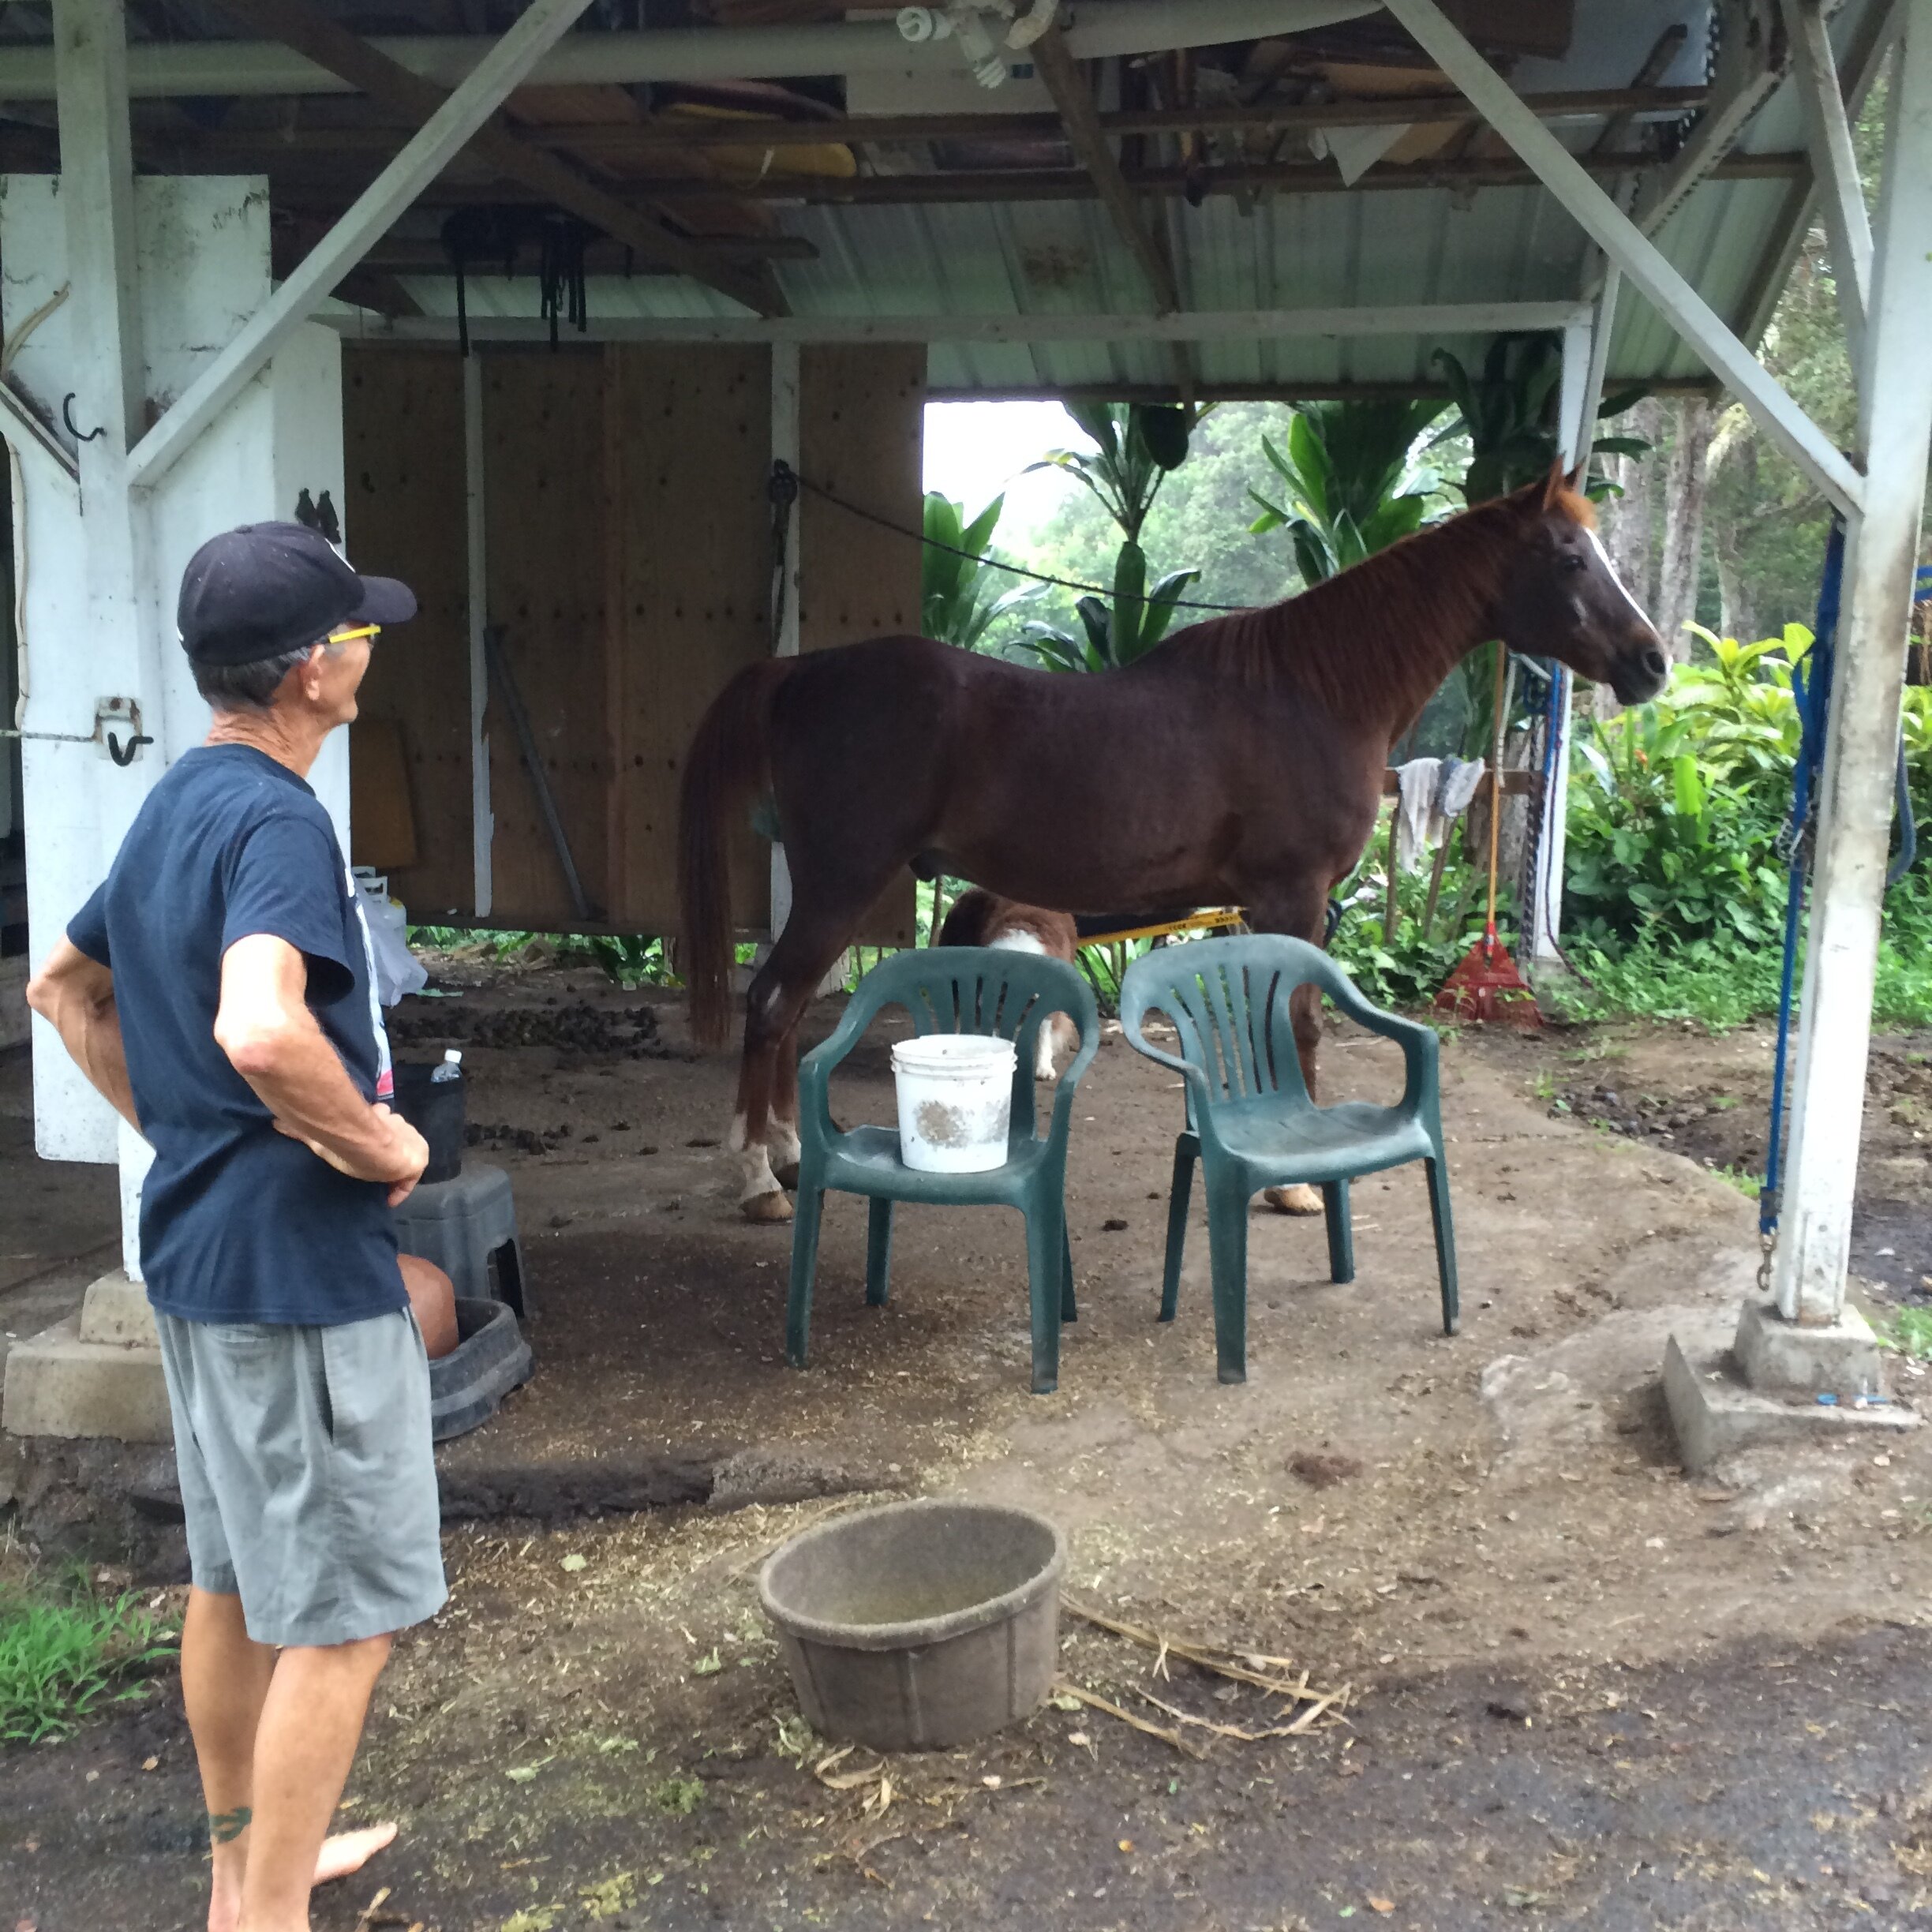

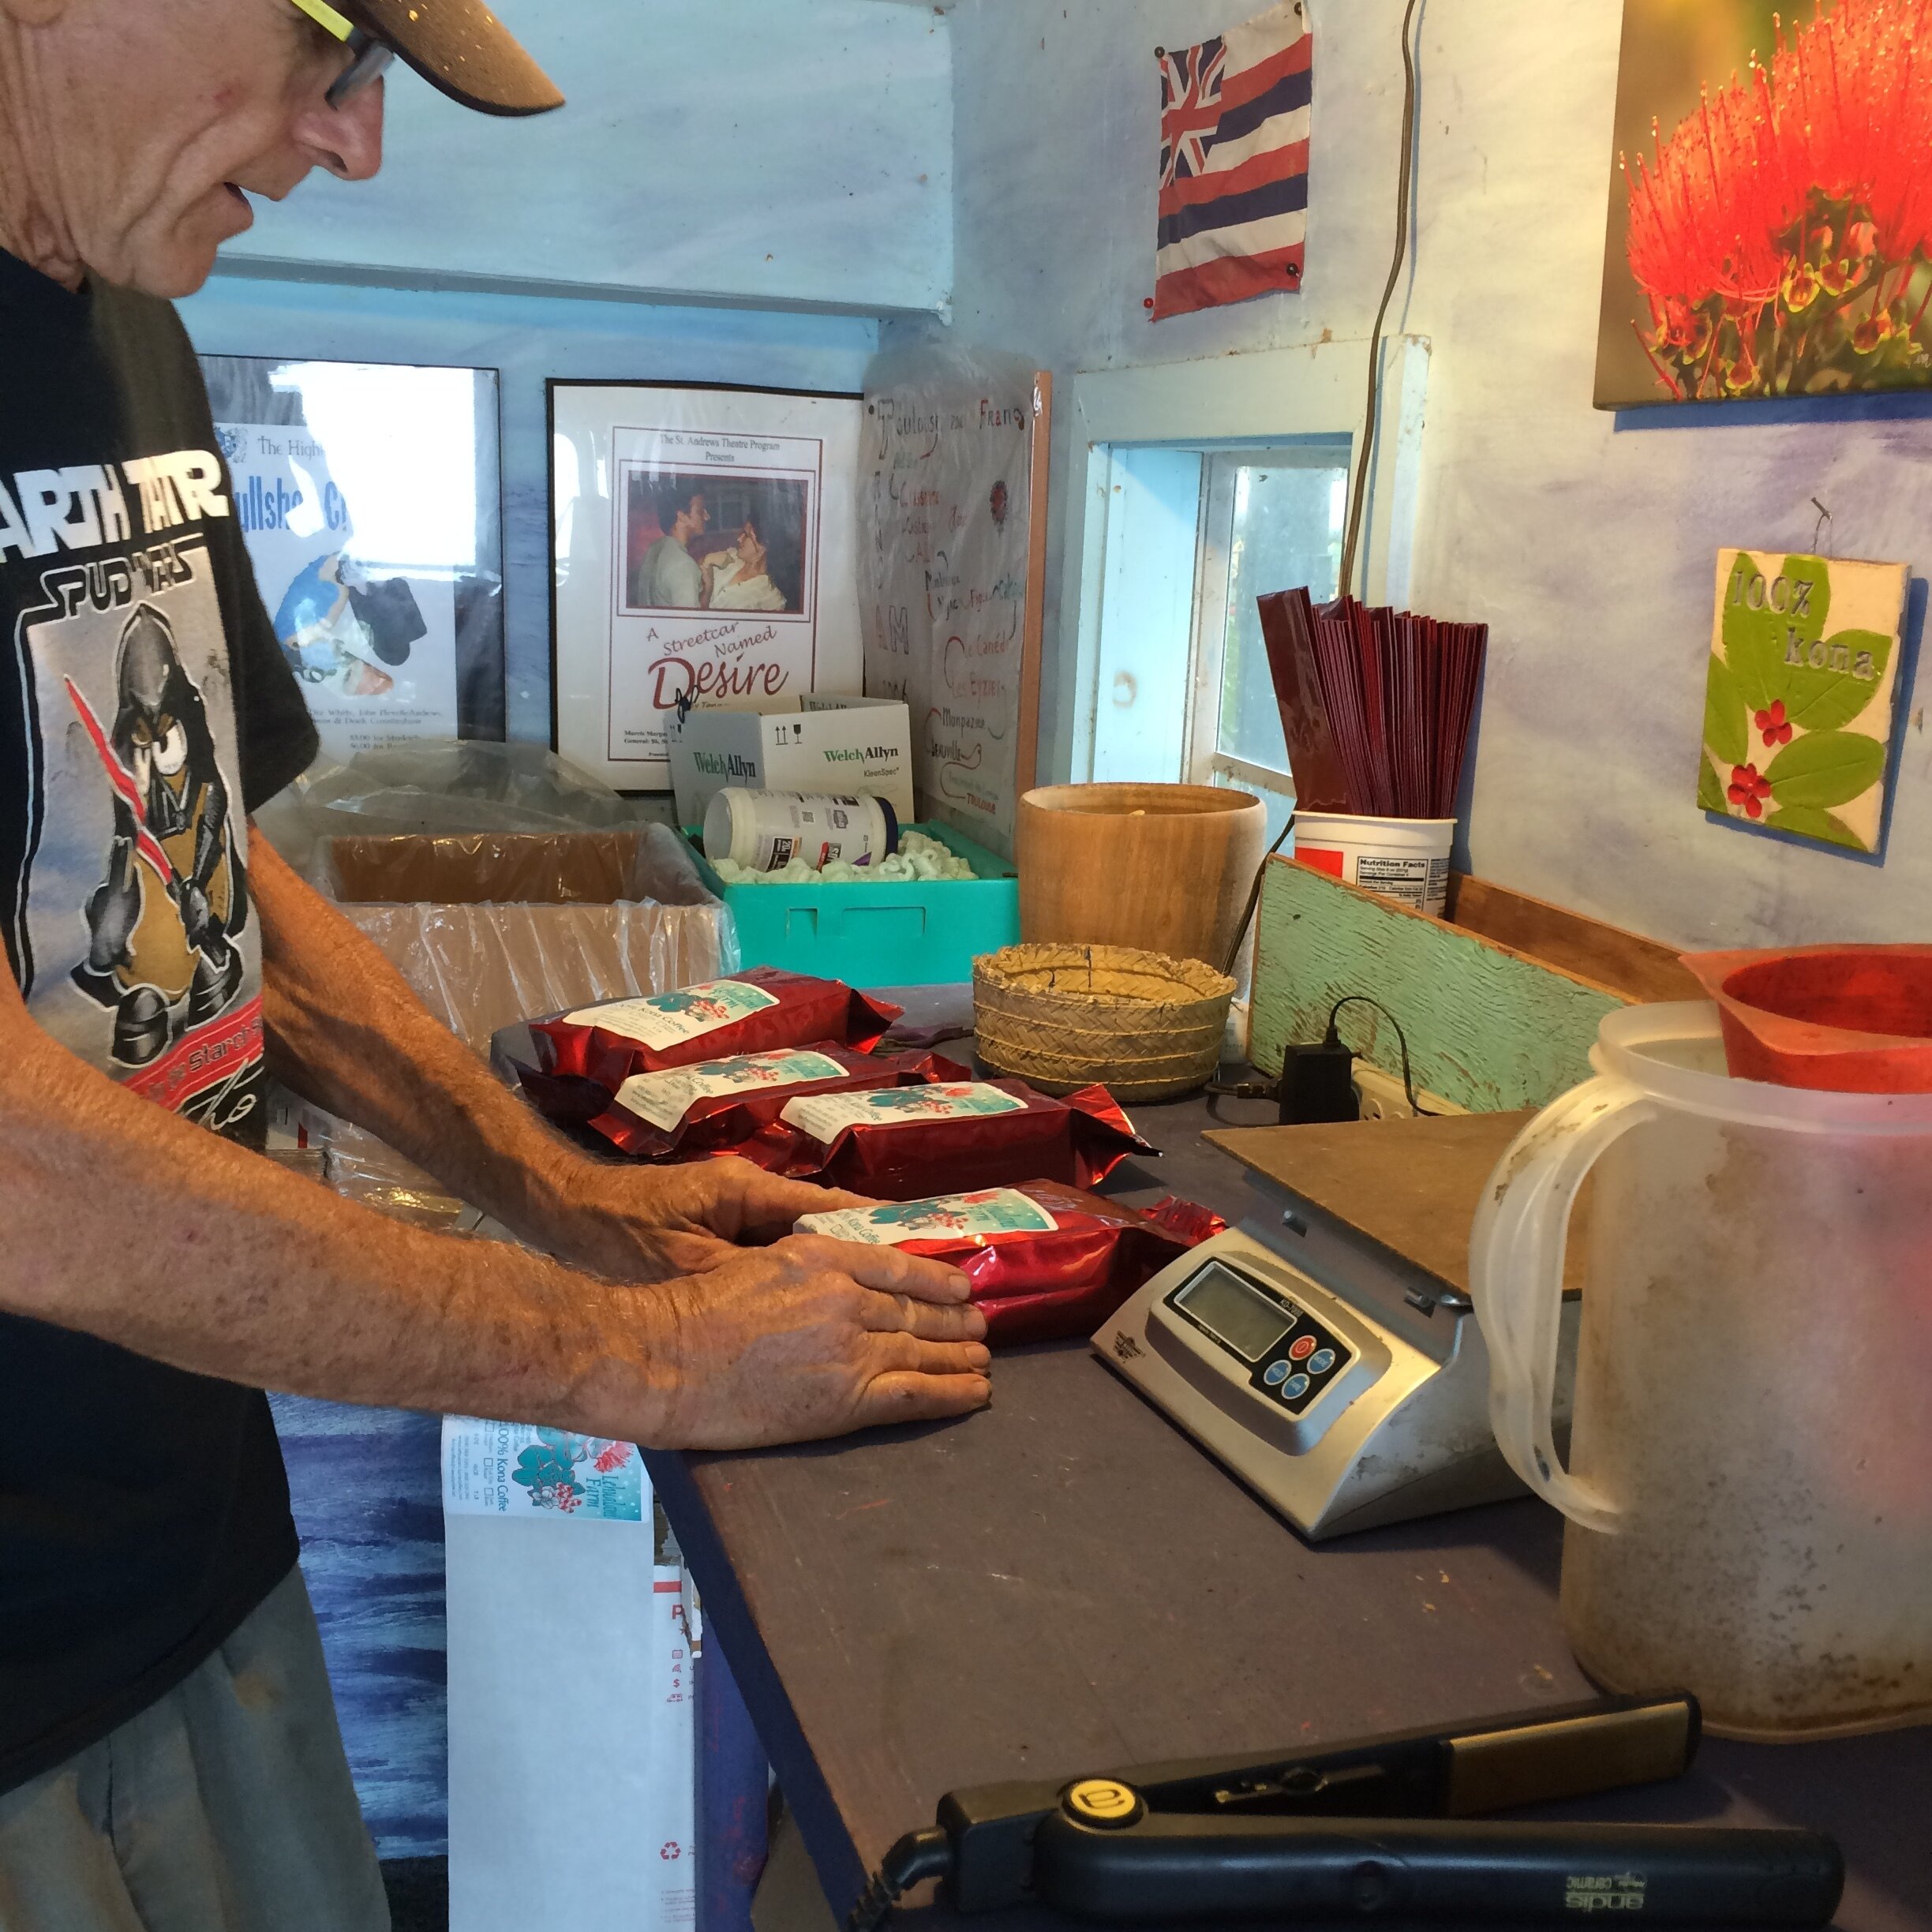
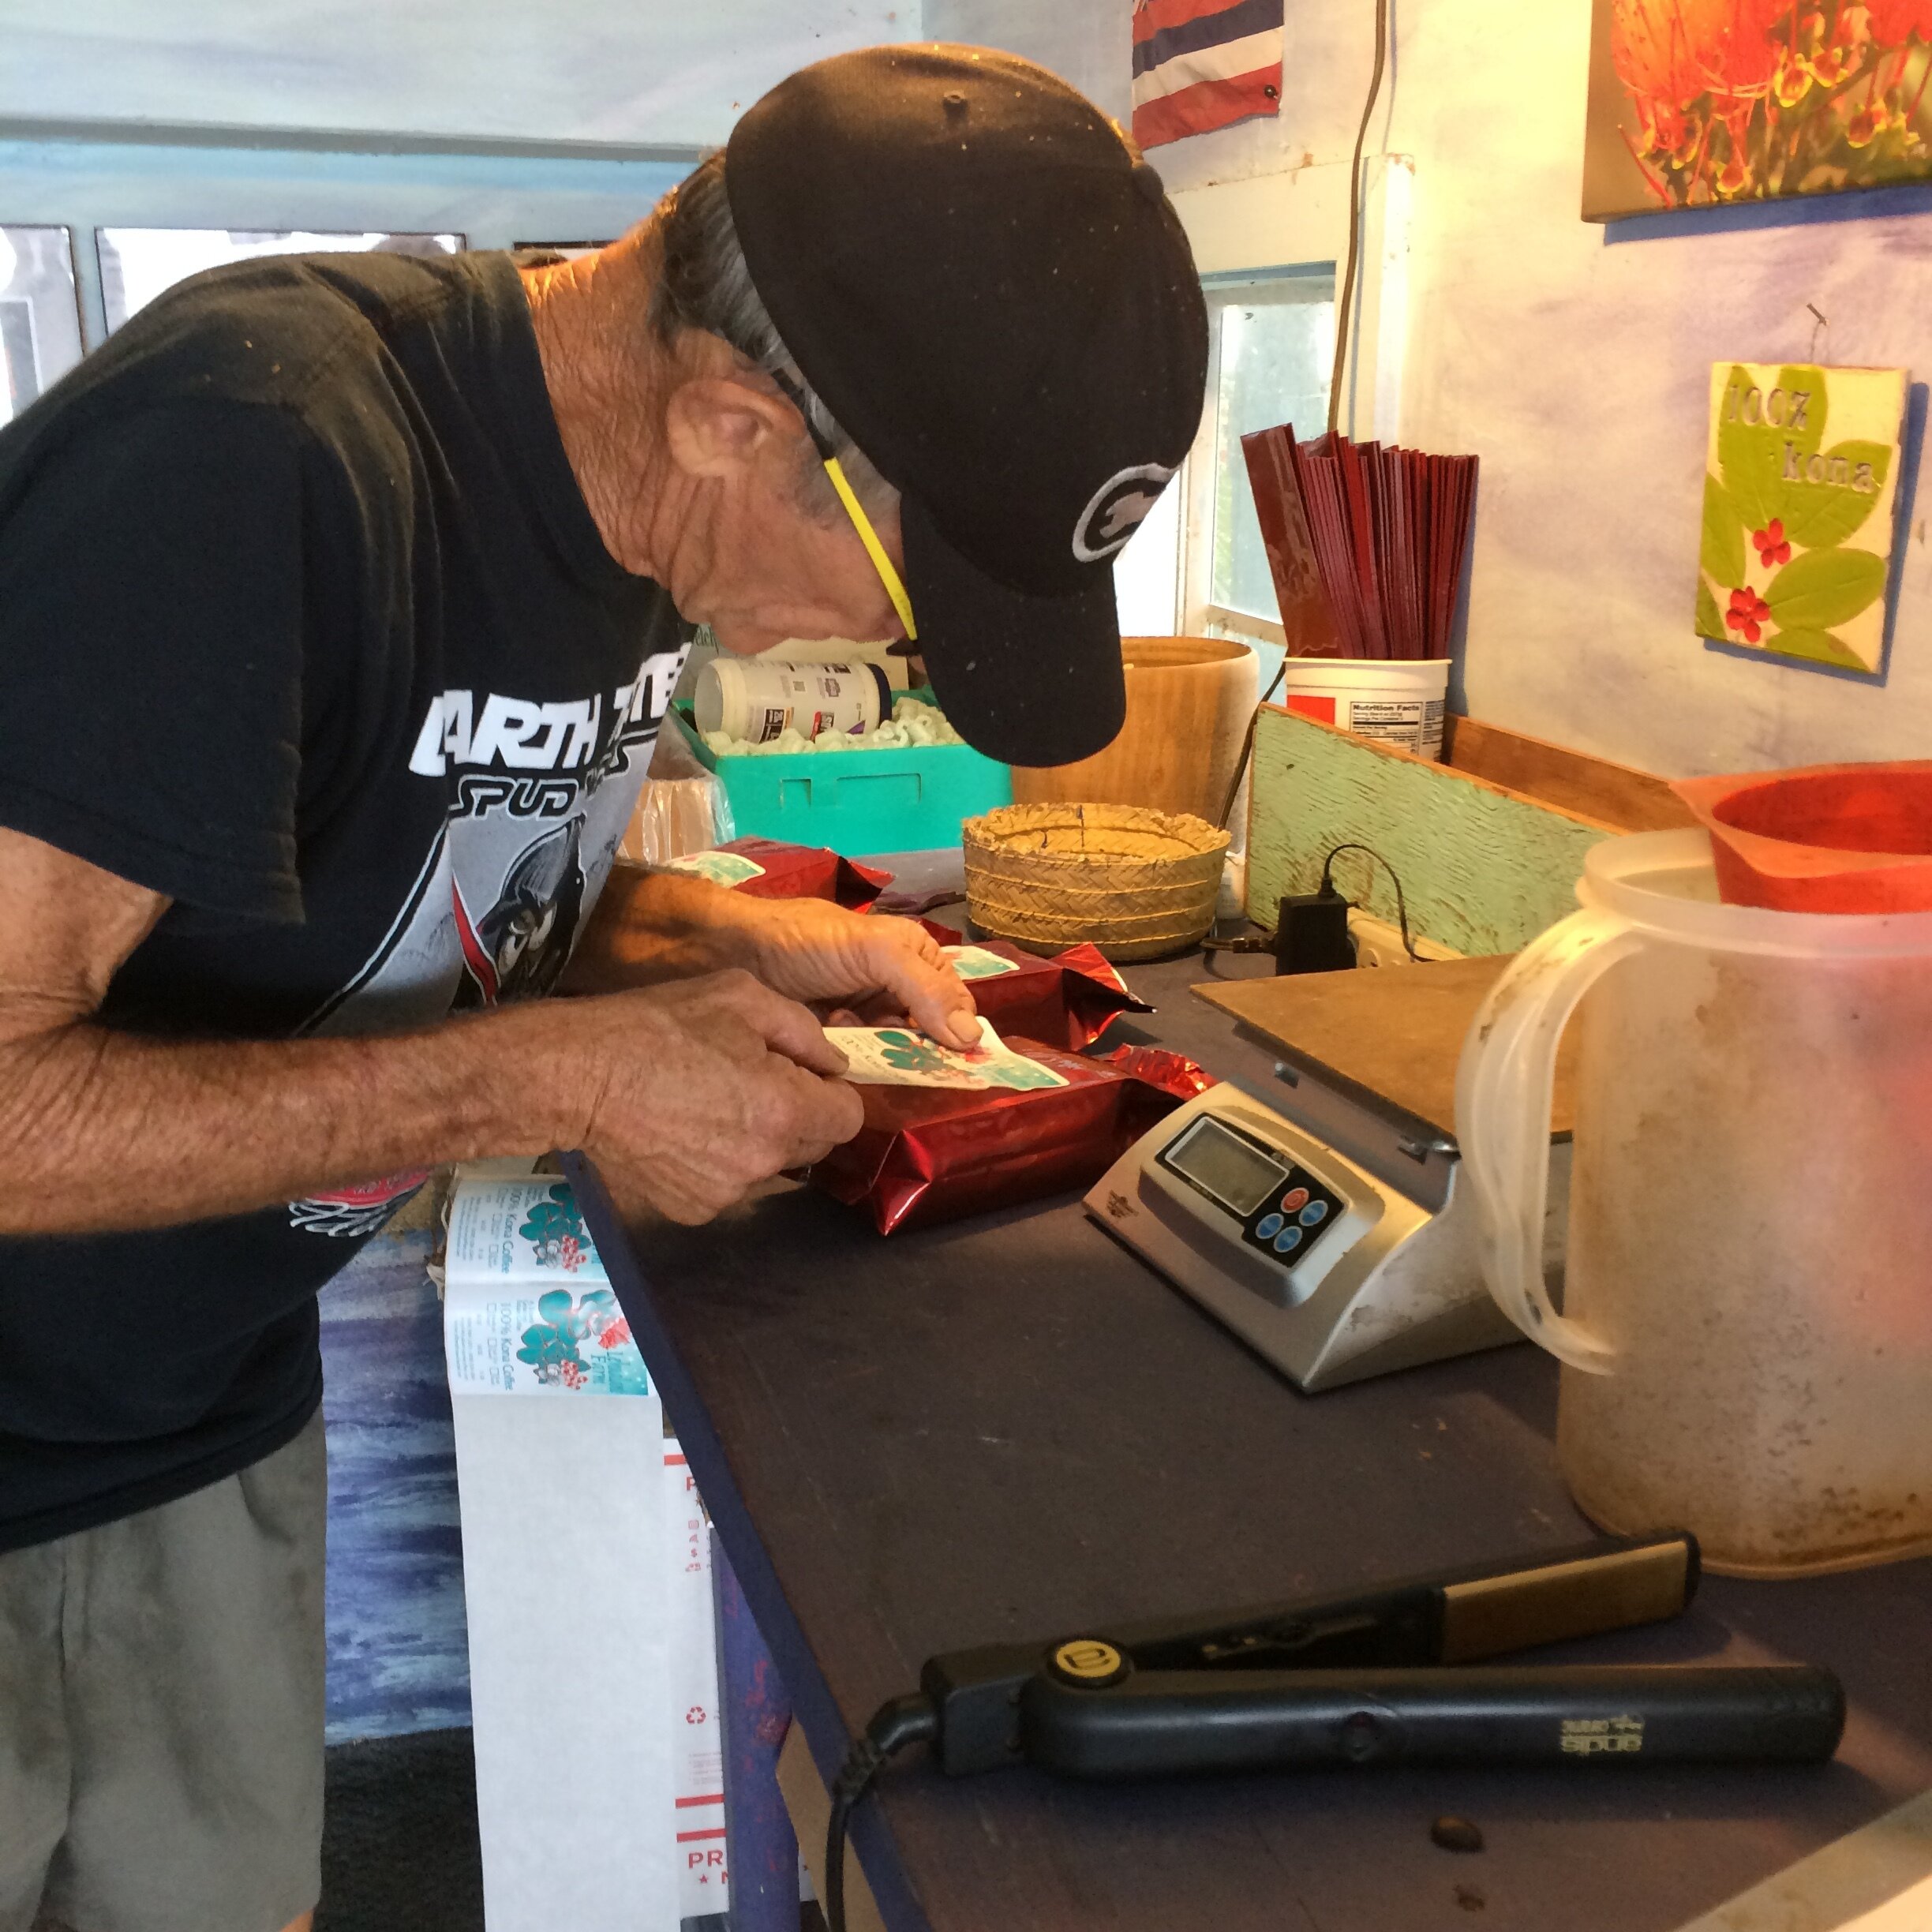

My New York race team decided to spend their final day on the Big Island touring Kilauea. After all our resident coach was a volcanist (in addition to a having come to us from the Hawaii paddling scene - your typical underachiever)! And while I certainly did not think the opportunity would be dull, I had done the tour, so it was not my plan. I wandered the shops in Kona, looking for a gift for my Makapo friends back in New York. A young saleswoman approached me and asked if she could help me. I told her I was having a hard time, because I was looking for gifts for visually impaired paddler friends. I had never really thought through what it is like to give a gift someone can’t see, and if you try, you will find how many gifts or things rely on their ability to be seen. To my surprise, the young woman told me she knew what I was dealing with, because her father was visually impaired - and a paddler! So, at this point the conversation took off. She told me he was a coffee farmer as well. Now, you certainly don’t need to see Kona coffee to enjoy it. Pretty soon she arranged for me to drive up the mountain to meet with her father on his coffee farm, where I thought I would buy some beans and call it a day.

Paradise.
Will met me at the bottom of his slopenear an agreed upon mile marker on the Mamalahoa Highway. He was driving an ATV, and he had on glasses with thick lenses. I followed him up, up, up the muddy road, then further up, up, up until there was no more road. Will invited me inside for a cup of his coffee, and we started to talk. Like many of my visually-impaired friends who are considered legally blind, he made his way around just fine, telling me he knew every rock on his side of the mountain. Looking out the windows to the grandeur of the Pacific Ocean and Kealakekua Bay below us, he said he knew he had a million dollar view, but that he could not see it. The Kona coffee was rich and delicious, and I felt blessed to have discovered him. He told me he had run the Boston marathon with a guide and that he stroked for his club, Keoua of Honaunau. It didn’t take a long before I realized he had an original Herb Kane painting hanging in his living room. So, of course, I asked about it.

Herb Kane painting of the Keoua Outrigger club of Honaunau.
The Marriott Hotel in Kailua-Kona is situated at the start of the Queen Lili race, and there is a lot of traffic through its corridors, especially through a hall hosting numerous Herb Kane paintings. Here I had already gazed upon original Hawaiian art for at least an hour, viewing each unique painting in turn. I was astonished to see one in Will’s living room. He told me that Kane had painted it of his club and that the club had bought it. A raffle was held to see who would get to display it in their home, and of all people, the man who could not see it won it. But he knew the painting inside out. He knew who each member was and where they were sitting in the canoe. He posed for me in front of the painting, displaying his club hat, which features the same color as their canoes. We finished our delicious coffee, and it was time for a tour of the farm as well as some custom roasting.


Will had a large display made so he could roast the coffee himself, which he did. A delicious dark roast for my Makapo paddler friends back in New York.
Will let me know he could not see money. When I paid him, it was with the understanding that a visually-impaired person learns to trust others more deeply than those of us who can see. It is a beautiful thing when trust in others becomes a necessity. The simplest exchanges have more depth to them. This is the kind of trust we experience when paddling together as teams, as ohana. On my way out I asked Will if he knew where I might be able to buy a Keoua club hat. He thought about it for a few seconds, took his hat off his head and said, “You can have mine.”
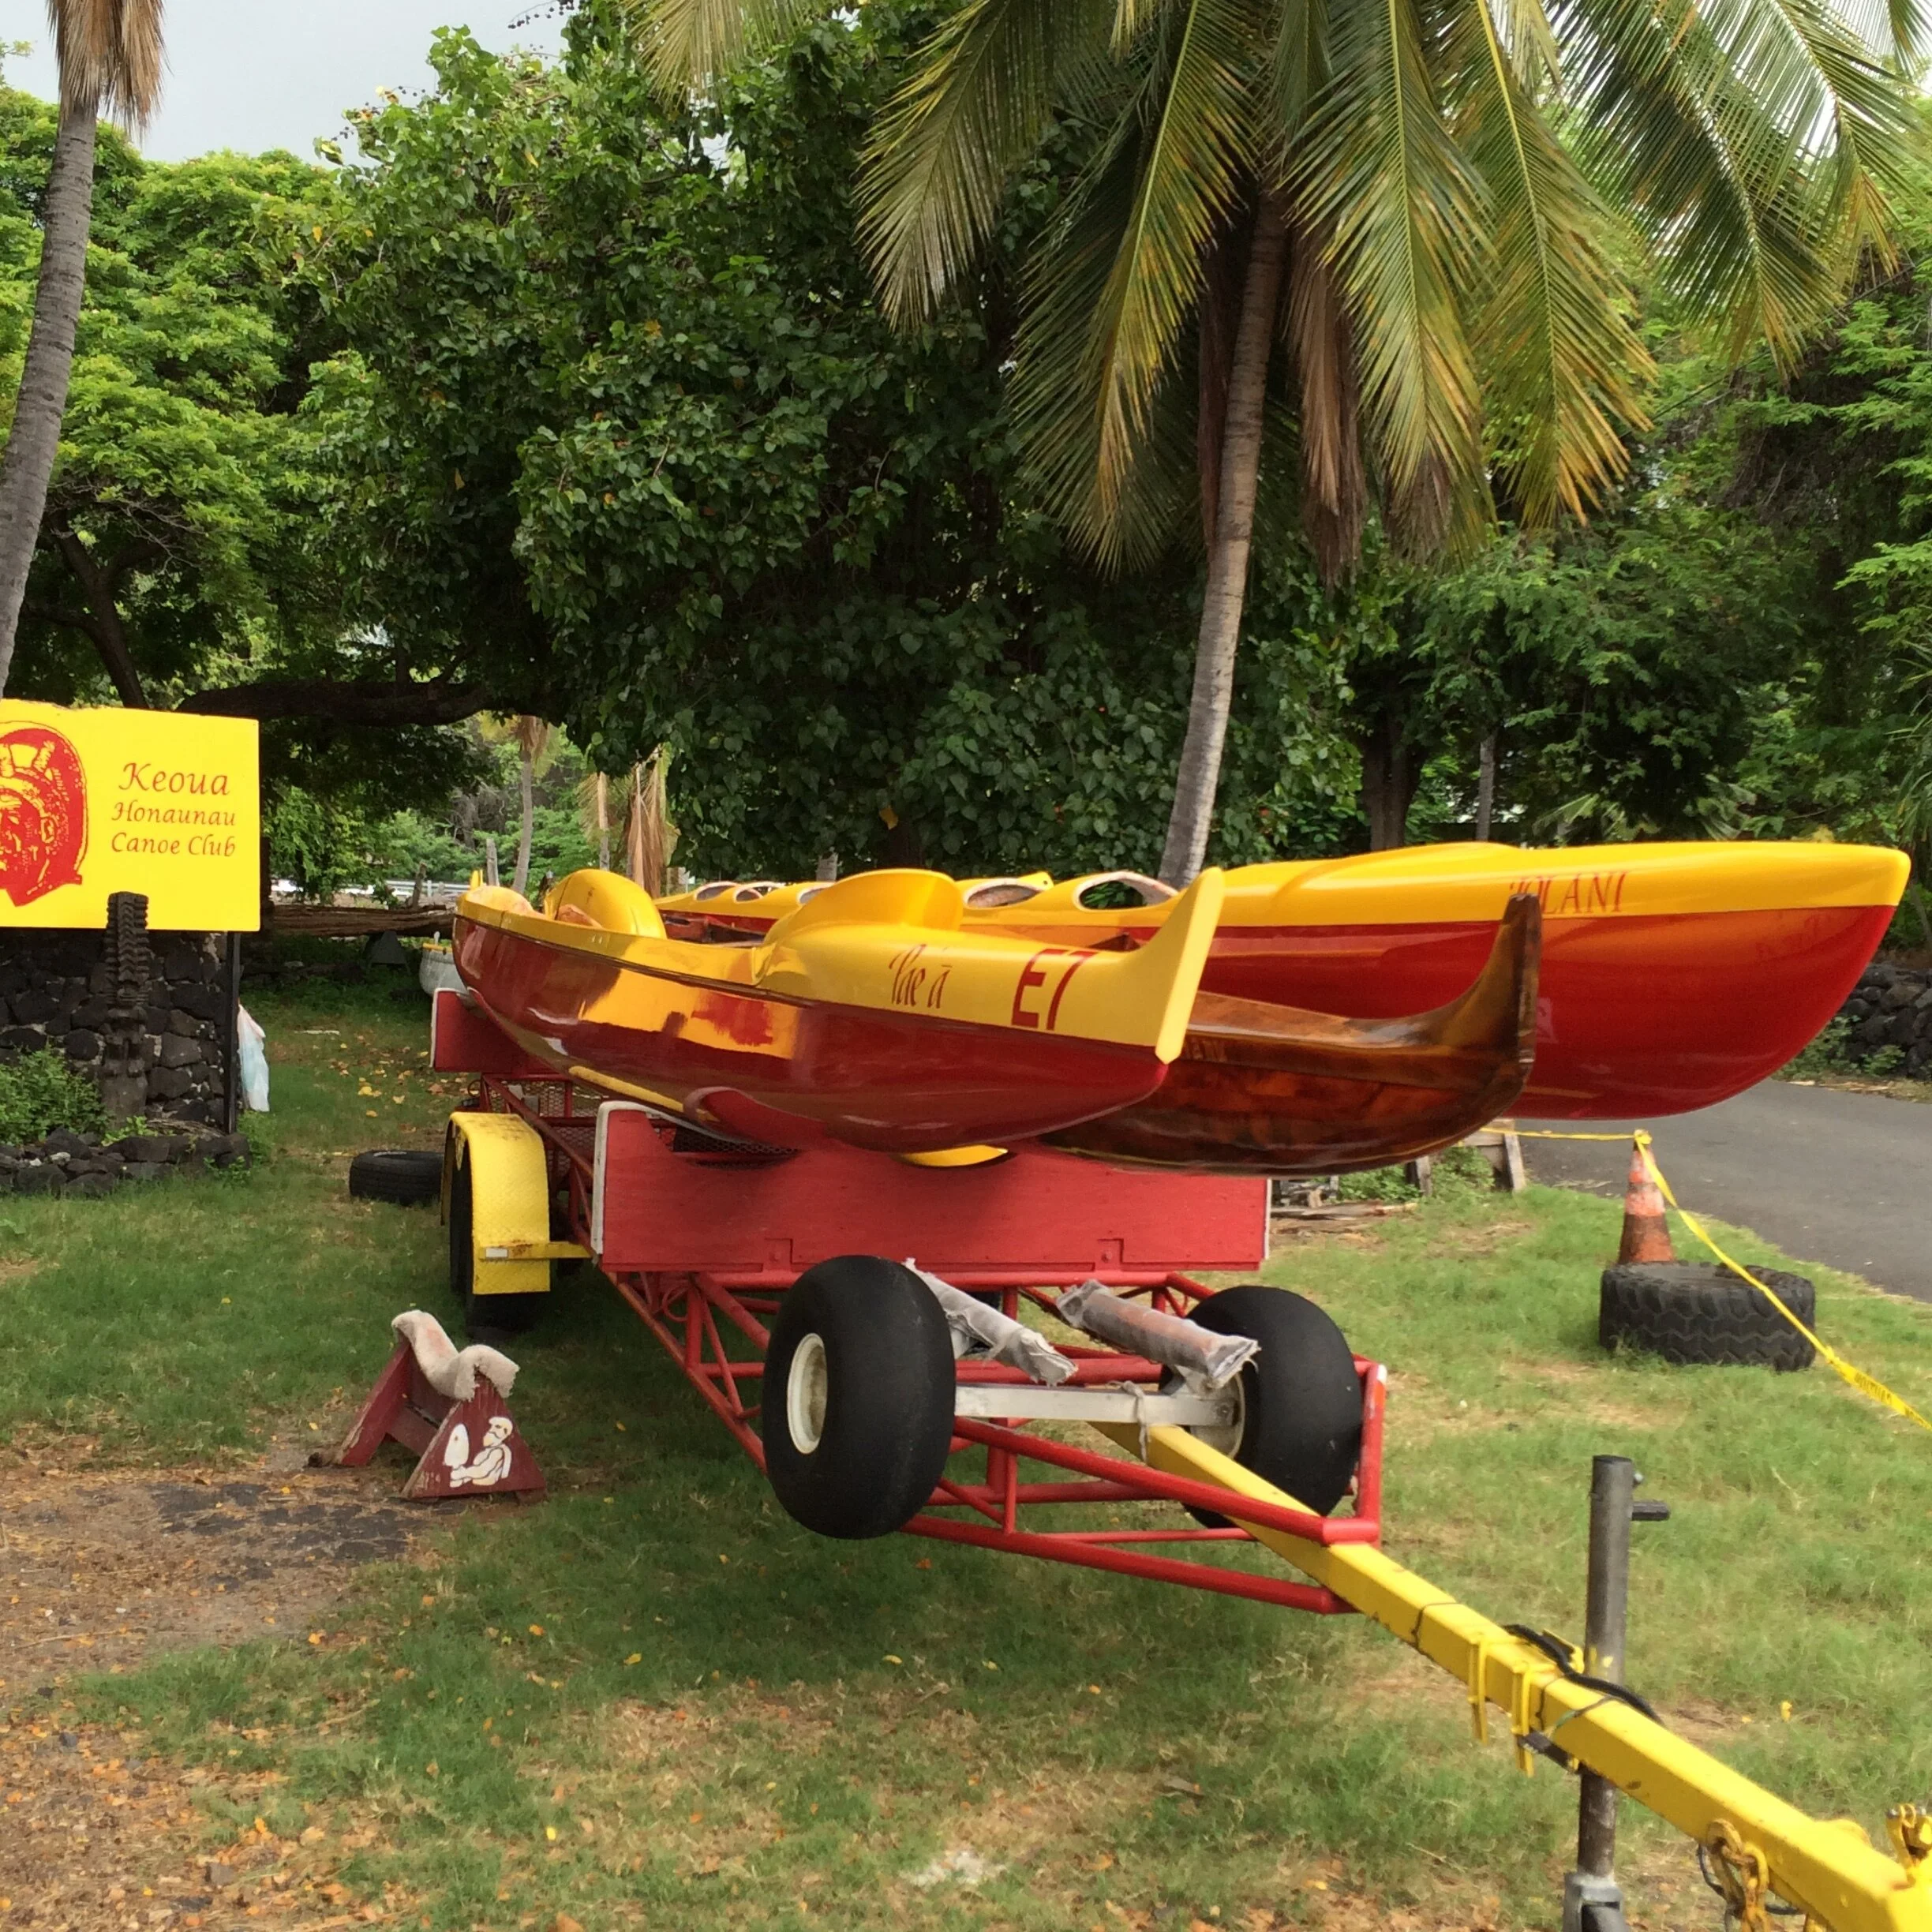
Rudder Repairs on a Tempest OC2
We are fortunate to have several OC1 and OC2s in the Manu’iwa club, and like any paddlers we would rather paddle than work on our boats. So, after a season of serious fun in Long Island Sound, it was time to take a closer look at a Tempest that several members had complained about. The issue was the steering, something to do with the rudder. A quick look under the stern showed that not only was the rudder at an odd angle to the canoe, it was rubbing the bottom of the hull. It even appeared that the pressure had caused two hairline fractures in the carbon. The first video shows part one of the diagnosis and repair.
There are not a lot of decent videos or articles about outrigger canoe repair, which is basically why I started this blog in the first place. It just so happens I had already seen the Outrigger Zone video on how to install a new rudder, so I went back to it for clues and discovered our club canoe had a nylon washer in the wrong place. Here is this video:
They use a little Loctite to keep the rudder screw in place. I did not have any and thought it would be better to test my repair prior to going bonkers with Loctite anyway. It can also be quite difficult to get a rudder properly aligned and screw it into place by yourself. You really want someone else holding the rudder while you tighten so it does not move around.
My second video shows the epoxy repairs I did on the hull with a West System product, also a little fairing and some strands of carbon mixed with epoxy to give new life to a rudder that has definitely seen some rocks. One of the most important takeaways here is that if your rudder starts to get really hard to move, take it out and clean out the shaft hole. The same goes for the tubes your steering cables pass through. Grit is going to build up in them, and issues will cascade.
Third video shows wet sanding with 600 grit paper wrapped around a sanding sponge. It does not take much to oversand so go light. Then I wiped everything clean, masked the repair areas with blue tape and hit them with my secret weapon: Fusion Krylon spray paint. This adheres to plastics, epoxies and is a quick solution versus gel coat to get you back on the water. We aren’t parading our canoes at the classic boat show, so putting a lot of time into nonessential cosmetic work is not a priority to me. This afternoon, on a glass October North Atlantic Sea, we put her back on the water and gave her a 9km paddle. She did great, so back to the club boathouse she went.
On the safety end of this, it is critical that our steering not fail us. Set time aside for routine maintenance on your va’a. Take care of it, and it will take care of you! See you on the water.

Repaired rudder: an hour with epoxy, carbon, sandpaper and secret weapon spray paint* (see below) rejuvenates the Tempest.
iPhone (or Android) Paddle Coach

iPhone mounted on Kahele for real time analysis using app Rowing Coach 4.0
A coach recently suggested I put a speedometer on my OC1 as the next step in my training. The price point of the NK Coach gadgets is a budget breaker, and I had to wonder what would I really get out of this data? At first I thought I would just build my own, since I’m a small electronics geek. I knew also that all of this capacity is built into our smart watches and cell phones. It just seemed that no one had written an app for paddlers that would solve the problem, and I have a huge iPhone 7 plus I don’t carry on the boat. Or was it the way I was looking to solve the issue the real problem? Once I entered the keyword “stroke” into the Apple app store, everything changed. There are stroke counters there, but they are geared for rowers. Aha!
I already have an accelerometer app on my iPhone, which gives you a visual graph showing how, in x,y and z coordinates, you move your phone around. I own accelerometers that cost about $5, and I can program them to recognize a specific motion in x,y and z coordinates. This is how your watch knows the difference between a step and a stroke. So, the question then was, just how differently were these rowing coach stroke counters calibrated for the accelerometer in my cellphone? Would they recognize a paddle stroke? No way to know other than to give them a try.
I paid $8 US for Rowing Coach 4.0, put it on my Apple watch and went out for a paddle. I was so confused that I just ended up deleting it and trying another app, named Rowing Coach. This one turns on water lock, and I even tried running it in the background with Waterspeed in the foreground. However, the stroke count was so off, the data was just useless.
I’m not sure why I decided to go back to Row Coach 4.0 and give it another try, but I did - with one major difference. I installed it on an old iPhone that has no cellular. Was it possible I could still use the iPhone as a computer, could I access the GPS and accelerometer chips and get the app to perform? I turned it on and went for a walk, giving it a little shake as if it were a paddling stroke. Sure enough, it worked. And what was really great is it had a high contrast white background with black lettering - very close to what you see on electronics used in direct sunlight conditions, like my VHF radio.
The next step was to mount the iPhone to my canoe. I put it inside a Pelican box, added some cushion with a foam block and a rubber thing under it, and went out for a paddle. Let’s just say, I did not understand the app when I first tried it. This is a REAL TIME ANALYSIS APP that works like the display on a C2 Rower. It expects that you are working in 500 meter sessions. It is very well-tuned and picks up every single stroke accurately. As quickly as it can track the satellites and do the math, it is telling you your stroke length - your distance per stroke or glide. Within minutes I had real time data of how far I was moving my canoe against the wind, with the wind, across the wind. If you stop paddling for several seconds, it will restart at 0.00. This is realize is part of its real time functioning.
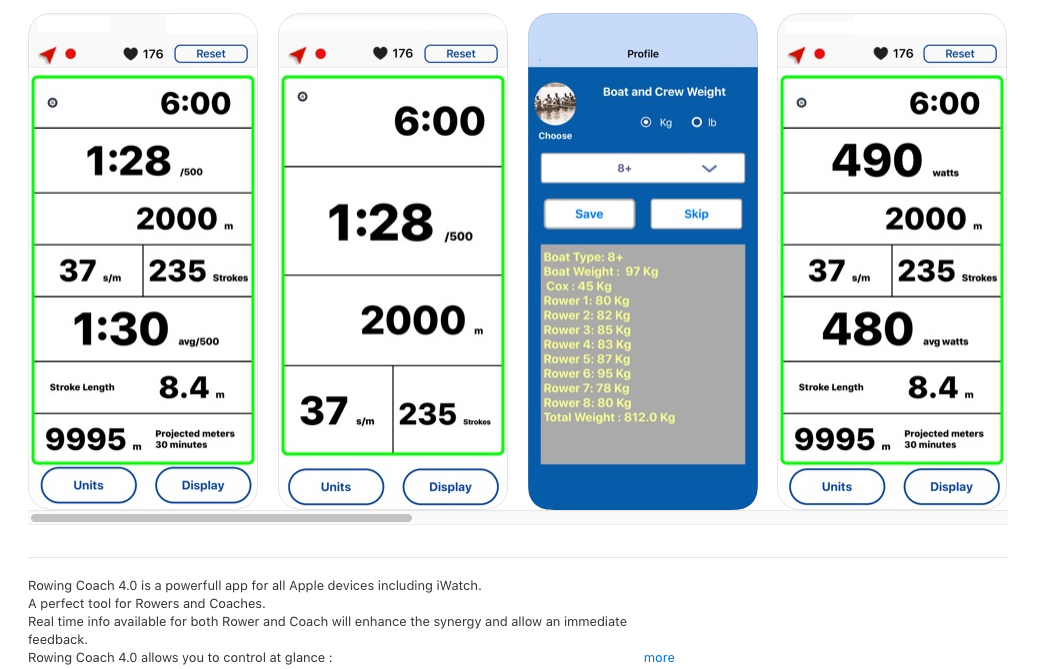
So how did I go from wanting a speedometer to wanting to know distance per stroke? I came across a podcast on Nick Murray’s TC Surfski site, in which Michele Eray discusses coaching and using the Vaaka cadence sensor for feedback on stroke performance. Speed, she says, is not meaningful. It’s how you move the surfski stroke by stroke, your cadence. Well, I’ve certainly seen long slow strokers cross the finish line ahead of rapid paddlers (and vice versa), and I decided that she’s an Olympian she probably knows what she’s talking about.
Row Coach 4.0, attached to your vessel (I’m sure it works for surfski, SUP, bathtub, etc.) is a great real time tool for power and cadence analysis. If you click on the little settings wheel in the upper left corner, you will go to a menu where “RECORDING” is listed. This is where a stroke by stroke log is kept, and you can scroll through it to get an idea of where you are at. It is very extensive. I played around with it running for 2 hours, had plenty of battery left and am a better paddler for it. I was even able to see just how far a well-time stroke could get me on some good downwind bumps. So, this is really a versatile tool.
Basically, if you want to go out and use 500 meter bursts for training, this is a great tool for setting a race pace. The reason you would put it on your watch is so that a coach watching your progress on a linked iPhone would get the data from the watch. So, basically, I was just clueless.
You can put this app on any current iPhone or Android, and if speed is all you are after displayed on your phone, you can use Waterspeed for that. I was a little clueless about what I could do with a cellphone as display. But on the other hand, of all the paddlers I know, I’ve never seen anyone using a smartphone as a real time display. If you have an old one in a drawer like I did, put it to use!
This app is smart enough to ask you how much you weigh and the weight of your boat, so it can filter out noise or be used on a heavier boat. It also has a real time GPS page with speed, but this display is rather small on the phone. Plenty to play around with.
A quick philosophical point: use data analysis to fine tune your technique, then put it away. There is so much data coming so fast it’s hard to keep your eye on the waves, and after all, it’s the waves that we’re after. See you on the water.

Guy Ringrave, Downwind Coach to the World, Lost at Sea
On April 25th, 2019 I received news of the loss of my downwind coach, Guy Ringrave, founder of Woo and host of the Guadeloupe downwind camp I attended for the past two Januarys. I want to be writing about downwind to make you excited, to try it, to do it and not once again be writing about the mortal dangers of paddling. I honestly did not think my chances of dying while paddling equaled or exceeded 20%, but now two out of ten of us who attended the 2018 camp have been swept away by the sea, our second home, in a mere six month period. To lose a respected instructor of downwind in addition to a paddler friend from camp has made me question what I’m doing on the water. And yet I keep going out. I am an addict, just like my lost friends, my Woo family members. But I am an addict who carries a VHF radio at all times and now the emergency beacon as well. And in addition I just added a phone-enabled Apple Watch.
I keep going out on the water because of incredible paddlers like Guy. Because the ocean is incredible. Because I love it.

With Guy Ringrave in Guadeloupe, January 2019.
I had already thought through what could have gone so wrong when Ali was lost, and I have thought through repeatedly now, What happened that Guy was separated from his canoe? It is now June 2019 and the U.S. Coast Guard no longer requires that PFDs be worn, only that they be on the vessel, but I am still wearing mine. Paddling will never, ever be the same for me.
Let’s leave no paddler behind.
Yesterday we paddled a heavy OC12 into two foot waves with a short length of only about 8 feet. They curled toward us, James Joycean white-maned waves, and then we churned around, and in that bulky set of canoes, we surfed. I am forever blessed by my time in the ocean and the privilege of knowing so many incredible watermen and waterwomen. I will never forget watching the whitecaps roll along the Carribean Ocean with Guy, and he knew I loved them as he did. He told me then, “You will never stop thinking about downwind.”
And thanks to Guy, I won’t.
Marine Communication Safety: a review of the Standard Horizon HX300 VHF radio, HX40 VHF radio and ACR Personal Locator Beacon PLB-350C
UPDATED! November 2019.
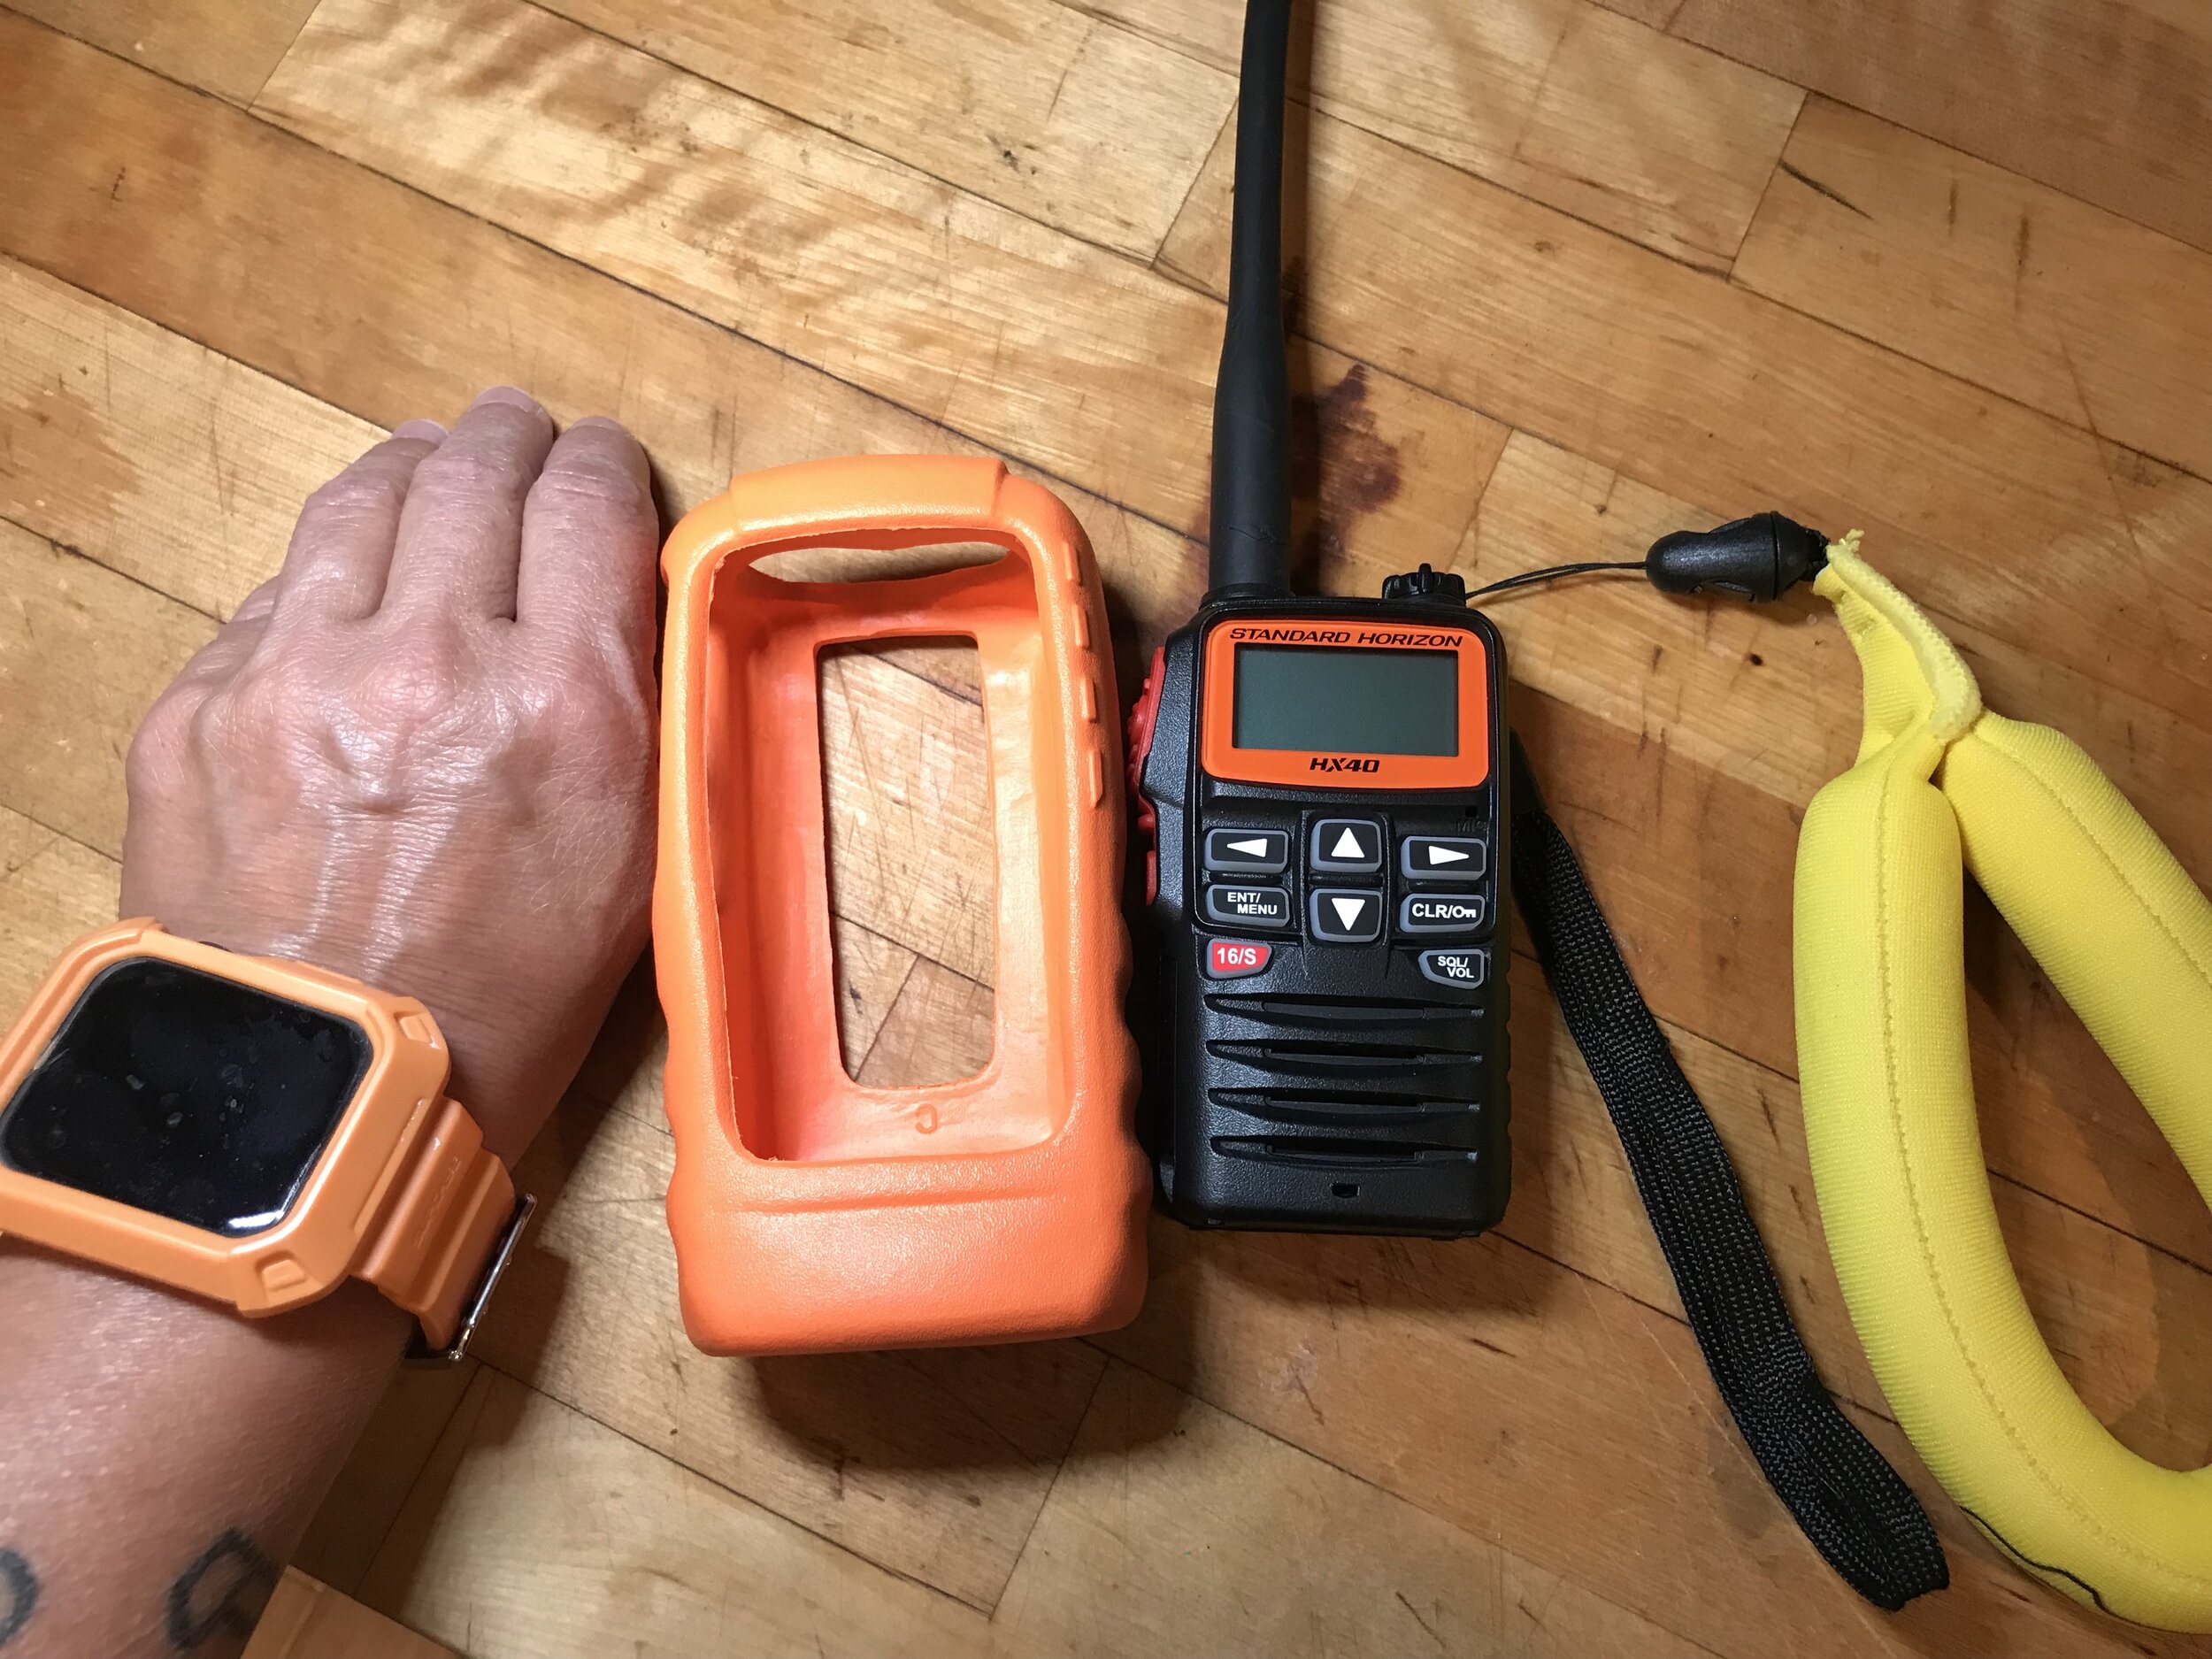
Skip the bulky case and attach the HX40 to your PFD or maybe even a floaty, as pictured. You can see it’s barely twice the size of my Apple watch.
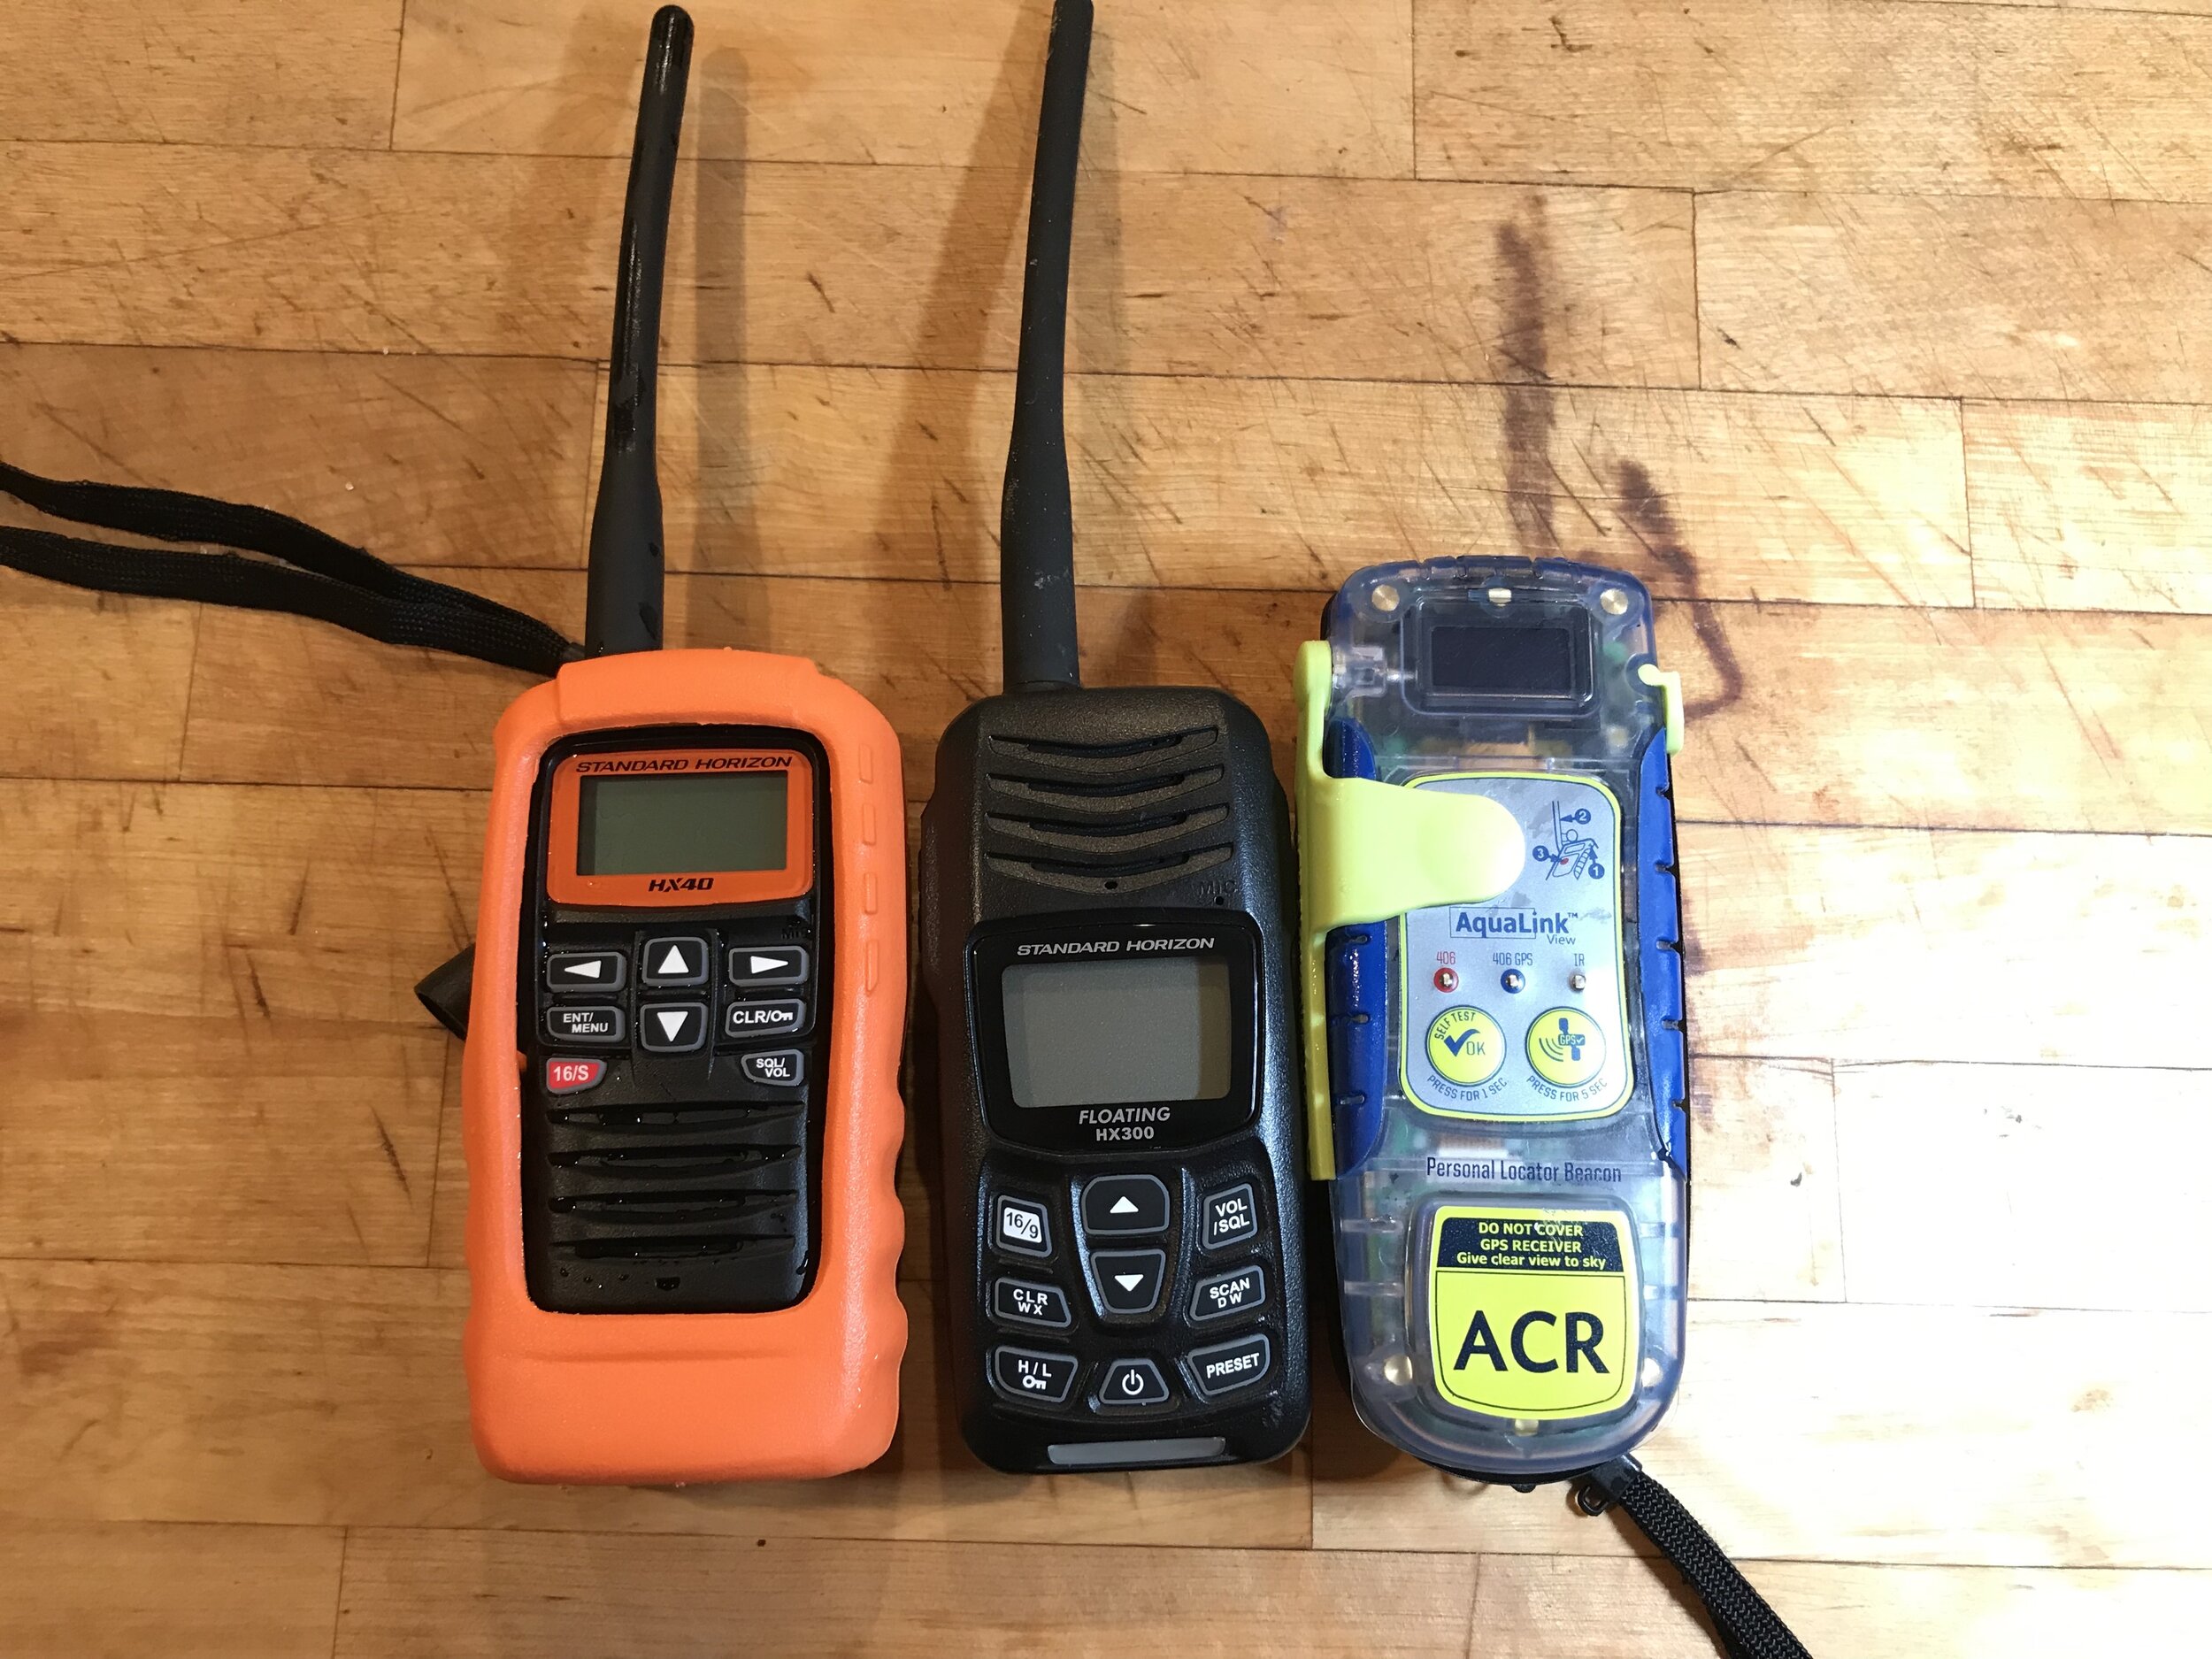
In the optional floating orange case, the HX40 is a little bigger than the HX300.
Due to the failure of my HX300, I am updating this entry. I had really liked the USB charging port, but this summer the latch over the port started opening. I got back from a surf session and found the port stuck open, and the light that comes on in the unit when it gets wet was on and blinking. I could not turn it on or off. I removed the battery and tried drying everything in a closed container with Superdry calcium chloride desiccant, but the electronics only partially came back to life. Since I won’t paddle without a radio, I headed to West Marine and bought the new, compact HX40. The HX40 is much smaller due to the fact the built-in flotation of the HX300 has been removed. I bought the optional floating case online, but it proved to be really bulky. Since I connect the radio to my PFD, I think that’s enough flotation for it. The HX40 is pared down. Just turn it on, hit the button for channel 16 and call for “Mayday” if you’re in trouble.
I tested it with my club radios then had it turned on to see if I got any Coast Guard chatter in Long Island Sound. Sure enough, I actually overheard the Coast Guard responding to a vessel in distress. Wow, that was a first time for me. I opened my eyes a little wider just in case I saw anyone in distress, but I did not. The Coast Guard repeatedly called back, without success, for the location of the vessel and number of people on it. I do not know the outcome of this episode, but it really taught me they are there and listening. If you are reading this and in another country, please comment on who patrols your waters and how we reach them by VHF.
While the radio dried and I researched the HX40, I discovered my HX300 had a 3 year warranty. As it was only two years old, off to the manufacturer it went. It was supposed to take 7-10 days for repair, but eventually it just sort of disappeared and no one picked up the phone or answered any more emails. After giving Standard Horizon an email ultimatum, I suddenly got a Fedex tracking number with no other correspondence, and a few days later a brand new HX300 showed up in the mail.
The HX40 is just a better size overall for paddlers, and while I had really liked the USB port, especially for travelling, the HX300 radio is better for boating not for small craft where getting wet and immersion are constant. The belt clip had to be on the HX300 for the strap to attach also. That is not the case for the HX40, which allows you to attach the strap directly to the radio body and then attach this to your PFD without all of the poking bulkiness. The HX40 costs around $100.00. It will be a little annoying to take a wall charger with me while travelling, but to have the electronics fail over the USB latch during some intense surf (hurricane was approaching) was exactly when I didn’t want my gear to fail.
In closing to this update, ACR also has a very compact PLB now that runs about $360.00. While I would like to have a little more room in my PFD, I will hold off on that expenditure for now. Be safe everyone!

HX40 does not float unless you buy the bulky, optional case.
The ACR Aqualink PLB-350C adjacent the Standard Horizon HX300
When I was first invited to paddle OC2 in the New York harbor with an experienced friend, I saw him put on his PFD and put his radio in a pocket. He put his cellphone in a waterproof Pelican box and connected it to the front of the canoe, under the crisscrossing bunjees. He plainly stated that communication must always be carried. I went home that day, in the summer of 2017, and put considerable time into reading reviews of VHF radios. Ultimately I selected the HX300 for its size and features. Over the past year and a half I have frequently paddled with it and have always had it with me on my OC1 in the Hudson River and Long Island Sound.
My review is overdue and prompted from the news of the drowning death of my associate paddler, Alistair Collier of the UK. I spent a week paddling with Ali at the Guadeloupe downwind camp hosted by Woo last year and am utterly disheartened to hear of the paddling community loss of this wonderful gentleman. I have certainly come across the blogs of others covering tragedy, and the focus of this entry is the prevention of any other. Ali’s close friends informed me he did not have any communication device on him and for reasons as yet unknown, the safety boats lost track of him early on during his final race.
I never would have thought a safety escort boat would not be paying attention. We must be prepared for worst case scenarios. I write this entry now not as an idle review but to urge you to be the most responsible person in your canoe.
Your safety is in your hands. The first step you need to take as a paddler is the commitment to safe paddling. When you can save yourself, you have a chance of saving others.
Now for the dry technical stuff.
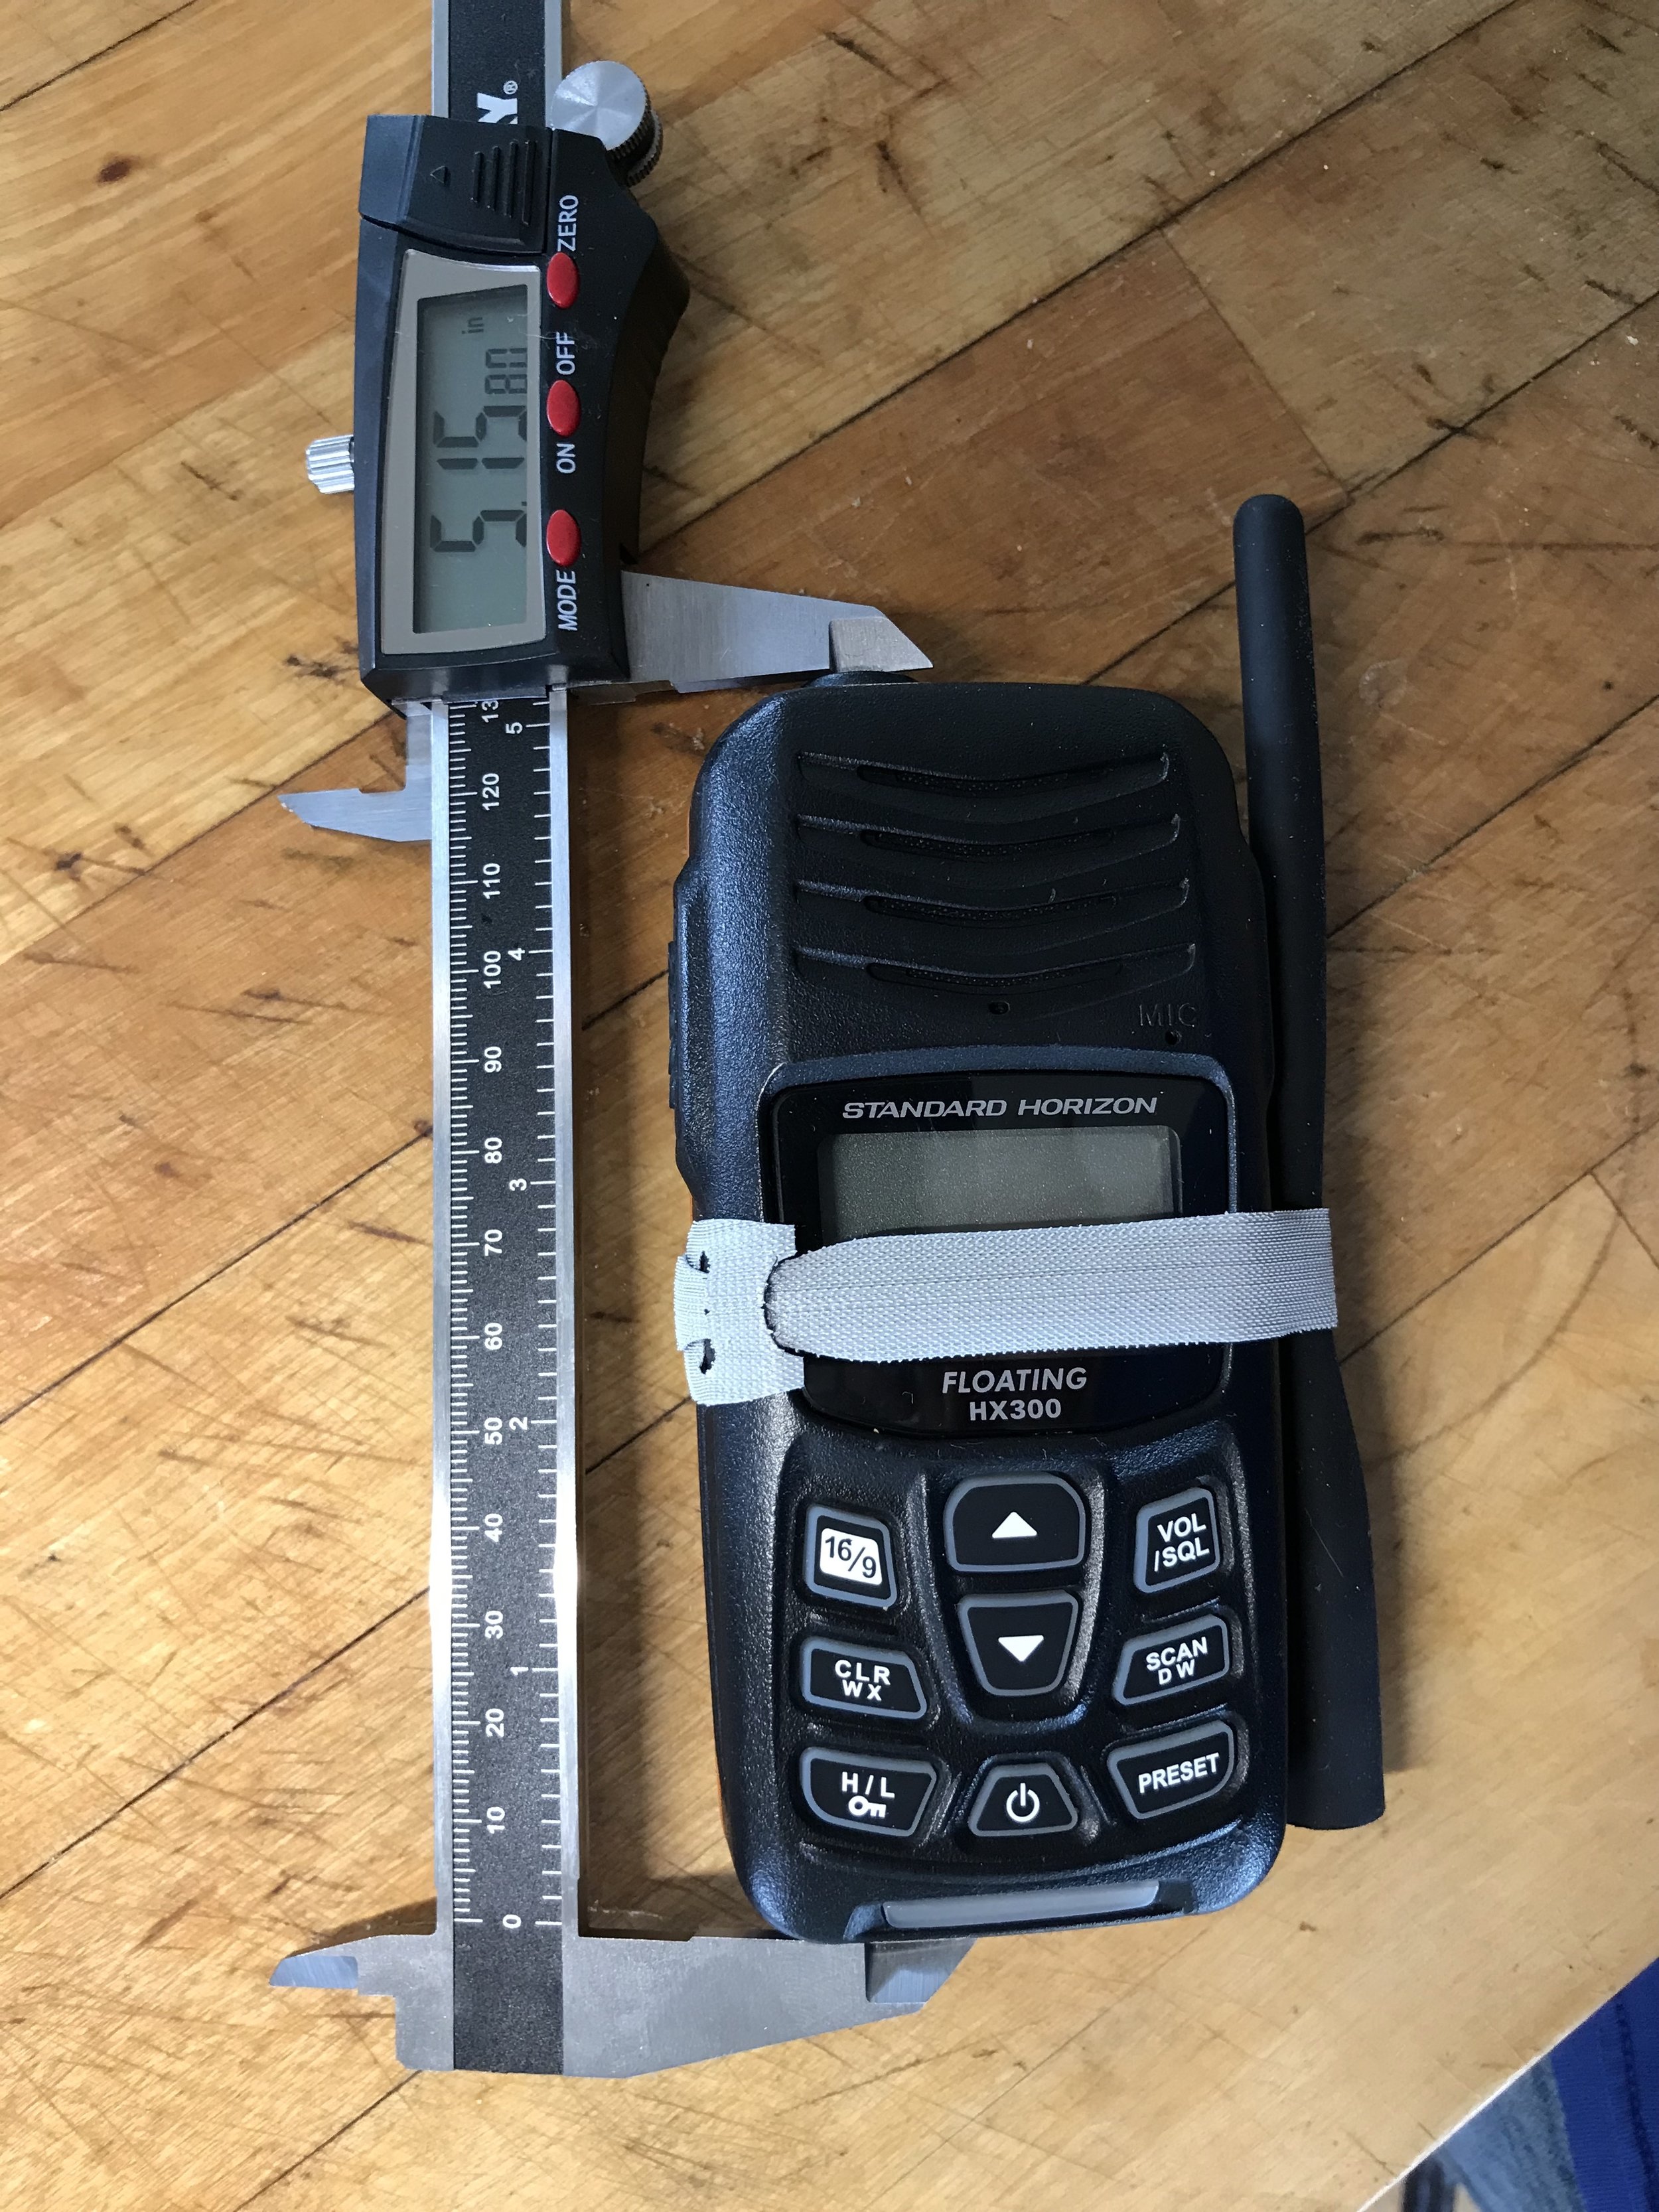
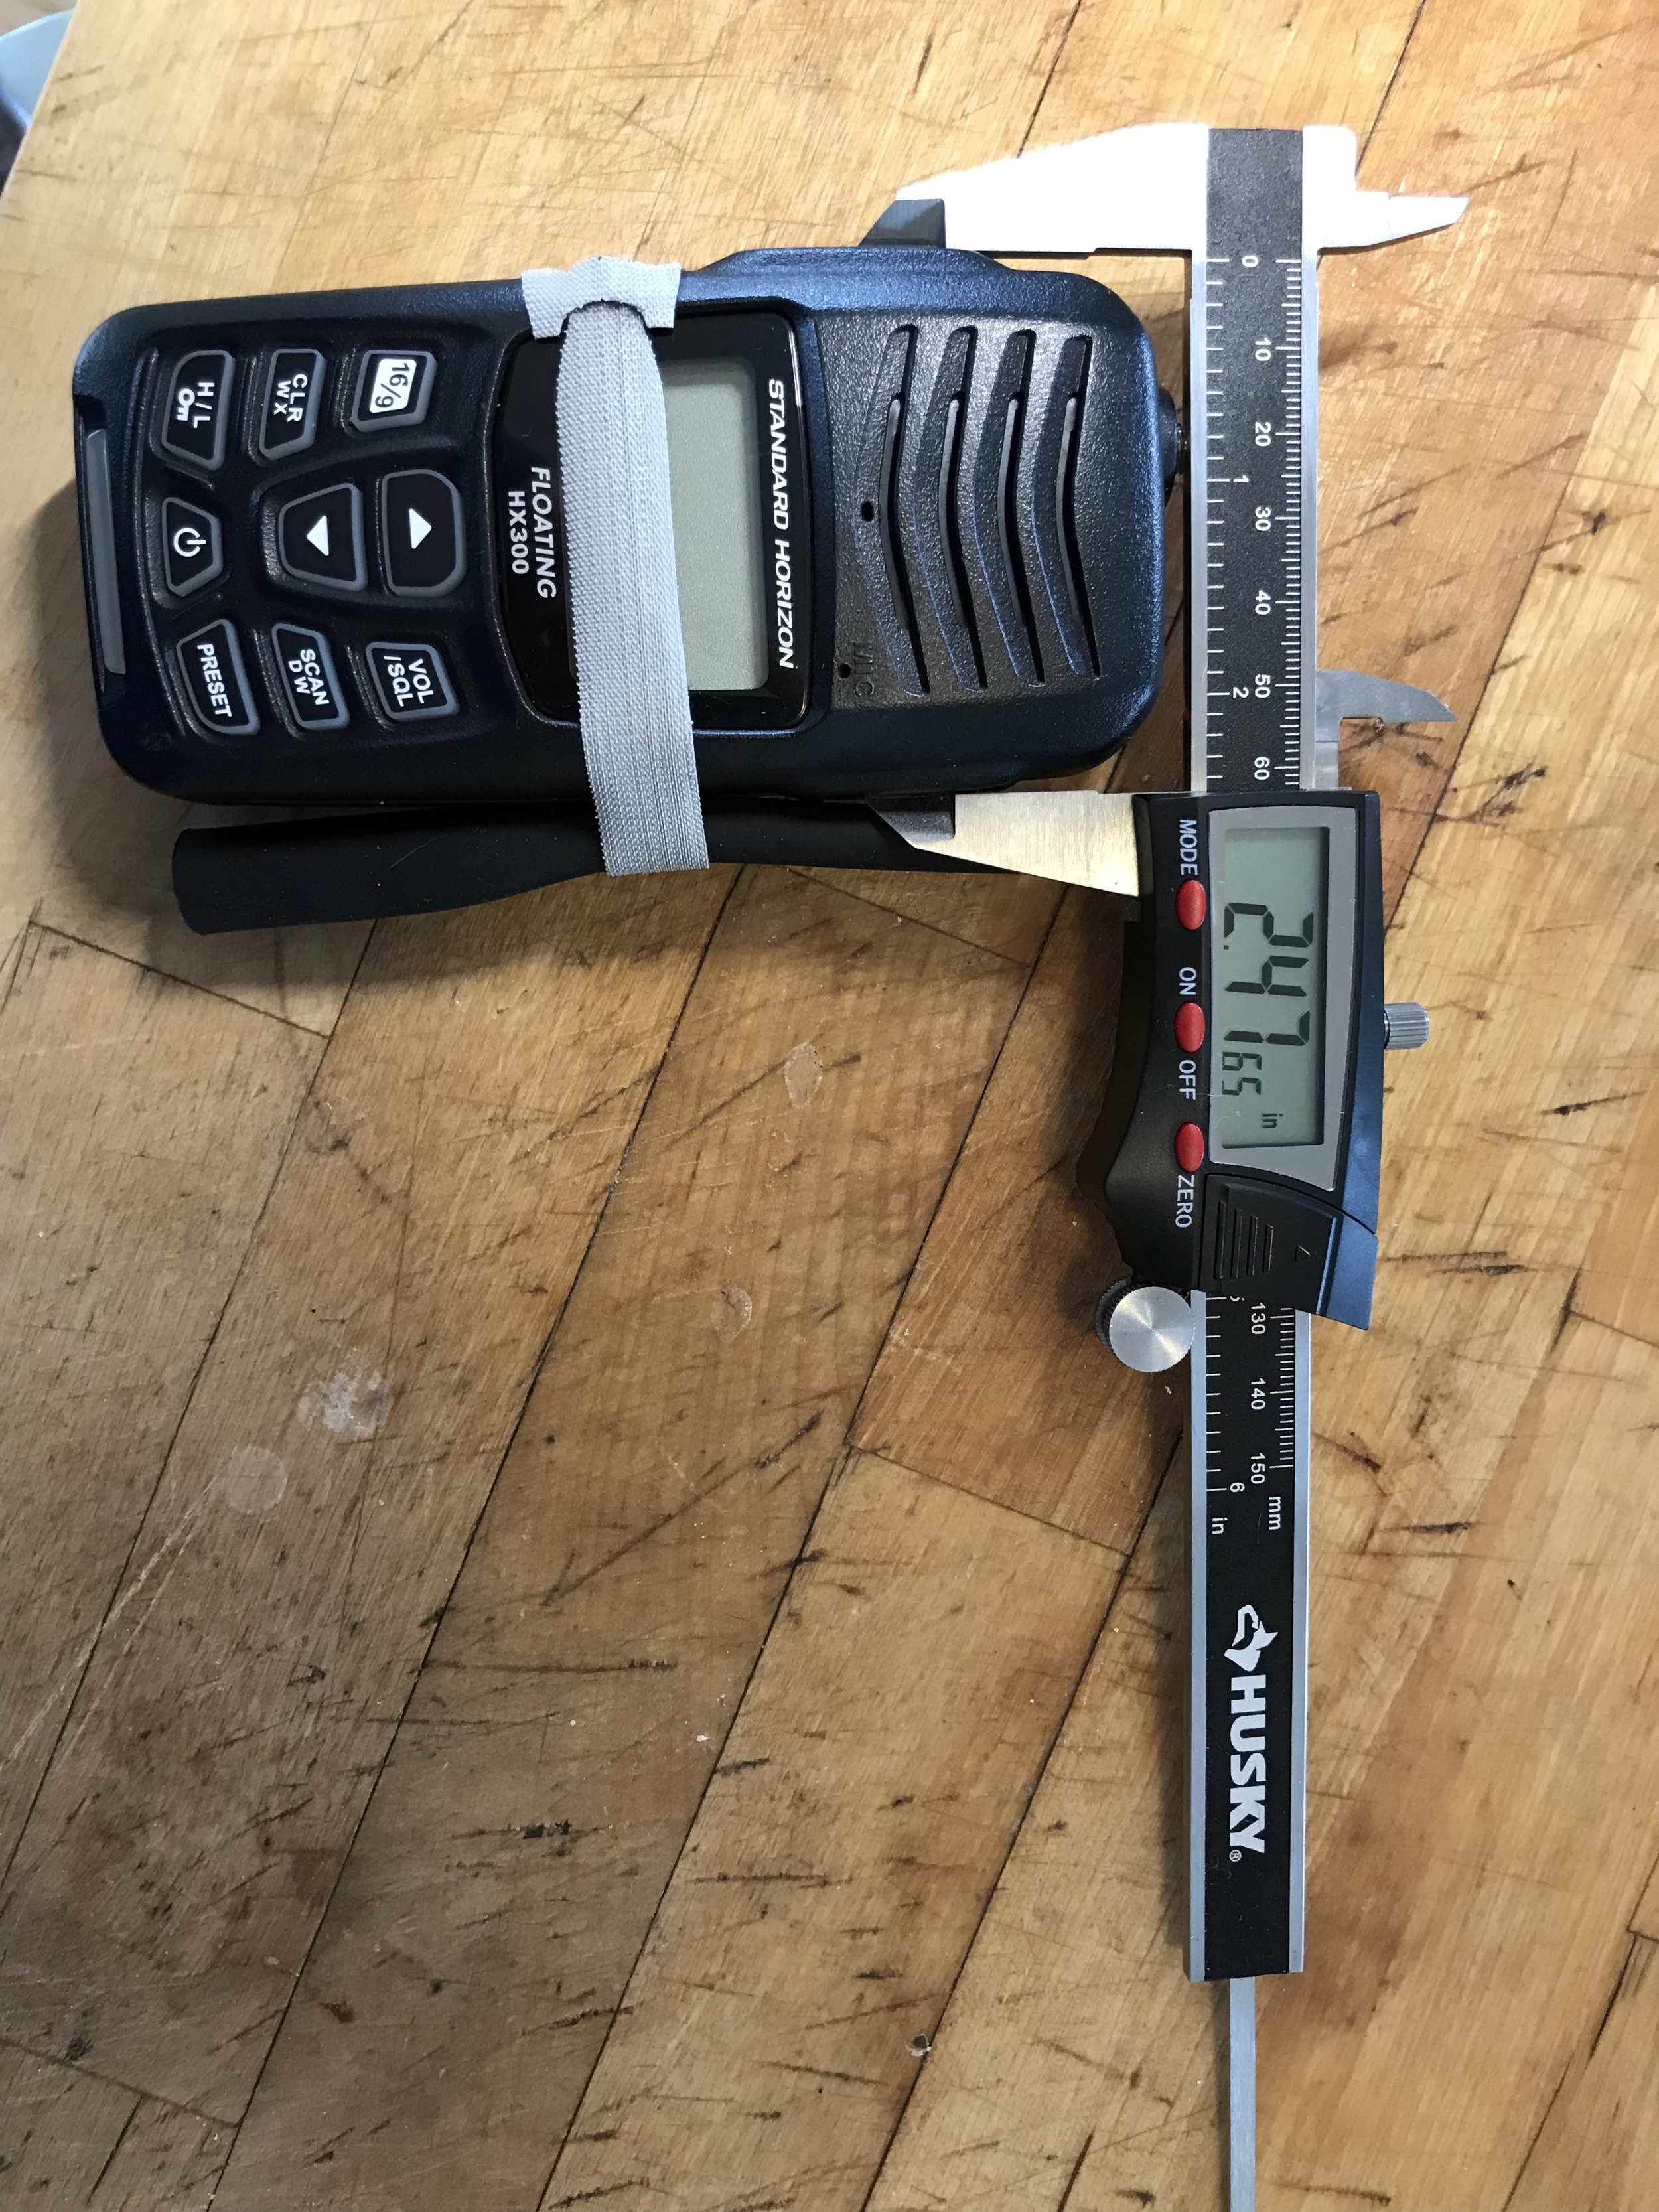
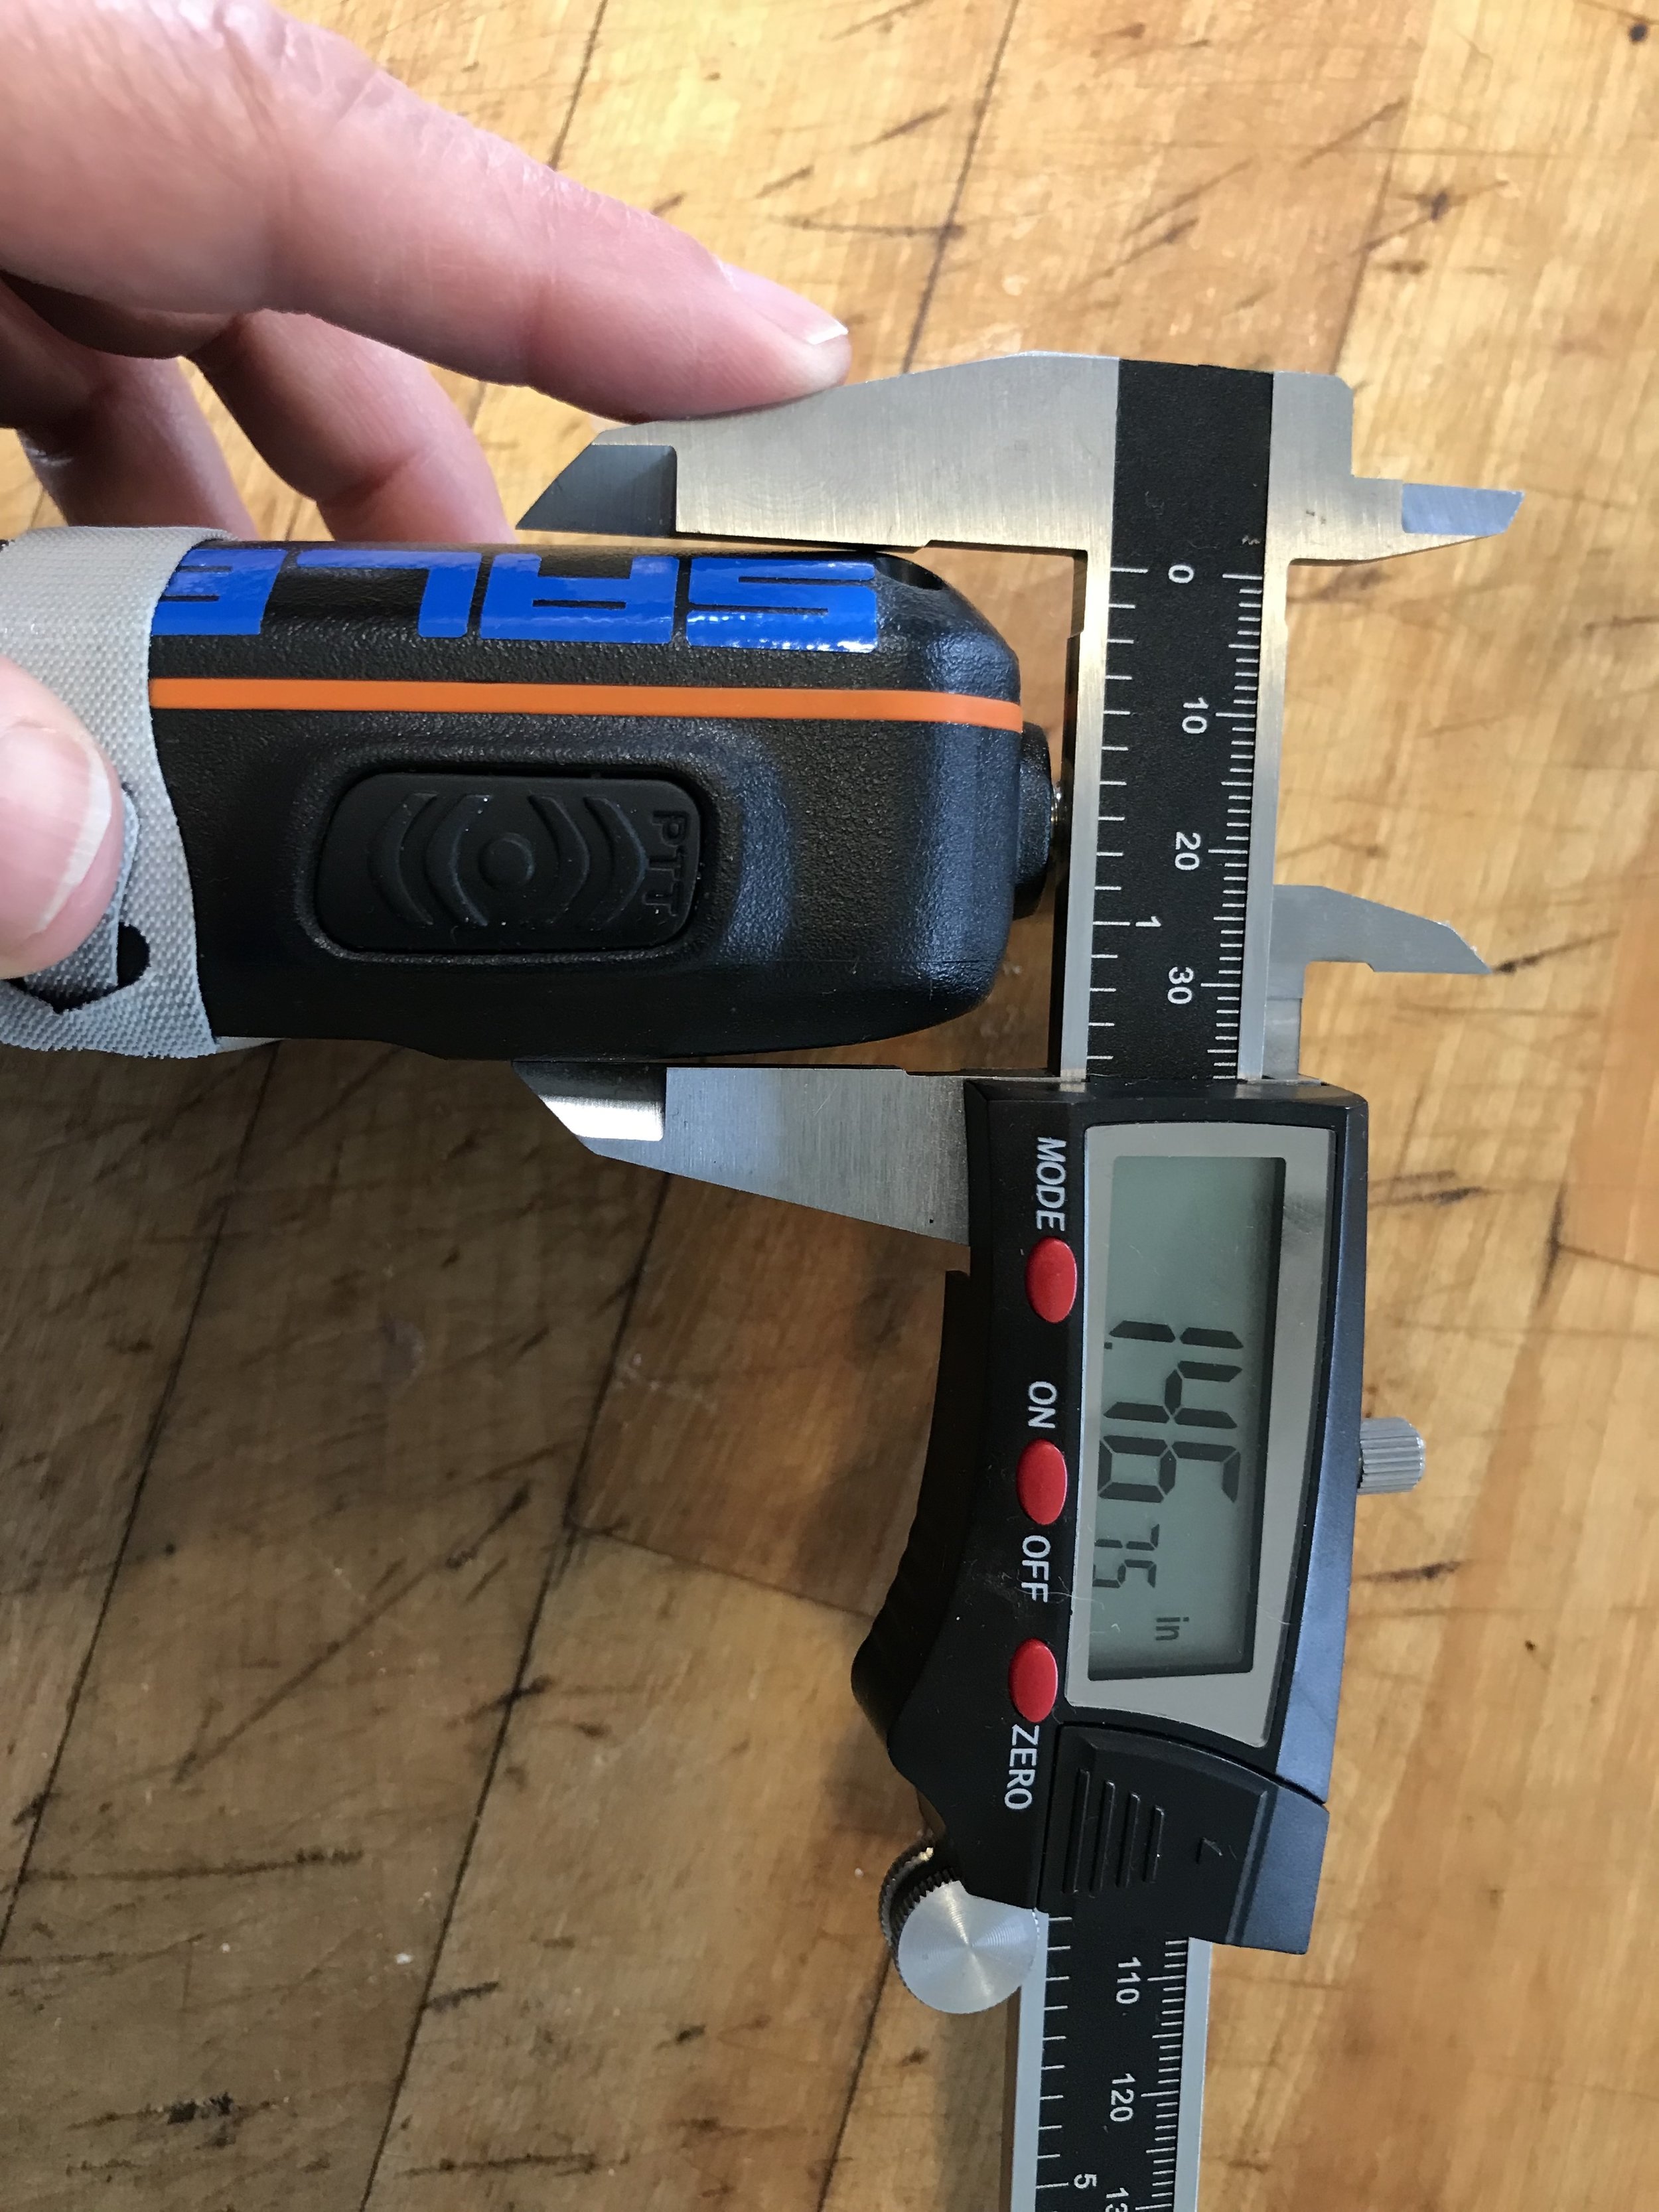
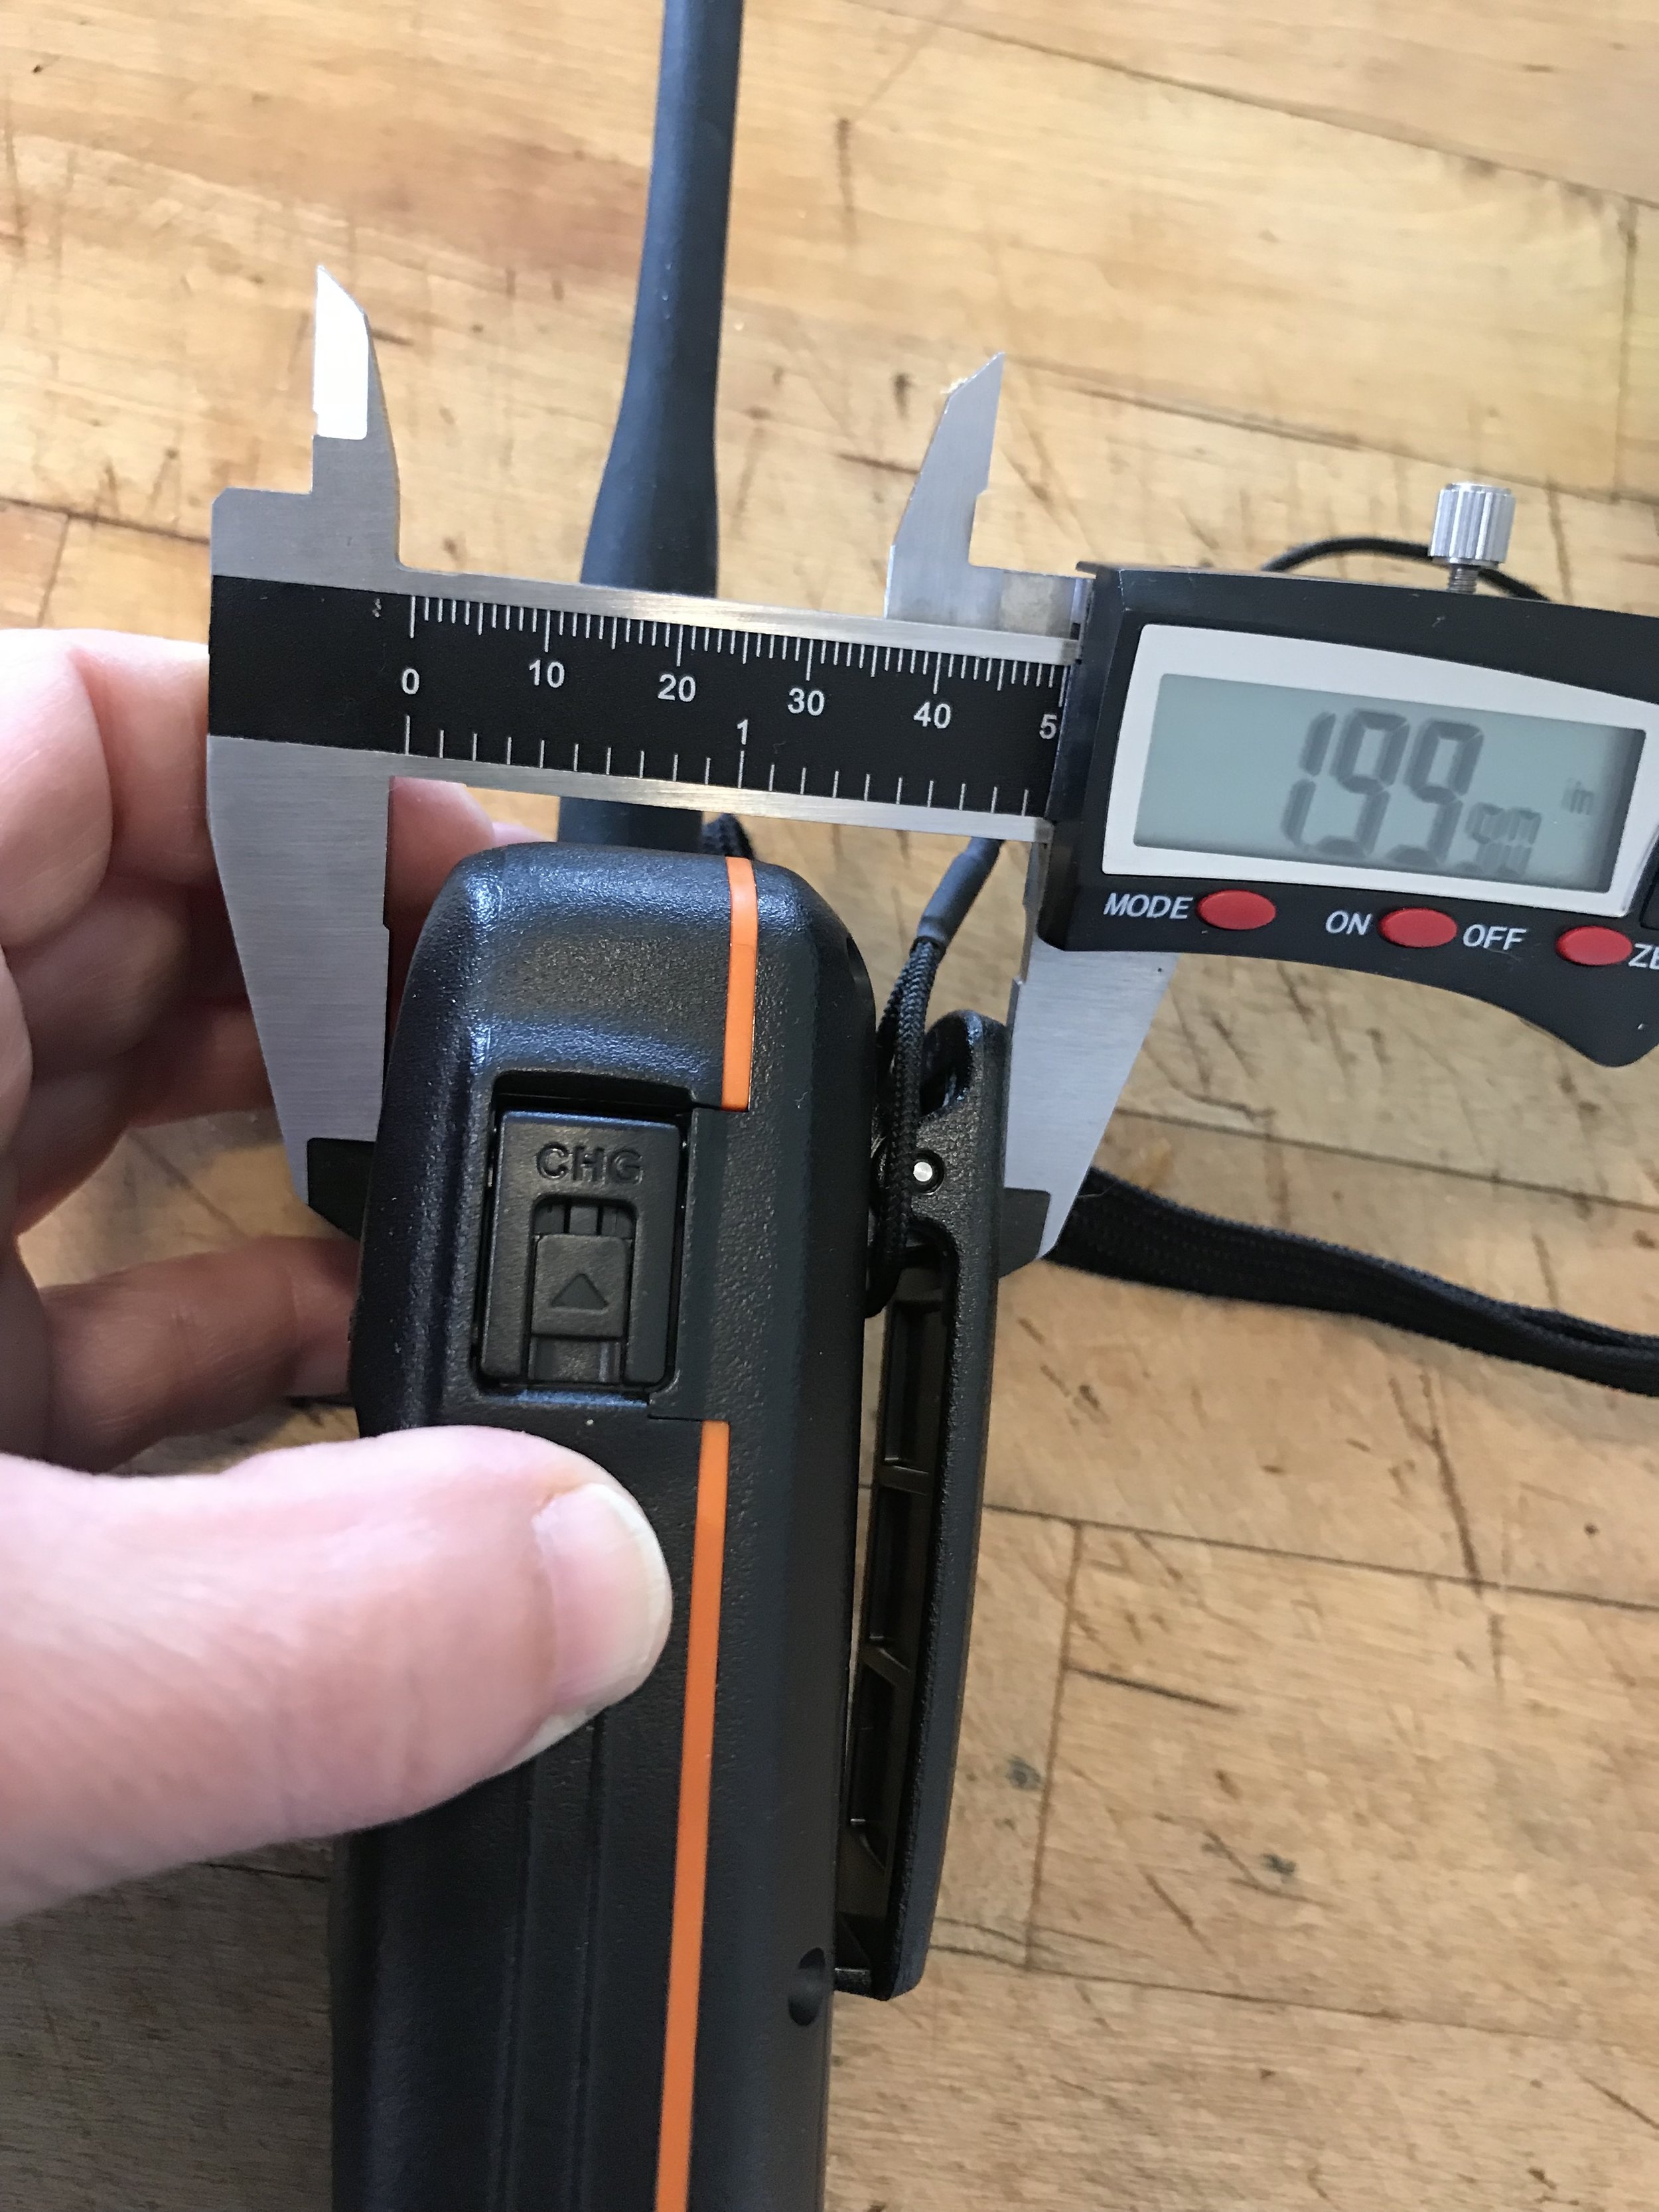
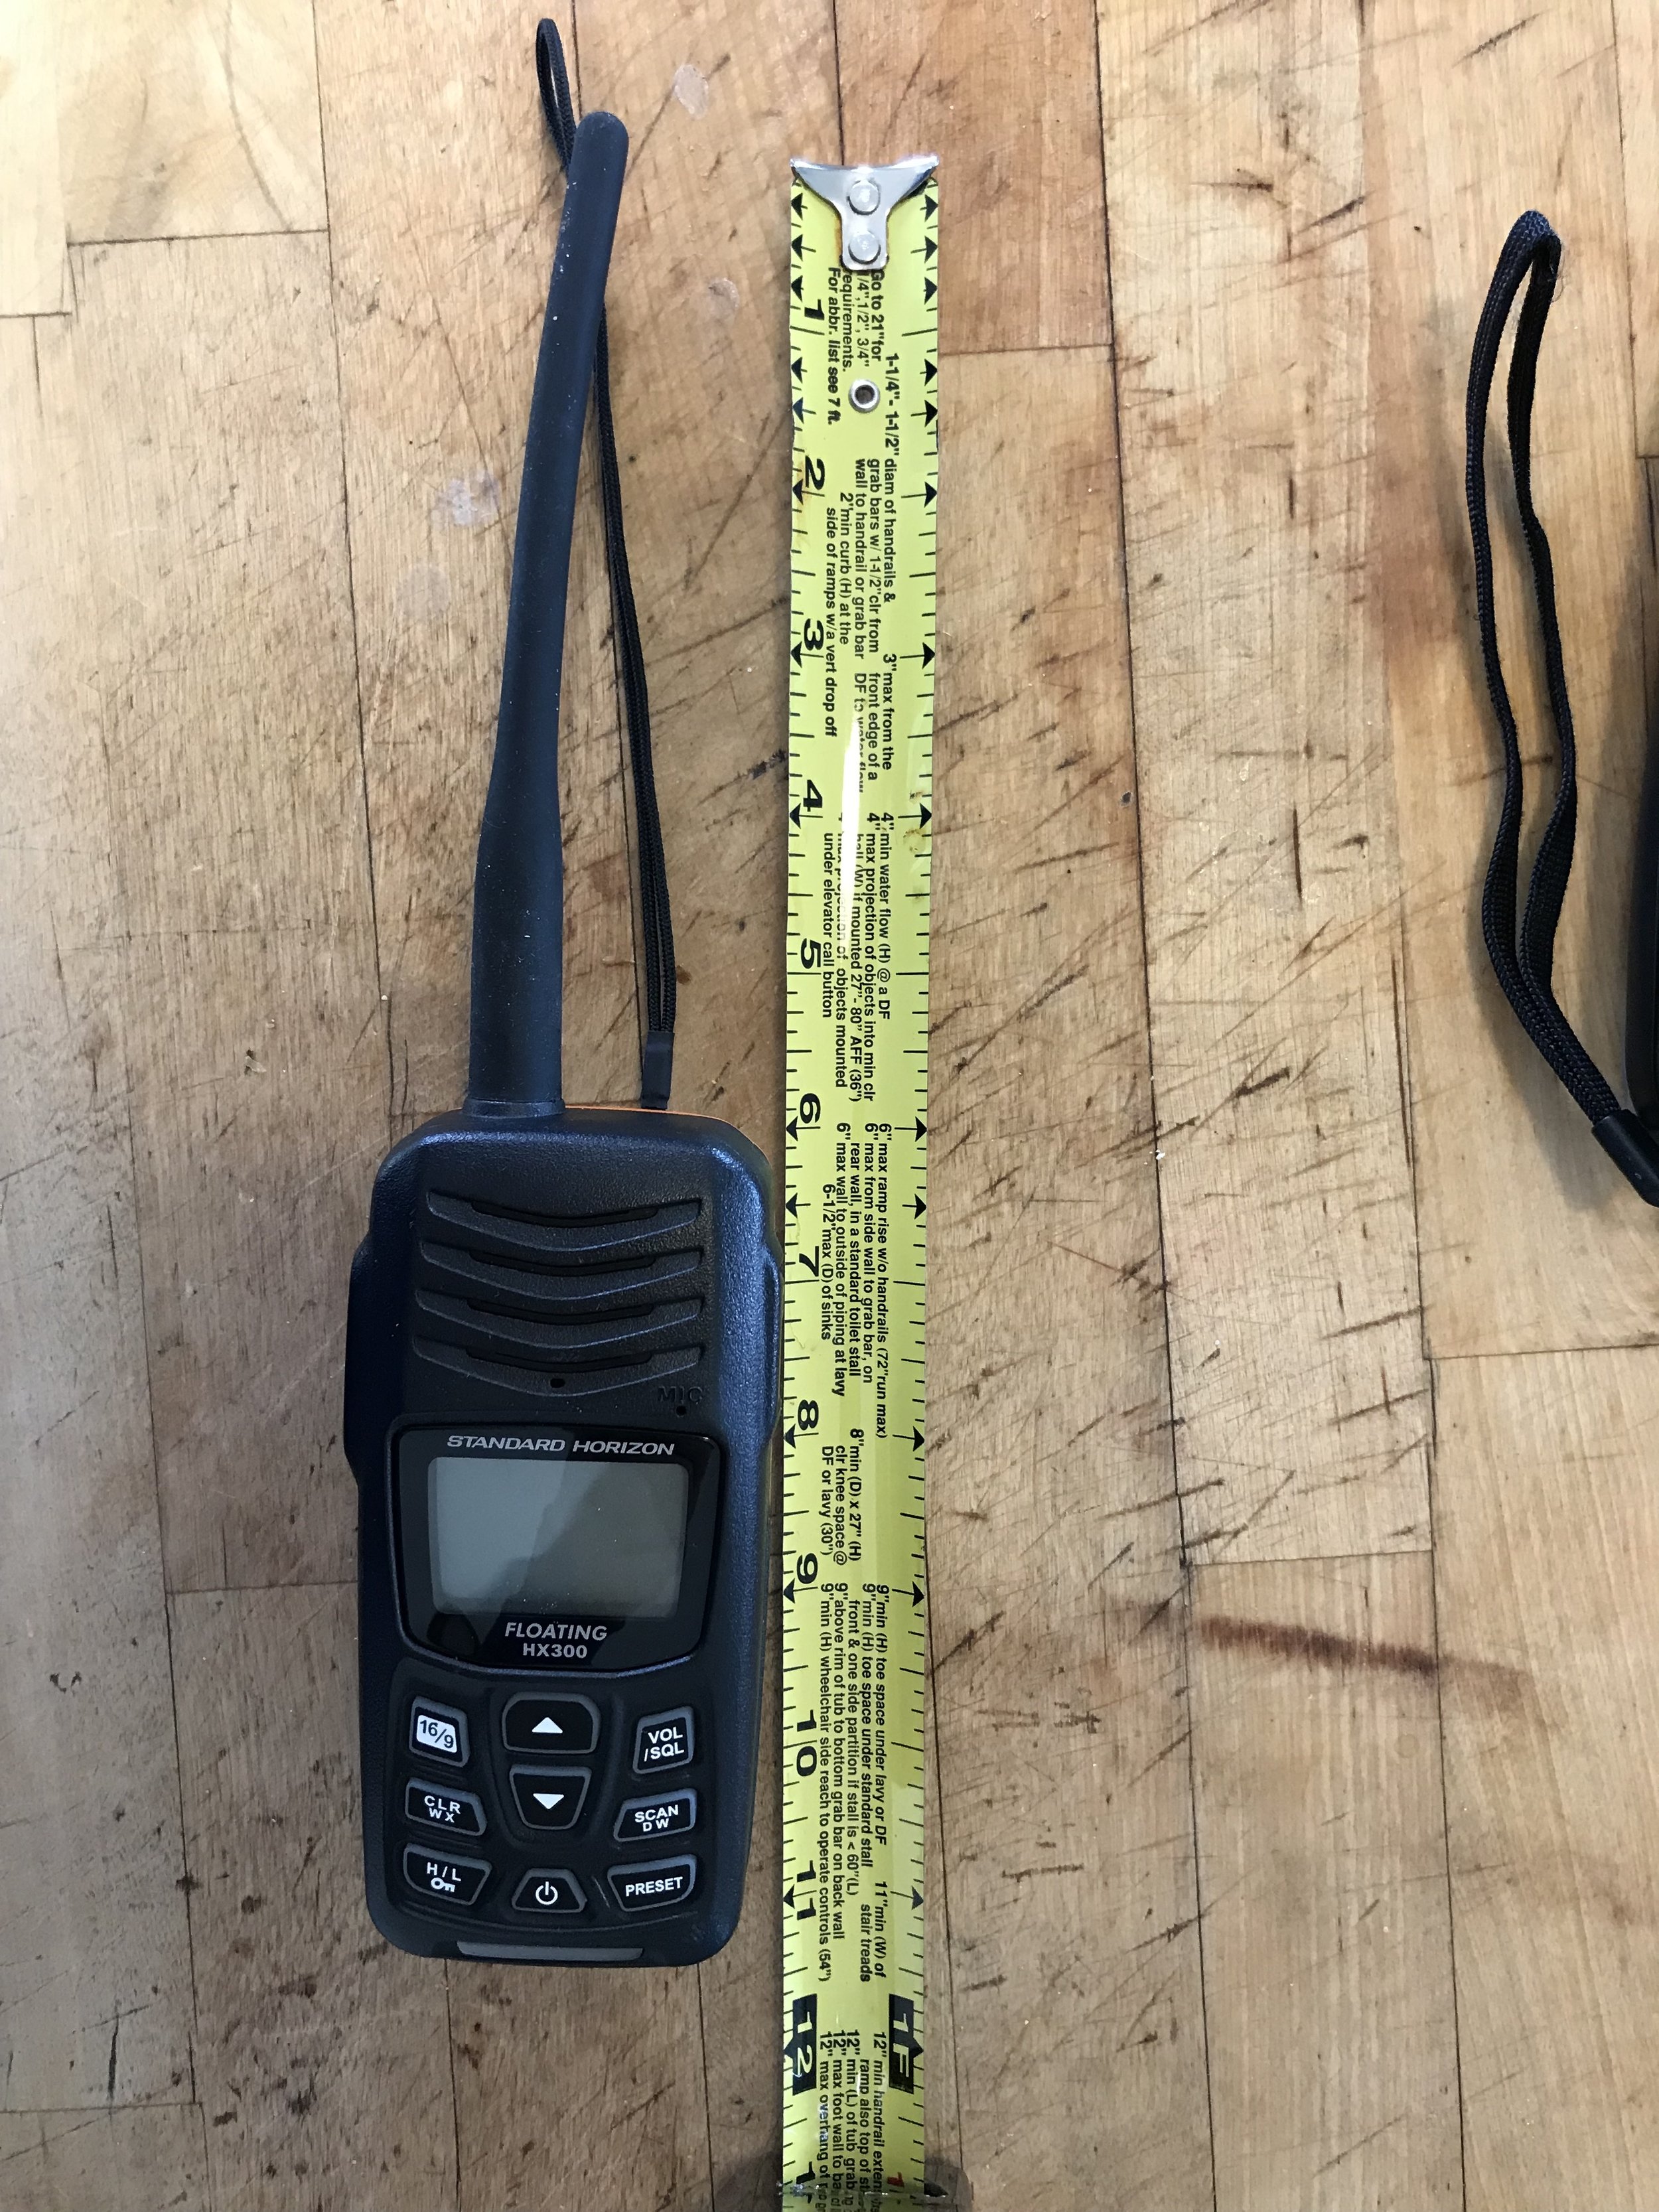
My biggest concern was size. The bulkier the radio, the bulkier the assembly of stuff on my person, the bulkier my PFD, the harder it is to get onto the canoe. After considerable deliberation I finally chosen the HX 300, which easily fits inside the large front pocket of my Mocke PFD. At 5.25”x2.5”x1.5” this was as compact as I could get with its features.

Standard Horizon HX300 inside the Mocke PFD front pocket. Note the orange whistle also.
Another major consideration was the USB charging port and the orange back light.

The orange light could be indispensable in night conditions.
I have now been using the HX300 for a year and a half. The battery life is great. I actually don’t know how long it lasts before it dies because it has not even gotten close to dying. What little recharge is required takes no time with the USB connection. This is also invaluable for travel outside of the U.S., because of the USB ports-to-other country-voltage chargers prevalent on the phone/computer market.
I recently returned from 2019 downwind paddle camp in Guadeloupe, where channel 71 (canal soixante dix-un) was used by our French coaches for their communication. I tuned in just to have it, just in case. I do not recall seeing any other paddler in the group with a communication device.
For those researching VHF radio use for travels I urge you to make the purchase and ask the locals how it is used in your paddling location. In the U.S., in the New York harbor, we use channel 16 to reach the Coast Guard. Typically I leave the radio on and listen to the intermittent chatter. It is quite reassuring.
If you are thinking your phone will take care of you, keep in mind that you might be in a dead zone for signal, especially in a foreign country or on an island like Guadeloupe. Also keep in mind that you will need to know the local dial code to reach police, etc. A VHF radio could get you in contact with another vessel in close proximity to you right away. “Mayday,” is the universal distress call, which I recently learned is French:
Mayday
universal distress call
If no vessels are close enough to hear your call for distress and survival is questionable, your investment in a personal locator beacon, like the ACR Aqualink PLB-350C is your way to alert the global emergency response teams you are in peril. I purchased the ACR for my trip to Guadeloupe in 2018, and I kept it inside my paddle shorts pocket at all times. I chose the product that is a little bulkier because it incorporates technology that allows you to test that it works periodically. I needed the peace of mind. When I heard about Ali’s untimely fate my first day of camp in 2019, both of my communication devices became my closest allies, ensuring to me that my idea of the greatest time in the world - playing in the ocean - was also respectful of the ocean’s power. We love the ocean, but she has no emotions for us.
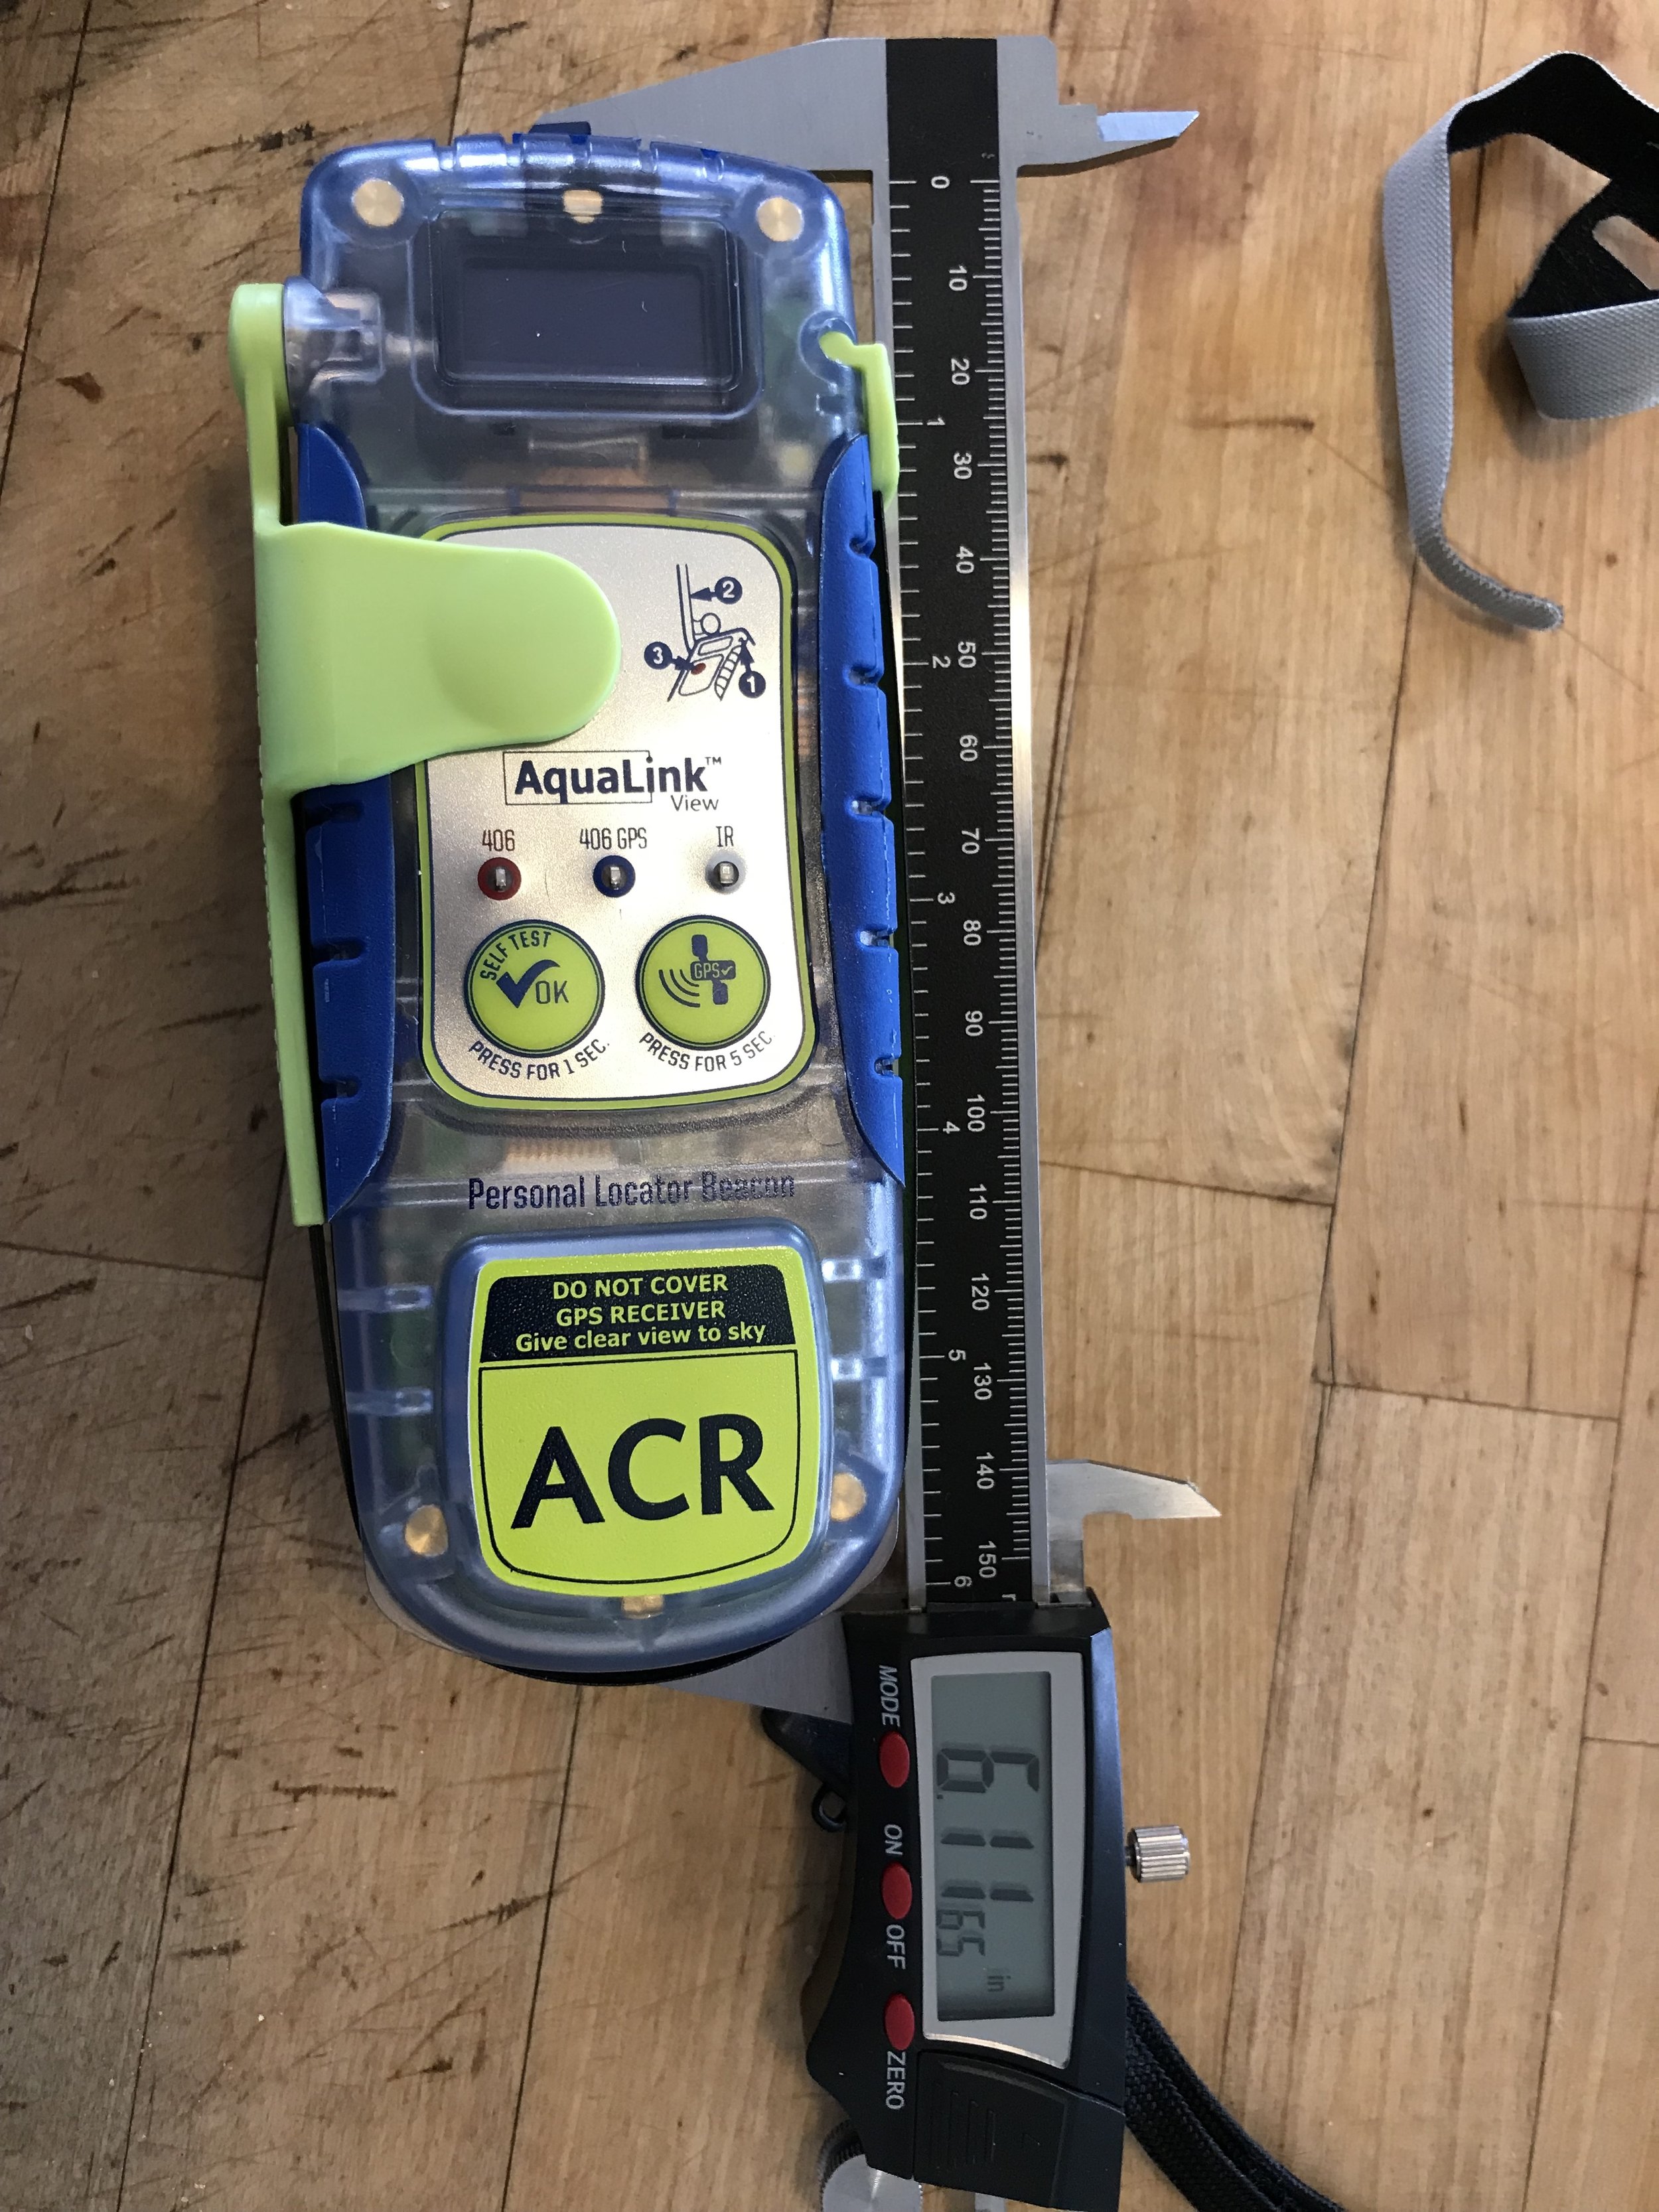
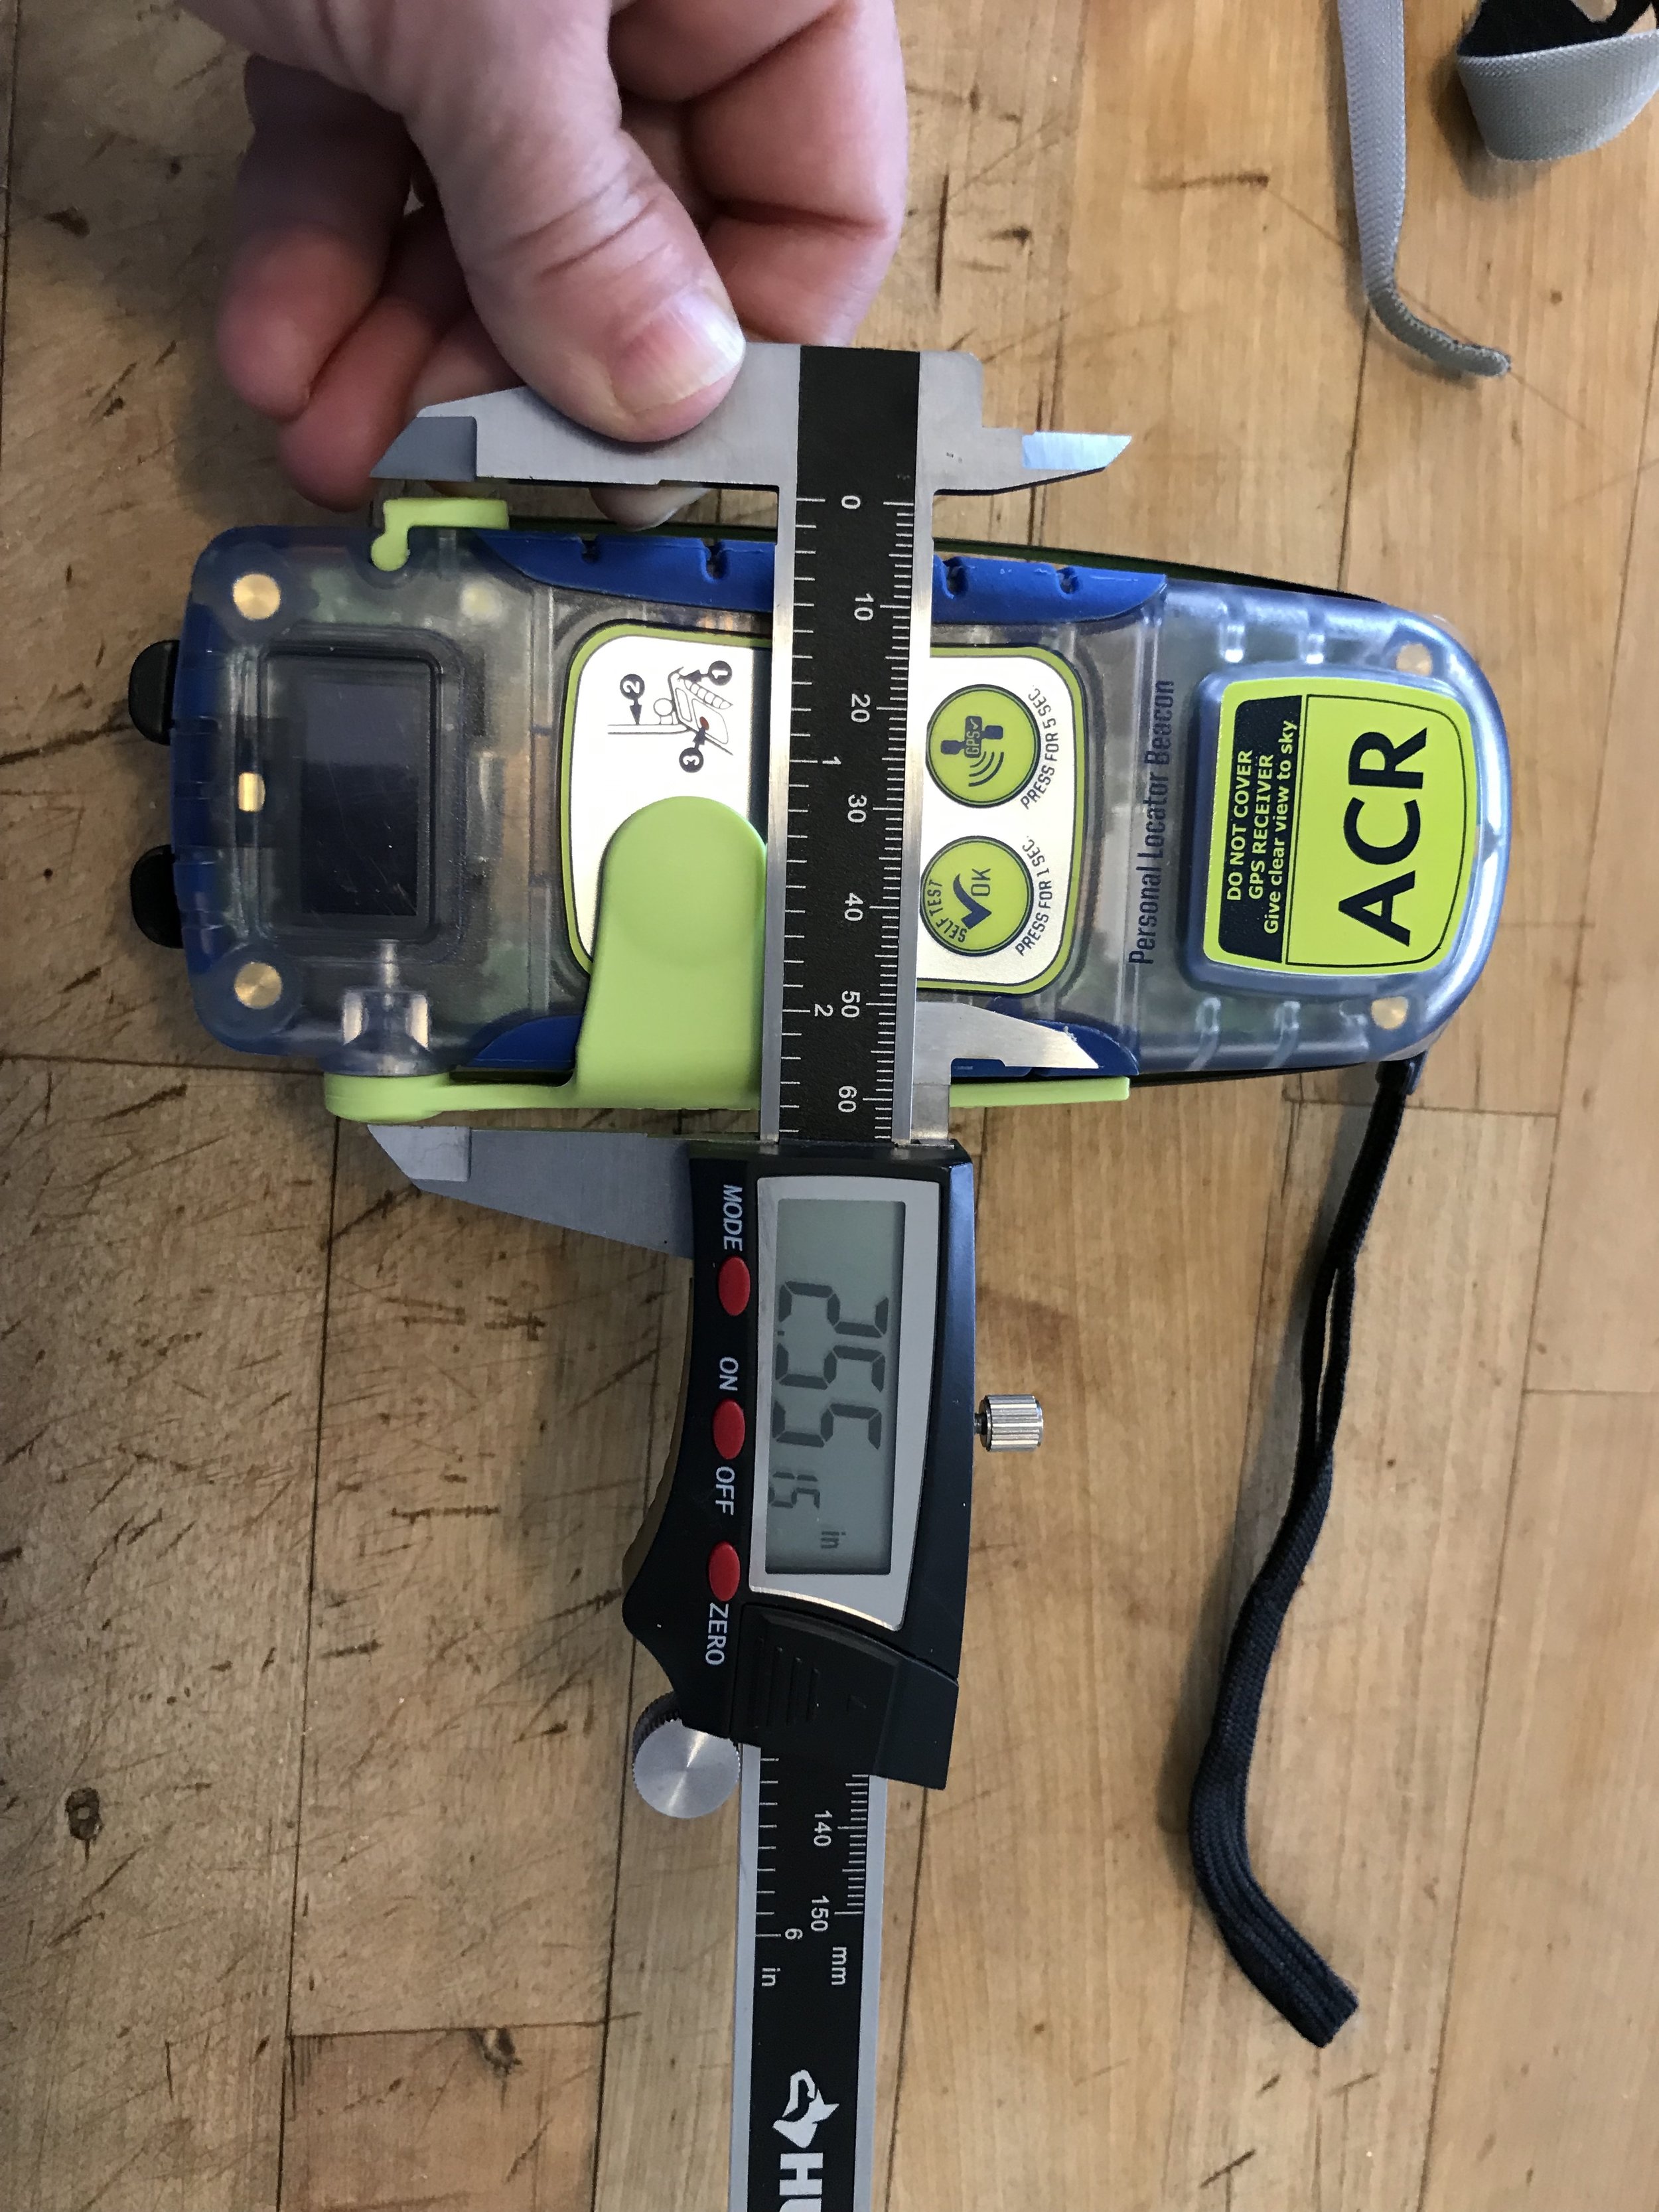
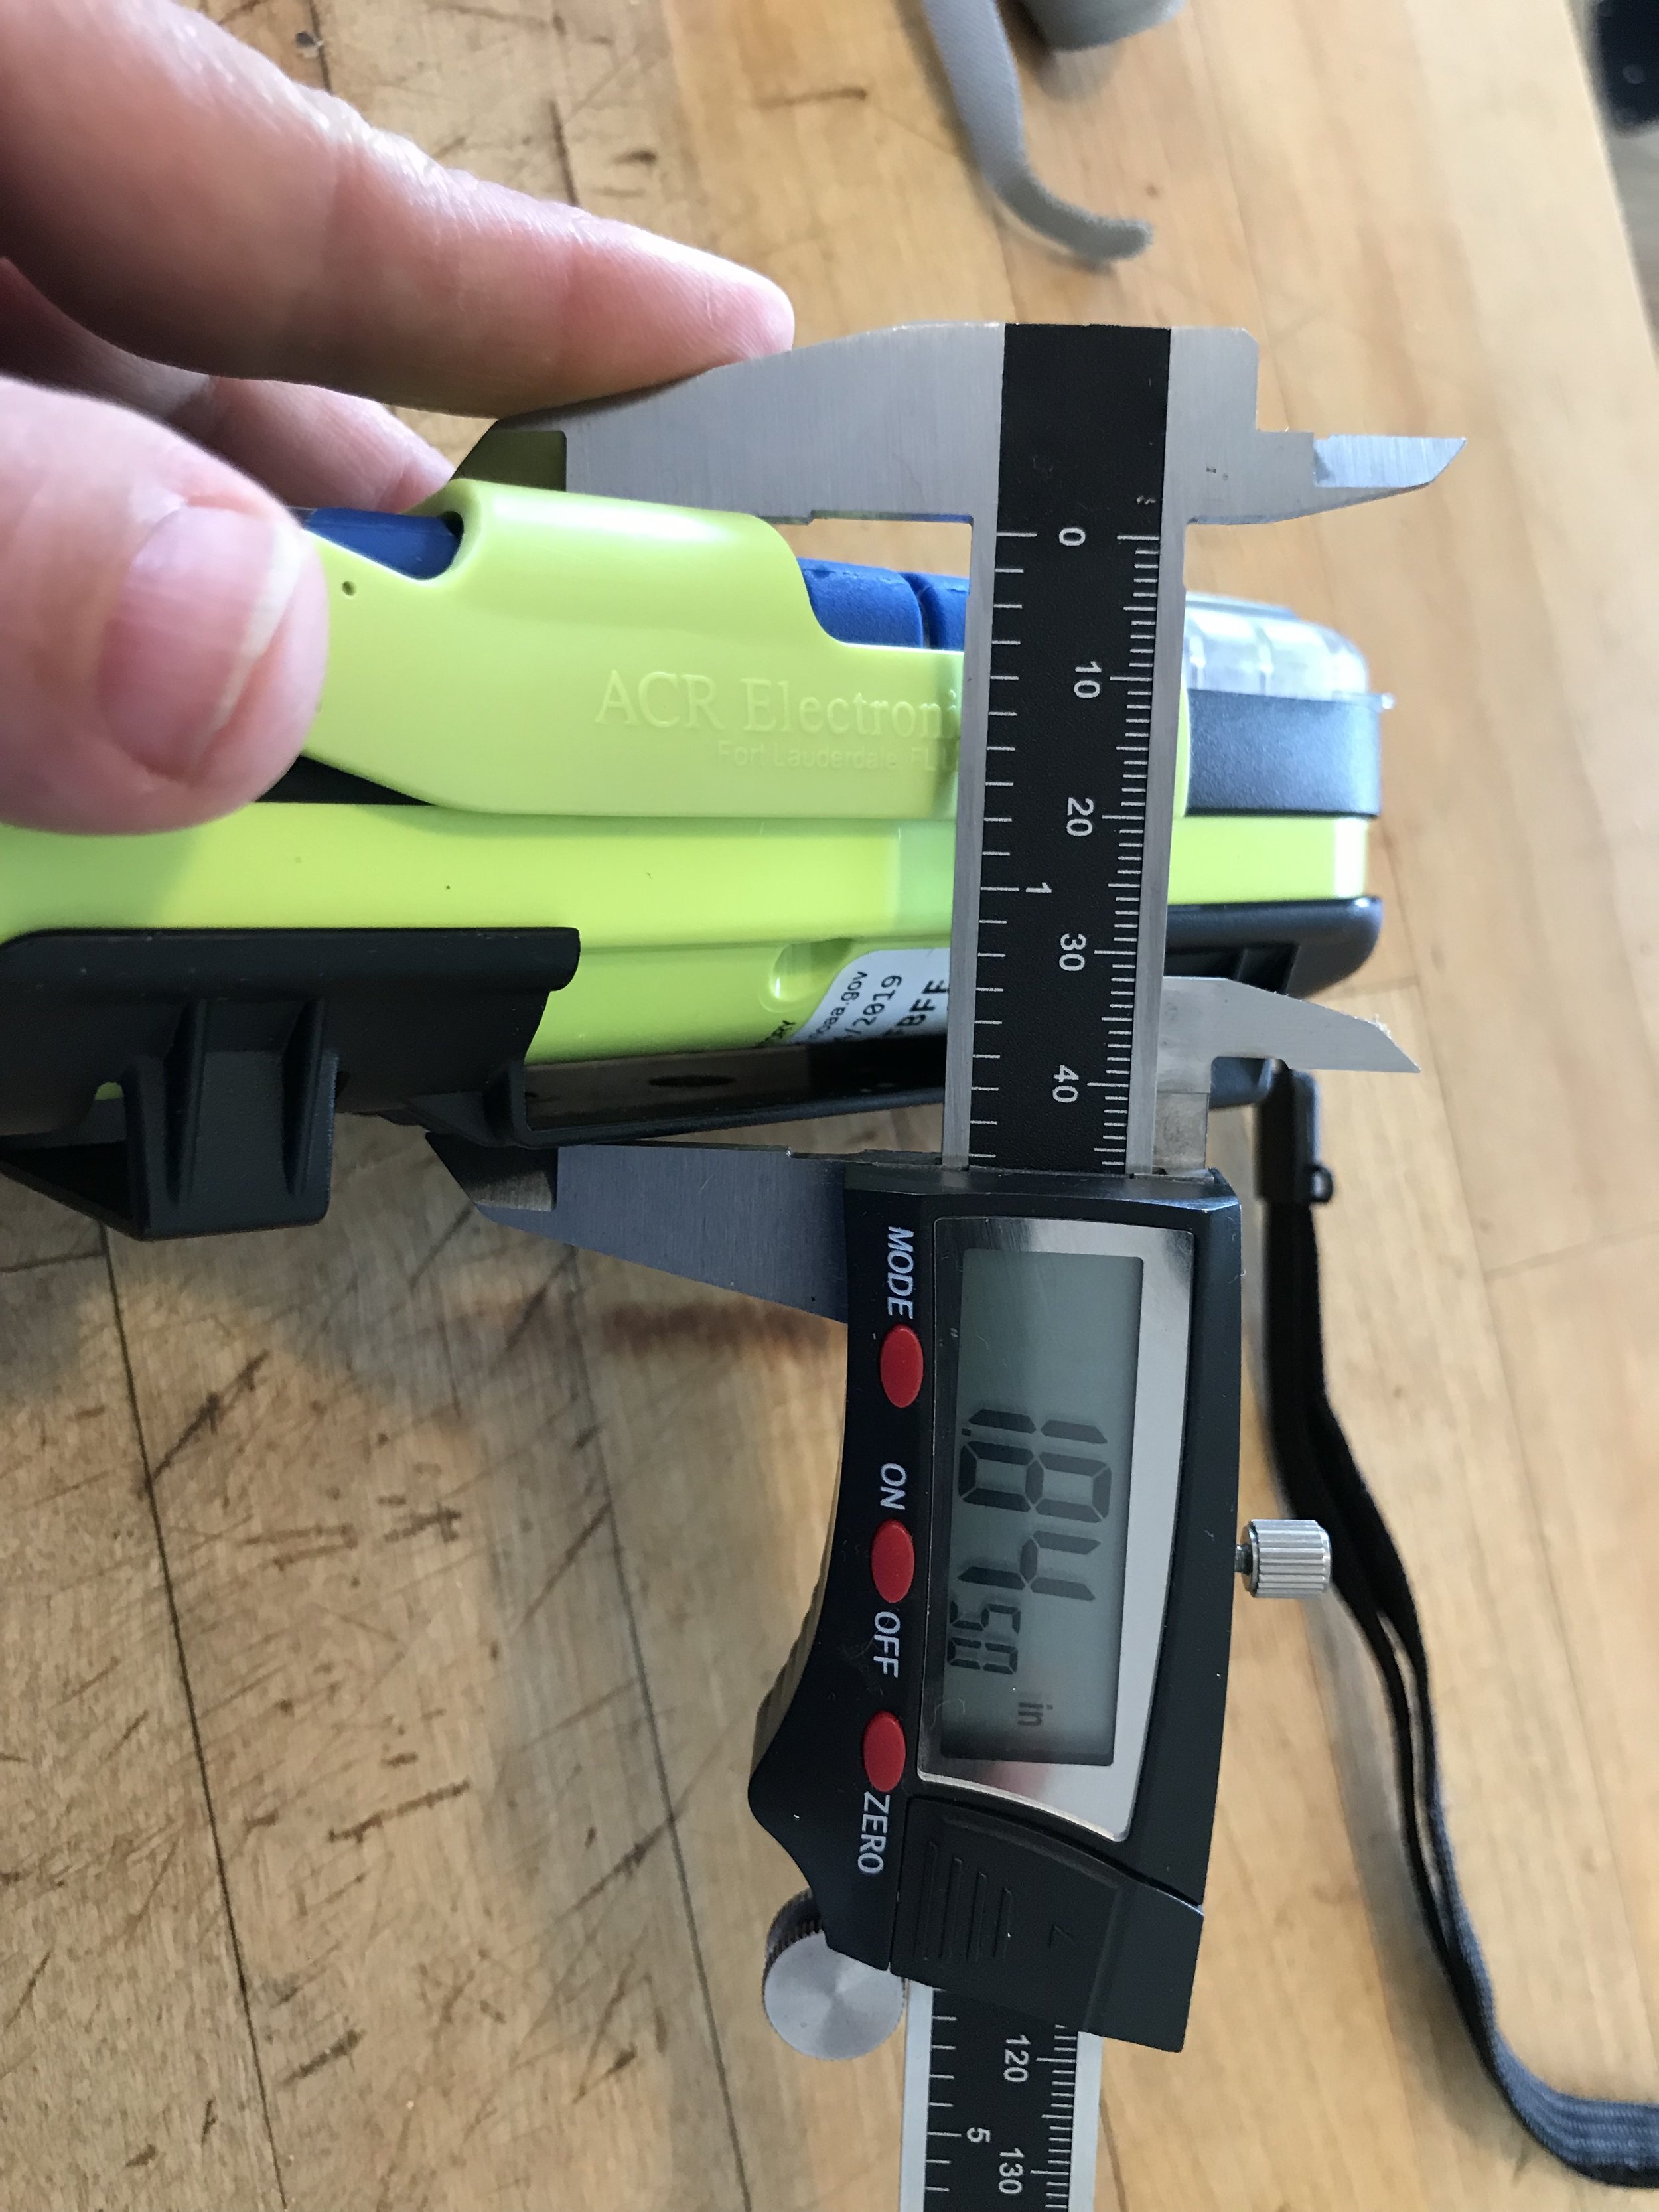
Safety has long been an aspect of my dayjob. The general rule is that the day you become so comfortable that you no longer respect your environment, that is the day you are open to getting hurt or worse. When a man at camp told me to do whatever the leader said, because the leader was a safe guy, I respectfully declined and used my own leg leash instead of the one provided. Something as simple as a minor equipment substitution can throw our game. Do what you know is right for you. Rehearse with your safety gear, practice hulis and distress maneuvers with your club. Be your own best guide.
And now for more technical information.
I fumbled with the the ACR antenna when I first got the equipment. The antenna wraps around the body and a male notch on the antenna fits into a female notch on the body of the unit.
The antenna.
When the antenna is up, the red emergency button is exposed. Once pressed a signal is sent to an emergency satellite system, and the dispatch process to search and rescue teams proceeds. Each unit is registered to its individual owner. Mine is registered with NOAA. You must fill out documentation that comes with your unit to get it registered. The search and rescue team will know who you are, where you are and be able to notify next of kin. There are additional packages for texting and so forth depending on what you choose.
The bulk of the unit is the built-in battery, which has a multi-year life expectancy. The only thing it does is send the distress signal and provide your GPS to the search and rescue team.
I’m pretty sure I read something like this when I was reading PFD reviews, but you won’t care what the thing cost when it saves your life. This unit runs about $400. I bought both units online.
Here is a video of what happens when you press the test button:
You won’t be allowed to obsessively test the unit. Doing so would drain the battery. So the computer in the unit will only allow you periodic tests. Don’t abuse it.
The Aqualink comes with a strap and a place to secure it. It also comes with a clip system. The HX300 does not have a strap that works without a clip, which ads to its bulk. I’ve left the clip off and just kept it secure in the PFD pocket.

The straps, clips and belt clips.
In closing, please be an ambassador of the water. Play it safe for yourself and for all others.
Rest in peace, Ali.
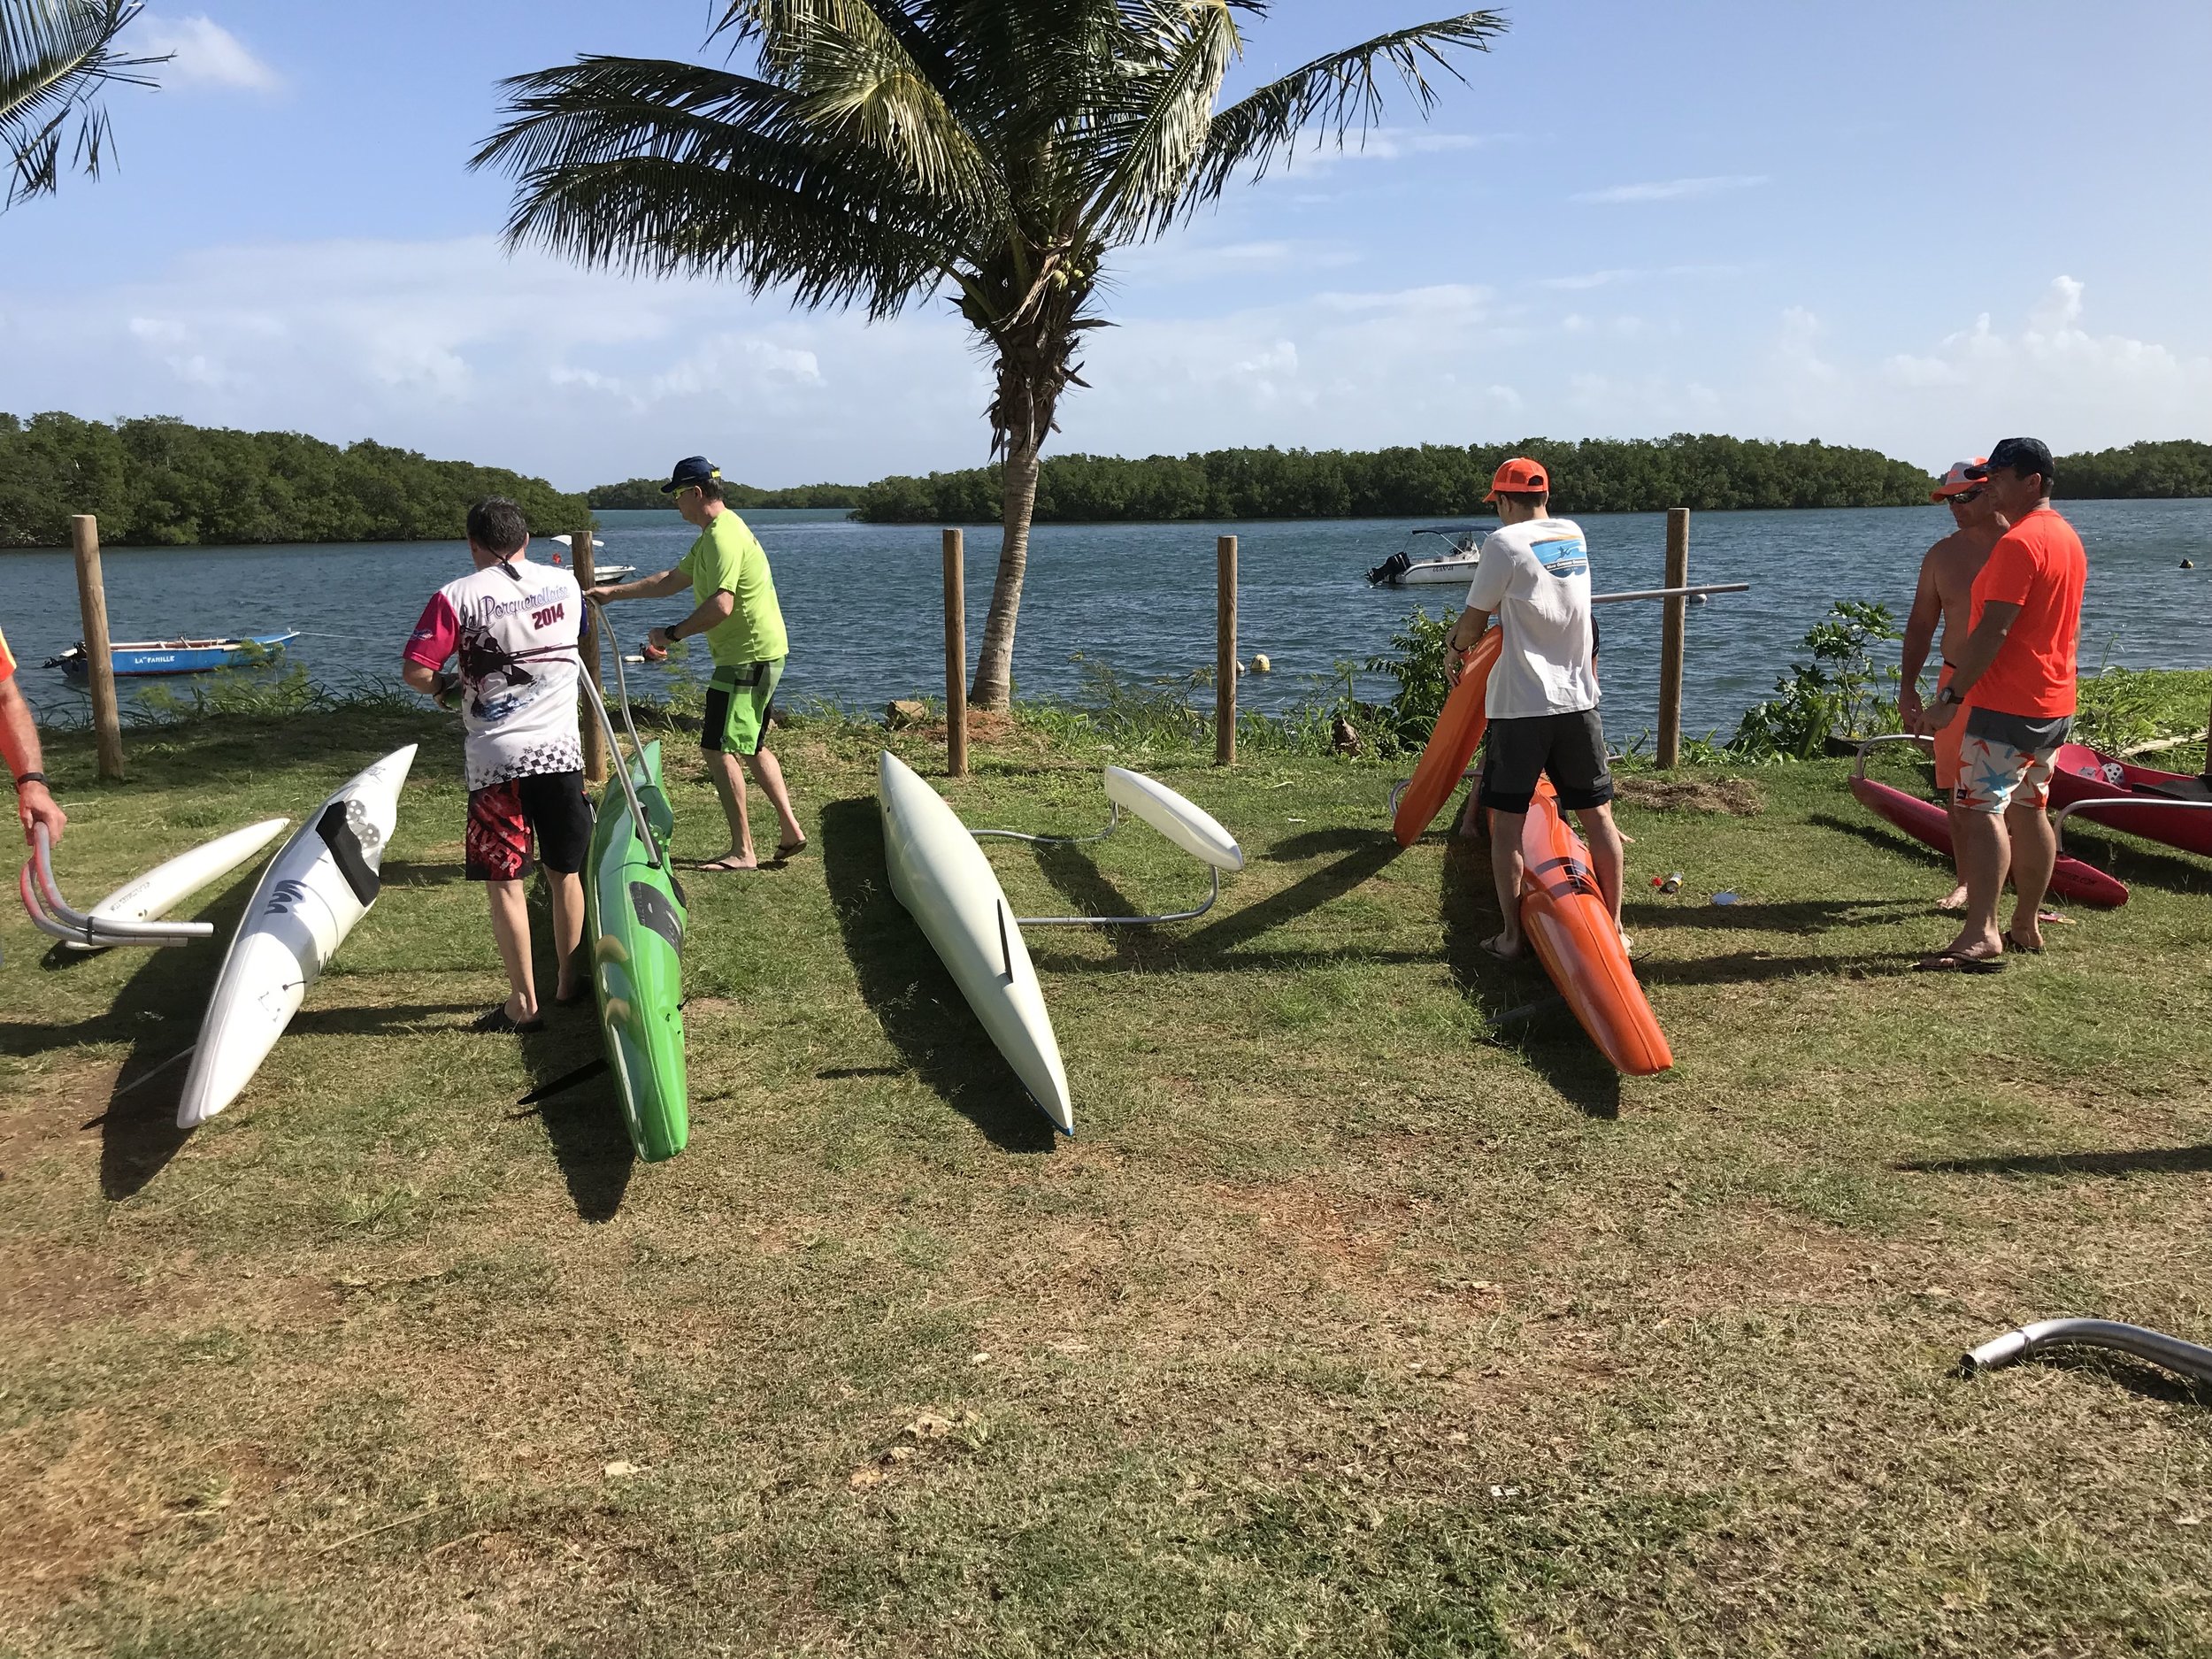
MetaLeash Quick Release Paddling Leash - SUP, surfski, outrigger, foil, prone
from $64.95
LIGHTER: at 4.5 ounces weighs half of other leashes, floats
SMALLER: 50% smaller than other leashes but still extends just as long
STRONGER: heavy duty webbing, stitching and YKK buckle system, 1600lb jacketed Samson Dyneema retractable leash, stainless steel clasp system (no hidden mystery hardware or plasticware like other leashes). Can be used with included Dyneema loops, without hardware, for greatest strength.
SAFER: easy to inspect, high contrast (red, orange, hot pink, lime, yellow or black cuff), red, yellow, orange or pink leash, dual quick release/connect for either race start or getting out of tricky situations
SIZING FOR OUTRIGGER, SUP, SURFSKI, FOIL, PRONE: Retractable leash comes in 9’ or 6’ length. Hardware comes in different sizes for conditions or hands.
SIZING FOR FIT ABOVE CALF: Leash cuff is to be worn above the calf or connected to waist strap.
Kahele Blues

I have the Kahele Blues because it is winter in New York City, and I’m not able to take my new Kahele out and surf in the spitting frigid rain. This is a slightly overdue review of the Kahele, which I picked up at the start of October from Crazy Paddlers in Clearwater, Florida. Slightly overdue because my first thought upon my return to New York was to find a boathouse for my expanding outrigger canoe collection. Having now added both new boat and beach house to my worldly possessions, I will soon return to the trusty keyboard to lavish praise on the Kahele. Let’s just put it this way for now: I have won the lifestyle lottery.
Racking my Brain about Boat Racks: Customizing a factory rack for Lockrack and an outrigger canoe
The season started off with a plea from the Wanda Canoe Club on the Hackensack River in New Jersey. Our old boathouse was falling apart and had been condemned by the local village of Ridgefield. We had decided to buy a shipping container, and it had fallen upon me to find a rack solution. Already familiar with Unistrut - a widely used, engineered rack system meant for making racks on the fly - I had proposed this material to the club. Frankly, while I had seen it used in miles of mechanical chases on buildings I've worked on, I had not thought to use it for my own needs.

A fellow paddler just happened to be getting some boat repair work done by Cliff Roach of Goodboy Paddlesports, and soon Cliff and I were in discussions about how to use his aluminum systems with Unistrut inside the metrically engineered container.
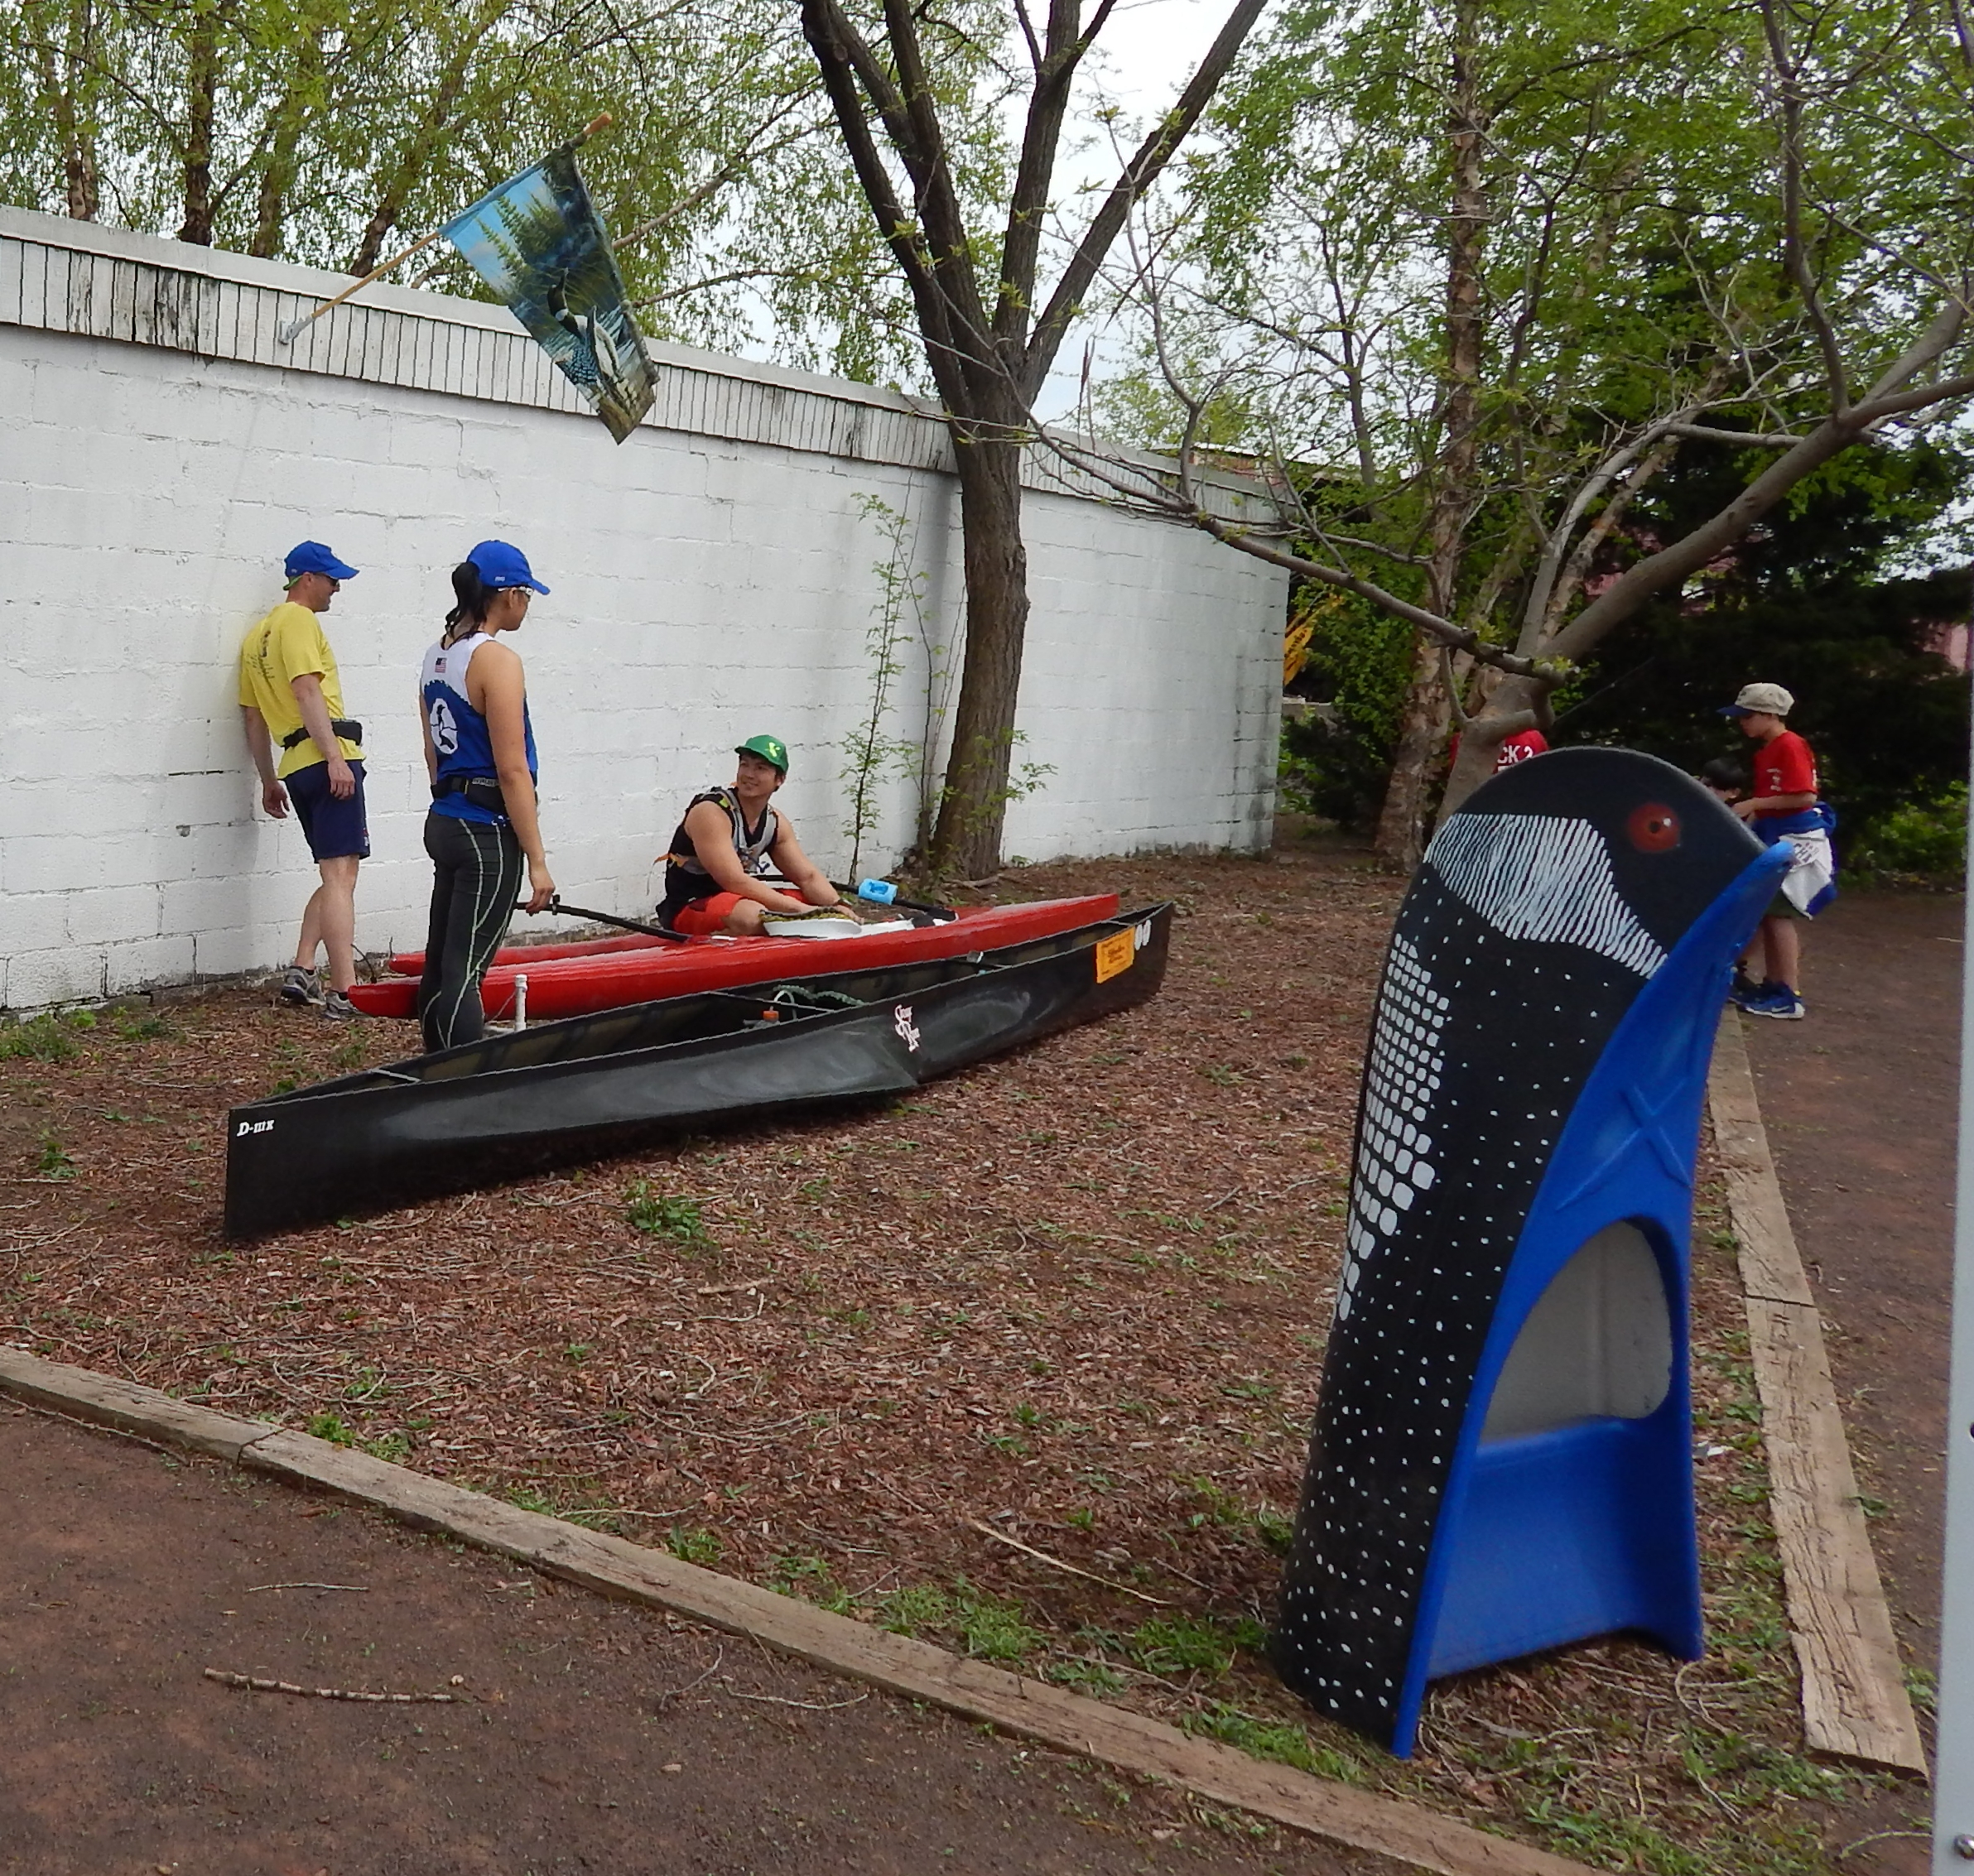
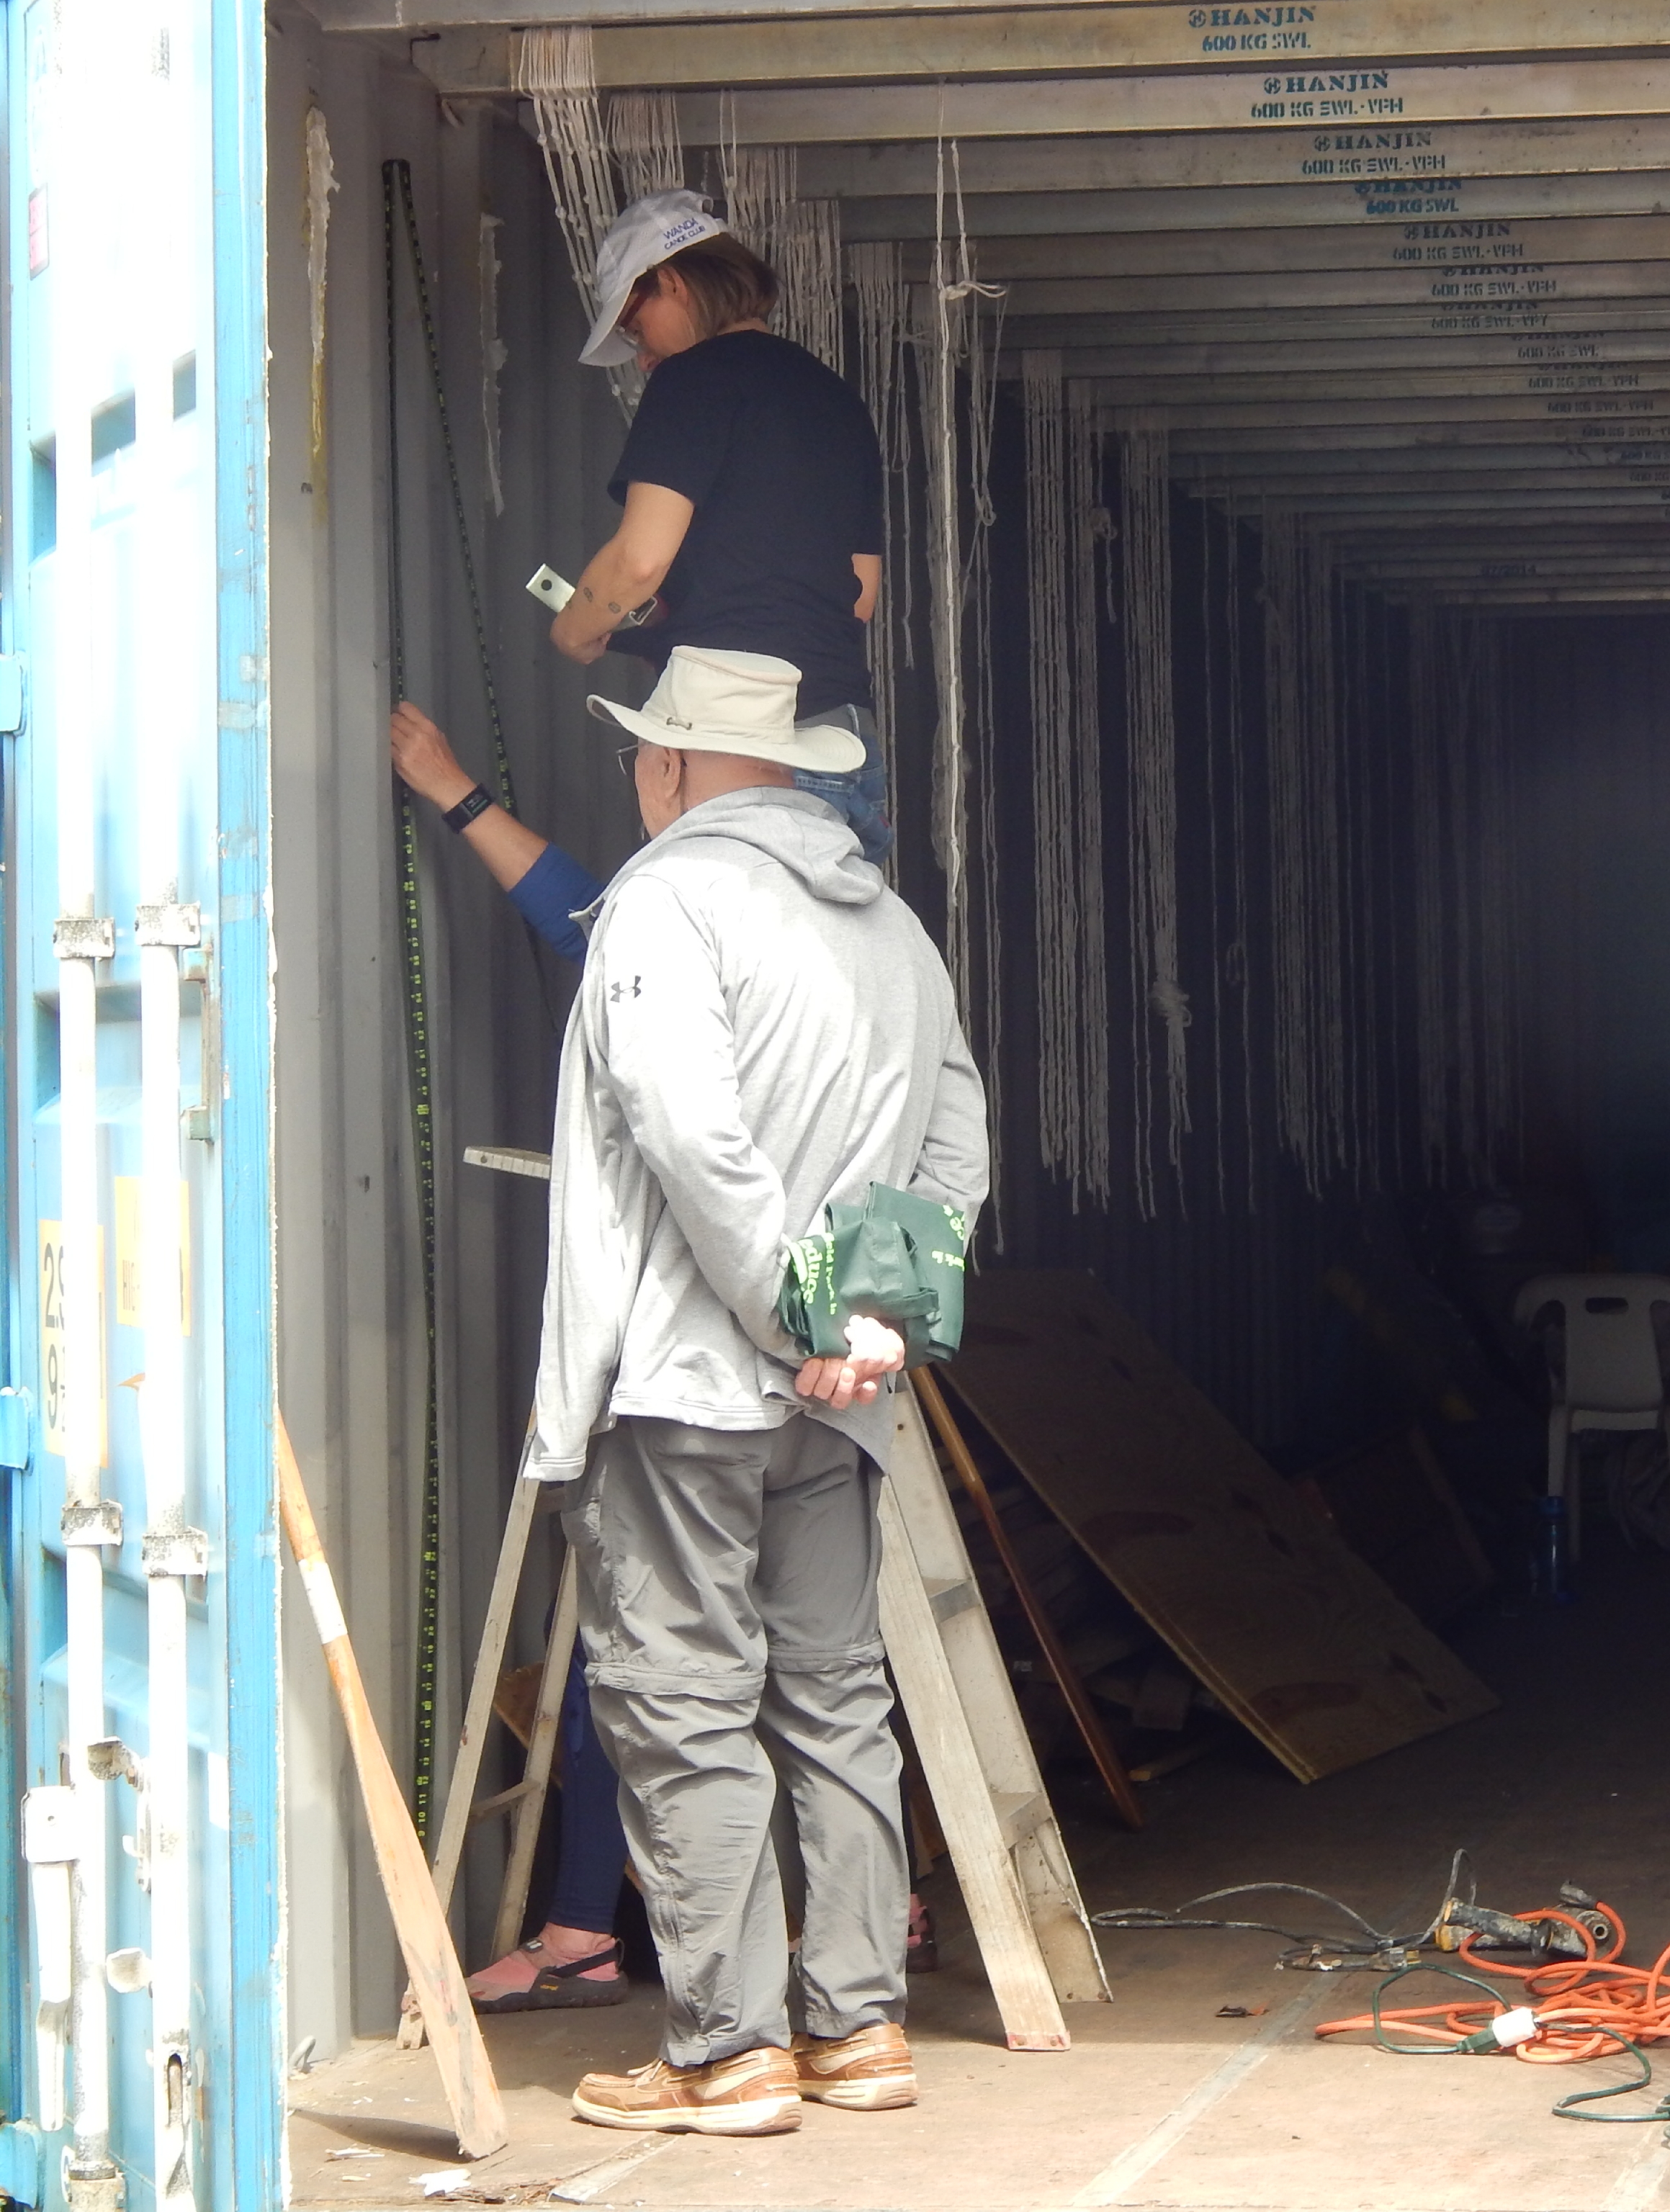

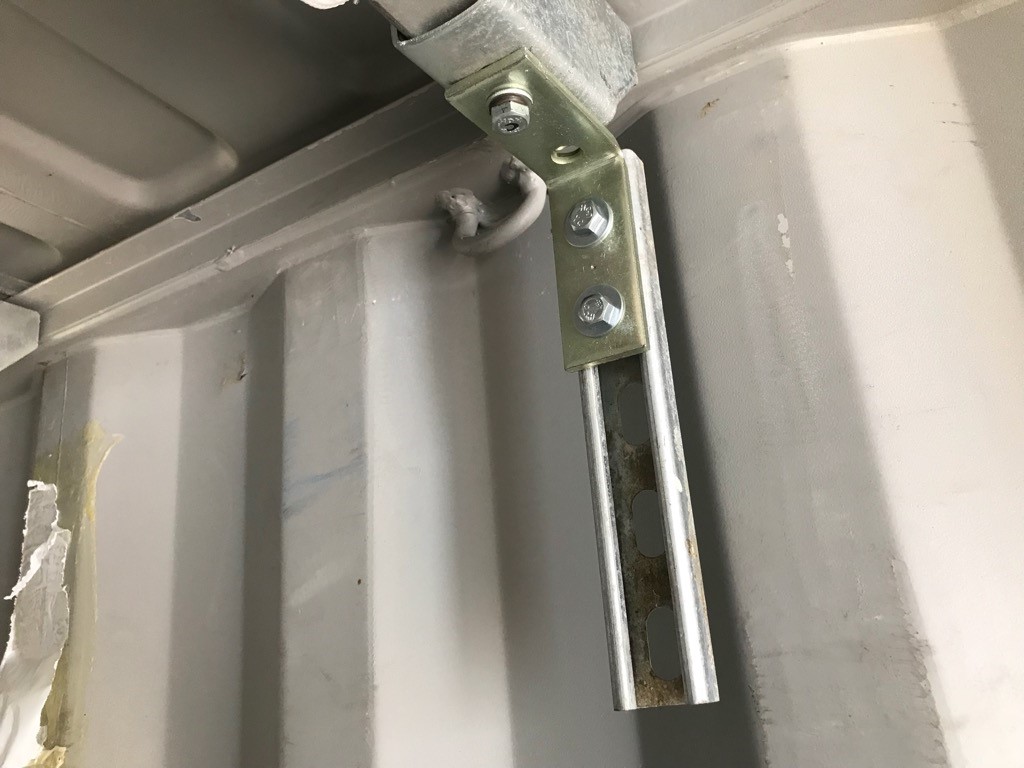
It turns out that small steel beams spanning the top of shipping containers are bolted into place, so it only took a few minutes to attach some Unistrut hardware when we Wanda Loons took our first good look at the container interior in May. I also took measurements and verified in a 3D drawing that we could indeed fit 20 vessels of approximately 22' in length each inside the container. As much as I had seen the Goodboy racks all over the east coast, after a trip to Lowe's - to the electrical section - I made my own V-rack out of Unistrut. (Sorry, Cliff!)

Right away I was concerned about the wobble. I gave some of the Goodboy roof racks a tug and noticed they wobbled also. V-racks wobble. Period. I had heard a story about a paddler crossing the Verrazano Bridge in a heavy wind and their concern the boat would shear off their car like broken propellor. I shared this concern. What if?
But with proper strapping, everything would surely be ok. A lot of strapping. An hours worth of fiddling and strapping and fiddling. Can't we be on the water by now? I slipped in the rain while fiddling with a strap and came down very hard on an elbow. Straps be damned!
Introducing the South African made Lockrack.
It was so promising yet so expensive and clearly made for paddleboards and surfskis - not for outriggers. I just couldn't get all the measurements I needed to verify whther it could work with an outrigger - until I clicked on etrailer.com. A Lockrack vendor, they have A LOT of photos and some decent videos featuring the product line. One even featured a Subaru Crosstrek - my car!
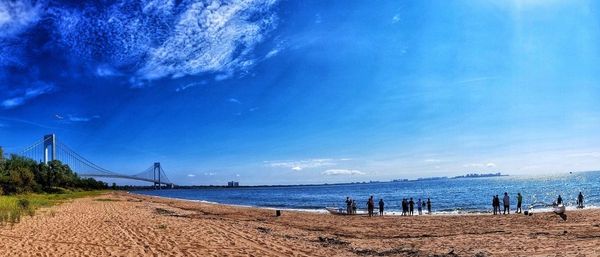
The Verrazano Bridge spans from Staten Island to Brooklyn, where the waters are pinched heading into the New York Harbor and the wind doesn't give a damn about your canoe!
Lockrack's customer service is virtually non-existent, but the folks at etrailer pick up the phone and answer questions, sometimes by making webpages with answers. Still I could not get exact measurements from Lockrack or etrailer. Which rack would work for me?
So, I pulled measurements off a photo. What else was I to do?

Lockrack makes a surfski model, and at first I was convinced this would be the closest match to an outrigger for rack sizing. However, after watching the Lockrack video for surfski I realized the rack arms were made to hug the low profile seat area. I was also concerned that the Lockrack is meant to go with factory crossbars, which are less than ideally spaced for 20'+ long boats.
The one obvious difference you will notice between a V-rack and a Lockrack is that on a V the hull is down and on the Lockrack it is up. Well, if you scroll way down to the start of this blog you will find my extensive below-the-waterline repairs. Gravity is great when you're paddling, but in storage or transit, I think it is best for the hull to be up. So, how in the world would I make this great Lockrack idea work for me?

Unistrut saves the day again.
The answer was Unistrut. You can see by the photo above how the factory rack actually has a very narrow ovulate crossbar with only about 30" width - the sides being taken up by bulky connectors to the siderails. I wanted to maximize the width of the car for easy boat loading and leave room for my ama or another outrigger or paddleboard altogether. I set the length of the adjustable Unistrut rails to 6' and added cross-pieces. The universal adapters were not required, and I was increasingly skeptical of Lockrack's new "X" version racks - that split apart to adjust to even wider paddleboard or boats. They just looked flimsy, so after a lot of head scratching I finally went with, of all things, the 2x SUP carrier - because of the size. I replaced the 10mm bolt that came with the package and used 1/4" x 20 x 1 1/2" pan head torx bolts to attach the Lockrack main bars to Unistrut nuts. These bolts and nuts will set you back about $12 if you buy them in packs, and if your Lowe's get as ransacked as mine you might be better off buying the misc hardware from McMaster-Carr.

Unistrut nut and stainless bolt versus included hardware for Lockrack. Nut and bolt cost about $1.50 each. You will need 4.

You will notice my hatch is fully up. No more banging of the forehead due to a low hatch pushed up against a longer rack bar.


A 2' 2-step Werner ladder also fits neatly in the Subaru Crosstrek 2018 cargo bay. No more standing-on-the-wheel-well acrobatics and straps for this paddler!
I could not understand what the black washers were for until I installed the Lockrack. They are basically spacers, required to allow the moving arms enough clearance to slide in and out. So you definitely need them.
Unfortunately, I live in a New York City neighborhood where people dig through the trash for recyclables and will take just about any kind of metal off the street (a band of thieves was brazenly stealing NYC public garbage cans earlier this year). Leaving the $275 Lockrack on the car was not an option, especially after I saw this salvage man stroll right past me.

Thus far I like the Lockrack, but here are a couple of things they won't show you. The inner arm isn't exactly something you can reach to adjust or turn on its side. I had to install the system as one piece. When you go to put the rubber base back in, it's a pain. And thirdly, the "keys" are something you are going to lose. They are cheap, black plastic and gonna roll off your car and into the sand. Goodbye. So, I plan on modeling one and 3D printing some in bright orange. Other than that, the next challenge is actually getting an outrigger canoe on and in it in preparation for a jaunt to Florida to pick up my new Kahele.
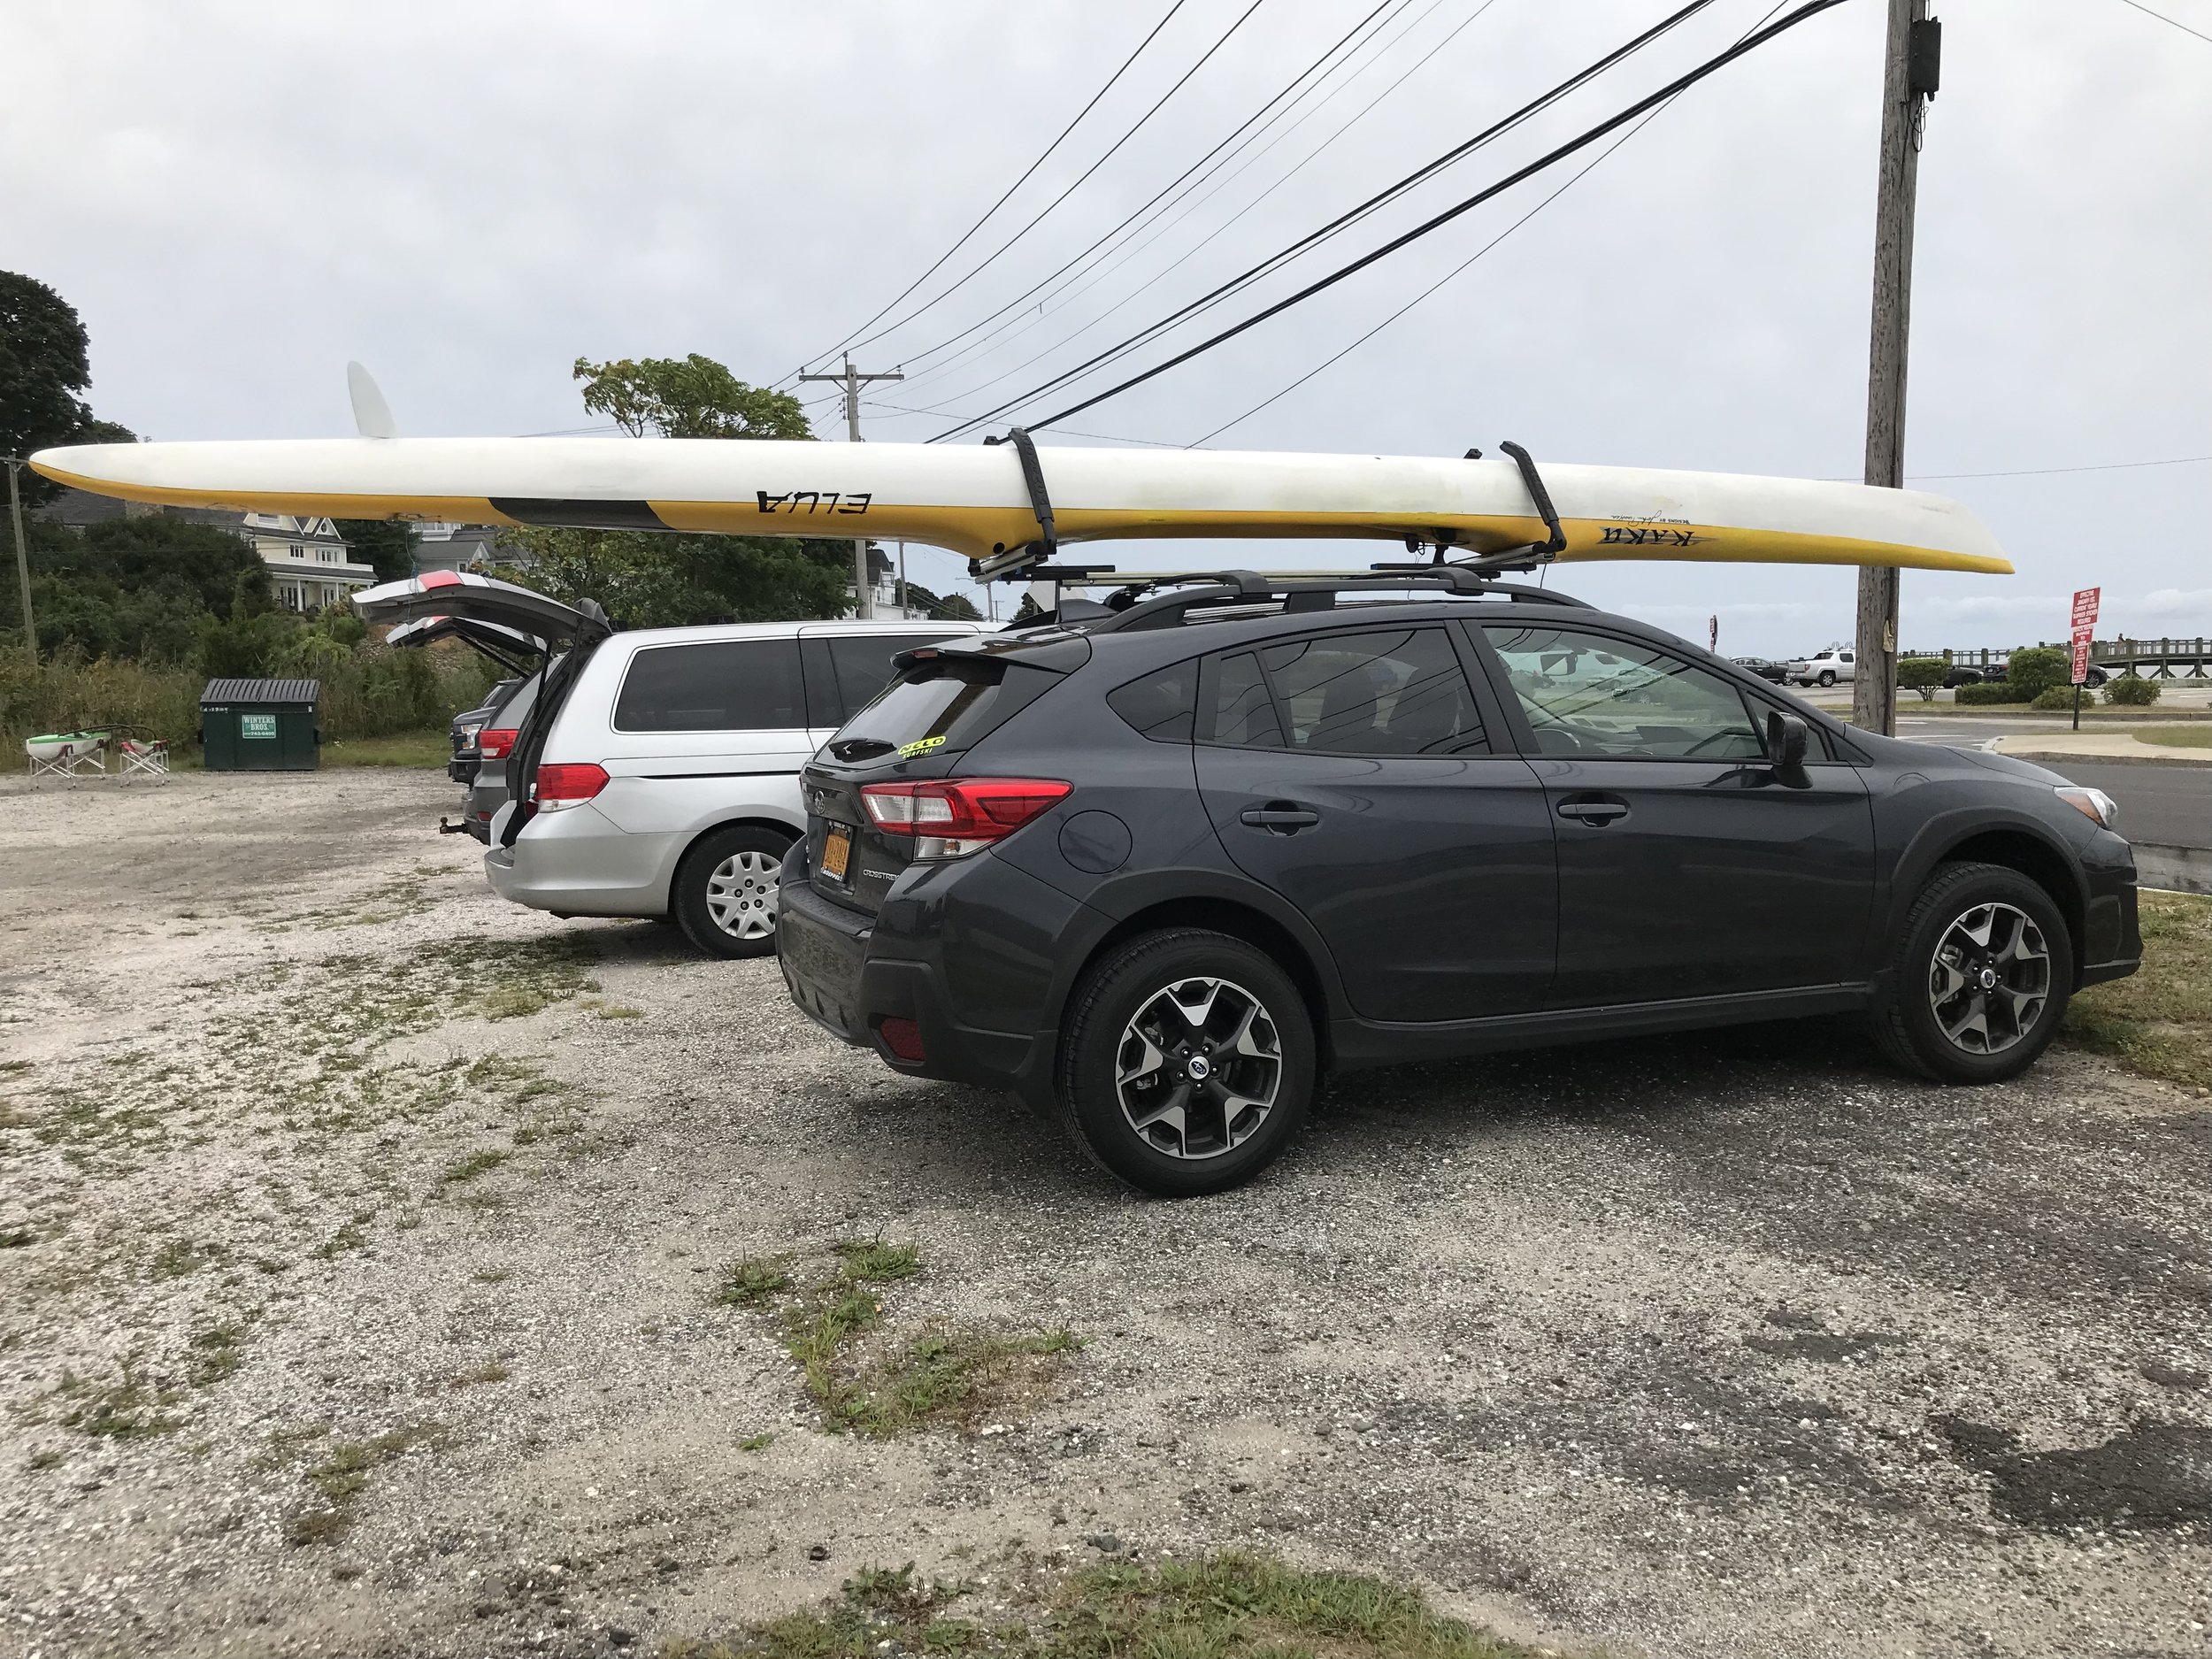
Waterline up.
I loaded the canoe in the same way I load a V-rack - by inserting the bow first then walking the stern end up. The racks as positioned landed right at the iako humps - the strongest parts of an outrigger canoe. The Lockrack arms did not fit this canoe snugly and were off by an inch or two. Time to add foam! The black rubber that comes with the Lockrack system is so stiff it's really only suitable for plastic boats, so I had pretty much assumed I'd want to add foam. I already had some Dakine rack pads around, and the Dakine foam (which they say is custom but is nothing more than pipe insulation) wraps reasonably well around the Lockrack arm.

You can't own enough foam when your canoe is carbon...
This foam is pipe insulation disguised under a Dakine logo on 600D polyester.

Pipe insulation. I mean, custom extruded foam...
I expect I will need to tweak foam and possibly the distance between Lockrack arms when I pick up my new canoe, but after that I expect to use the Lockrack as advertised. I reinstalled the whole system today in just under ten minutes, as well as loaded and unloaded the canoe at about a minute each. I decided to try driving with the Lockrack arms in, and they made an awful rattle, so I took them all out in about a minute and stashed them in the Subaru cargo hatch. The pin that holds the rack arms in place definitely has a chance of shearing off over time, especially with that looseness and rattle. I don't recommend keeping them in while driving at all. I will do a follow-up review once I complete my road trip with the new Kahele. See you on the water!
MetaLeash Quick Release Paddling Leash - SUP, surfski, outrigger, foil, prone
from $64.95
LIGHTER: at 4.5 ounces weighs half of other leashes, floats
SMALLER: 50% smaller than other leashes but still extends just as long
STRONGER: heavy duty webbing, stitching and YKK buckle system, 1600lb jacketed Samson Dyneema retractable leash, stainless steel clasp system (no hidden mystery hardware or plasticware like other leashes). Can be used with included Dyneema loops, without hardware, for greatest strength.
SAFER: easy to inspect, high contrast (red, orange, hot pink, lime, yellow or black cuff), red, yellow, orange or pink leash, dual quick release/connect for either race start or getting out of tricky situations
SIZING FOR OUTRIGGER, SUP, SURFSKI, FOIL, PRONE: Retractable leash comes in 9’ or 6’ length. Hardware comes in different sizes for conditions or hands.
SIZING FOR FIT ABOVE CALF: Leash cuff is to be worn above the calf or connected to waist strap.
Epic Weekend: Surfki reprise in Sandy Hook, New Jersey, Atlantic Ocean
Sandy Hook is a large sandy hook capturing a bay on its west side and the sandy surface of the submarine Hudson Canyon in the Atlantic Ocean on its east. When the National Park Ranger told us there were great white sharks in the waters, we immediately loaded up a paddleboard and sought out the salty sea. Gateway National Recreation Area encompasses Sandy Hook and other awe inspiring oceanic sections of New Jersey and New York, and it was to the Hook I headed (with a borrowed Epic V10, courtesy of the Hoboken Cove Community Boathouse) for what was my first surfski session since my immersion with Oscar Chalupsky.
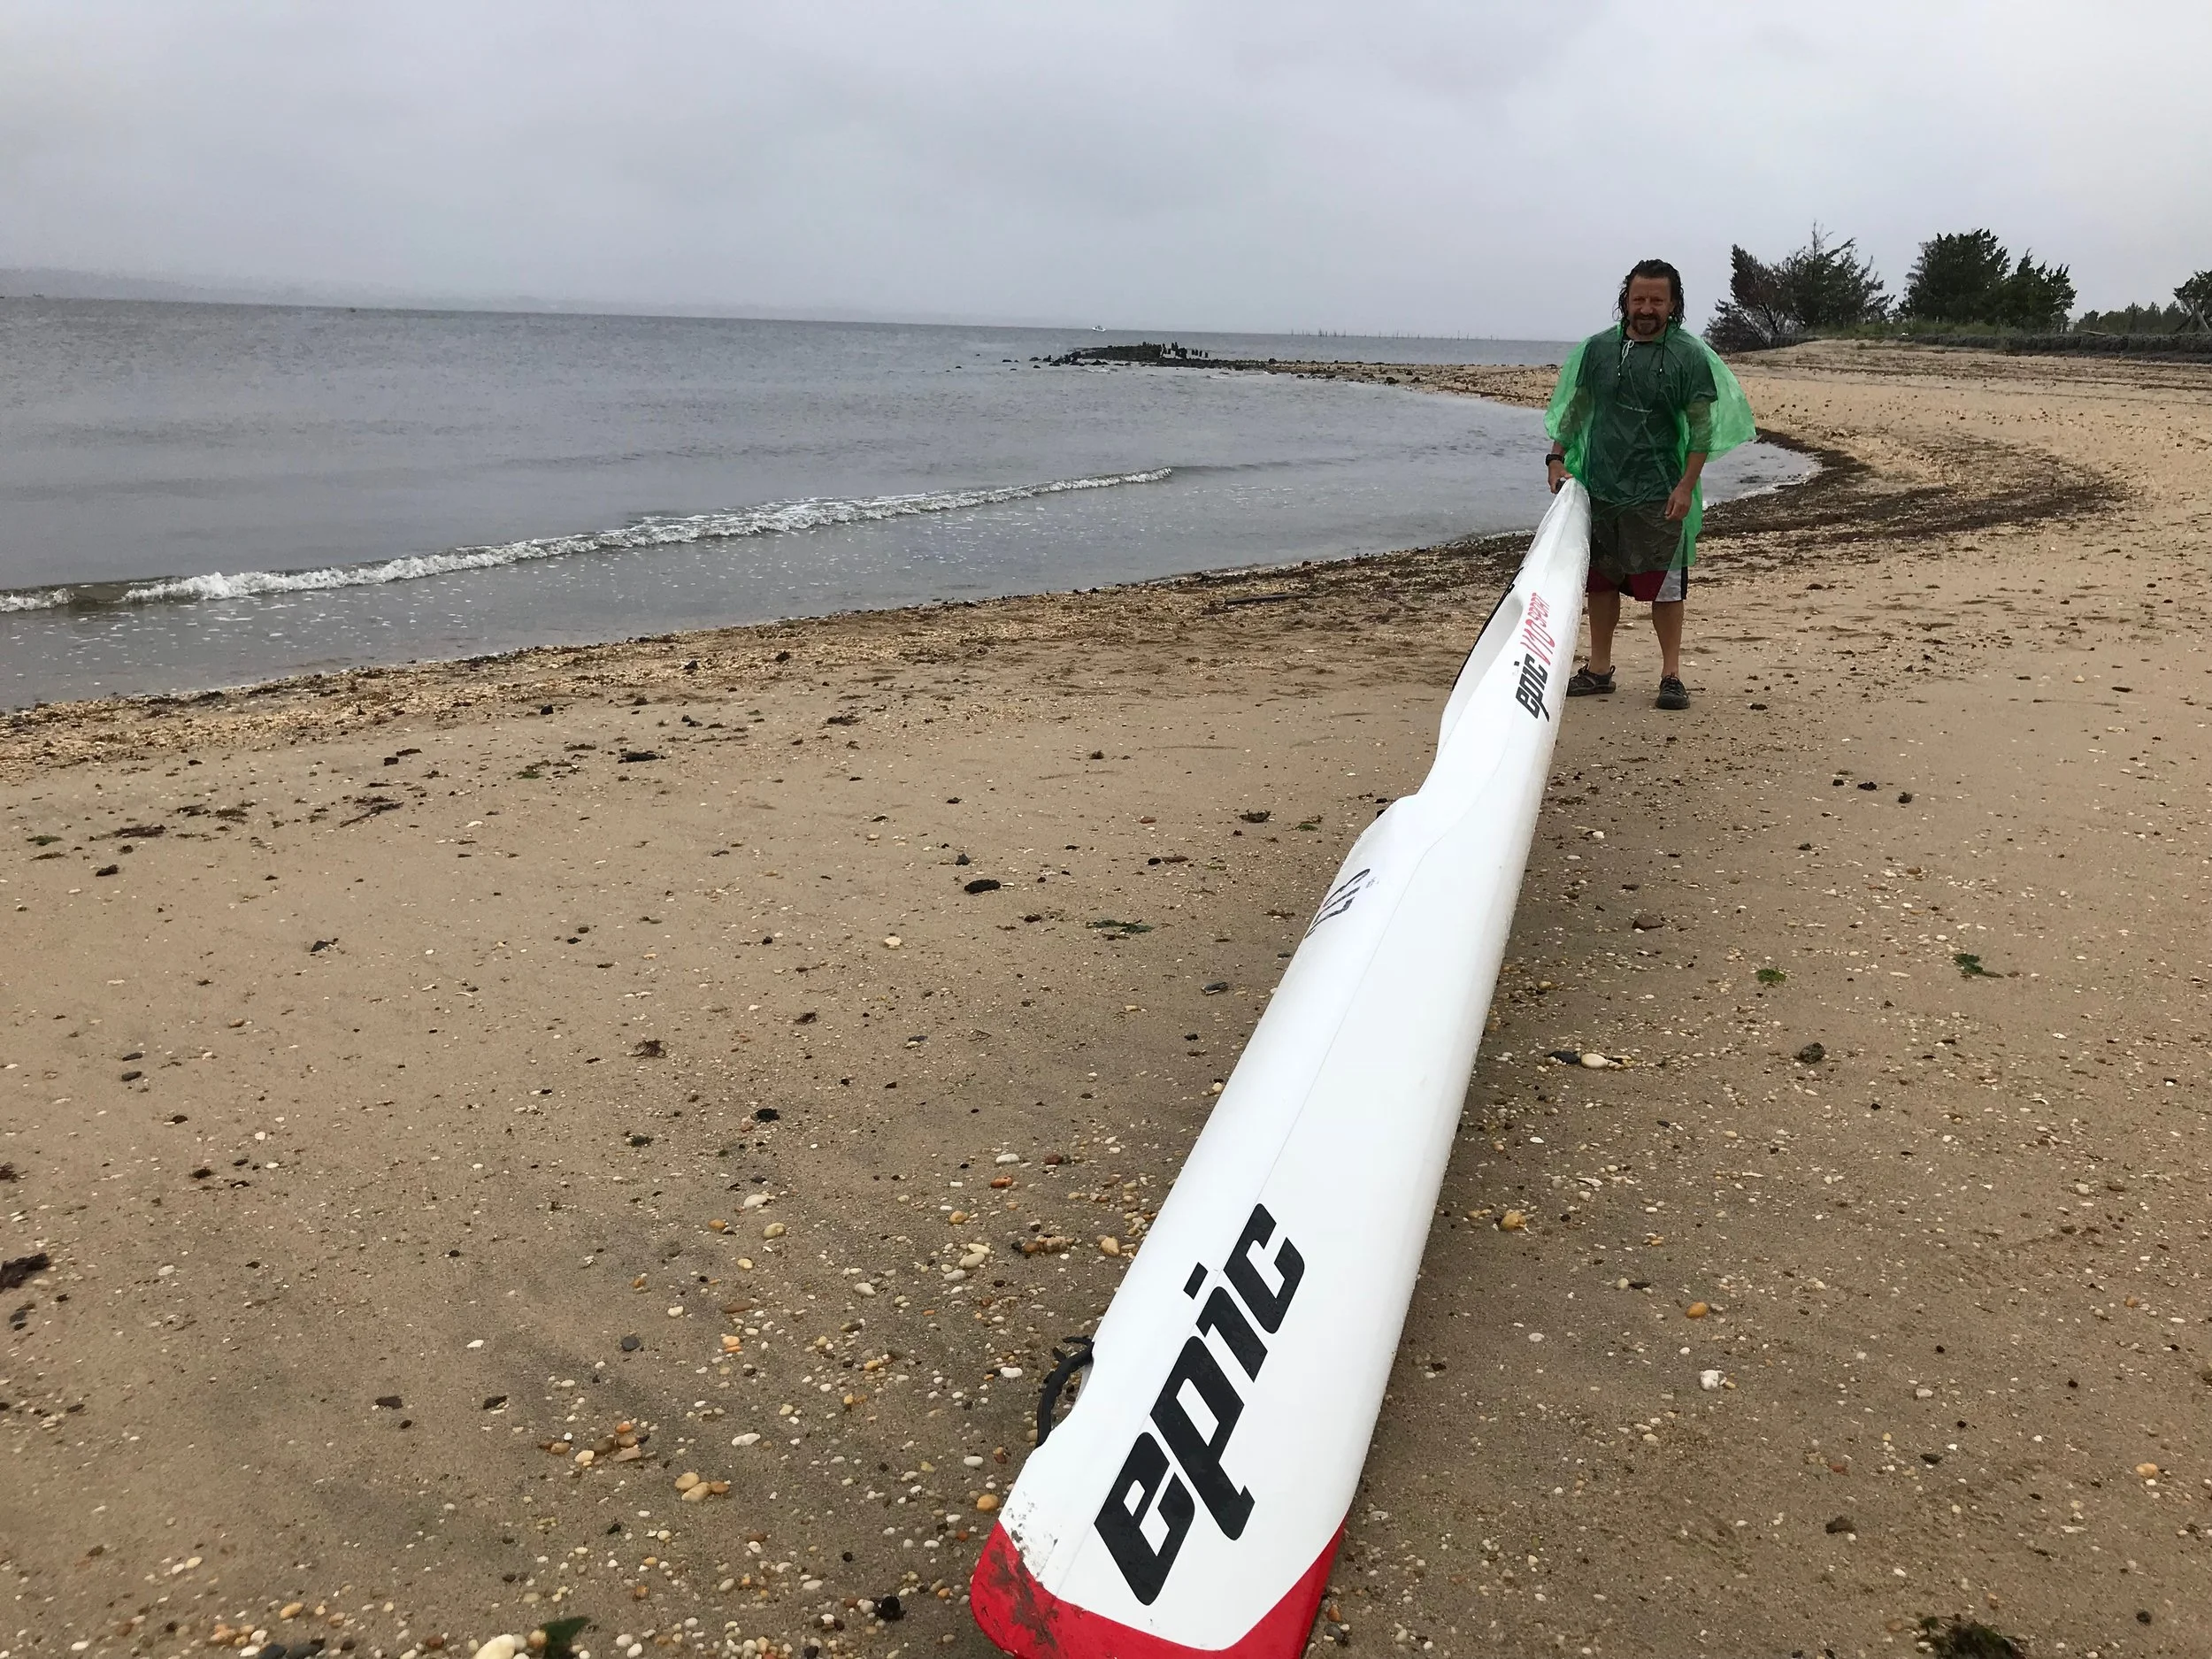
I am a fourth season outrigger paddler and only a second season OC1 paddler, with few options to launch directly from my Brooklyn headquarters via surfski. The Hoboken Cove just happens to be loaded with kayaks and kayakers and puts 6000 people a year into its boats. I'm one of them. I hitched myself to the Cove's staycation and ventured out with them to Sandy Hook for this rare opportunity to get back onto a surfski. It was the Hoboken Cove after all that gave me my first two wobbly minutes in a surfski before I headed out to Michigan in June for surfski immersion with Oscar C.
ARE YOU INTIMIDATED BY YOUR SURFSKI?
It's not uncommon. Just who did I think I was, launching a V10 into the Atlantic Ocean? I set myself side-saddle in the V10, took one stroke while lifting one leg in, took another and...off I went. Remembering my paddle was my outrigger, I got into a pattern of bracing against the wind driven surf, making long football field arcs. I got the wobbles turning over the surf and questioned my sanity, but I returned to the beach over and over to drop my legs out side-saddle. With each dry return to the shore, I became more confident. Oscar was right, practice makes permanent. Just remember to practice!
All too often we emphasize distance over drills. I hear from seasoned outrigger paddlers that they lean too far to the left and get sore. Why not just practice how far you can lean? Why not practice bracing? Why not practice simply getting into the kayak or canoe?

Keith Tsang practices sand surfing at Sandy Hook! (Photo courtesy of Kirsten Brink)

While we were loading up the V10 a fellow came up and asked me what it was - some kind of sea kayak? - he wanted to know. I explained that it was, and that it was called a surfski. So, you can literally surf in it? he wanted to know. Yes, I told him, yes. At least in our imaginations, for we aren't that practiced yet!

The other Oscar in my paddling life - a volunteer at Hoboken Cove - tempting the great white sharks of Sandy Hook! (Photo courtesy of Kirsten Brink)

The kayaks spent the night tucked in grasses on the beach!

Bathymetry of Hudson Canyon - a submarine canyon to rival the Grand Canyon.