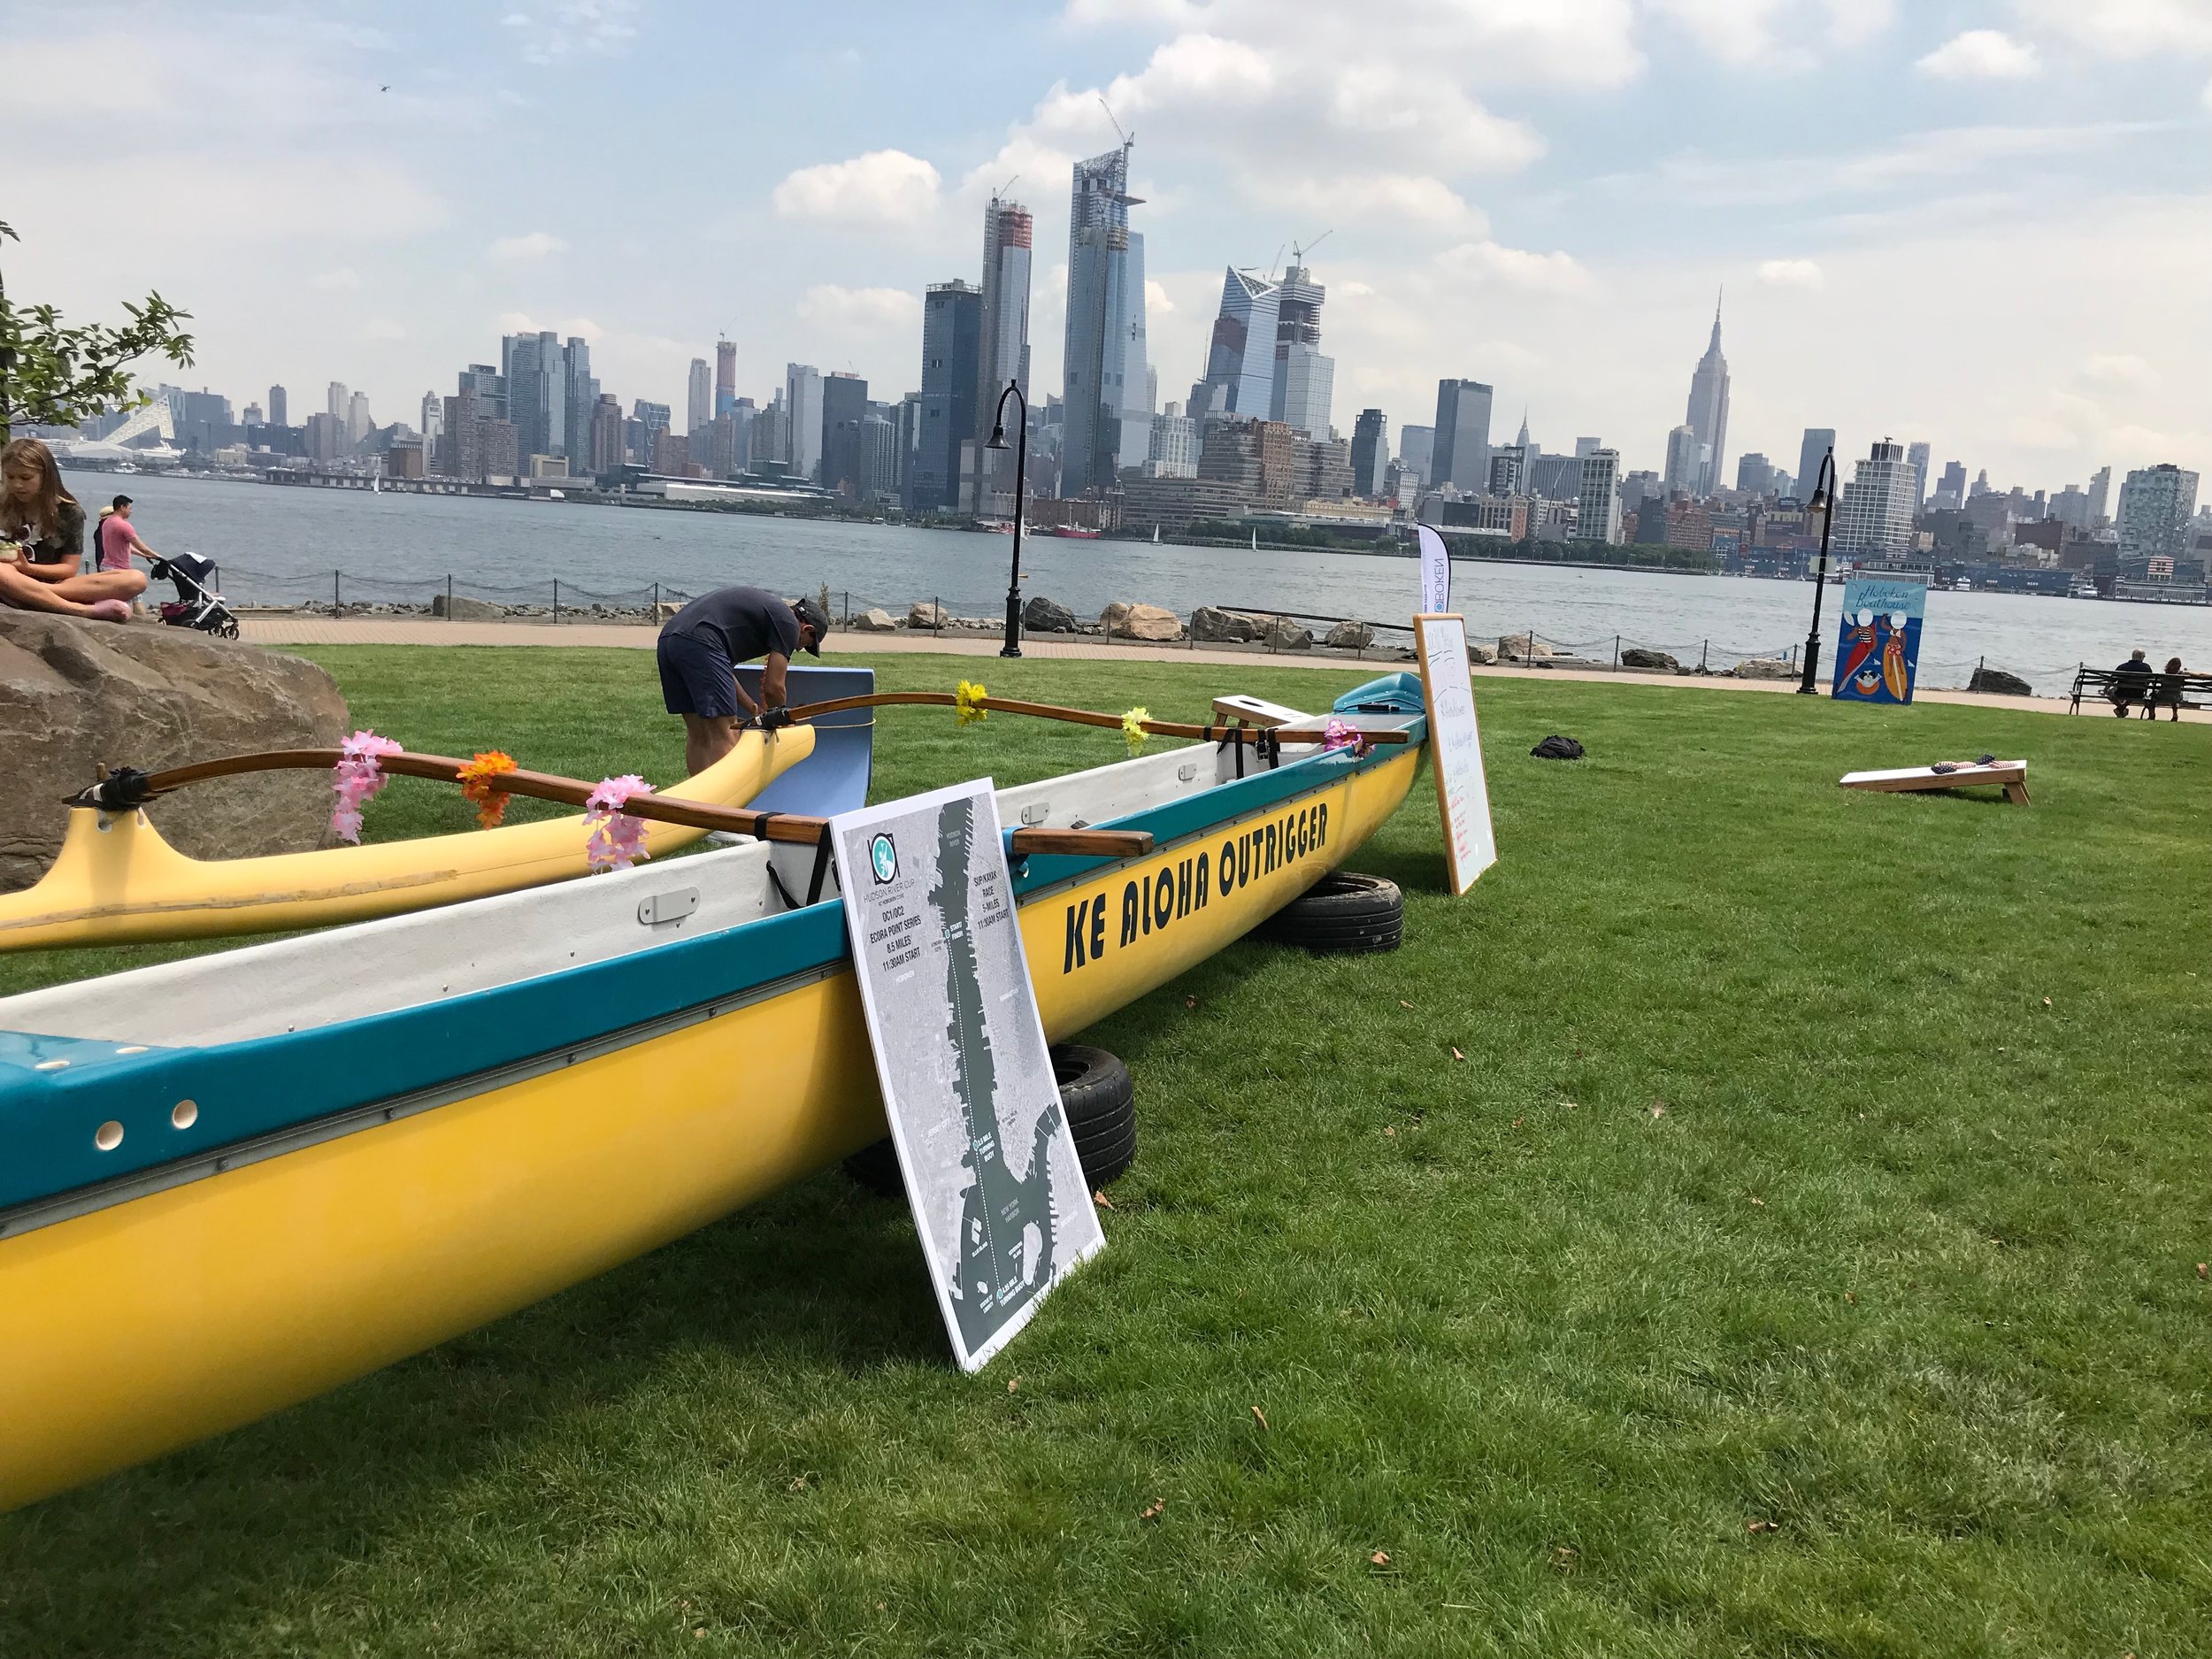
The Hudson River does not quite equal the Columbia Gorge in her ability to lure paddlers, but this year some 45+ paddlers, from OC1, OC2, surfski, SUP and even the salty kayak, dared test her brackish green waters.
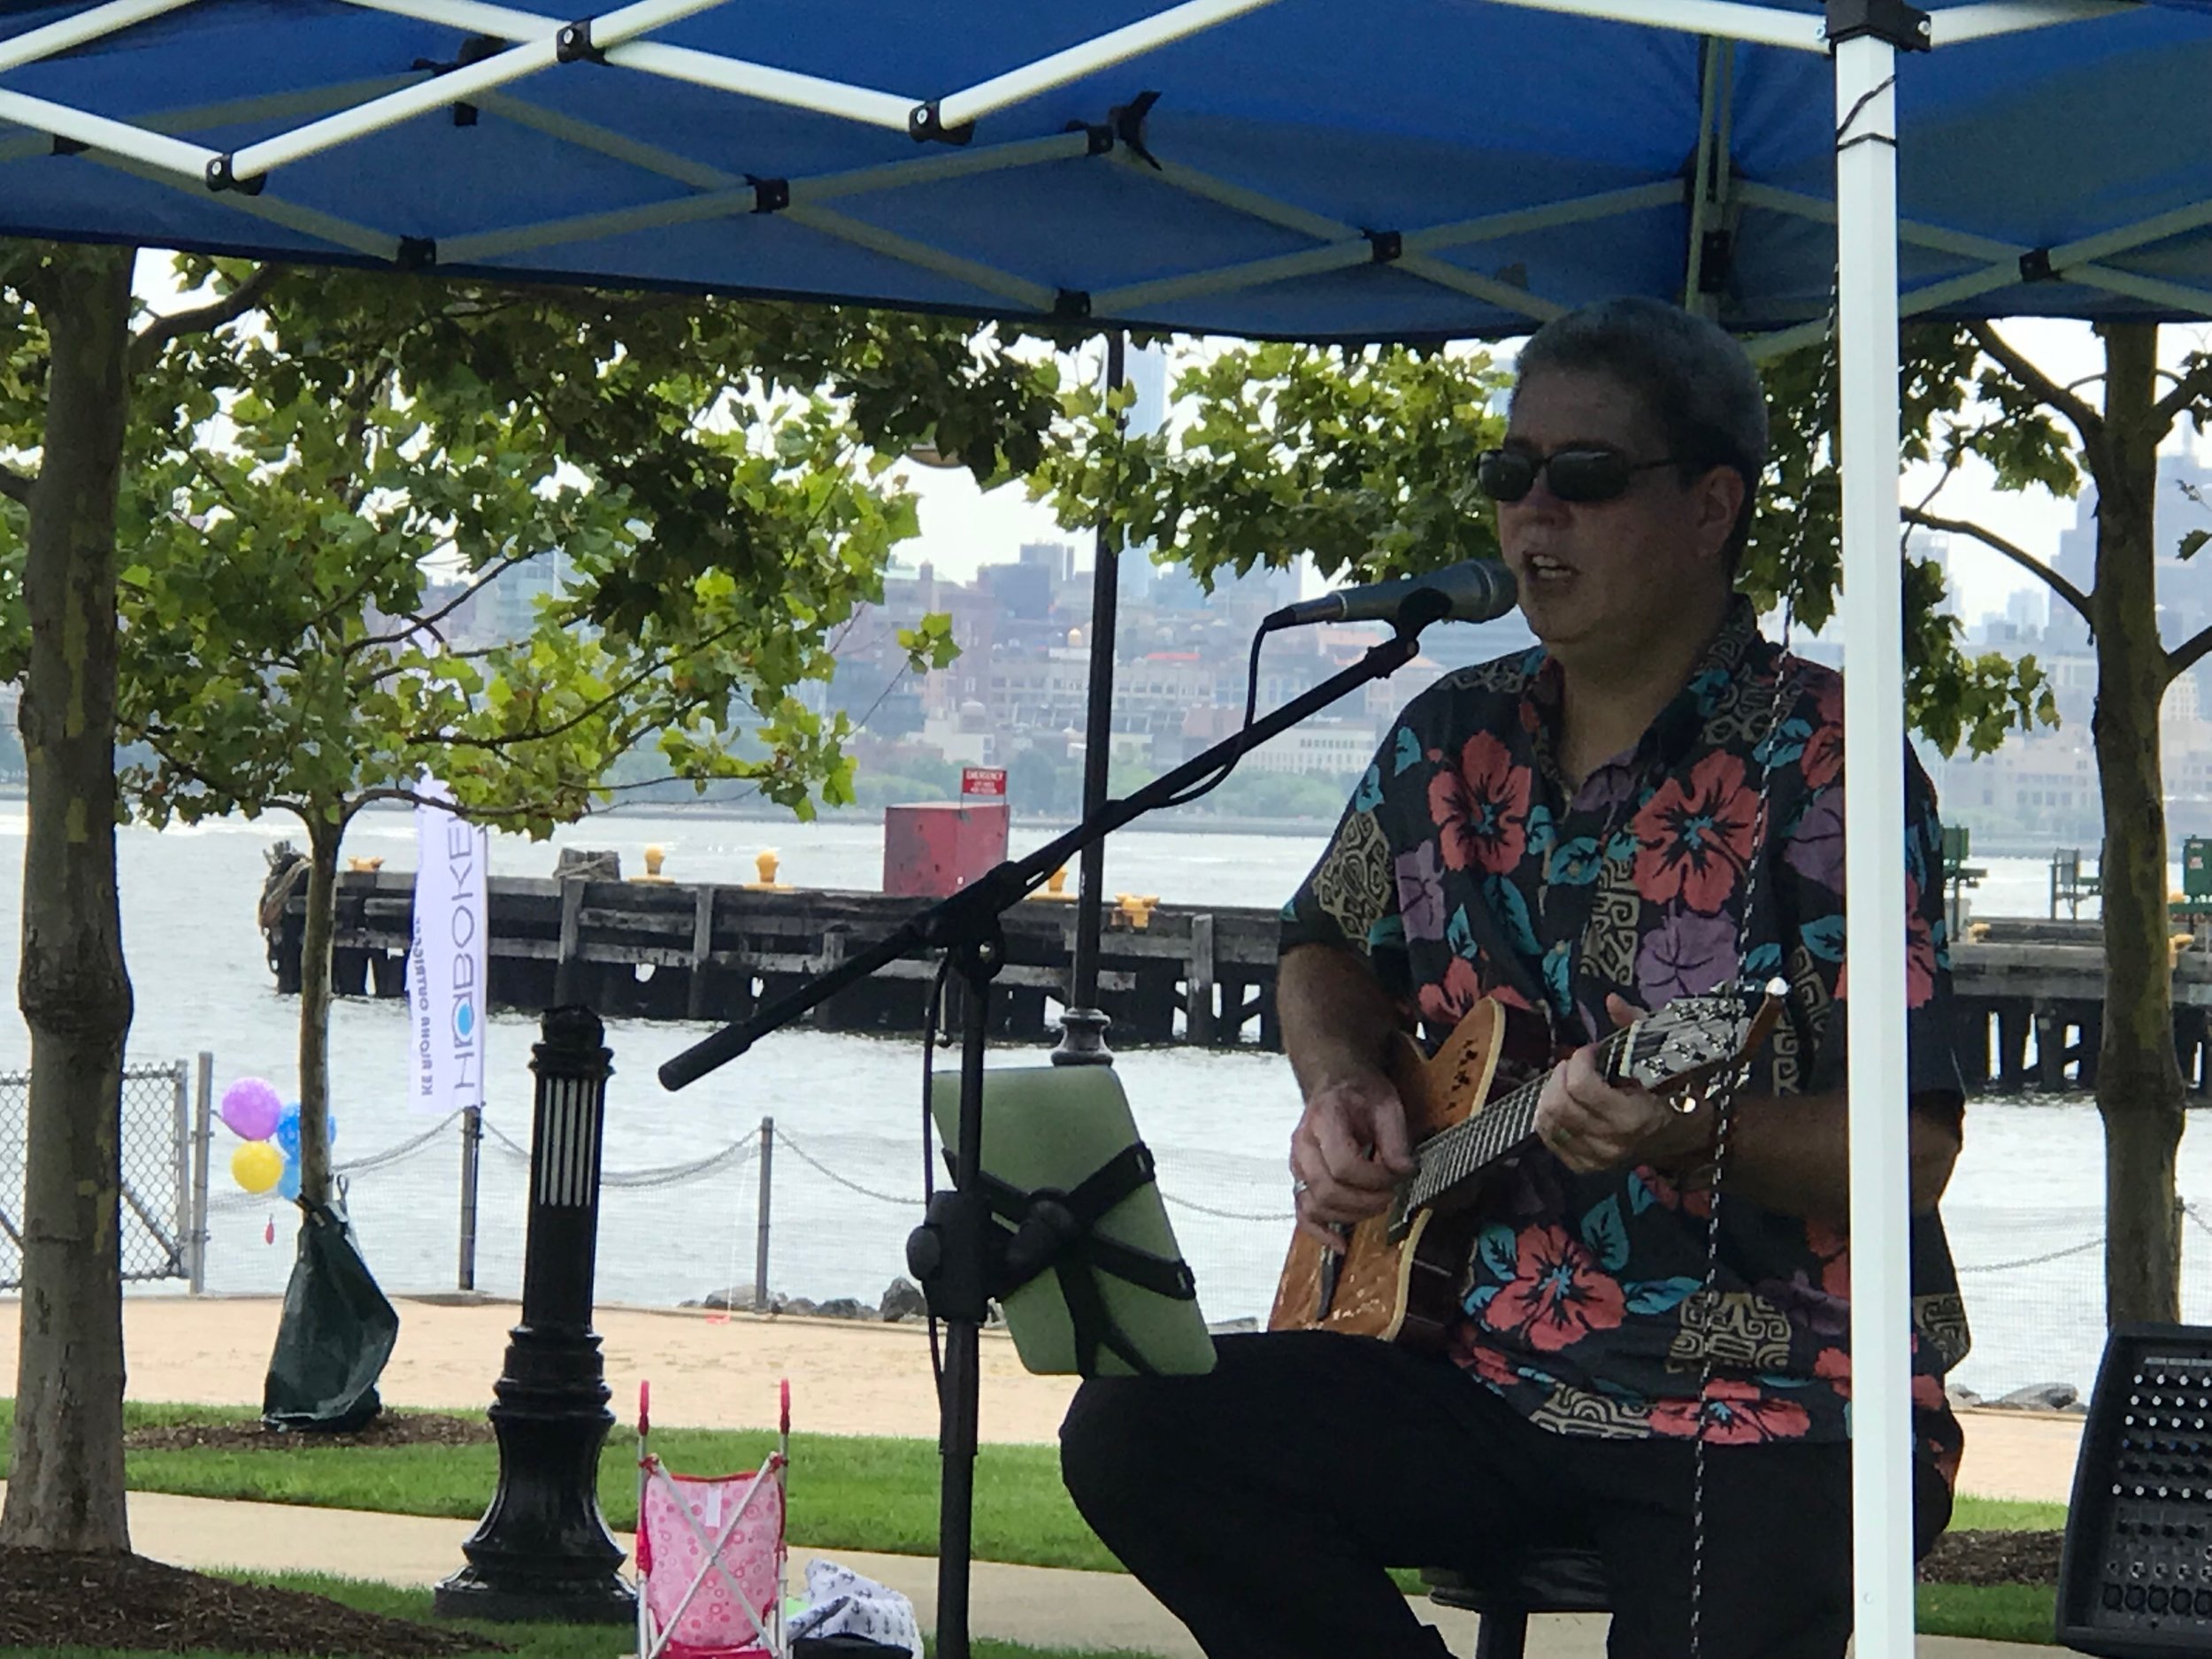
Hosted by the Ke Aloha outrigger club of Hoboken, this small craft race jumped its participant numbers, setting the stage for the possibility of an even larger race in 2019 as word gets out. What's in it for the paddler? Well, that would be the washing machine action of the New York Harbor churning beneath the feet of Lady Liberty. It is definitely one of those races where you will lose a few seconds off your personal best due to gawking.
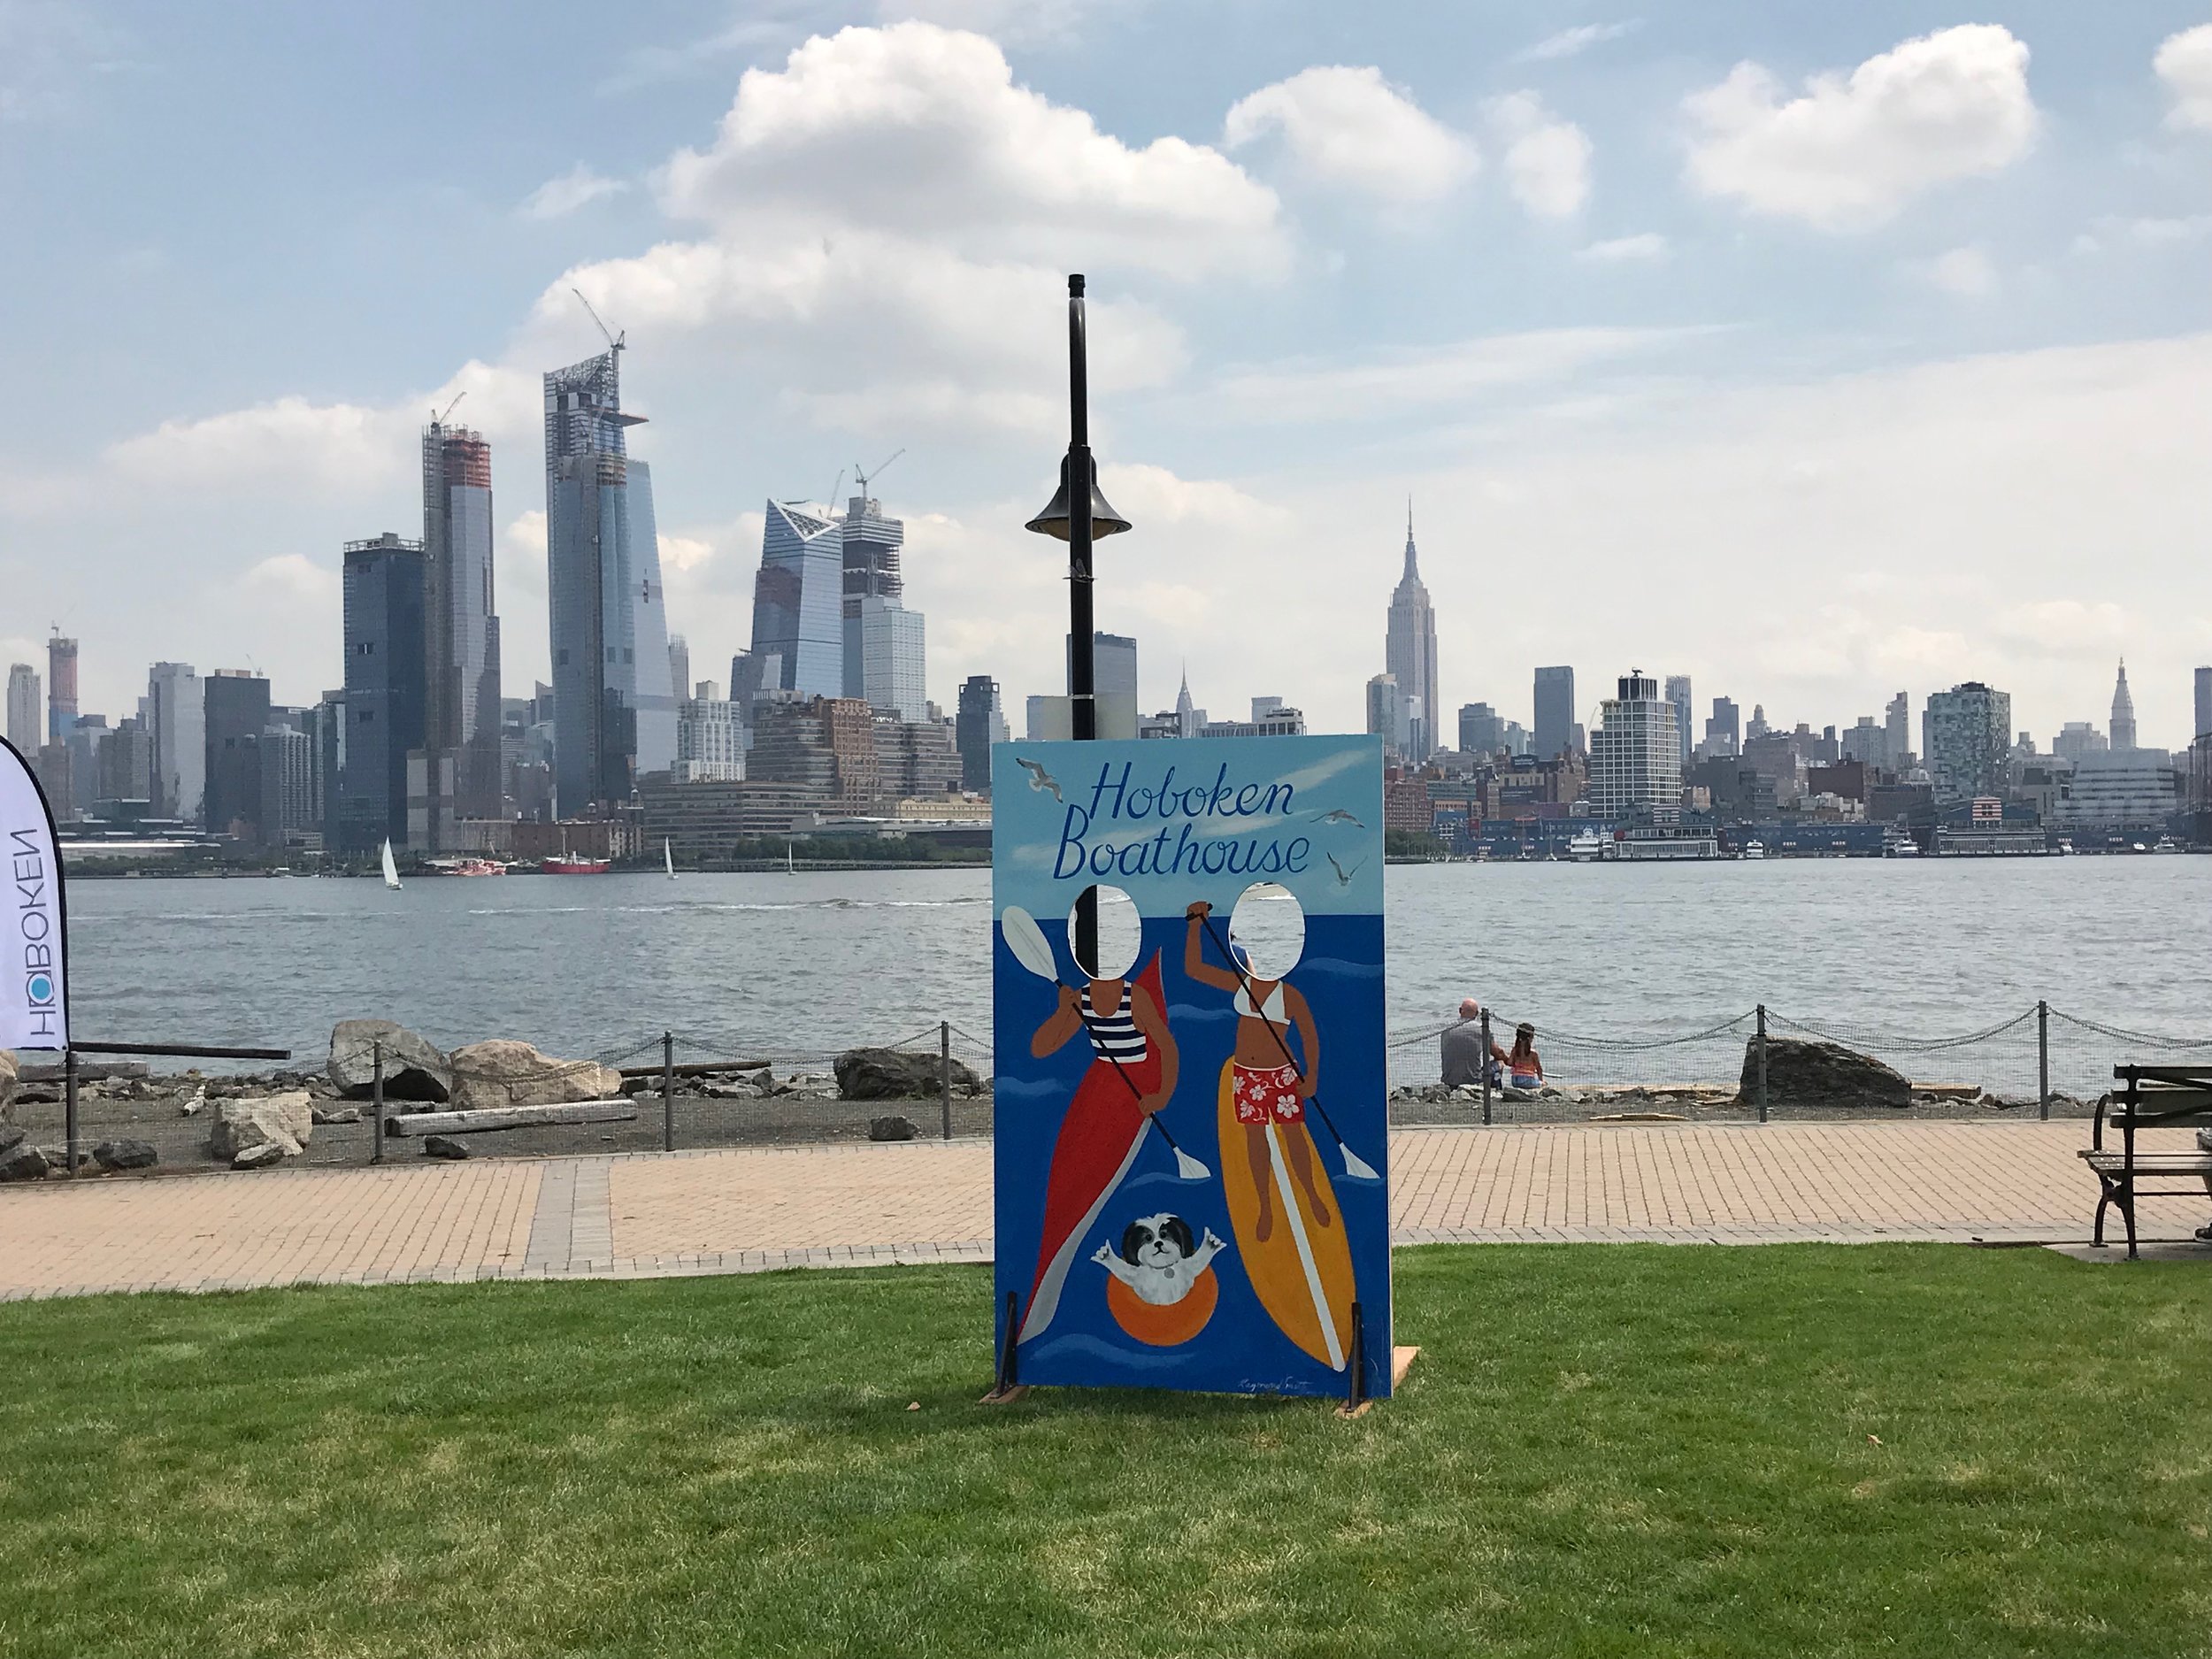
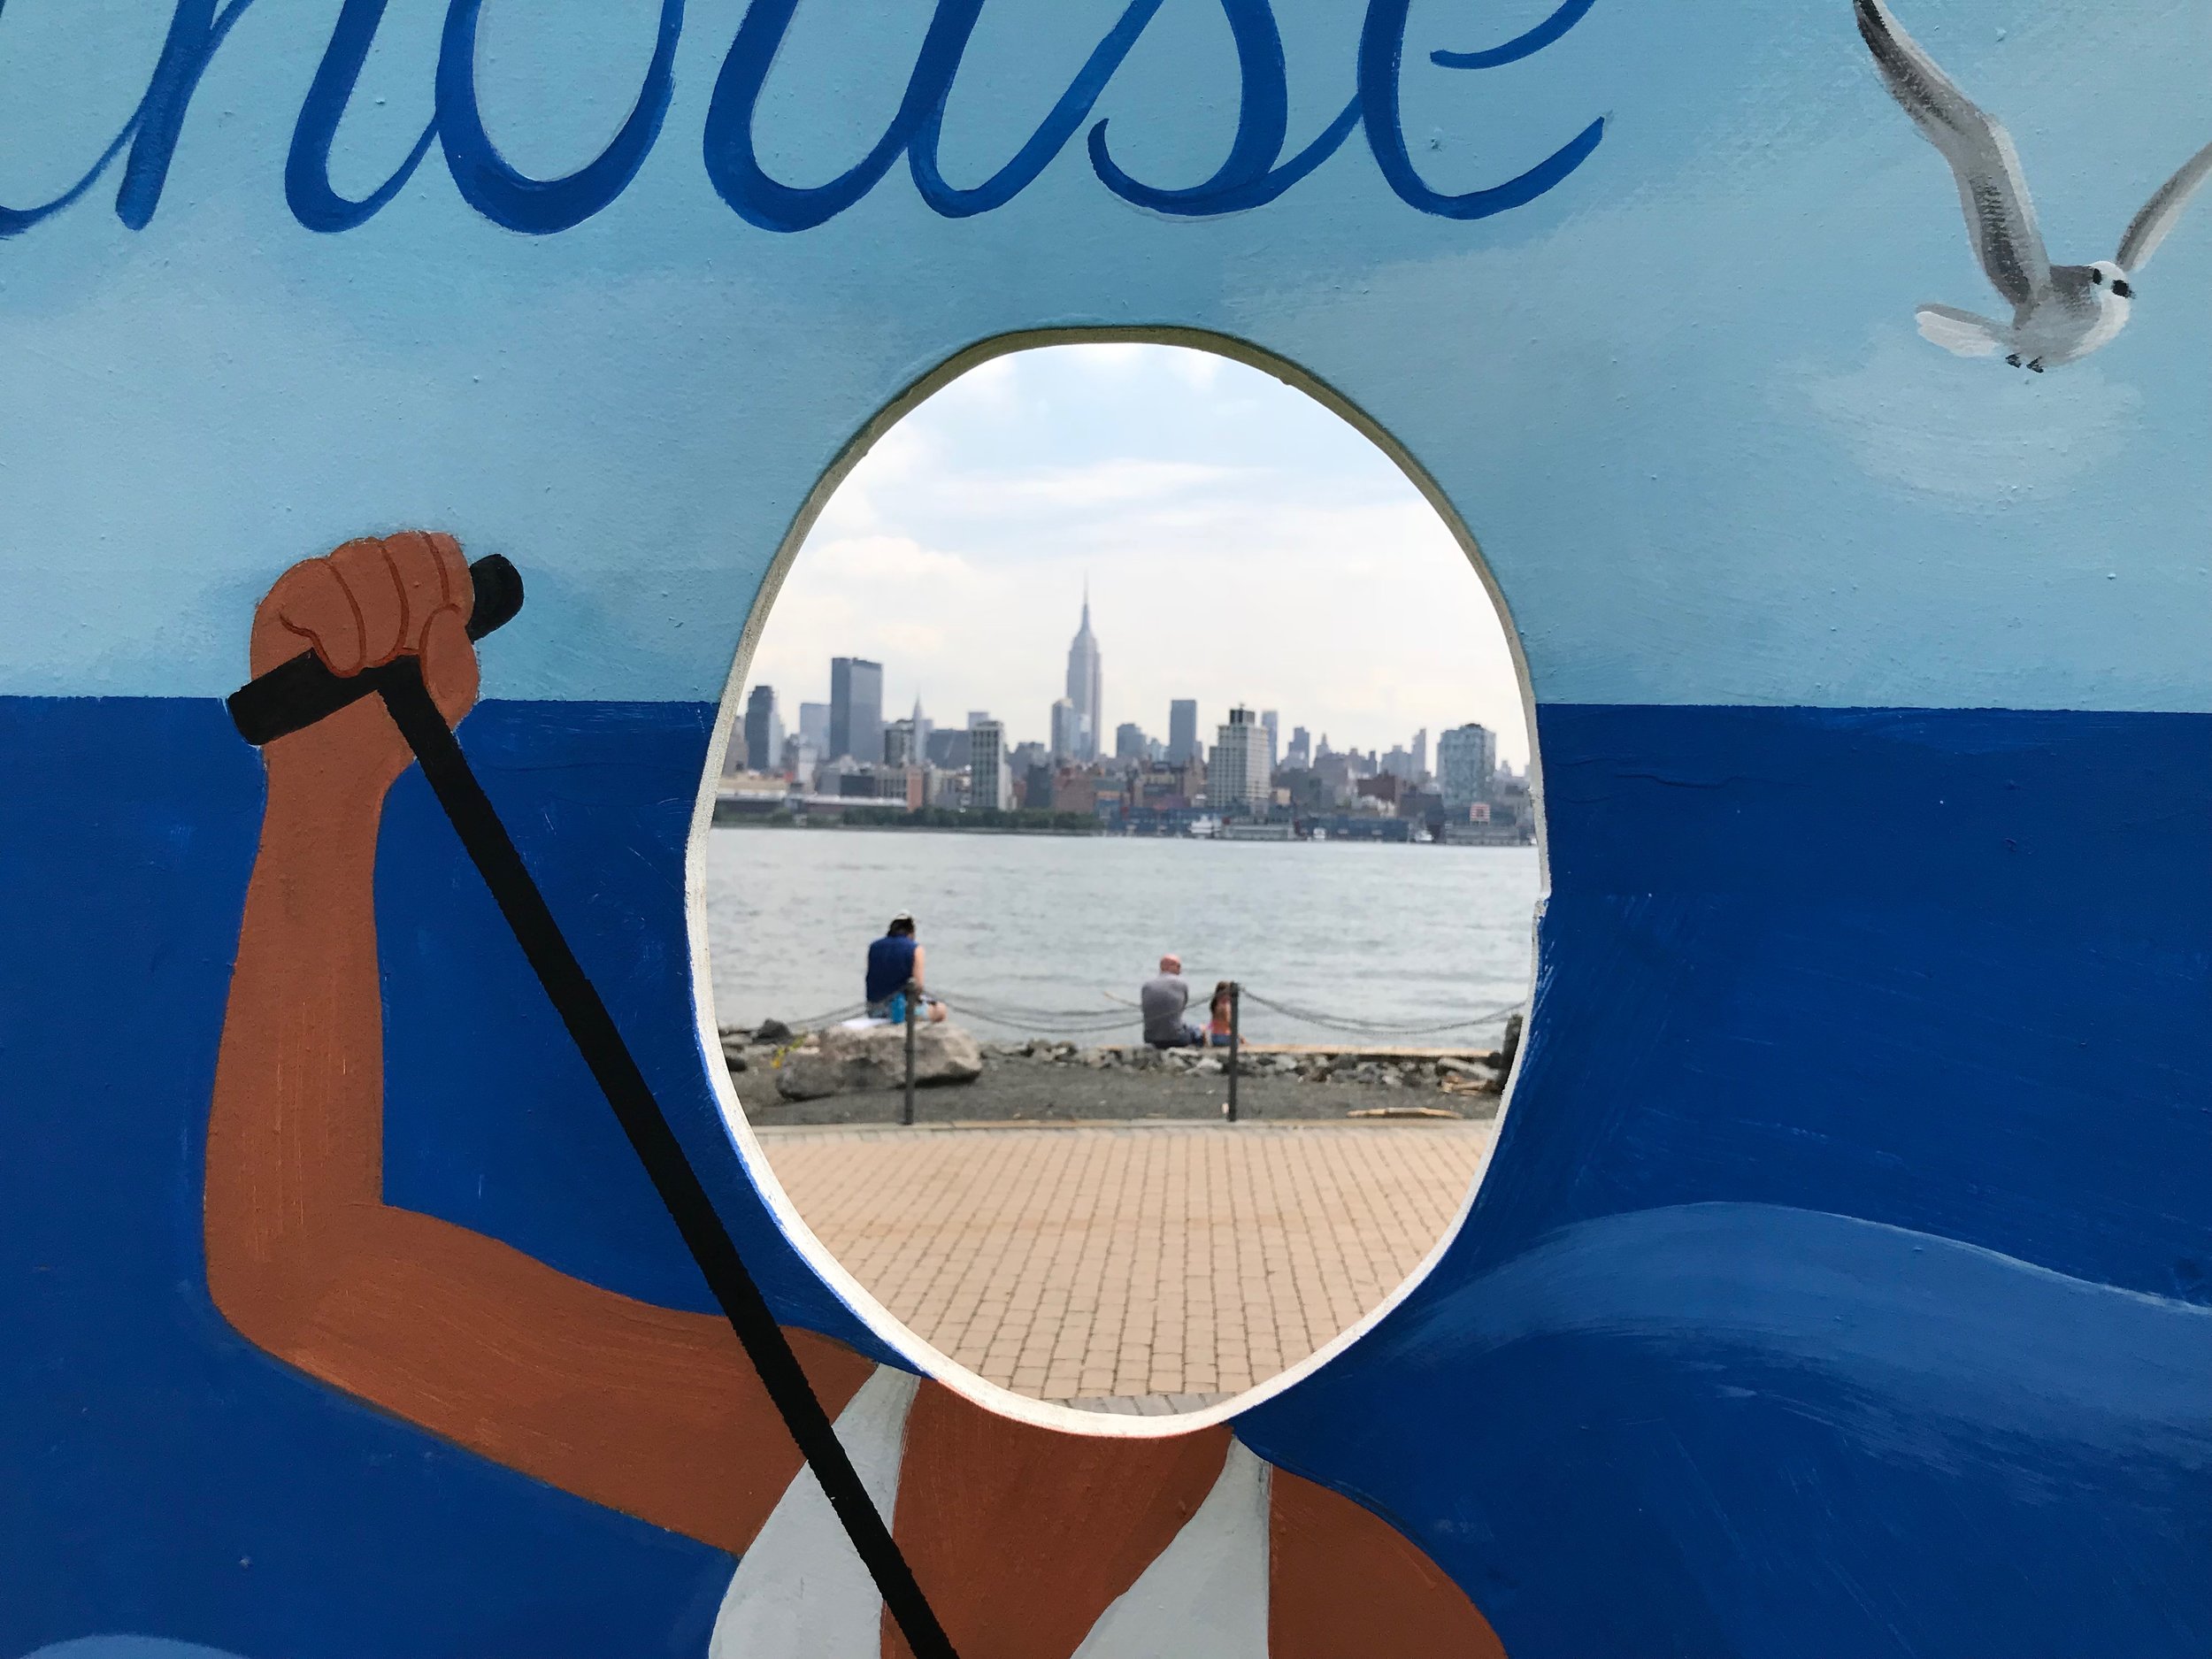
Where exactly is Hoboken, and why would you want to paddle there, you ask? Well, it has better views of Manhattan than Manhattan has of itself. And if you're a paddler, it means you can take the fastest route between New Jersey and New York straight across the river that divides them. See you on the water!
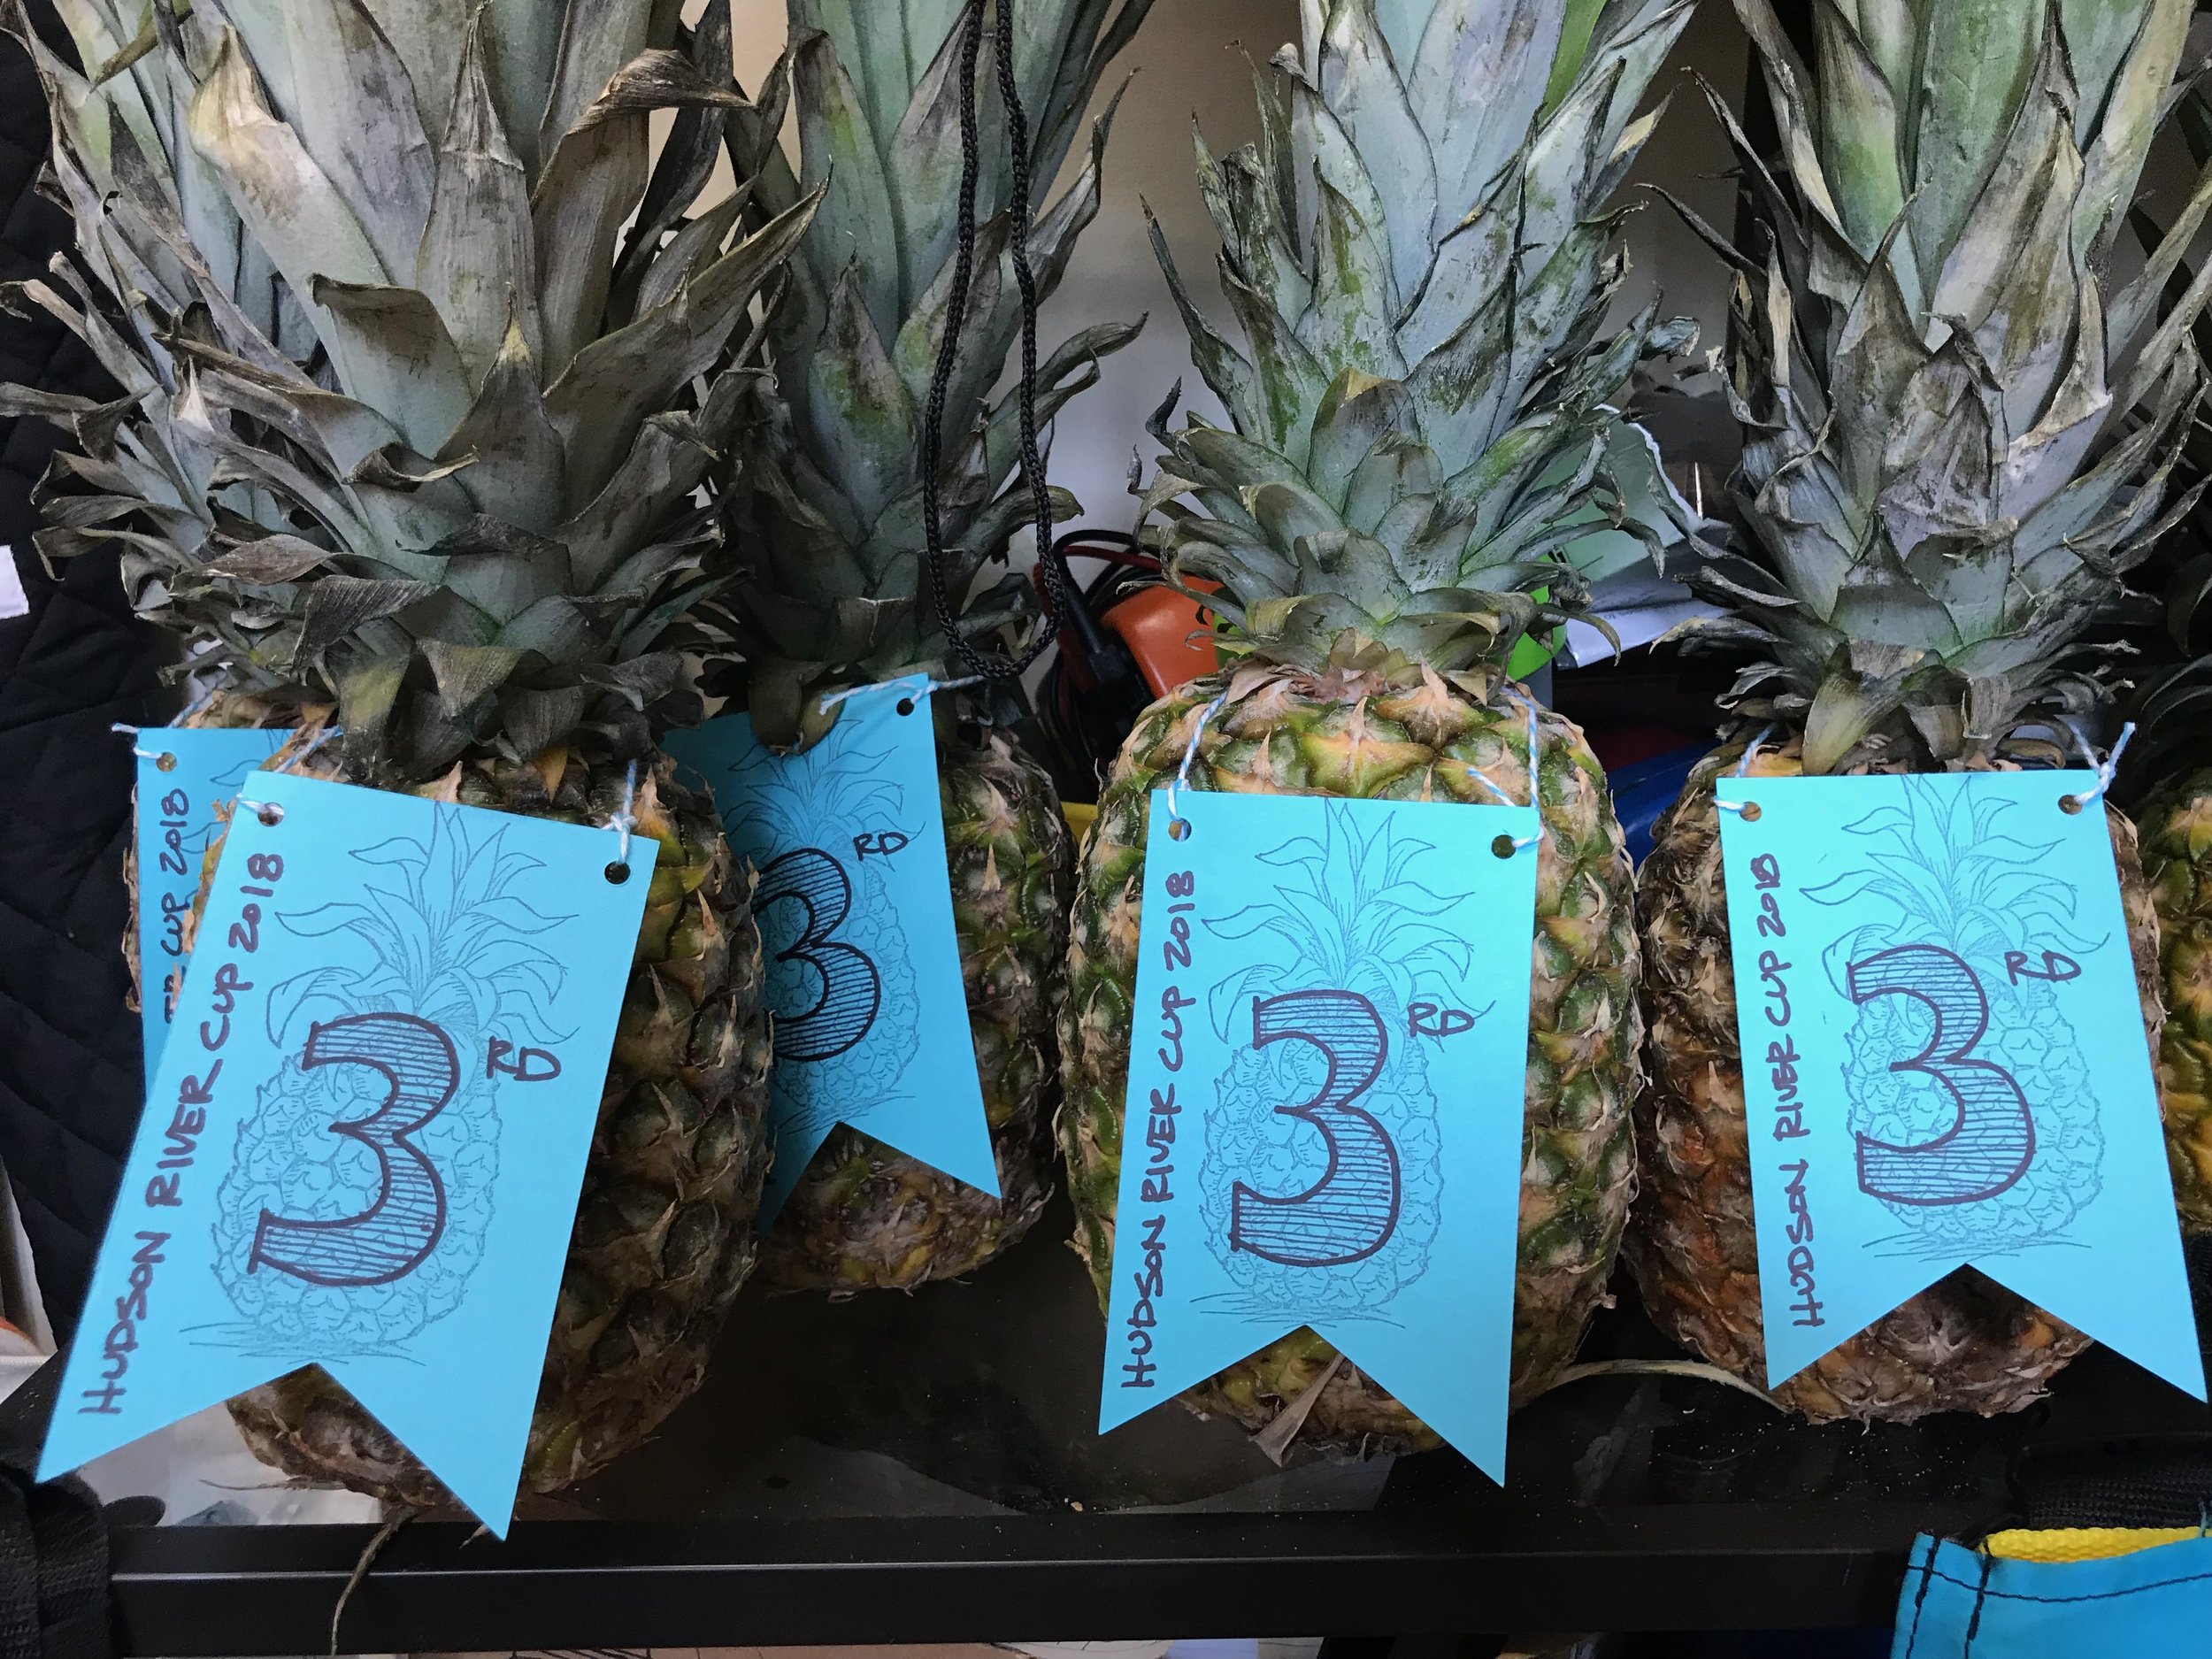
Why my sister turned into a sticker making nut around the same time I turned into a paddling nut, only the sirens who seduce us to our passions could say. Lest we crash upon the rocks, at least we will we able to identify our stuff from our stickers! These are cut from marine grade vinyl. If you are interested in stickers (which come in different fonts, colors and sizes) for your paddle gear or boat, hit me up by email.
At the start of every race, I question my sanity. There is no harder work than trying to beat the ocean at its own game. Soon the heart rate builds, the power propels the canoe forward, and I get lost in some kind of alpha wave trance with flickers of beta - where my brain analyzes the waves, conjures some distraction then ultimately sinks into a meditative state. I pull myself, stroke by stroke, forward across the water and eventually, around forever minus twenty-two minutes to be exact, I cross the finish line between two yellow buoys.
The Ghost Hope, a Puakea Kaku Elua, origin Hawaii, exact circa per Johnny Puakea: “Back in the day.”
Ted Taylor, head honcho at Manu'iwa Outrigger Club, introduces himself before the race as an Englishman, coaching outrigger, in Connecticut. Nothing like hearing a Hawaiian Mahalo with a UK twang on the sands of an ocean inlet in the USA. Later at the luau, Ted requests a plug on social media (click here for media/photo links). Was this race better than last year's, he wants to know? For me, yes. And it isn't just because I took first place (for finishing in 2018 the race I started in 2017) nor because I took first place in the $175 canoe class. It was, dare we utter its name, because of the Milford Triangle.
The Legendary and Deadly Milford Triangle
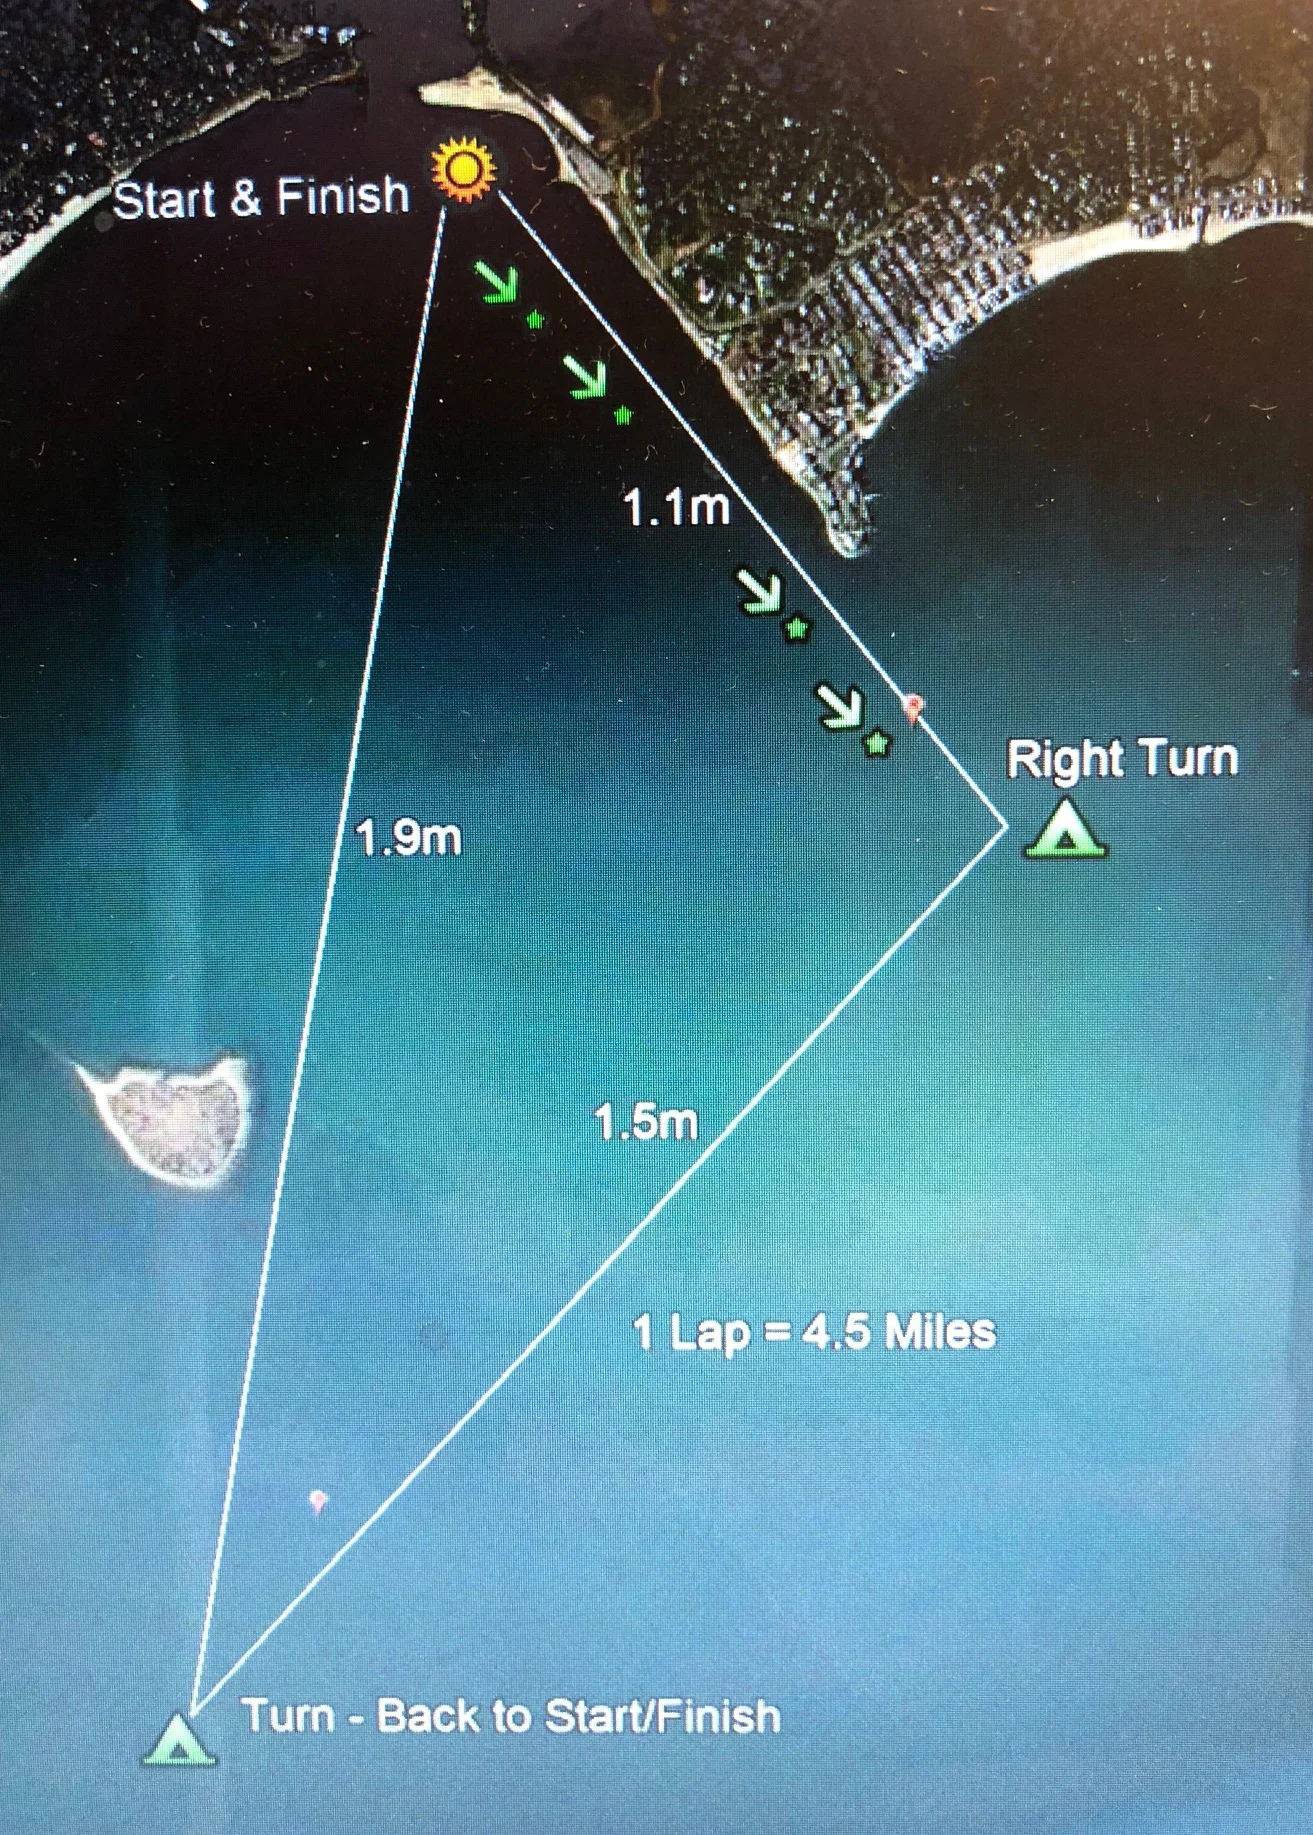
I personally find races that follow a coast a little difficult to mentally tag. Coastline unfolds like a rocky rope with nothing terribly remarkable. The triangular buoy set up gave me a mental check and a goal with enough frequency to keep me motivated. It also gave me three different wave and current patterns - four actually - because the southerwestly wind (that some of us surfed after the second buoy turn) tapered off near Charles Island. So the overall pattern was 1: flattish , 2: turn into the wind with bigger waves (ama bouncing up), 3: turn and surf (bow lifting high, ama rolling under the swell) and 4: calm and flat for a dash to home - then repeat. On the second round we all had a learning curve down, and mentally it wasn't just another 4.5 miles but 1.1 mile (buoy turn = Pavlovian reward), 1.5 mile (buoy turn) and 1.9 mile (beer is in sight).
A first place trophy for a first place race!
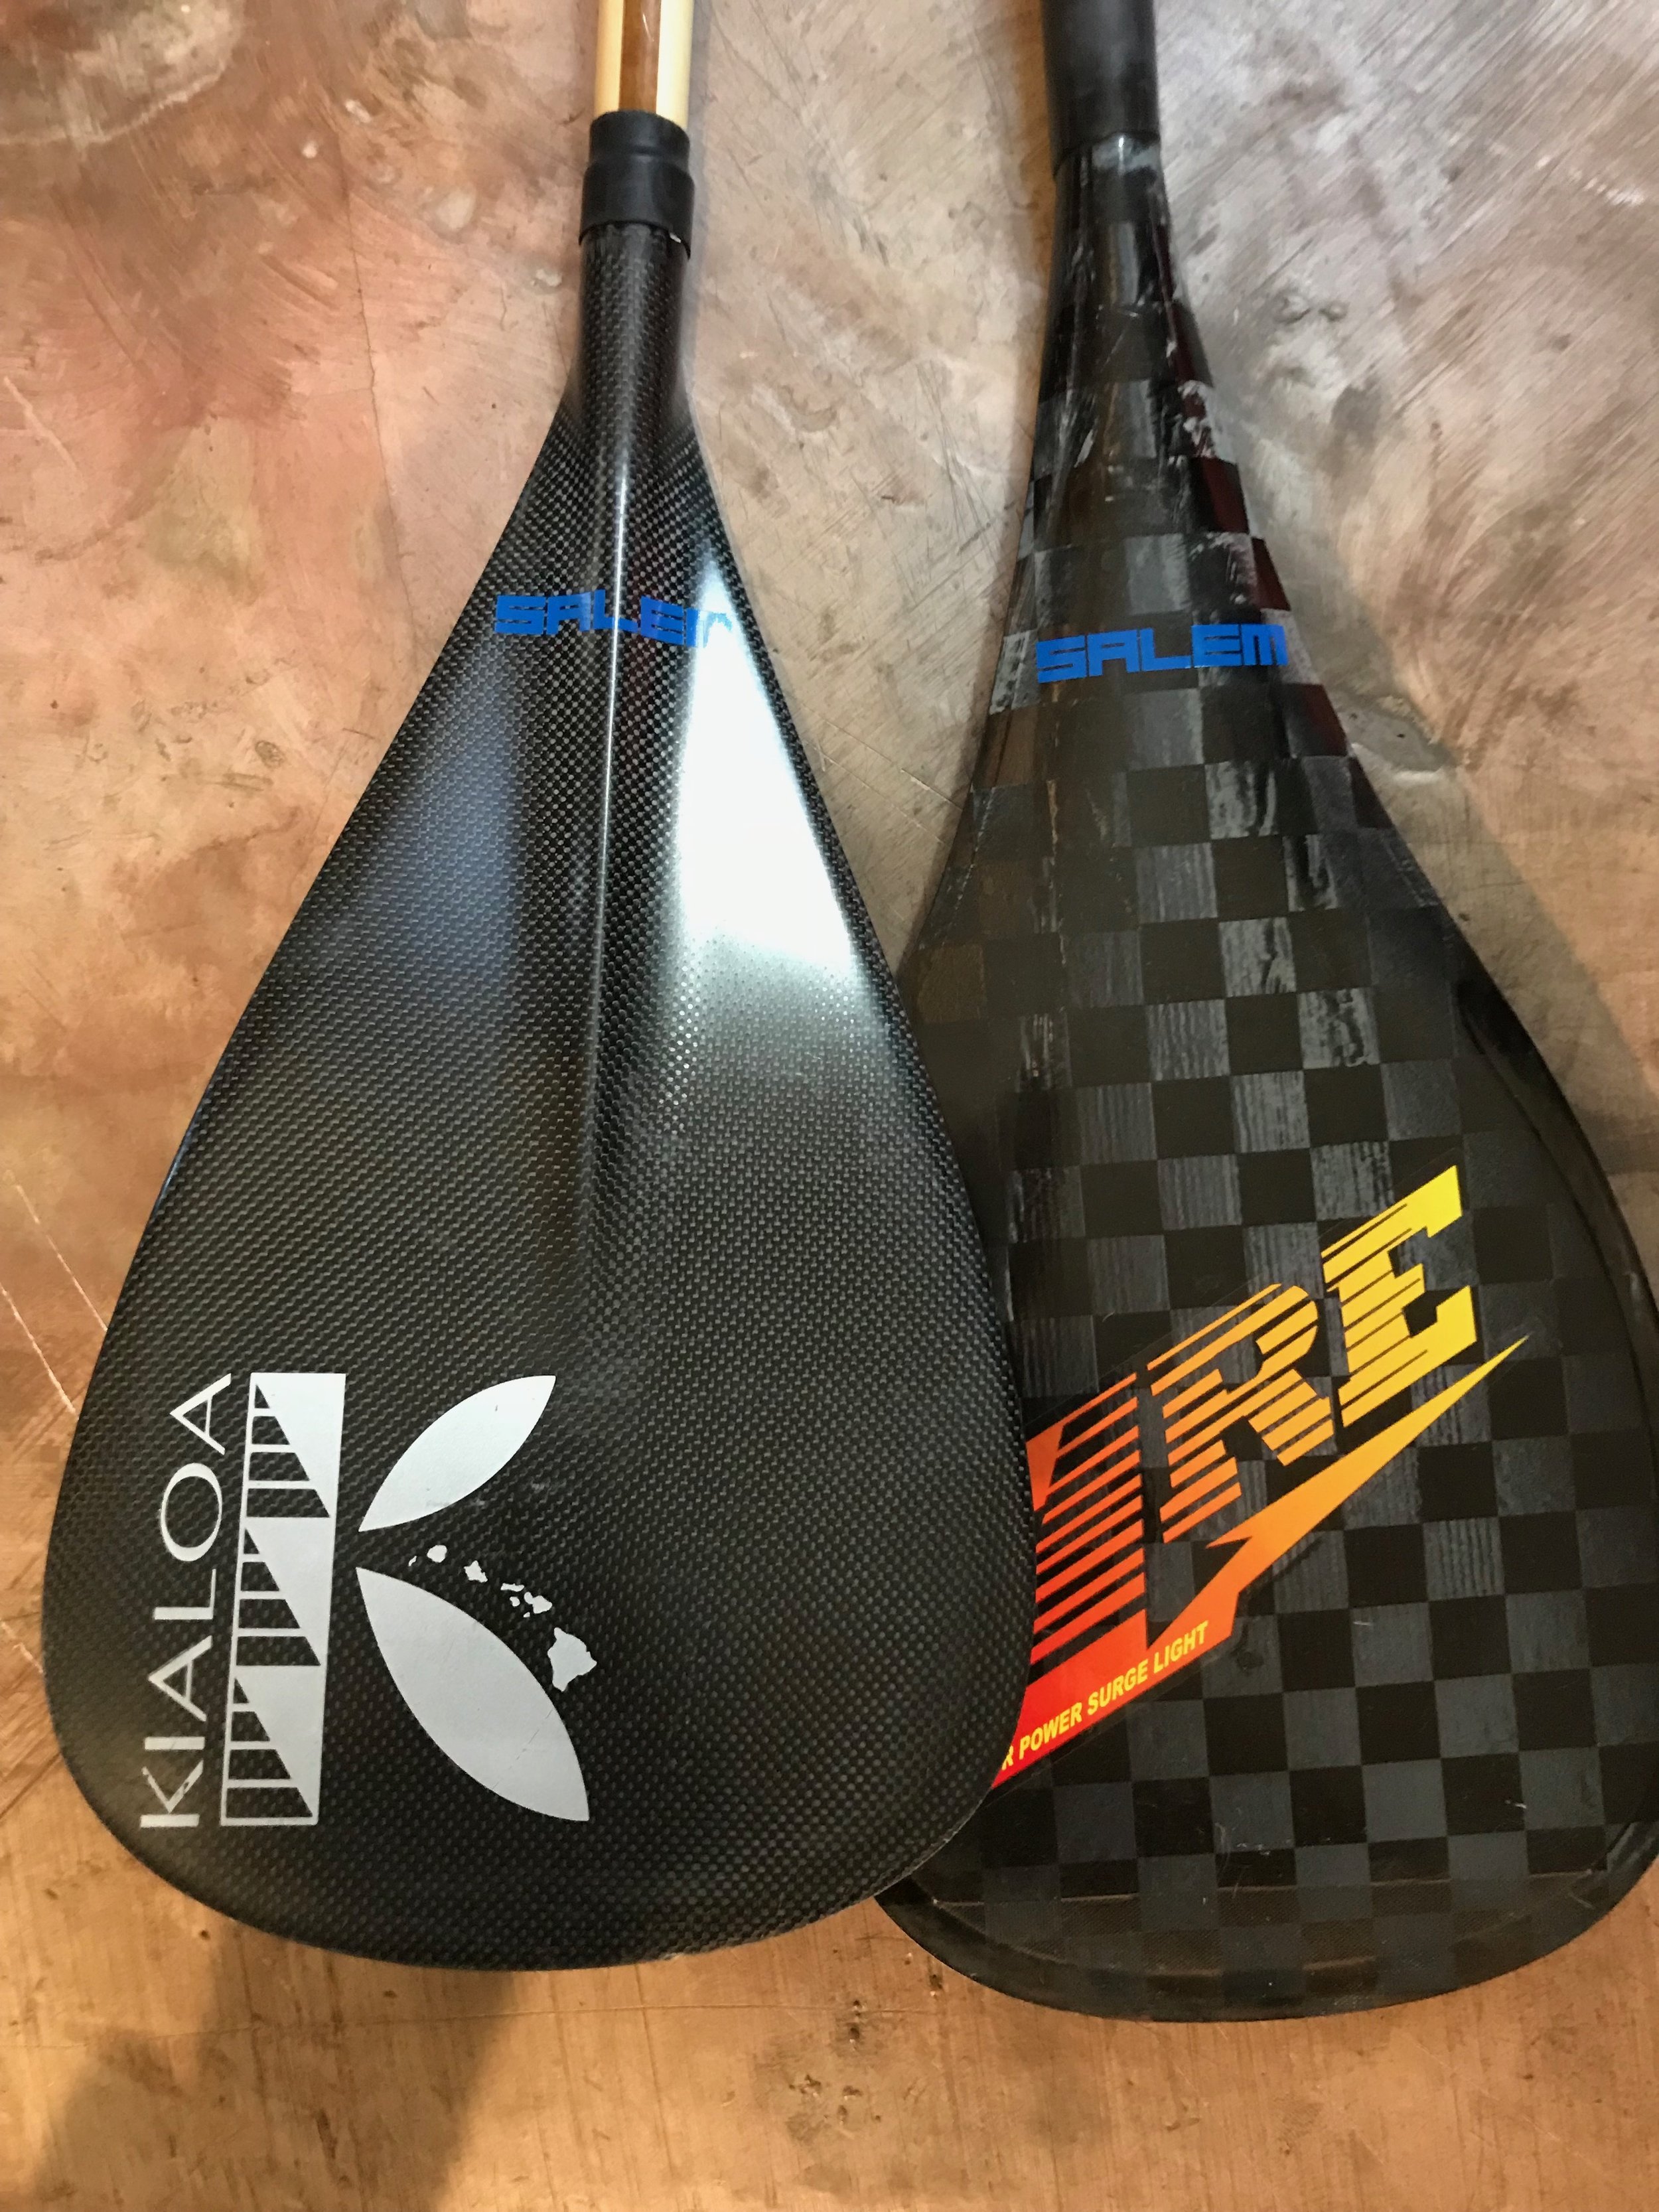
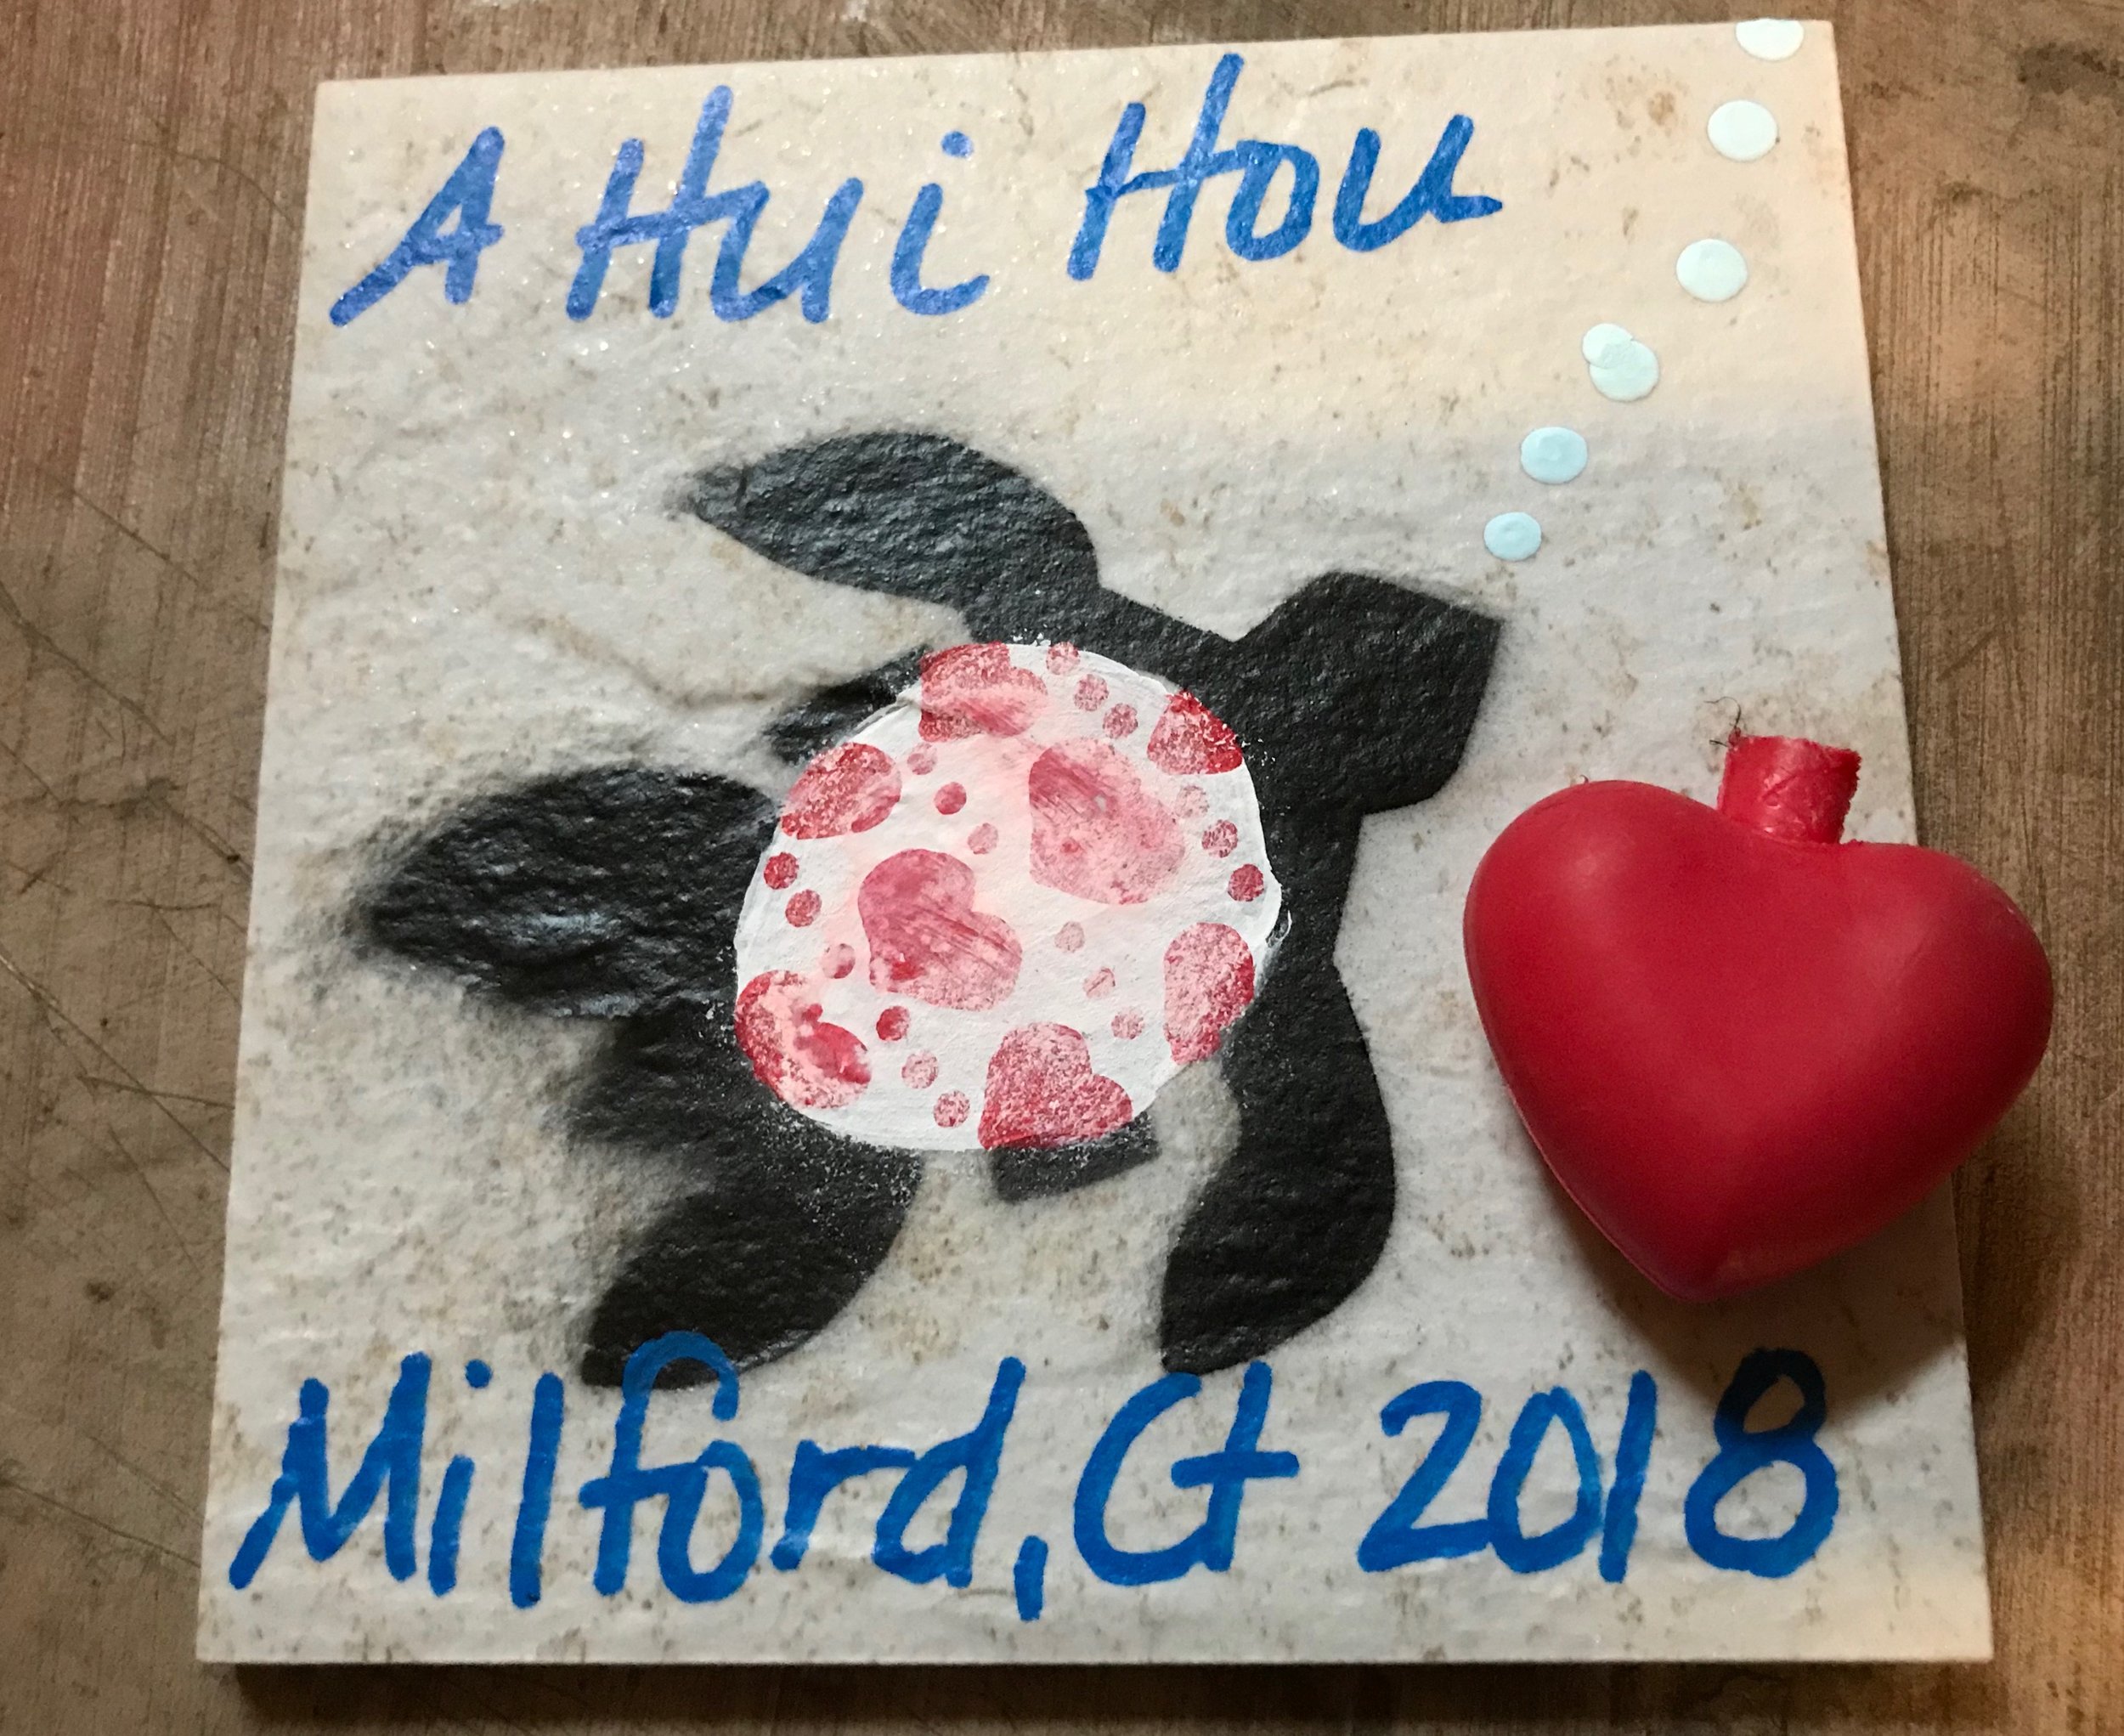
I have raced in Milford four times. The first two were OC6 races, and after training on the stinky Hudson River in New York City, let's just say I was astonished by the beauty of the Gulf, a tranquil little curve tucked into the greater ocean inlet of Long Island Sound. This is a five star race, where the quality of the food down to the quality and craft of the prizes are not forgotten. Manu'iwa's own novice Nicky not only came in first for women's OC1, she got to take home one of the first-prize, bottle-opener-paddles she made--and the rest of us got to choose from Monique's thoughtful and unique commemorative tiles. Thanks for a great race and bringing us, no matter our accent or World Cup favorite, together. Mahalo, Manu'iwa. Mahalo, ocean.
This one matches the heart-shaped squeaky toy my dog ripped out of a stuffed Cat-in-the-Hat. Concidence? The secret lies in the Milford Triangle.
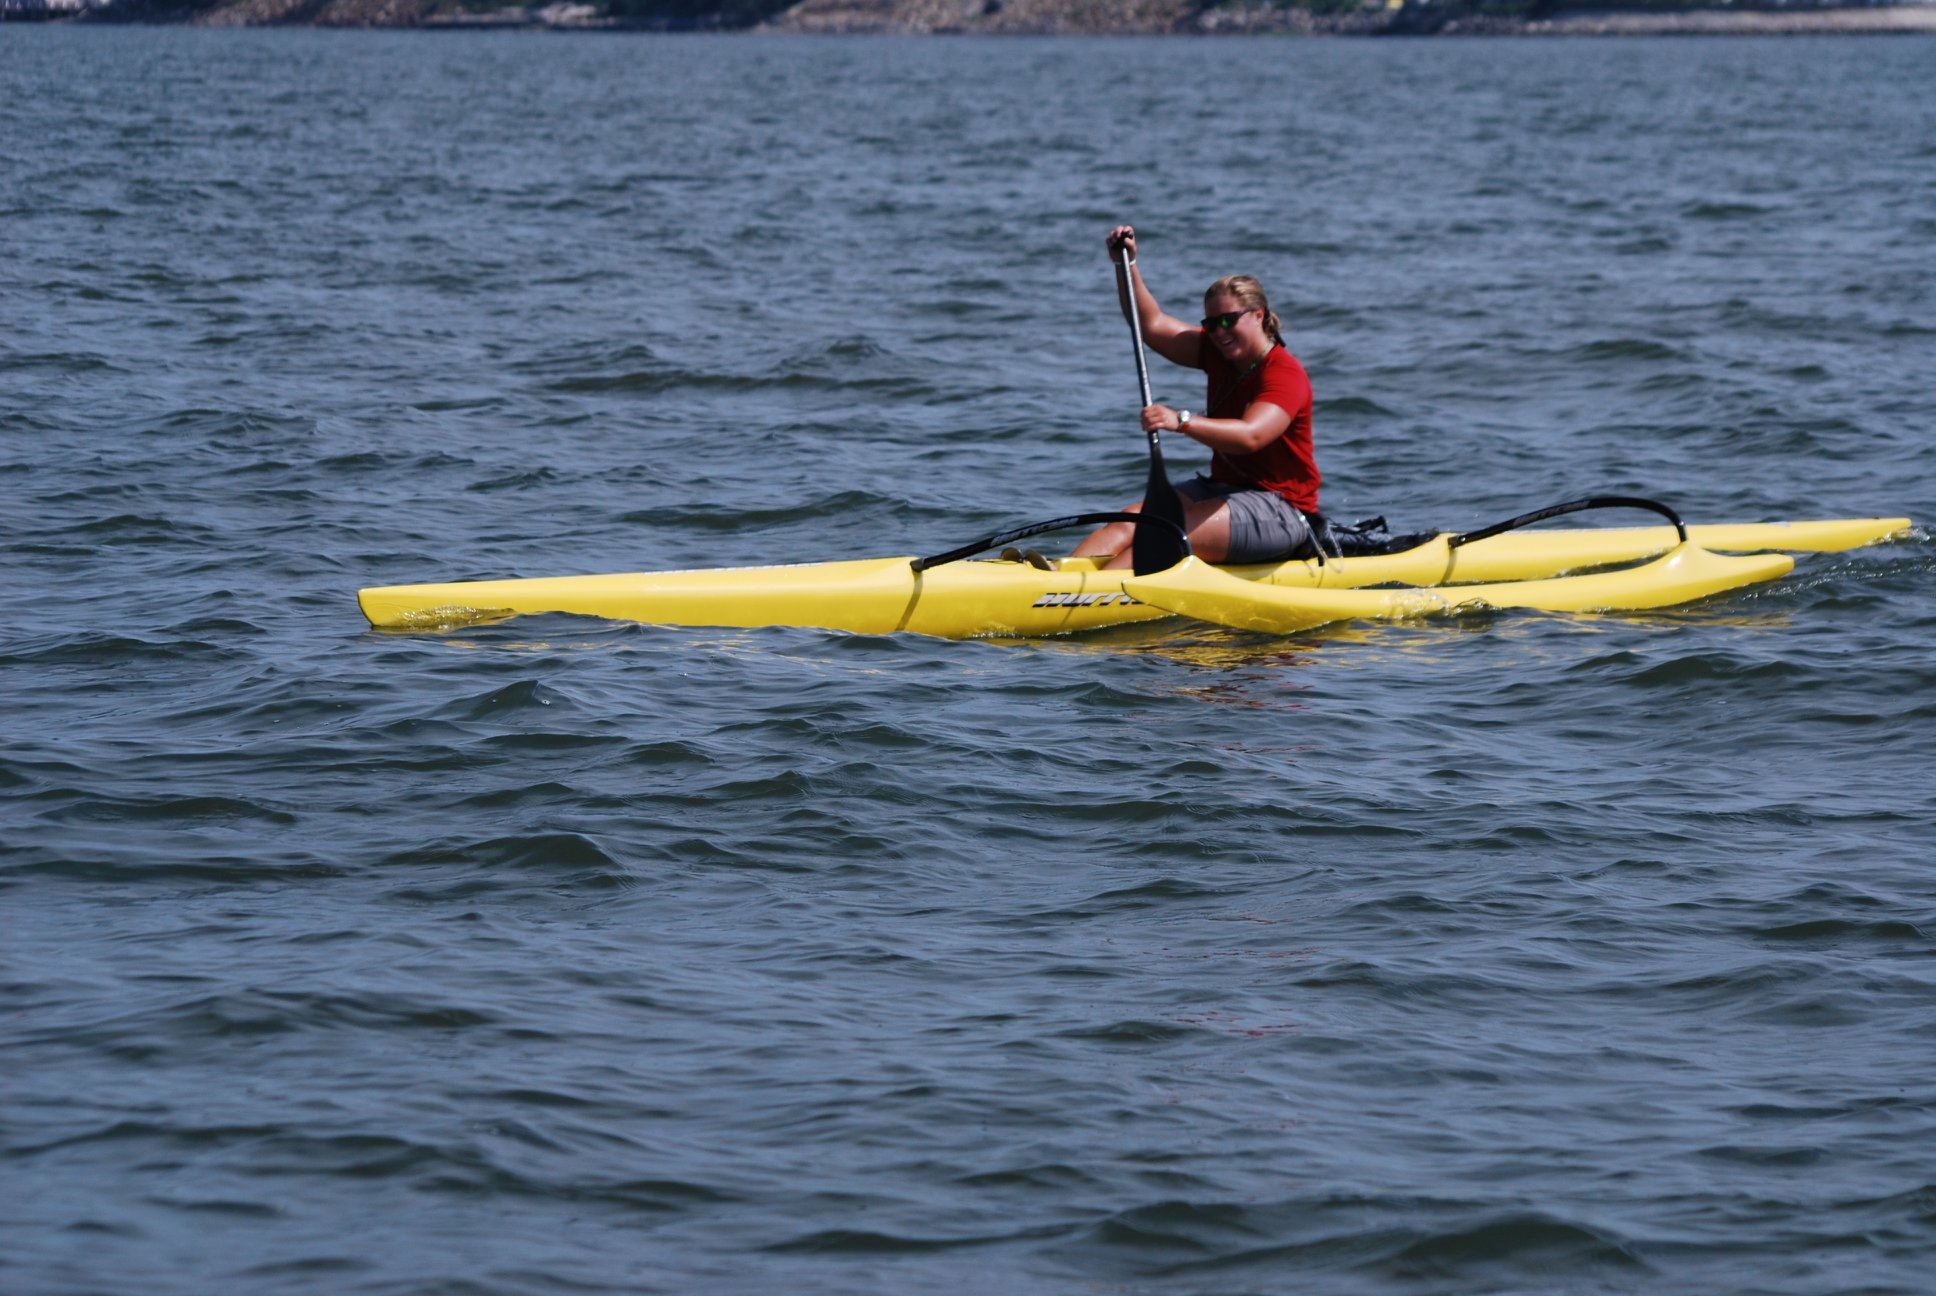
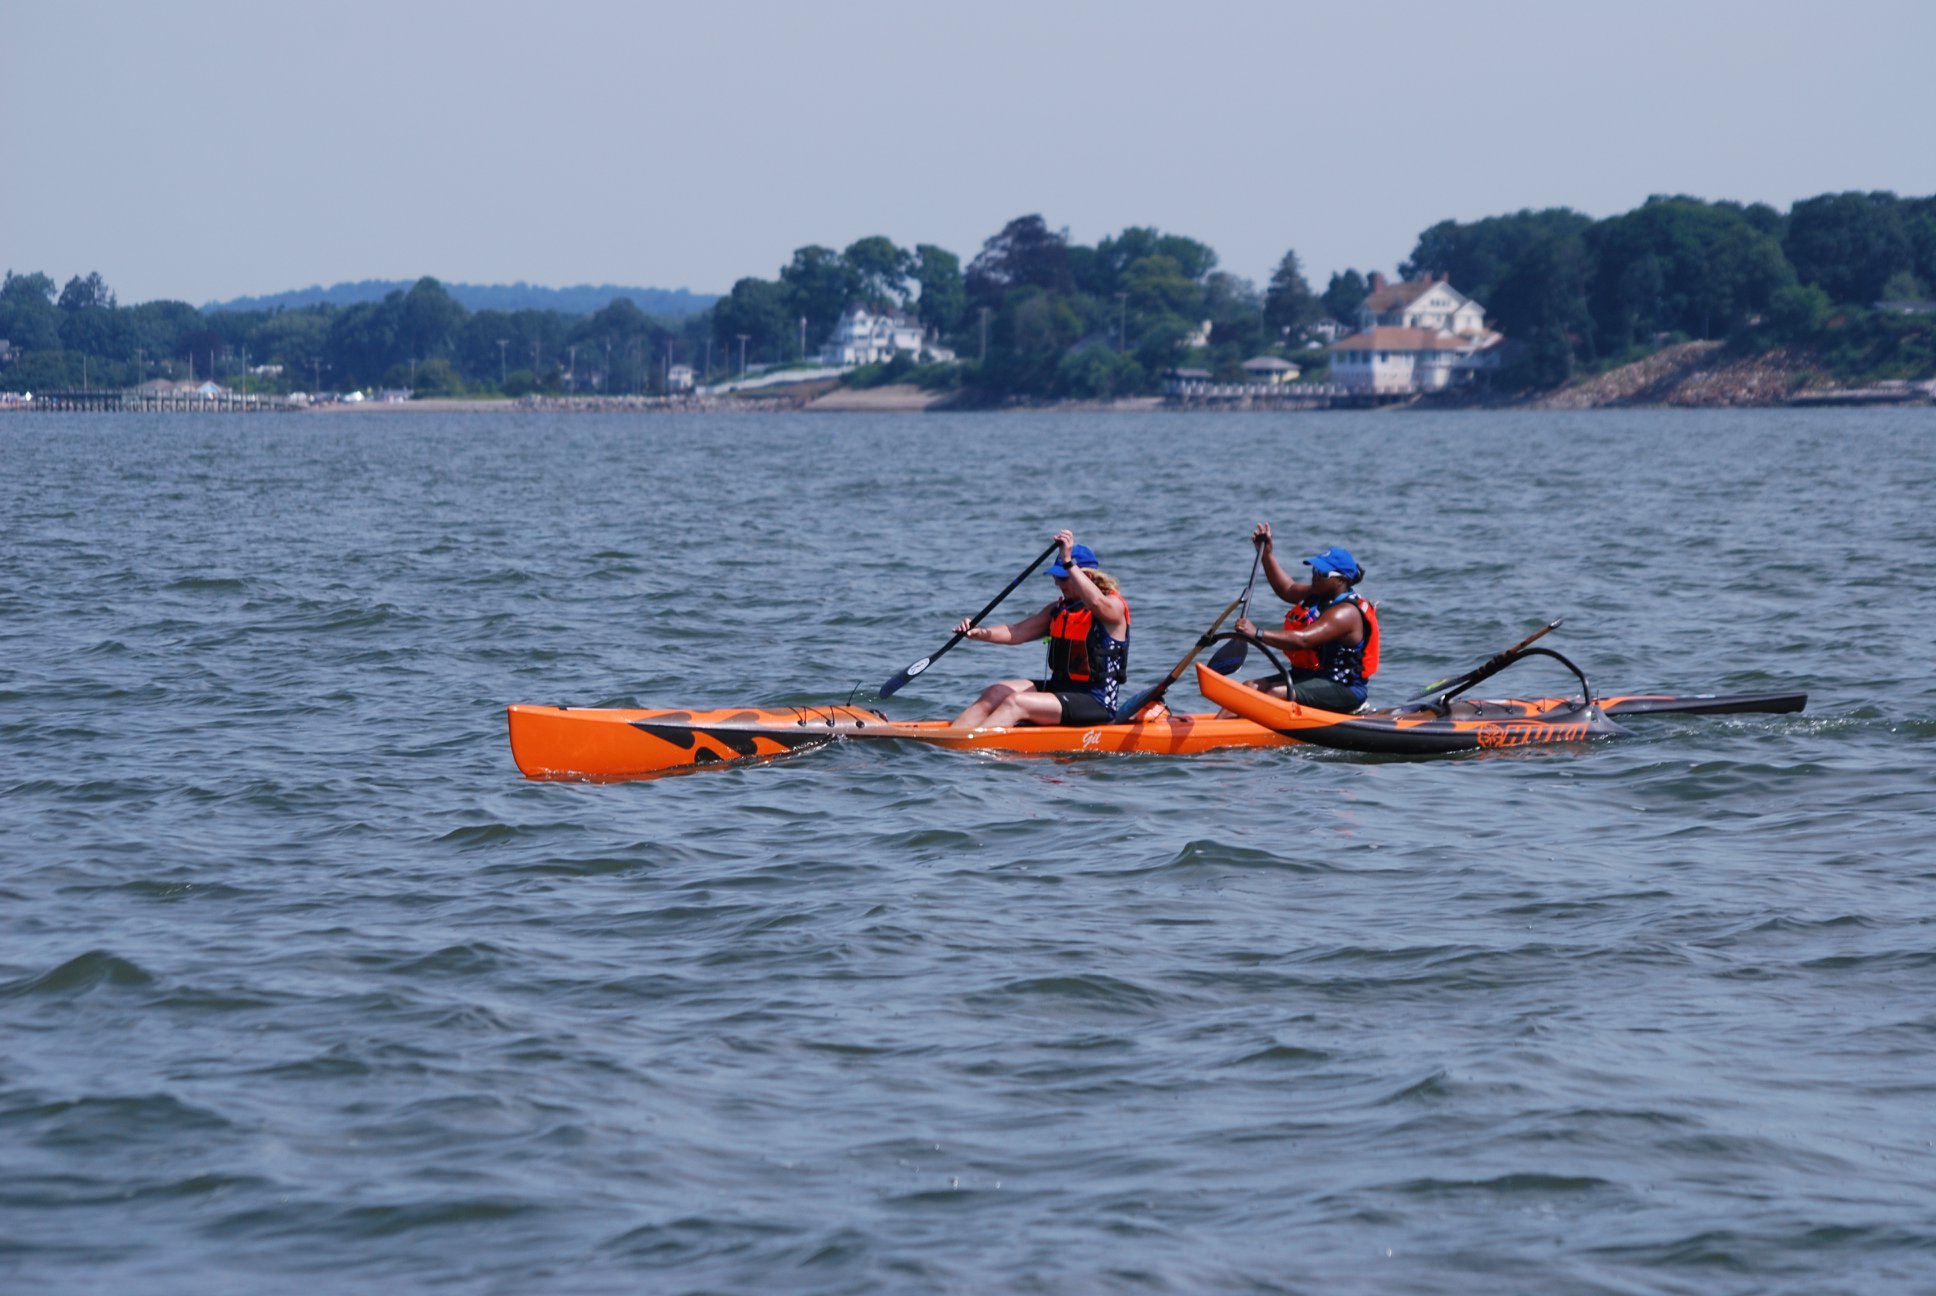
Salem flyin' the ama. Well, sort of...
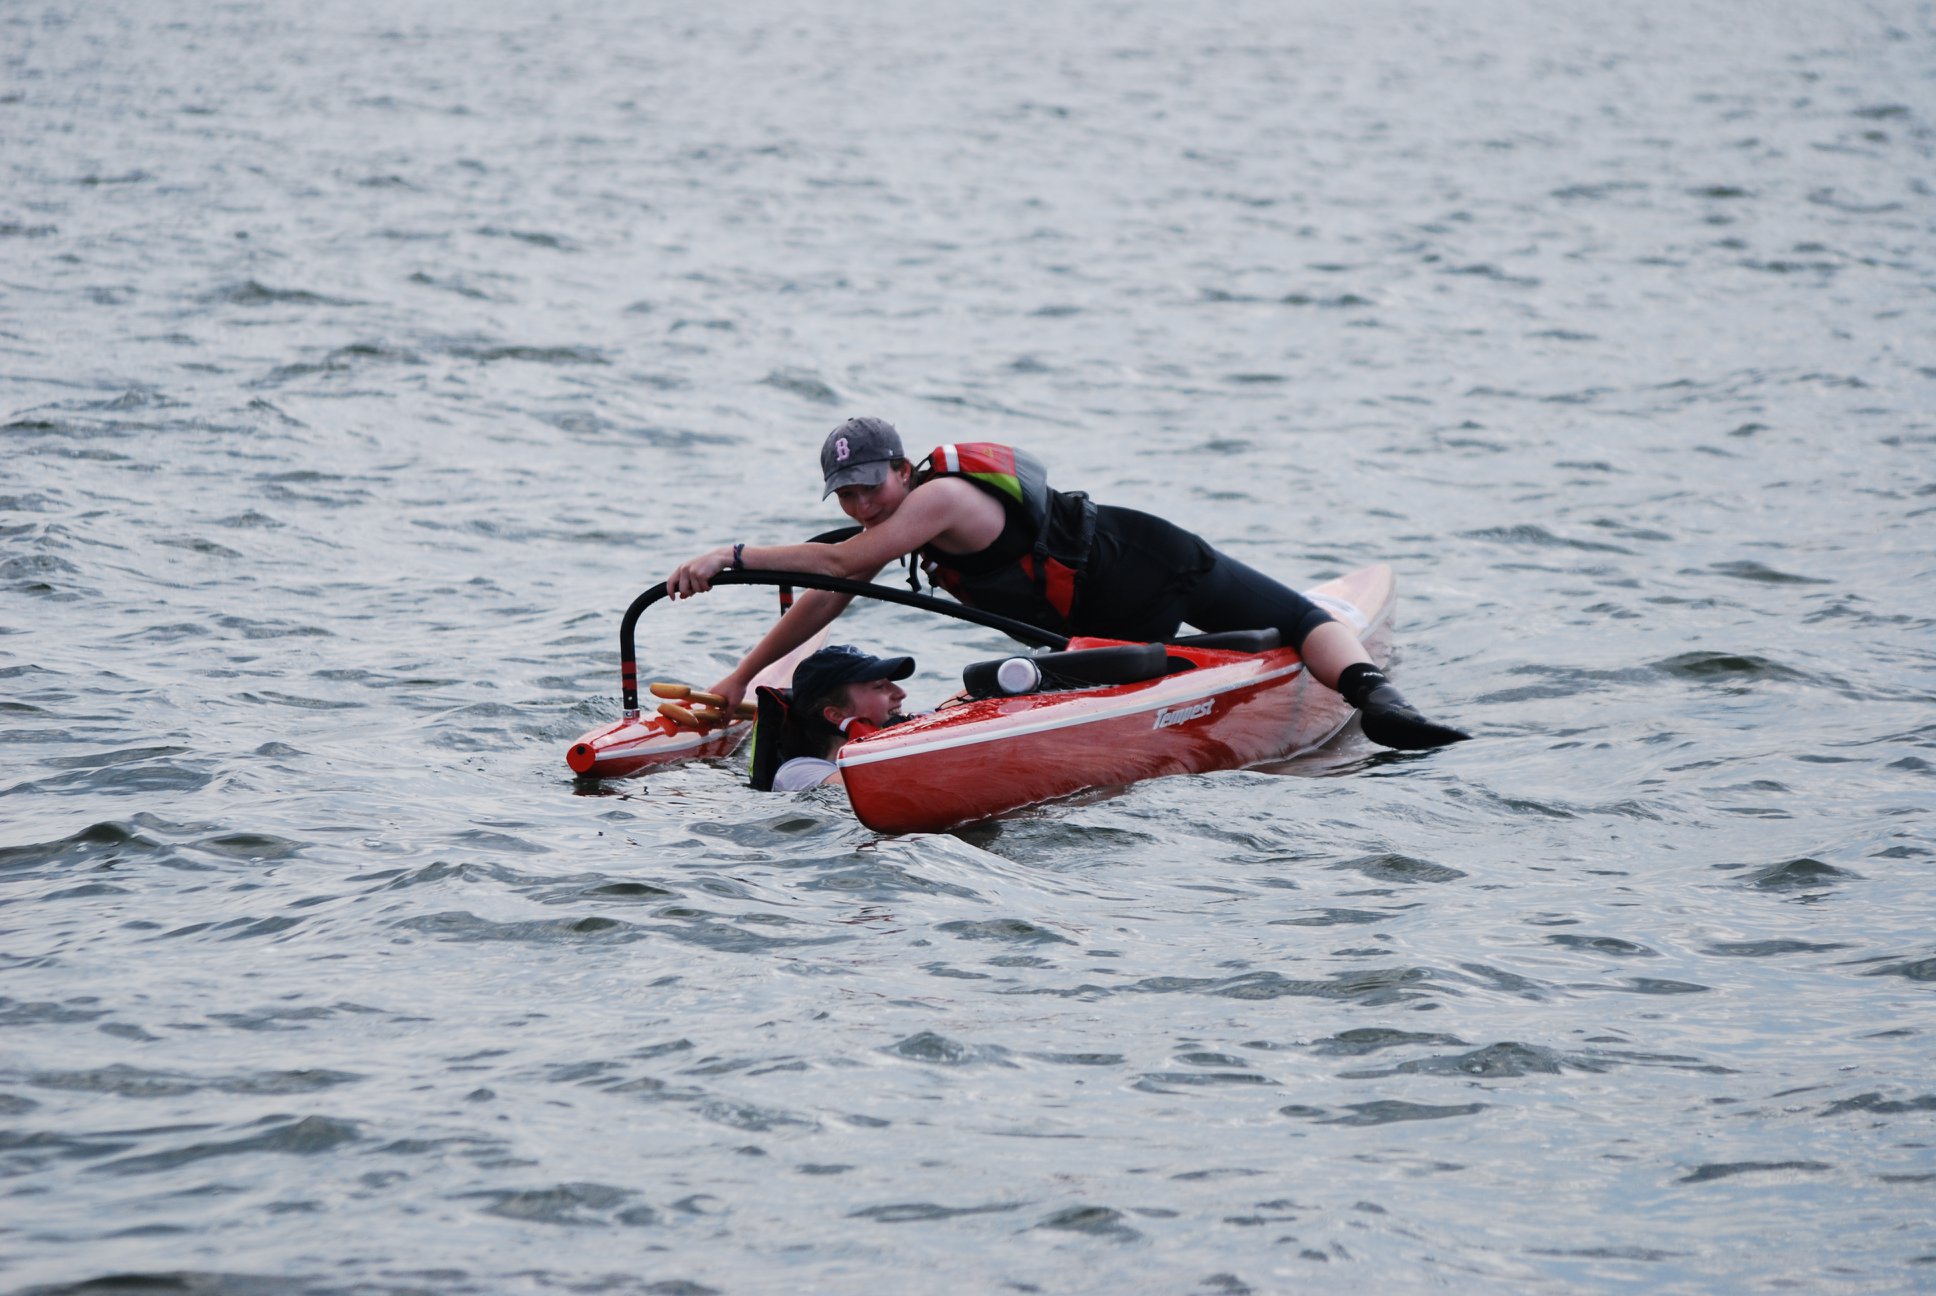
Nicky rockin' the Hurricane and snatching 1st place!
Googling "downwind paddling" gives limited results. In my searches, I found myself reading the same few articles over and over, trying to grasp what I had tasted in Guadeloupe, where the tradewinds that delivered Columbus to the Caribbean still blow. One article I reread was a post on the TC Surfski website. Since I had never surfski'd I reread the post with interest but kept sweeping the internet looking for more opportunities for outrigger downwind. TC Surfski, however, kept popping up. I ended up on an email list, and I discovered in my inbox one day an invite to downwind surfski immersion with TC. I ignored it. Then, after some time, I saw it again and actually read it: beginners welcome.
I signed up.
I bought my ticket to an area of Michigan I had never heard of, via the curiously named Cherry Capital Airport, and prepared for another fool's adventure, this time into a paddling realm I knew only two things about: surfskis go faster than outriggers (less drag) and paddlers fall off of them all the time. I jokingly referred to the upcoming immersion as my "submersion."
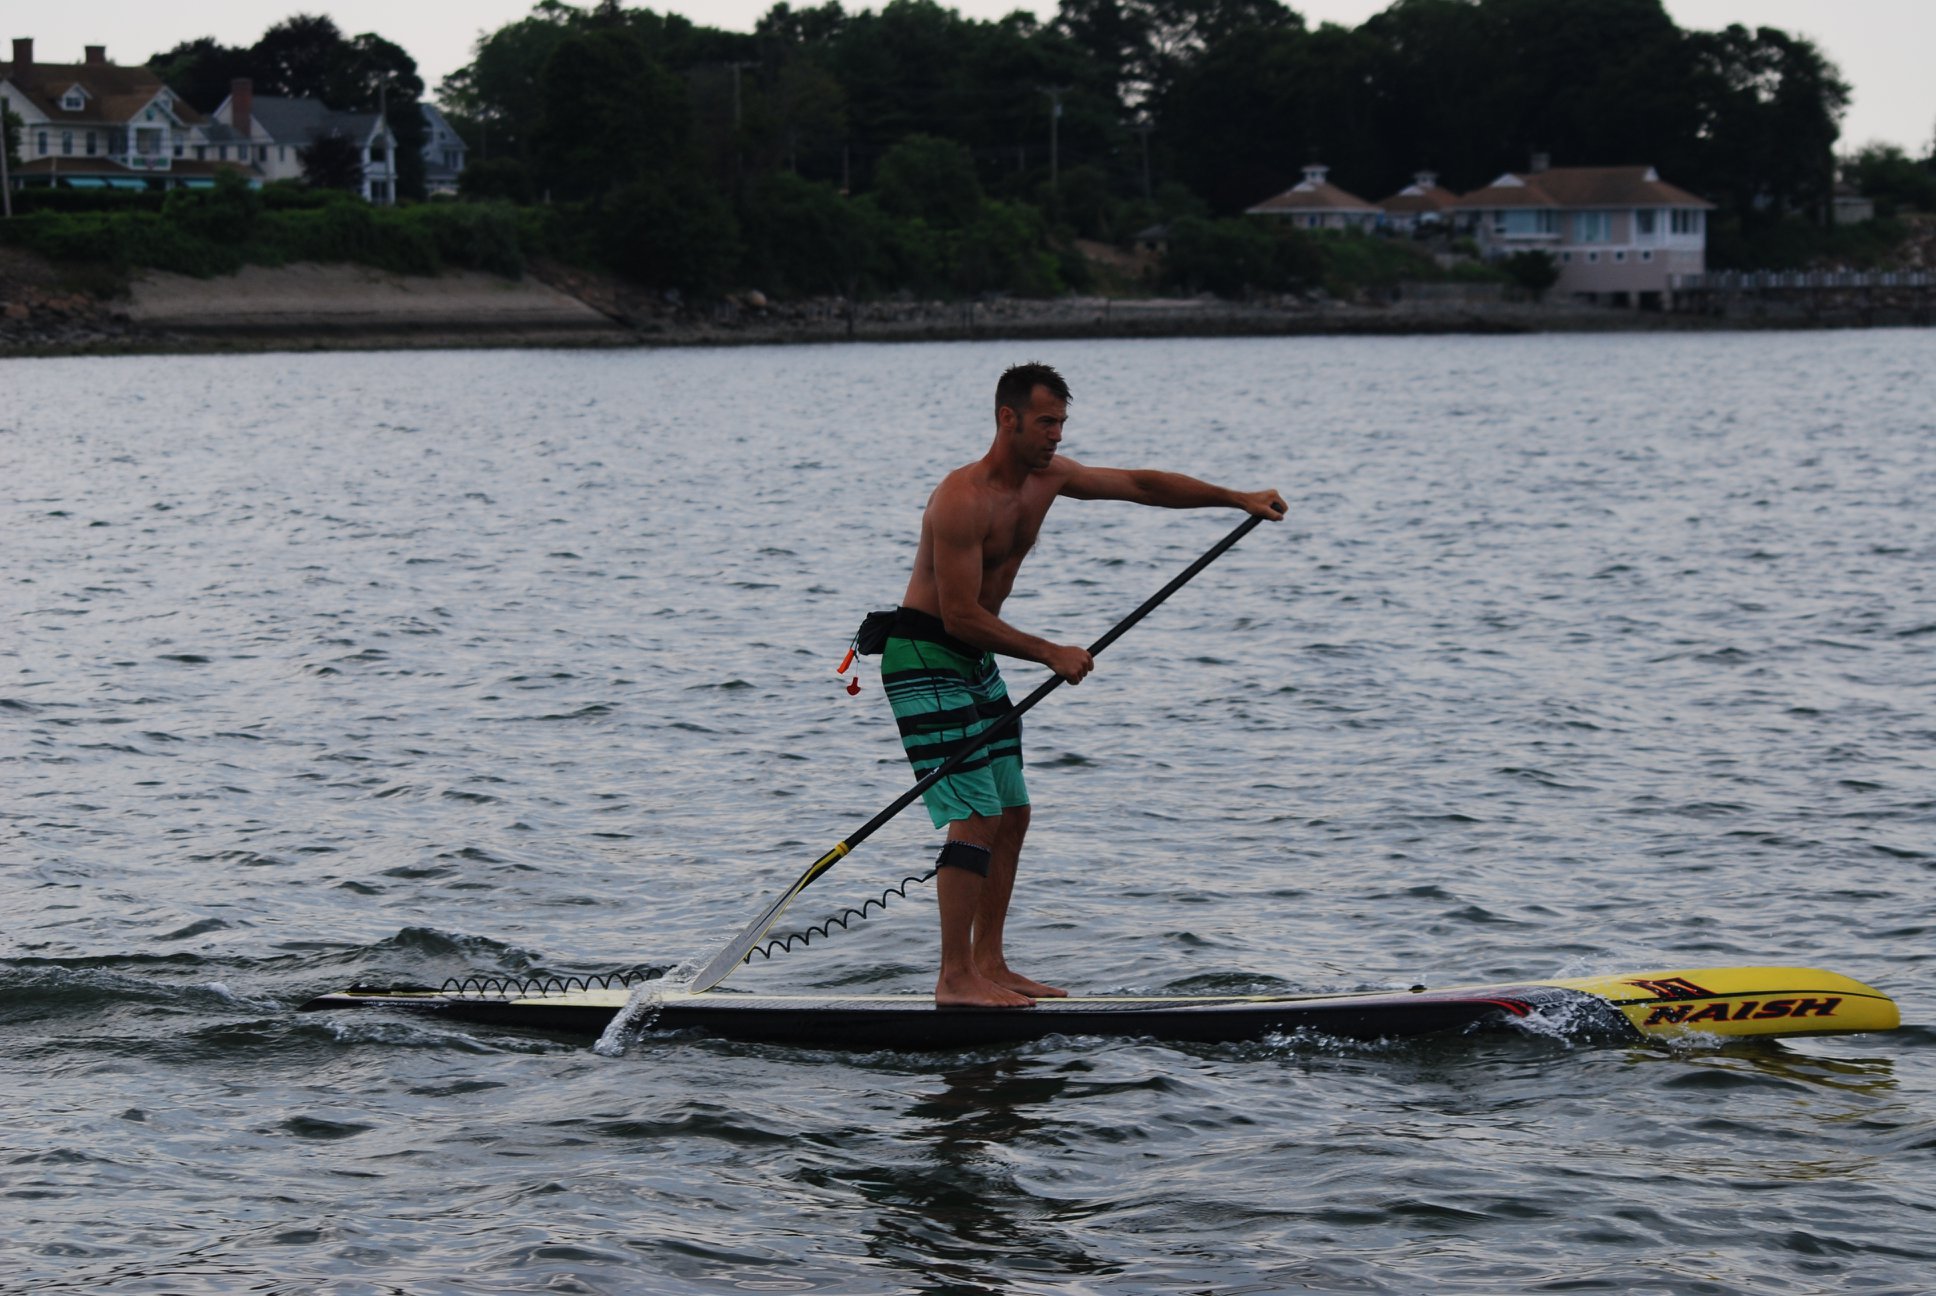
Now, what occasionally gets washed. The shirt or the paddler?
I started paying more attention to this chap named Oscar Chalupsky, who was to be our main instructor. I was fascinated by his Youtube videos, though I couldn't really grasp what he was seeing in the waves in front of him, no more than I had vaguely grasped what was happening with the waves in the Caribbean Ocean in January. I had scoured for online resources and possibly books about waves and finally settled on WAVES by Frederic Raichlen. Raichlen swears he won't bury the reader in math in the terse intro then promptly buries the reader in formulas. I wasn't about to turn a page without understanding a single formula, so I very slowly started making my way through the book, starting here:
DEEP WATER WAVES
L (length)L=P(SQ)* 1.56mLength
P (period)L=P(SQ)* 5.12fLength
After a few months I was still poking my way through the math and learning a lot, but I wasn't paddling. I figured if I could ask Oscar what he was looking at when choosing his runs, if I could learn one thing about what he was seeing, what he understood, the surfski immersion would be worth it. I packed my book on WAVES and my neoprene but not my GoPro camera. Who in the world would want to watch footage of my rolling face-first into Lake Michigan over and over again?
Oscar taught me a little something when I showed him this book. Trick question: How many waves do you see on the cover?
Lucky me learning side saddle stability and bracing in the 2ski with Oscar.
As a total beginner the one thing I couldn't take with me was a surfski. Oscar easily remembered my name and playfully growled at me I was to paddle with him in a double to start. One rarely has the opportunity in life to learn from a master, especially from the very beginning. I was very fortunate to have excellent surfski paddling instilled in me from minute one. In the hours that followed, Oscar dutifully deconstructed paddling and provided insight into downwind I will certainly never forget. Thanks to Oscar, I never rolled off the surfski, I got a cool shirt with awesome fine print in keeping with Oscar's sense of humor, and I know something about waves that changed my life. Thanks to local Andrew Amato for capturing this awesome drone video. Stay tuned this summer. I will be deconstructing outrigger paddling Oscar style and fine-tuning the fundamentals.
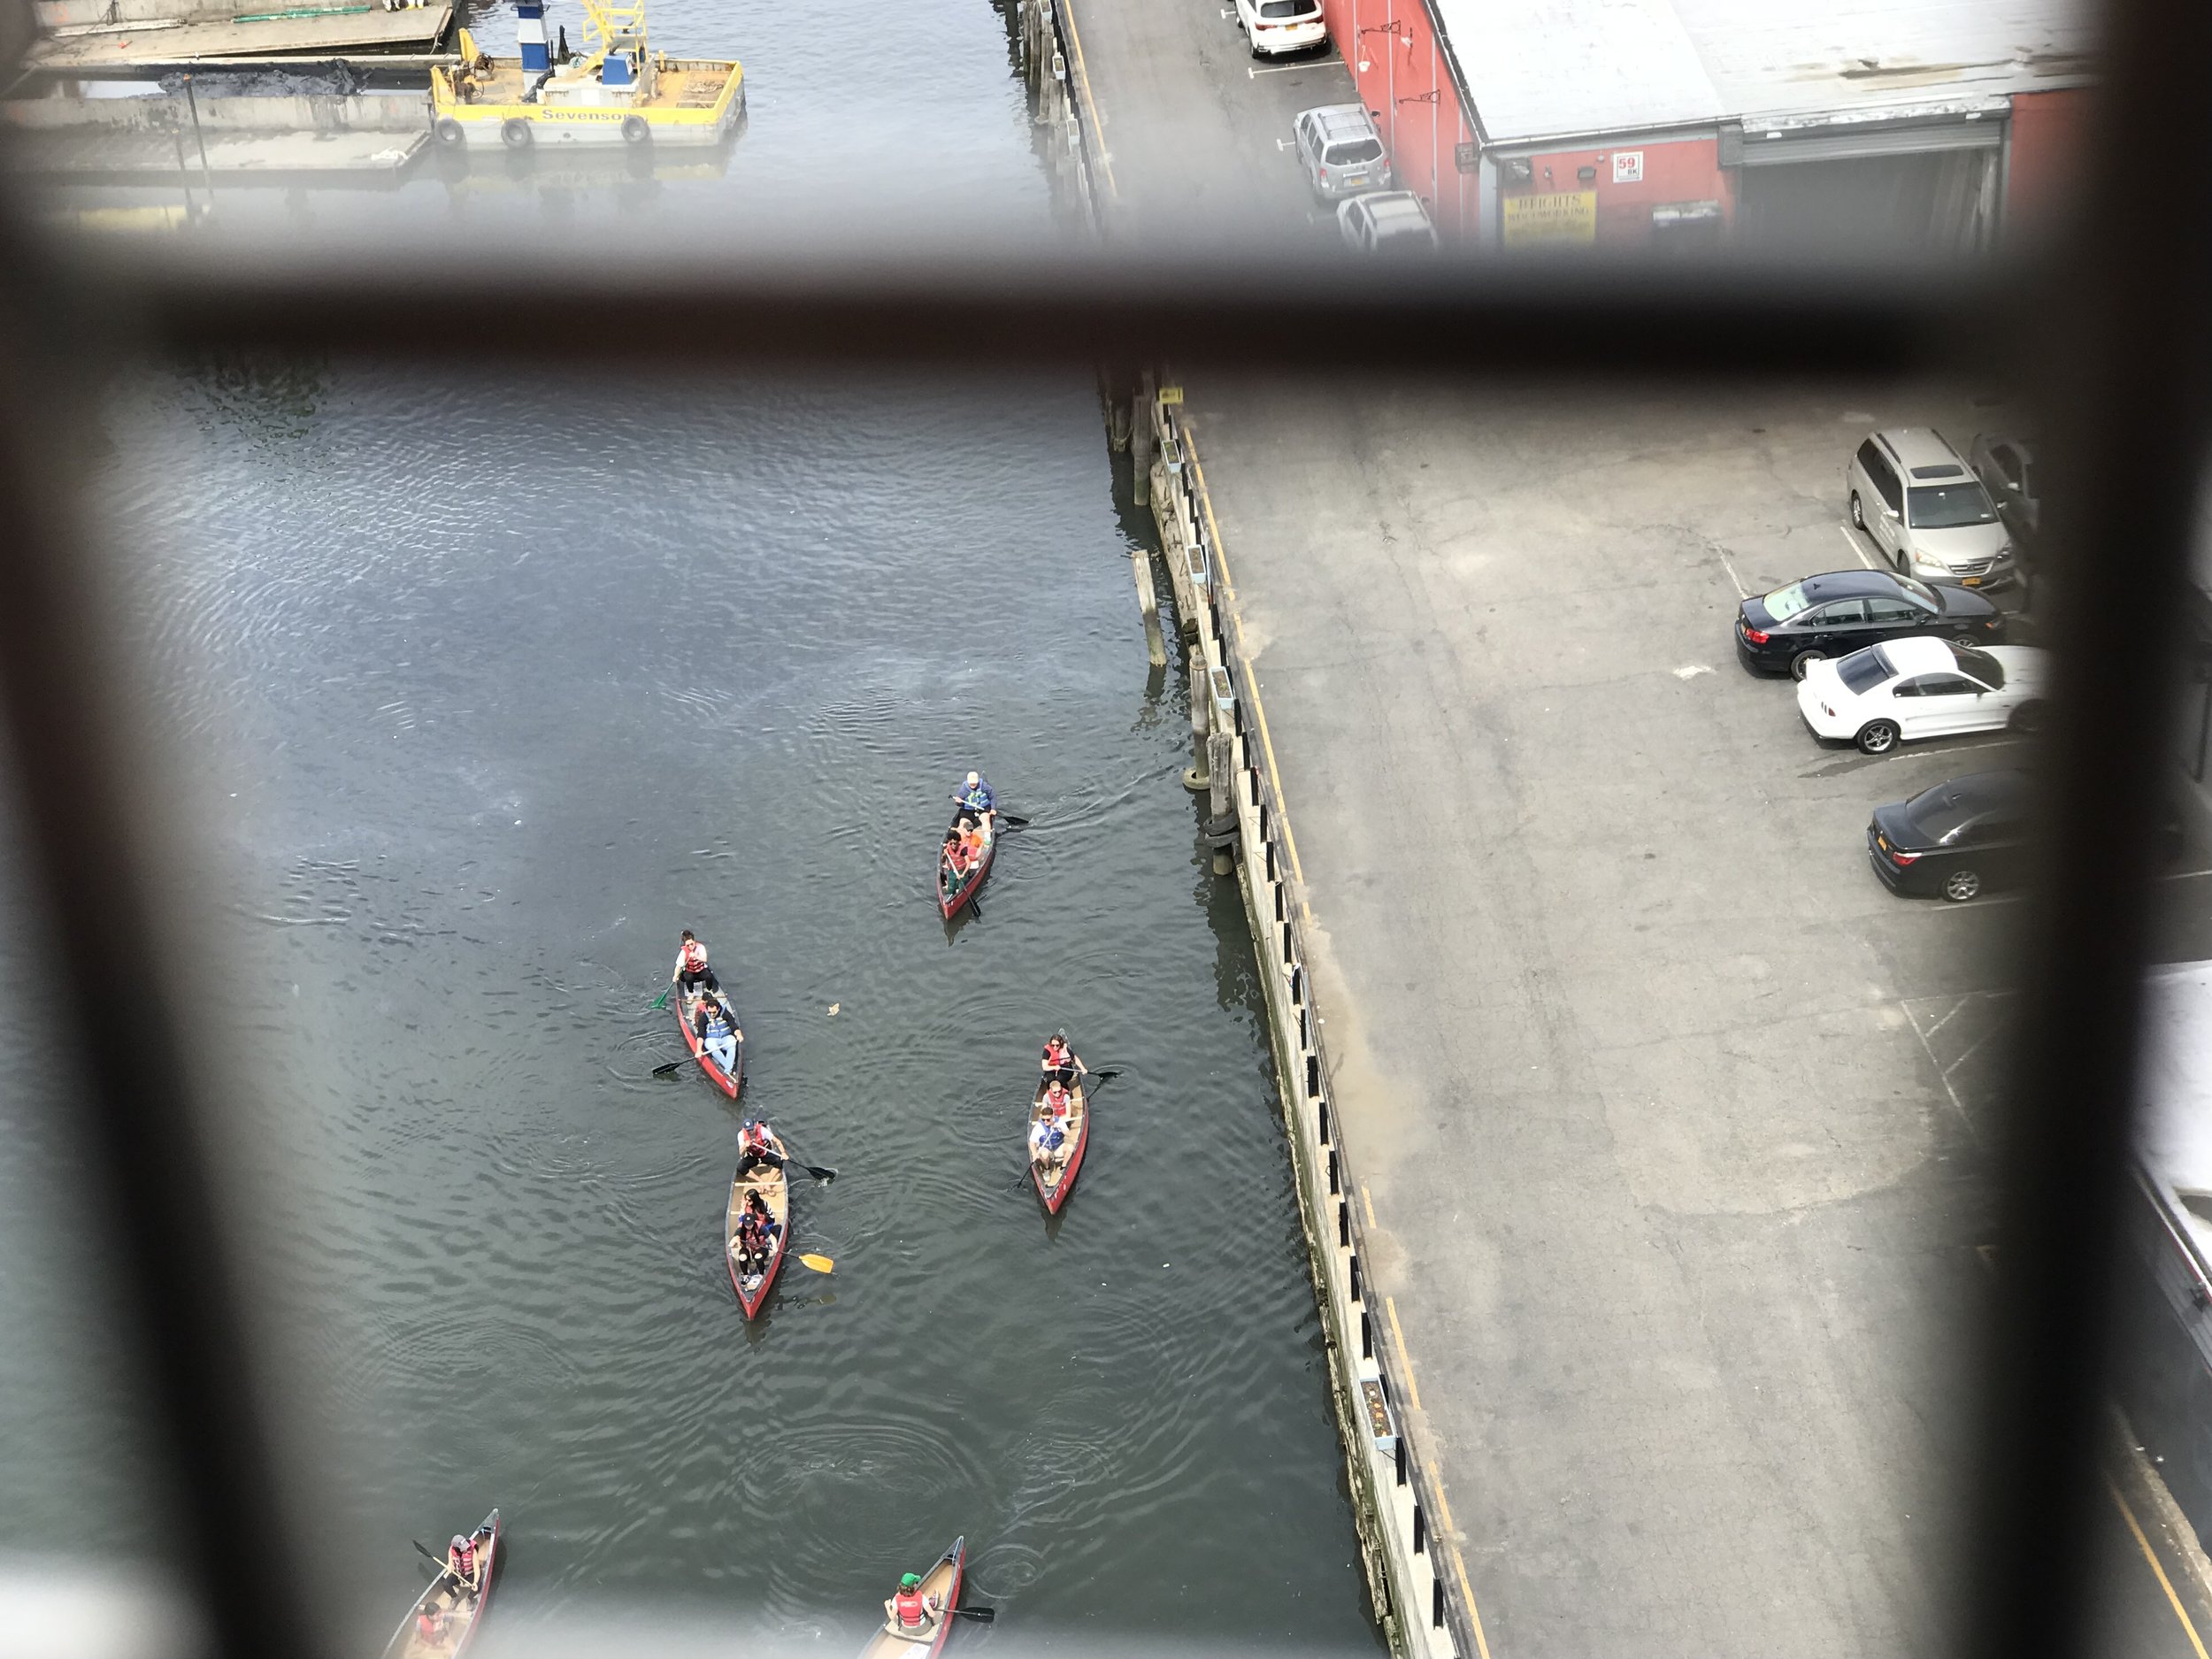
Red Hook is a Brooklyn neighborhood that is off the subway path, torn away from the main Brooklyn heart by the filthy Gowanus Canal. Its skyline is otherwise stitched by the poorly named Expressway, where one can sit for hours admiring the pollution emitted from heavy trucks heading north and south around the lower bulb of Brooklyn. Unbelievably, I witnessed paddlers from my perch high above the Gowanus at a rare in-the-sky train station.
In other words, Red Hook, named for its ruddy soil, is a gem. And it is in Red Hook I have landed, overseeing work we won't bother discussing. Here the ubiquitous paper plate, free and careless in its twirling, gets to taste something other than the barbecue sauce staining it, for the wind gusts across the harbor are unbuffered. I would suggest 3D printing the plates out of iron and bolting them to husky picnic tables made of concrete. The weather I have witnessed at the water's edge in Red Hook, the white caps strolling across the Buttermilk Channel, make this downwind addict ache for a paddle.
Paddle? Isn't this a paddling blog? Indeed. And this May I finally got to put my R&D 3D printed paddle to the test in the mighty Hudson. (Photo credit: Diana DeDomenico).
That's a 3D printed Brooklyn Bridge blade!
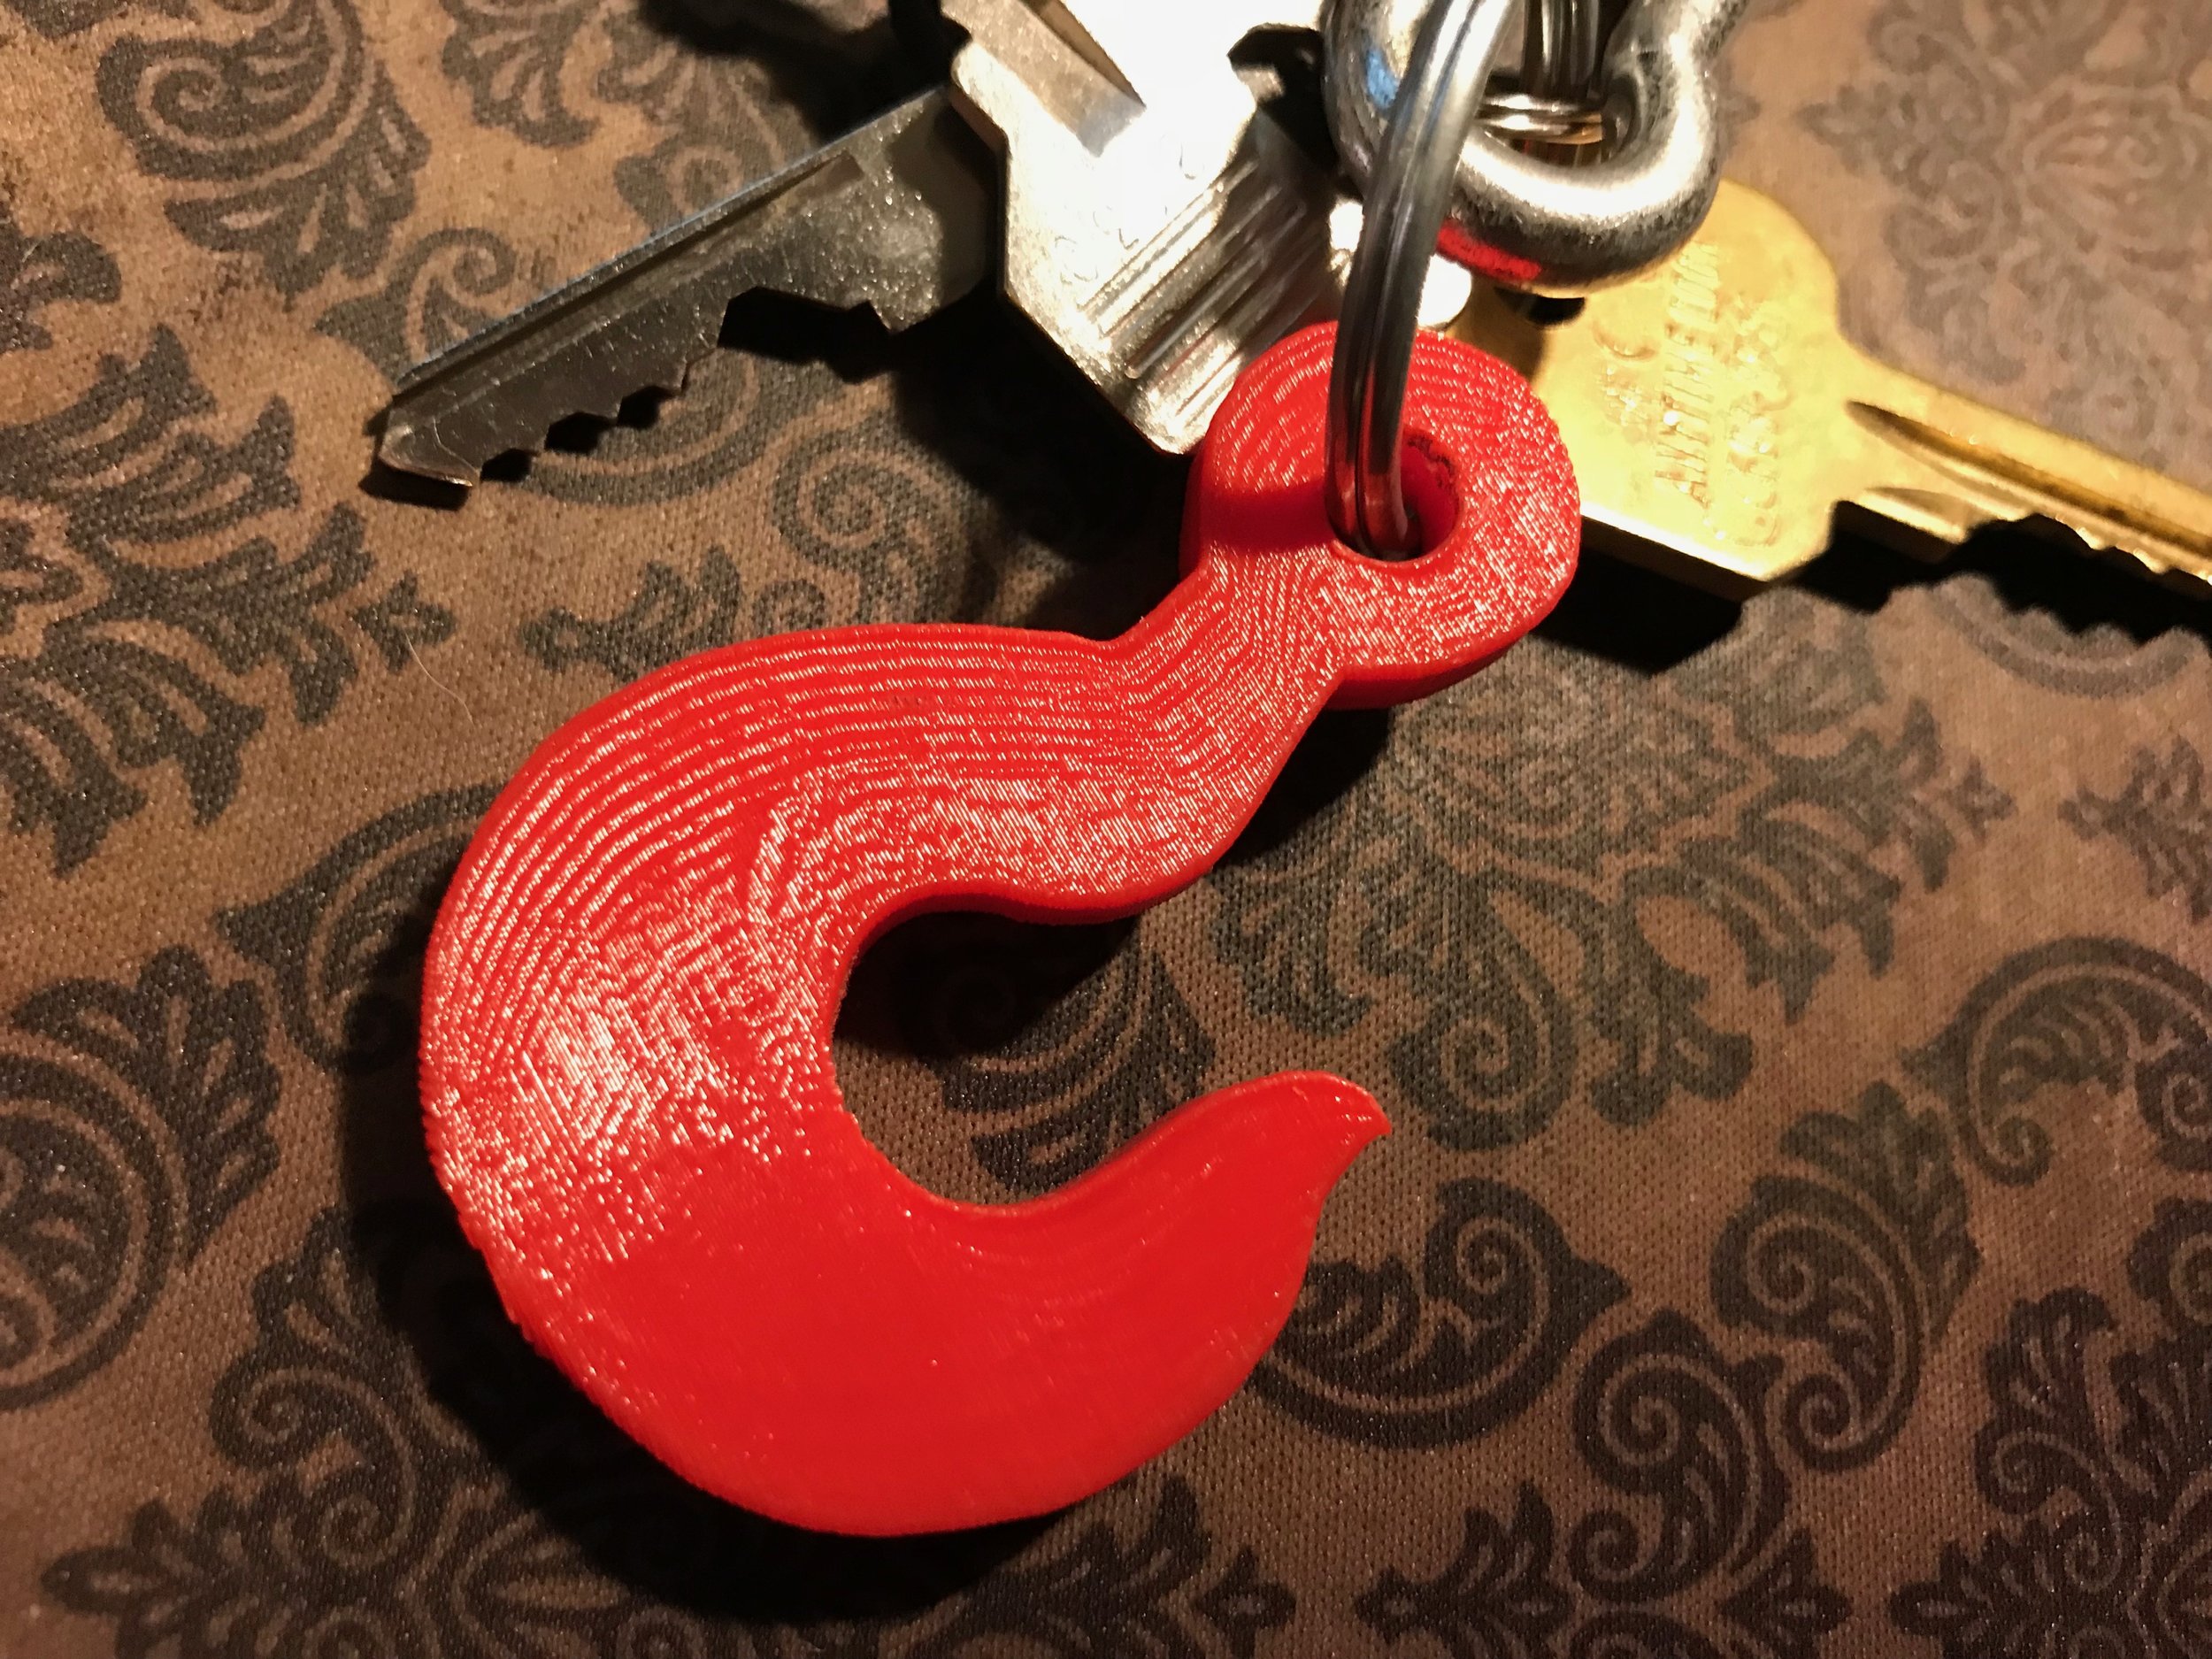
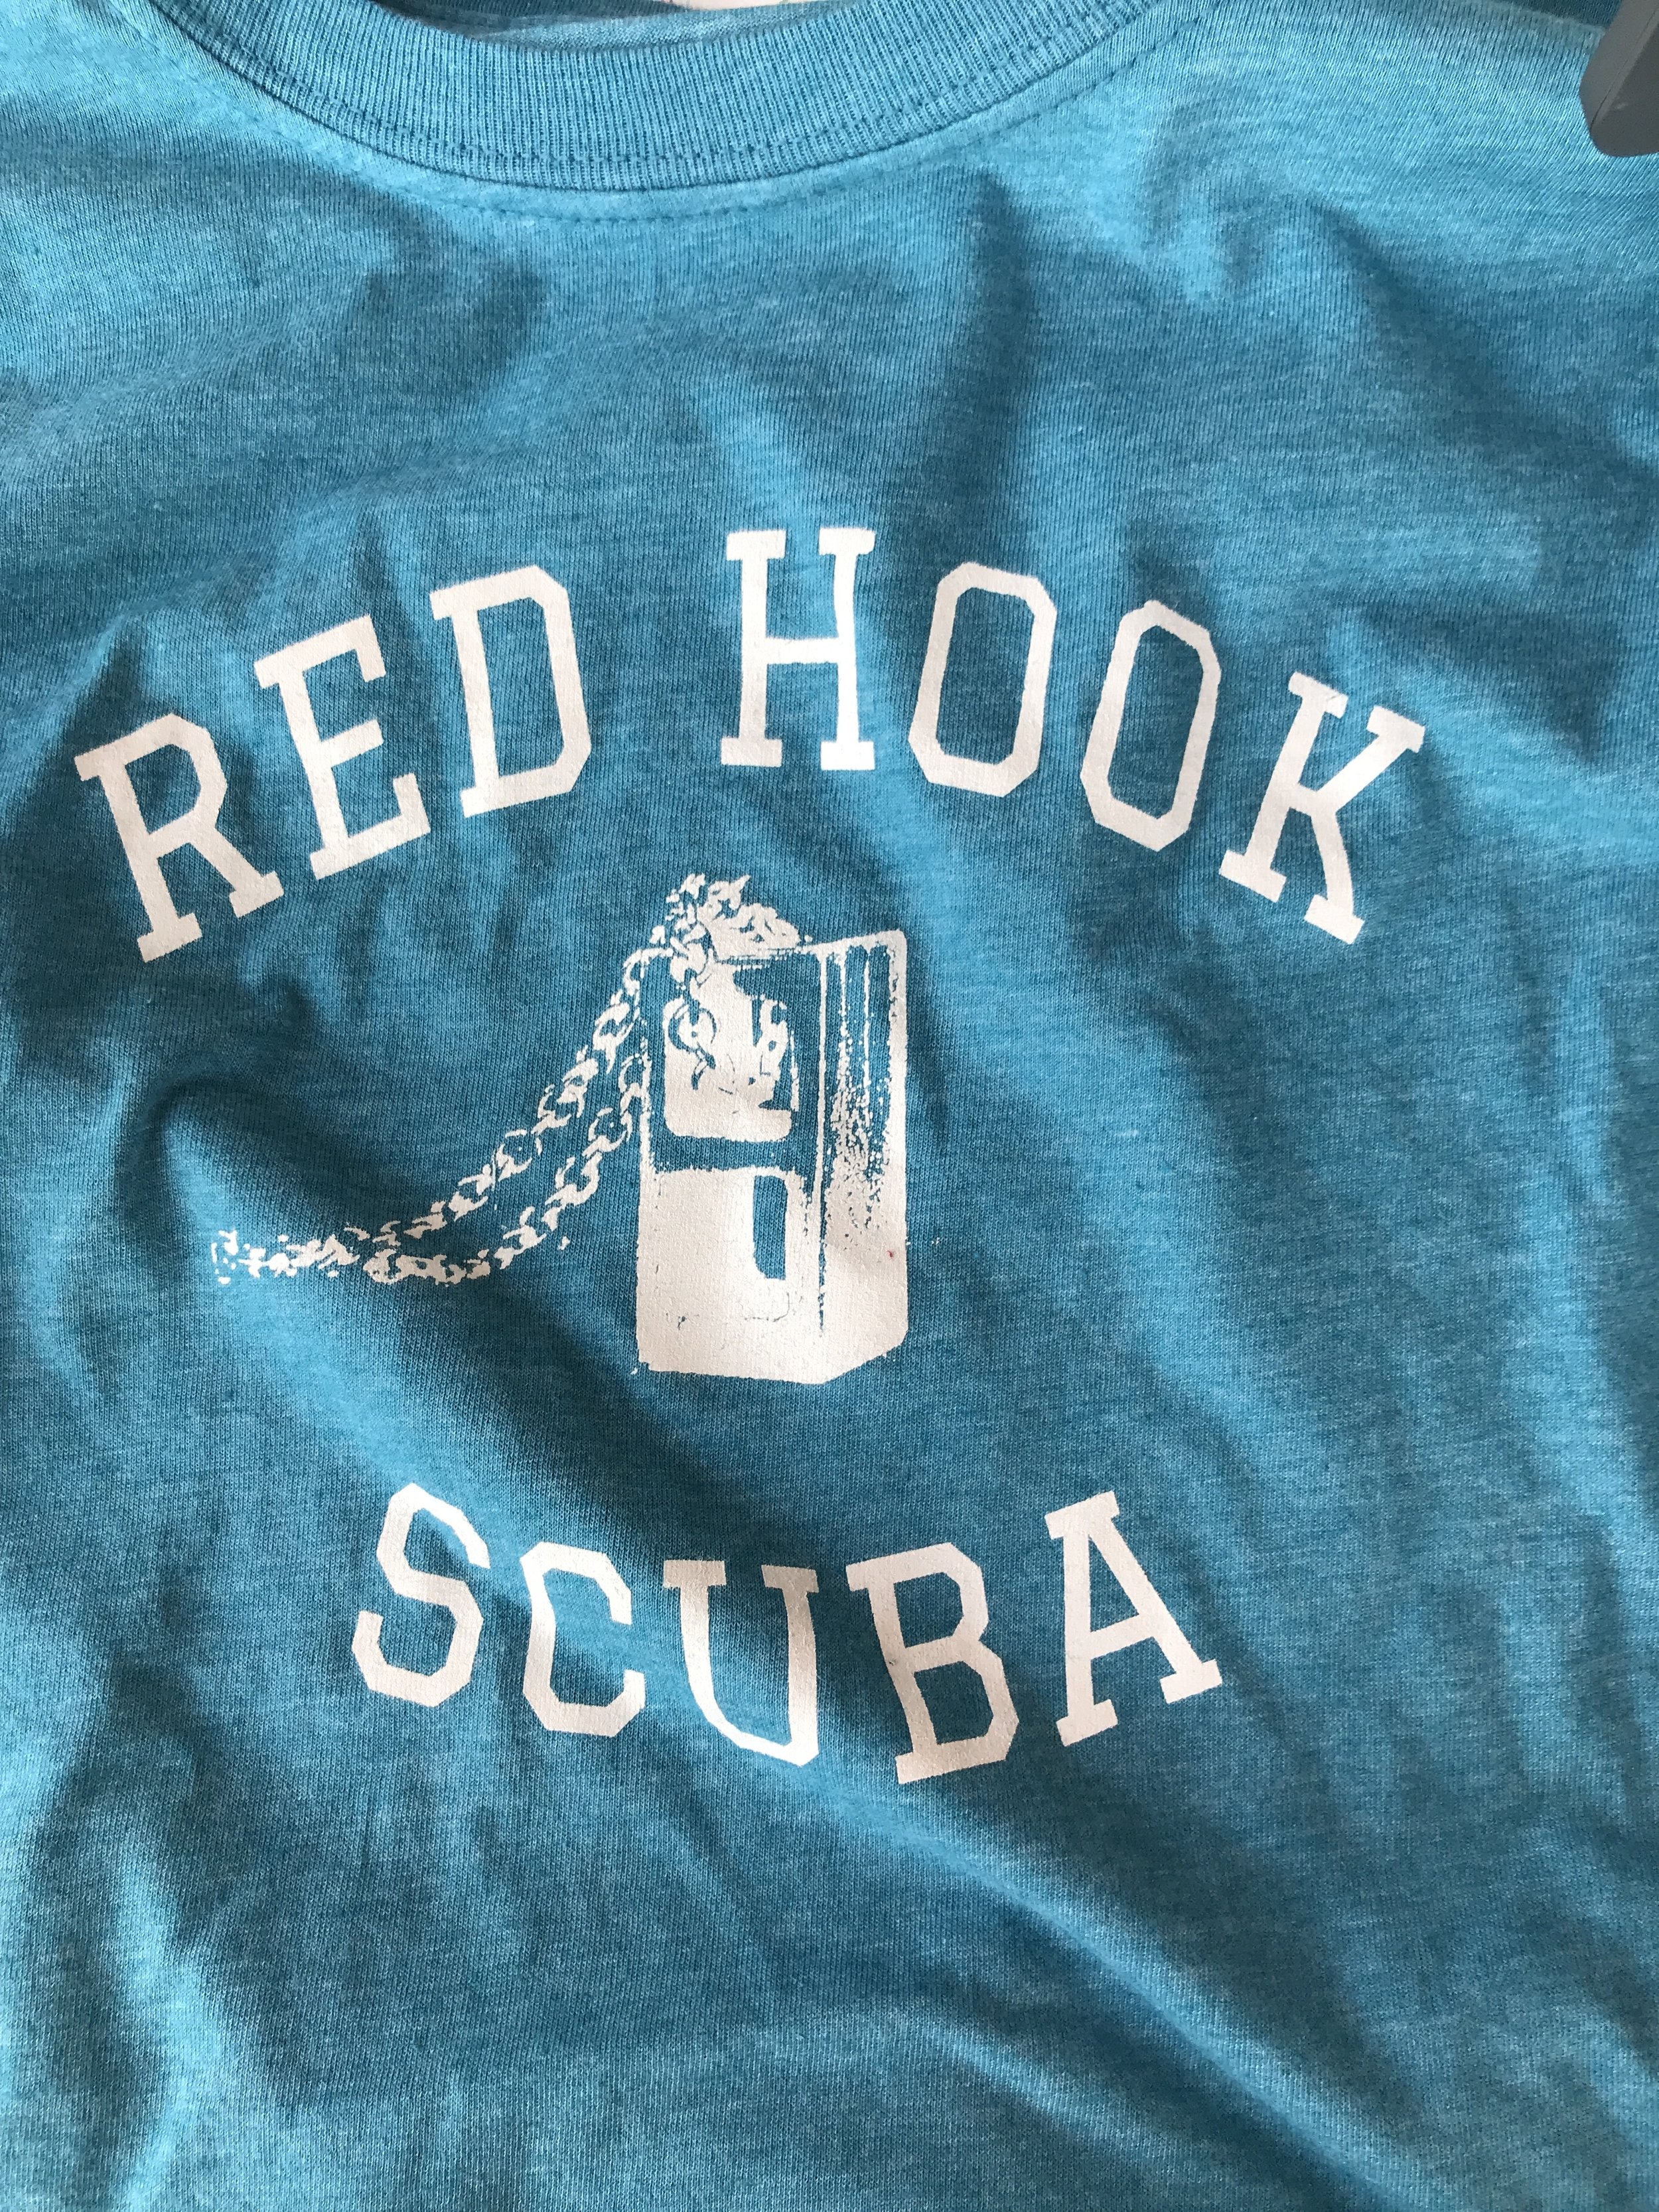
One day I discovered a small t-shirt printing shop, and attracted by the literally "red hooked" shirts for sale, I wandered in and bought some. There was a 3D print of Cheech (from Cheech and Chong) wielding a plastic red hook, and before too long the proprietors and I were discussing Red Hook history and 3D printing. There was even a 3D print of the proprietor. Somehow I mentioned my 3D paddle and the two informed me they were going to be entering the Red Hook Regatta. Being a boat enthusiast, I needed to know more. I quickly added a 3D printed Red Hook key chain to my horde after I was informed it floats. This is now an easy to spot Hudson River friendly key chain. I also informed the 3D printing whiz of the duo that he should take a look at Simscale, so he could not only model a propeller out of the red hooks, as was his ambition, but model the fluid dynamics. Just what is the water doing when your paddle spears down into it? See image below, and see you on the water.
This is what the water is doing on the "catch," when the blade is buried at the start of the stroke. Or at least the computer thinks so. What do you think?
As a seasoned 3D draftsperson in the architectural world of big box buildings, getting comfortable with drawing complex curves on a very small scale was a much greater challenge than I had imagined. I had the fortune of working with a great fellow from South Africa, who worked with me on a project as a BIM specialist. All day long he drew the building we were working on and from time to time we were visited by Autodesk specialists, who introduced us to deeper aspects of their cloud platform. My fellow worker politely informed me that I would have to give up on SketchUp if I wanted to actually print curves. And so, reluctantly, I left the long comfortable and now rather cartoony realm of SketchUp for Autodesk Fusion 360.
Utterly failing to draw and extrude complex curves, I finally found tutorials for fans on YouTube, and when I finally emerged victorious with my first simple fan drawings, I knew I could move on to drawing paddles. At first I printed a 1/4 scale paddle in black ABS just to see how it executed.
Next I found myself up against print size limitations, so I had to engineer the paddle in pieces. Today, we epoxy together the Brooklyn Bridge prototype... STAY TUNED
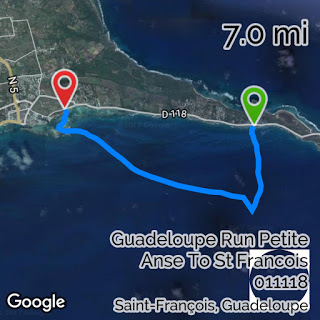
Let's just start with the action, my first successful downwind:
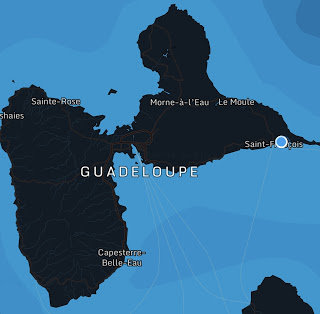
This is an edited version of an approximate 10K downwind run from Petite Anes to St. Francois. I don't wear a GPS, so the paddle path is general, based on our southerly trek against the wind and waves until we turned west to make the downwind run. My technique is truly lacking here, but I started to get the feel for timing, and
I did not huli.
Which is a little remarkable given some of the action.
I am a novice OC1 paddler, or as my new paddler friend J.P. told me in French, a
debutante
. Fool might be a more appropriate word. What was I thinking taking on the Caribbean Ocean? This was probably my 8th paddle in an OC1
ever
. I had spent more time fixing my canoe than I did paddling it during the 2017 season. (Vintage Puakea Kaku, see previous repair blog entries). I did get to spend a lot of quality time in an OC2 in the New York harbor and signing up for Woo downwind camp stands as testimony to my enduring foolishness. I emerged from camp as a full-blown downwind addict. Where can I get more???
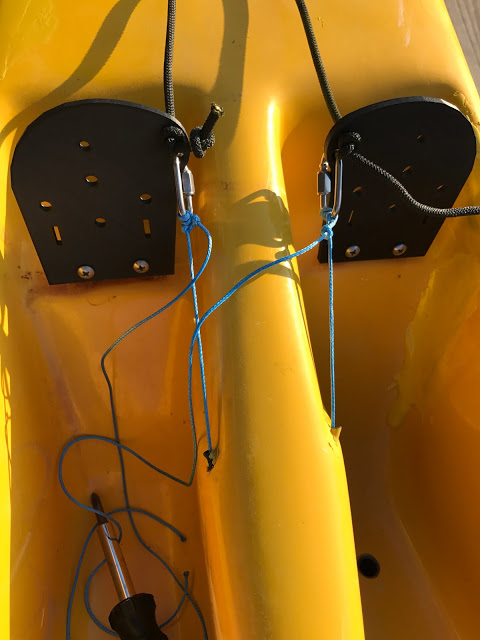
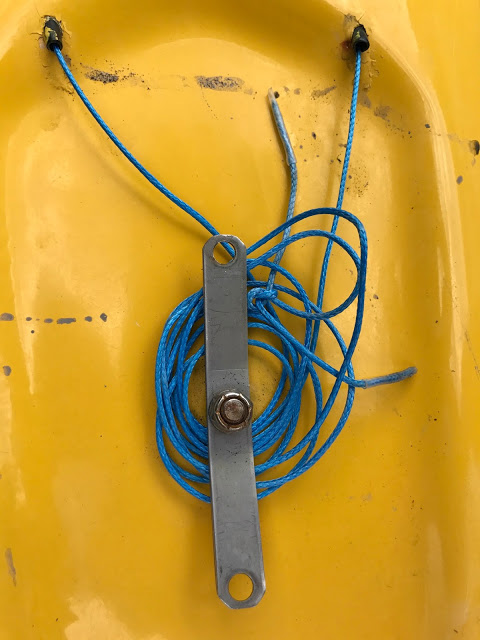
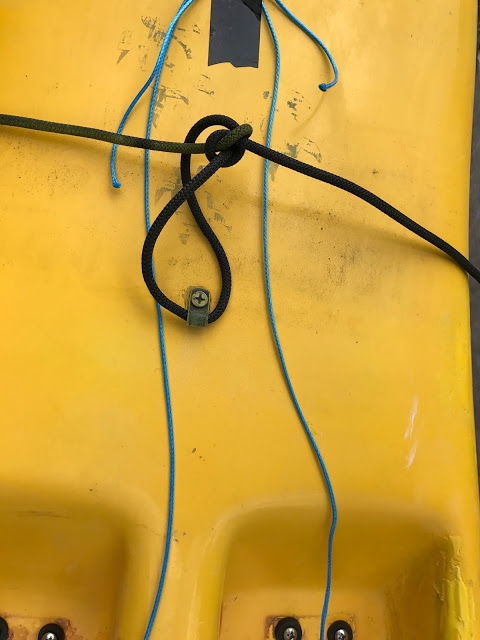
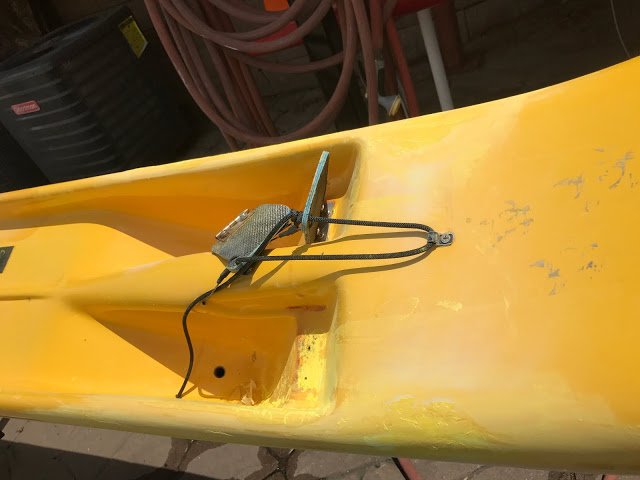
Tonight I finally got to install the new 3D printed pedals. I work with SketchUp and exported the file to STL. From there I went to 3D Print Hubs and chose a hub in Connecticut. I went back and forth with the owner of Diversified Manufacturing Tech while I refined the basic design. He suggested the carbon fiber/nylon material named "onyx." I spent considerable time engineering the holes through which the bungee cord and rudder lines would connect, and during attachment I had a friend hold the rudder while I toyed around with the length of the lines, seeking the right amount of tension.
3D printed ONYX pedals, $20.80 total
Not only are the pedals great, Andrew even did a follow up. A lot of customer service for $20.80, and he threw in a tablet stylus as a business promo gift. As someone who owns three tablets, I really appreciate that. So, here is his plug: Diversified Manufacturing Technologies website.
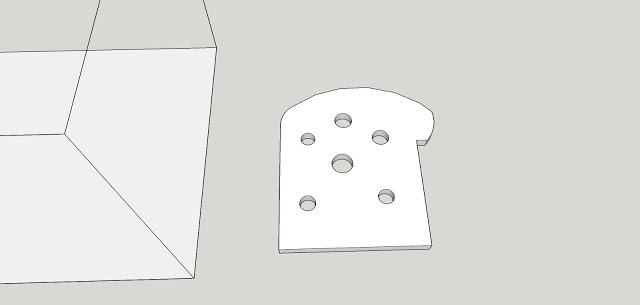
My first SketchUp drawing based on the old pedals
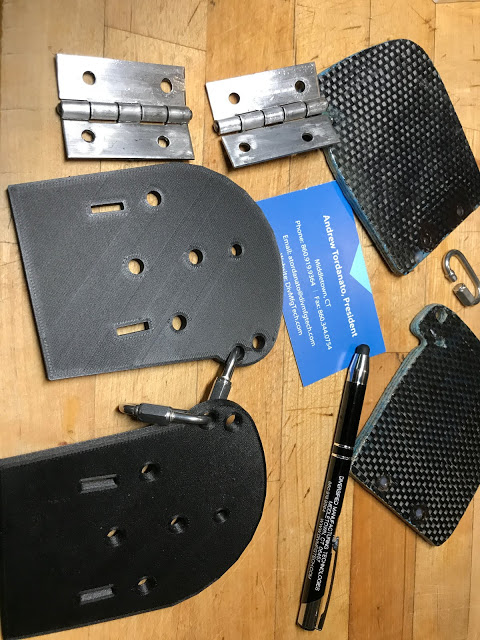
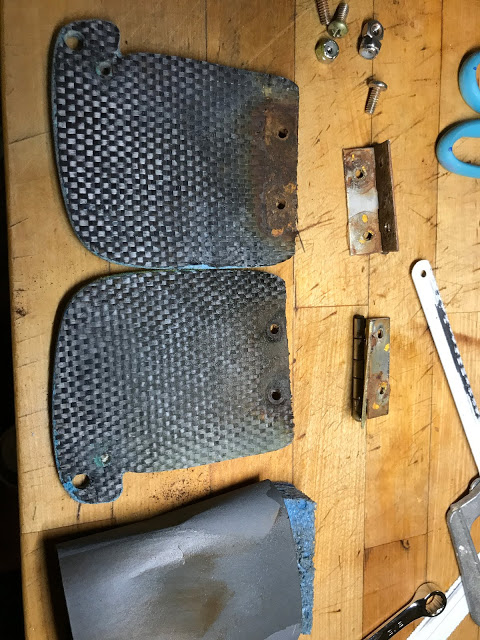
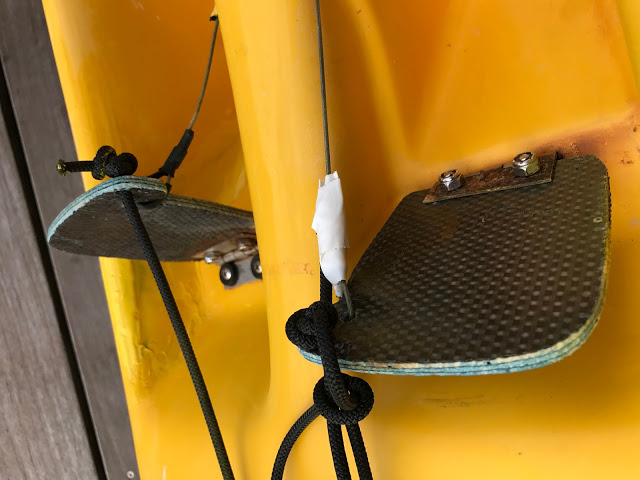
Not knowing the material, I agonized over how many holes I could put into the pedals and still retain stiffness. I definitely could have gone thinner. I definitely could have gone with more holes or etched my name into them. At any rate these pedals will probably outlast me. Fully recycling the older pedals was not much of an option because they are a ply material and warped. The hinges, as you can see, were brought back to life with a few minutes from a Dremel and some 220 and 3000 grit sandpaper. I also hit them with a little silicone marine lubricant. Shiny!
New Pedals and Rejuvenated Original Carbon Pedals and Stainless Hinges
Before: condition of pedals and hardware (the rust had issued from the old non-stainless screws)
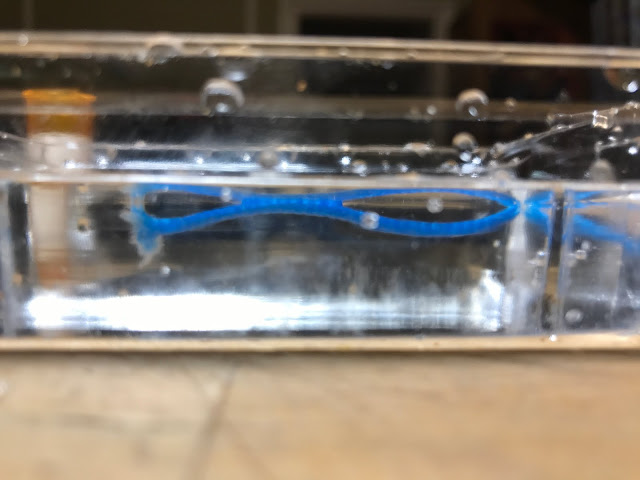
24 Hour Float Test with Plastic Cable
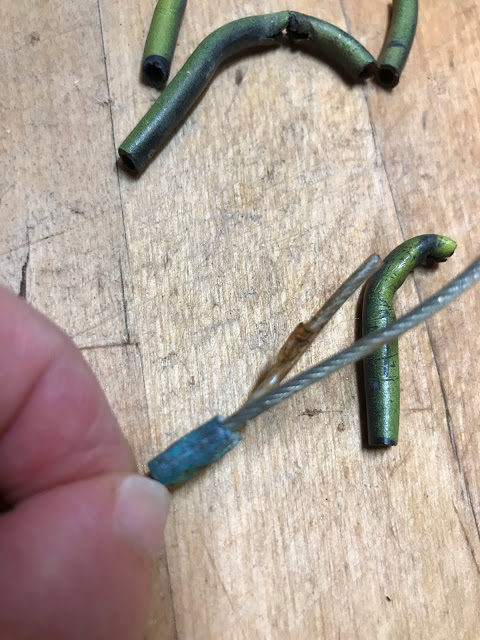
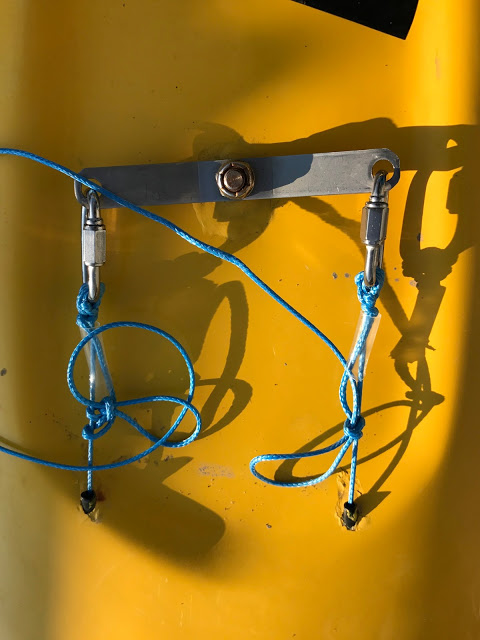
A rusty crimp in the hard loop of the old stainless and cracking, failing tube
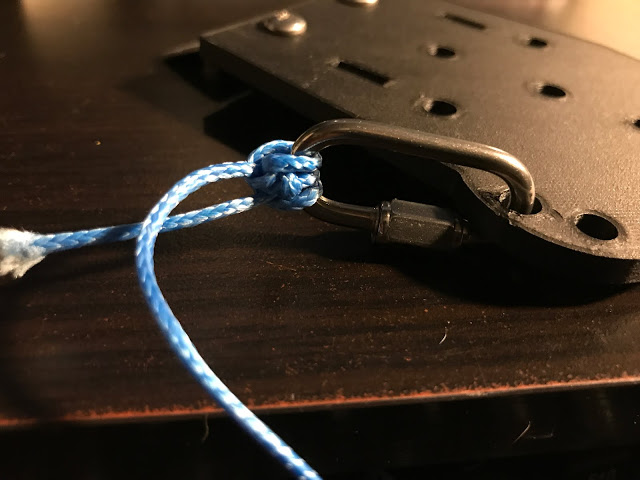
Slip Knot with a lop and another slip knot - 3x strength
The UHMWPE is supposed to float. Did I have the real stuff or some kind of knockoff? After a 24 hour test, the material proved not to take on water. It is only supposed to stretch or creep under sustained load, which is not our case. I decided also to go with the stainless quicklinks (1/8", 306 SS) for pedal and rudder tail, since the rounded edge would ensure a longer lifespan for the new cable. Paddling is all about avoiding friction, right? See you on the water!
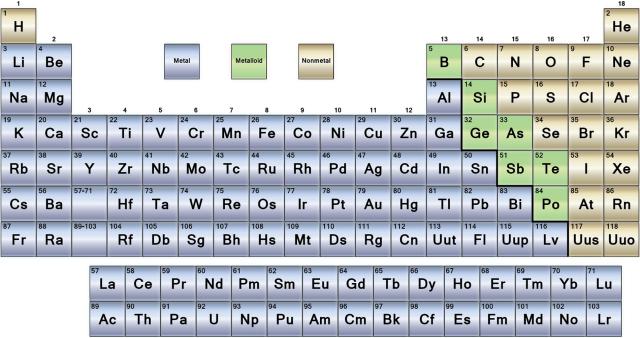
Did you know we live in a mostly metallic world? That salt you like to shake on your dinner?
Metal. That saltwater you like to play in? Metallic water. Those rusted rudder cables that snapped on you just when you least expected it? Rusted metal. So what is metal, and why do we think our stainless steel cables are strong, say, in comparison to plastic? If you've landed on this blog, it's because you like me need to swap out your rudder cables, and you've come across an alternative cable, likely named Spectra.
As you can see from this periodic table of the elements, most of our elements are metal. Loosely defined, a metal is an element that bonds atomically with itself in a fluid manner. Stainless steel is an alloy of iron and chromium as well as other metal elements namely nickel and molybdenum (Mo, number 42). What makes your rudder cable strong is not so much the willingness of its metal elements to bond to one another but the number of strands wound into the cable. Metal filaments can stretch and break quite easily, but wound together into a rope, like any other kind of rope, they gain strength. Like just about everything else also, when they flirt with omnipresent oxygen, oxygen steals their bonding strength. The red of rust is the bleeding, if you will, of the iron as it succumbs to oxidation.
Luckily I was playing around with my rudder cables on the dock when I had a rusty connection snap before I got myself into trouble on the water. Perhaps it wasn't so smart to rig up the loop with medical tape, but that's what I did. I was comfortable with knowing very little tension pulled the cables while steering. This comfort also helped me make the decision to switch from steel cables to plastic.
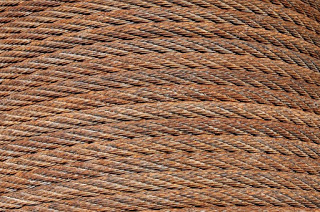
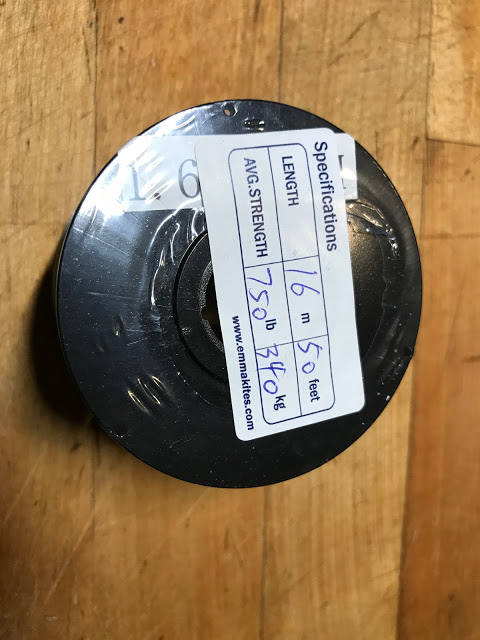
I ended up choosing a reel of generic UHMWPE from a kite string company. You will find any number of UHMWPE lines on the market for spear fishing, etc., without the comfort of a brand name. But does your stainless steel cable that snapped have a brand name you trust? Probably not.
Curious Hand Written Specification
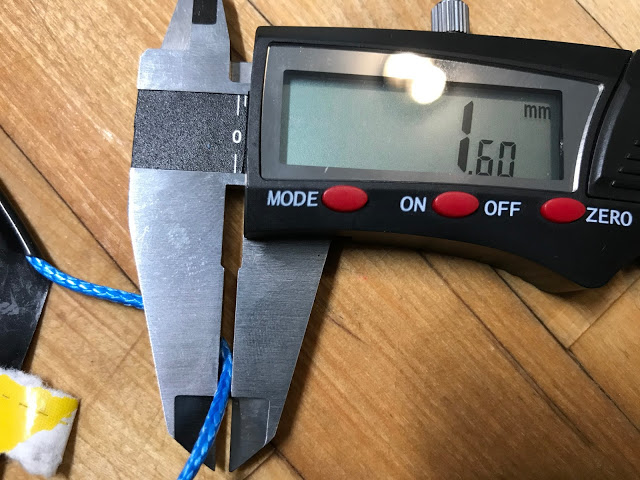
I visually inspected the fiber and found it appeared to be the same kind of product listed as Spectra or Dyneema. It had no give and was nearly impossible to cut with anything other than a fresh razor blade. As someone who has worked with wire rigging and synthetic rigging for the past twenty years, I know the only thing that will prevent any kind of line from failing under use is INSPECTION prior to use. There is nothing about this fiber that indicates it will fail spontaneously. This particular product was cost effective at $12.95 for 50 feet of 1.6 mm on Amazon.
UHMWPE Fiber
At first I thought I'd be able to wrap the end of it to the broken stainless cable with electrical tape to pull it through the rudder line, but this product is very slippery.
Looks a lot like Spectra and Dyneema
I was on the dock scratching my head when I had the idea of using some of the shrink tube I had purchased to connect the two ends. I'd taken a variety of tools with me and was very grateful to have the clear tube. Success was mine a few minutes later.
The tools, including clear shrink tube at the top ($6.99 on Amazon)
The cable measured true to its specification as listed on Amazon and on the product
Here's a video of me inspecting the line and trying to cut it. I was only able to cut it with a brand new sharp razor blade. This is good news, since it does not easily cut against an edge and gives me ideas about how to protect it from rubbing for final install. Anyone who has ever worked with mason's line, which looks similar from a distance, will see how taut this line is in comparison and how difficult it is to make it cut or even fray.
The clear shrink tube linking the two materials together for pulling
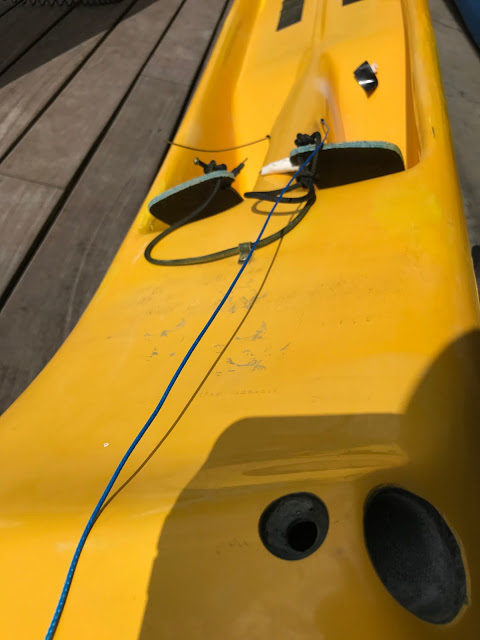
My first tug through the cable tube failed, and I was surprised when I pulled the blue line out to find the shrink tube had slipped off the stainless. So, using a Bic lighter, I redid the shrink tube, shrinking the tube longer on the steel side. Plastic rope will melt easily, so I did not want to go overboard heating it on that end. I unspooled a decent length of the UHMWPE so there would be little resistance while guiding it through from the pedals to the rudder.
UHMWPE fiber and stainless pulled through. Success!
Some dirty water came out with it, and not only was the shrink tube joint intact, I could not pull the ends free by hand. I cut the tube and left the end on the fiber line. My confidence in the products was gaining by the minute. Soon I had both lines pulled and terminals protected by clear shrink tube. I'd spent considerable time reading up on tubes and finally went with clear so I will be able to see what is happening with the weak areas of my rudder lines. In the photo above you can see rust on the stainless.
Excess line pulled through at rudder
Excess line left at pedals
Stay tuned for the next post, which will cover sprucing up the steering pedals and rigging the rudder bar and pedals to the pretty blue line. Remember to check your steering line BEFORE you paddle each time, and you can pretty much guarantee you won't experience failure on the open sea.
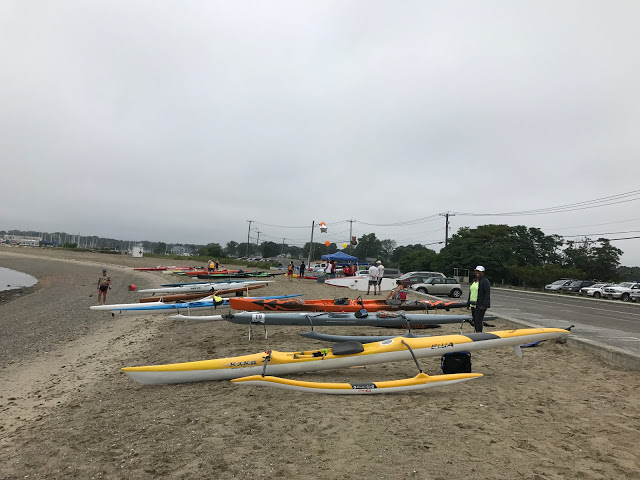
The GhostHope Kaku, with her razzle-dazzle of matte-white and off-white and blemishes of sunbeam yellow, was as anxious to get on the water as I was. We reviewed the short course of the Milford OC1/OC2, Surfski and SUP race but were encouraged to just go for the long race. I countered to the organizer, Ted, that the Luau would be held up by your humble narrator, but he insisted, saying "Everyone has a first race."
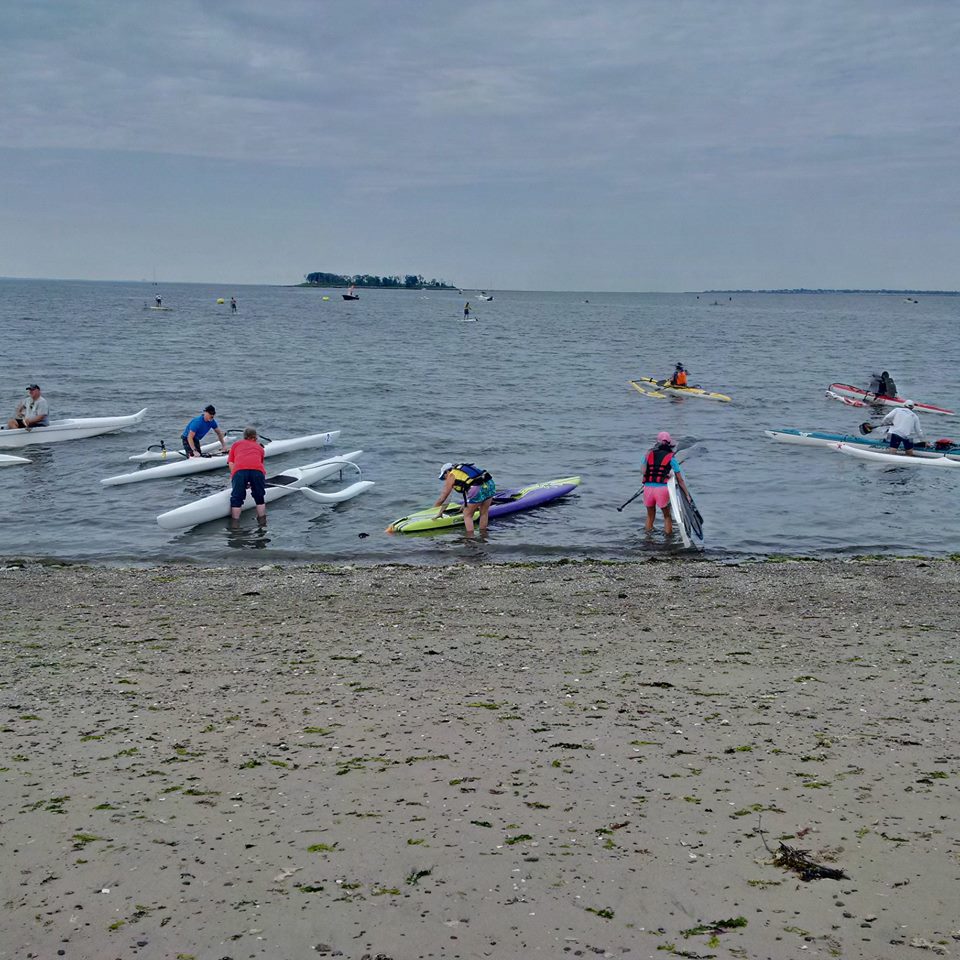
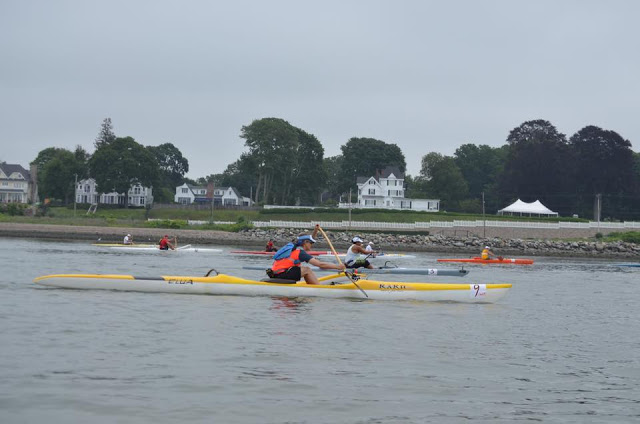
Canoes Lining up on the Milford Gulf Beach
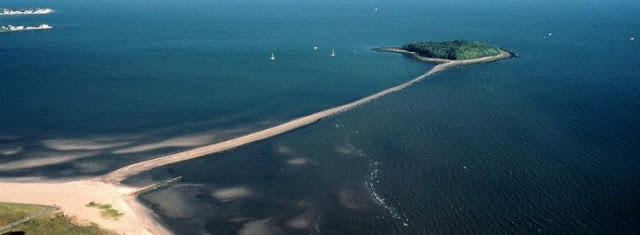
A few words about the Gulf Beach: it's a beautiful sandy arc and home of the Manu'iwa Outrigger Club. If it weren't for the interconnectivity of the sport and our planet's waters, I would scarcely think of visiting these waters, which are fairly spectacular. Charles Island, in the near distance, gives the racing eye a focal point beyond the endlessly unrolling shore and seductive points - you know, those points you look at during a race, thinking the finish is just around those rocks?
Charles Island, Audobon Bird Sanctuary and Eye Relief to the Ocean Racer
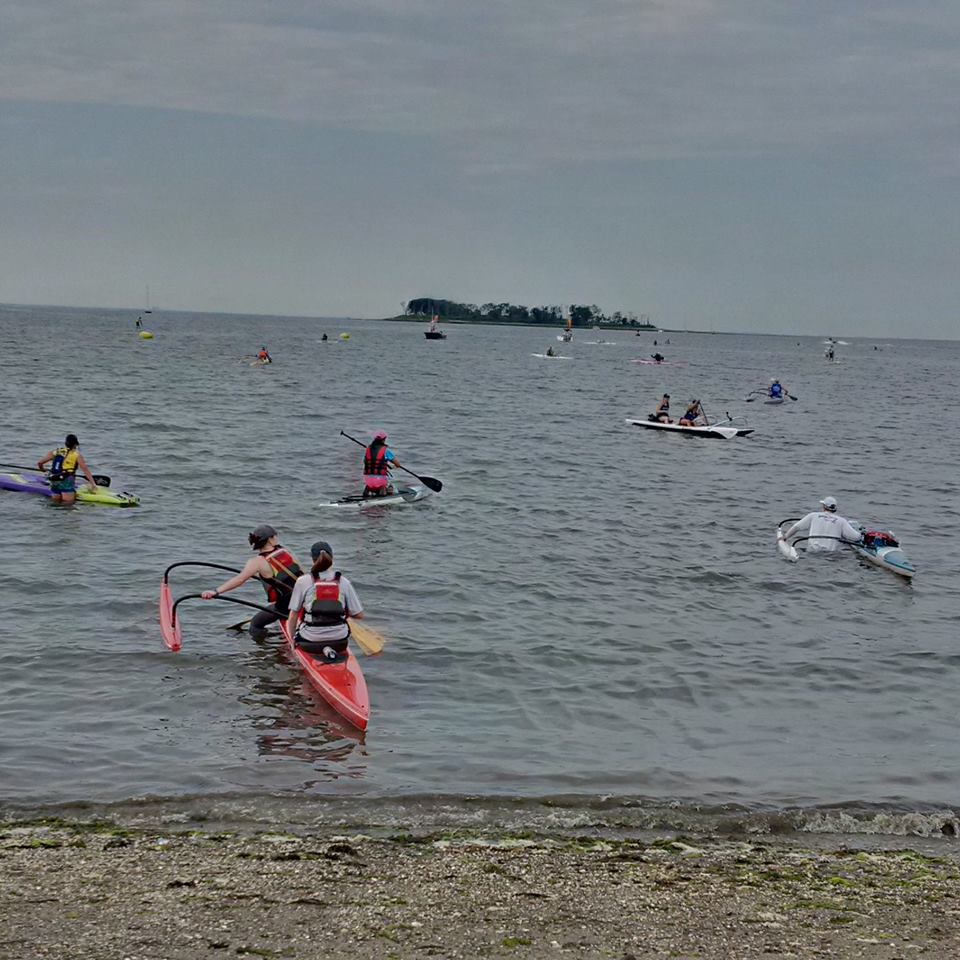
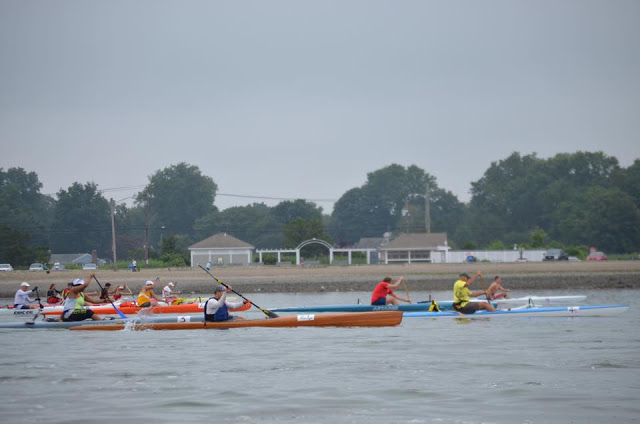
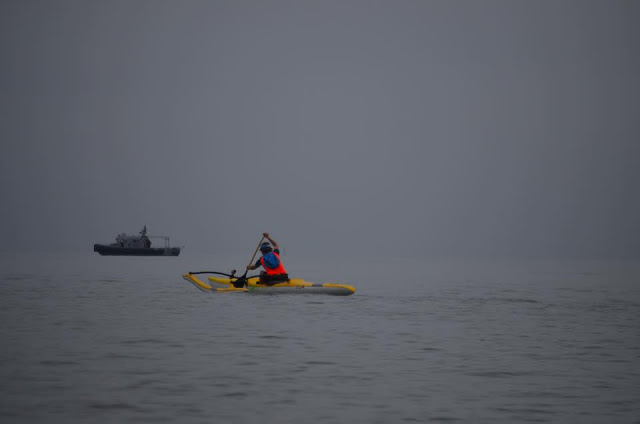
The morning was gauze gray, great racing conditions, nice and cool for July. The water was flat with intermittent rolling swells and ambitious schools of fish. During the race orientation Ted of Manu'iwa went on at length about rocks and how far to stay off the rocky shore. He gently warned ambitious racers about the dangers of hugging the coastline and off we all went to line up.
Milford 2017 Race Lining Up
Bright Orange Shirt to make it Easy for Rescue
Having spent most weekends working on the Kaku, diligently razor-knifing away chipped gelcoat and sanding, sanding, sanding, I held back on the race start and steered very clear of the first rocky point, which we clear prior to paddling into the open Long Island Sound. I was a few minutes into the start when I had to slow my 60 strokes per minute down due to an OC1 drifting across my path. An OC4 behind me exchanged dialogue with the craft, and it was discerned they had hit rocks, hulied and had rudder damage. Let's just say, I pulled away from the rocky coast and easily added a mile to the 9 mile race. My goal was firm: finish alive without a huli or a scratch to the beloved Kaku.
GoPro interlude:
It was a wary paddle thereafter, with this novice zig-zagging through some rolling bumps and puzzling about how to paddle through schools of pronging fins. Eventually I caught site of racers on the return, which gave me hope I too would find the green buoy, pivot and return. Ted had nicknamed the green buoy the huli buoy, so I made a long languorous graceful arc around it and finally found my groove. I was going to make it. Many thanks to Manu'iwa! See you on the water.
It was time to switch from the West System epoxy + fairing to gelcoat, and after watching my share of YouTube videos and reading reviews, I felt it was time to experiment. Let's just briefly say nothing went very well, and here is why:
1. Gelcoat consists of numerous chemical compounds, and no sooner did I open a can than the fumes got to me in the way of a headache. I certainly did not see a single person wearing a respirator rated OV for organic vapor in any videos, nor did this come up in any literature I read. So, here is my WARNING: USE A RESPIRATOR RATED FOR OV - ORGANIC VAPORS - WHILE WORKING WITH GELCOAT.
Got it? Gelcoat contains styrene, which kind of has an intense plastic odor - because that is what it is.
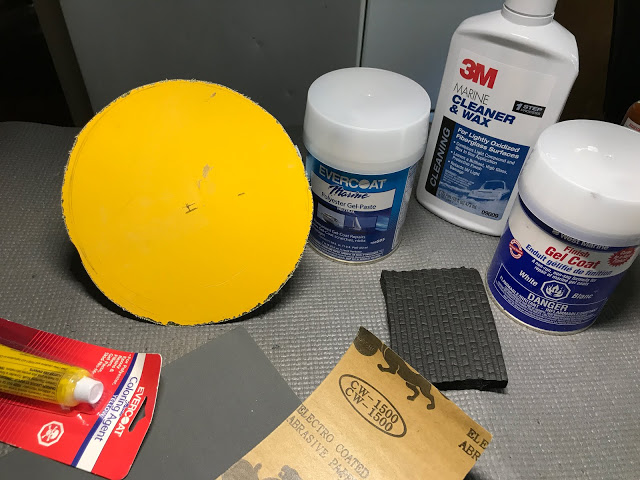
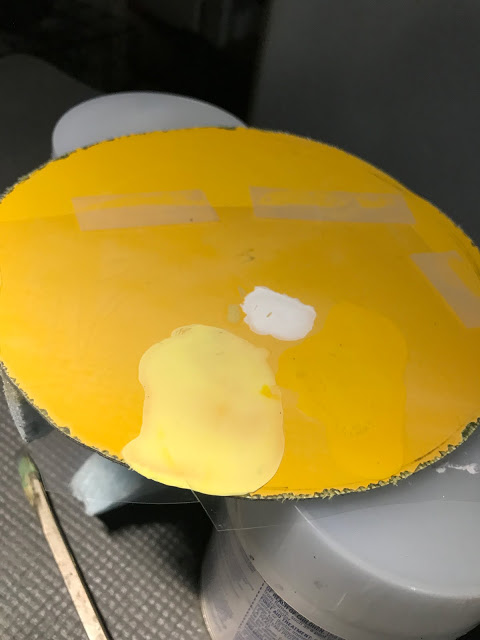
I had the hole section I'd cut out to use for color matching and was stupid enough to set this up in my kitchen. I believed I had good results with approximately three drops of yellow to one teaspoon of clear gel paste. It is important to note that trying to tint white gelcoat to get a bright color will not work. You will only get a pastel, like the light yellow in my sample. I did not add MEKP to my color samples since there was no need to make them cure. I covered the samples with acetate and stuck them outside, then aired out the apartment. Then bought OV cartridges for my North respirator.
Color Matched Yellow on the Right
Chipping out loose old gelcoat was accomplished with a flat razor blade and an angled razor blade. When it stops chipping, you're done. I hand sanded, beveling the old edges prior to adding in new gelcoat.
2: Another NOTE about things going wrong: Evercoat makes West Marine products, but apparently not the instructions on the different label. It is very easy to follow the Evercoat instructions and very confusing to follow the West Marine instructions. After consulting with three different West Marine techs, it was finally divined that FINISH GELCOAT means waxed, which is not an ideal first coat for just about anything. The wax will rise to the surface and seal the gelcoat, which requires an airtight seal to cure, which does not explain why Evercoat would tell anyone to use wax paper to seal the gelcoat. But, I did it just the same, with regrets.
Wax Paper Wrinkle Indentations in Yellow Gelcoat - Ugly
3: More things going wrong: Following the YouTube instructions of a well known marine repair person (who does not wear a respirator and who shall go unnamed), I used a cheap chip paint brush for my white gelcoat and a small plastic putty knife and squeegee for the yellow. My first surprise was how green the yellow gel looked once I added the MEKP. I went into slop mode and filled all the voids hastily then covered them with wax paper, as the Evercoat instructions suggest. I knew right away this was a bad idea. I had to sand down the high spots and wet sand out all of the stuck wax paper. Not fun. Yellow-tinted epoxy with fairing would have been a better alternative, but you don't know until you fail at some other option. Since I need to get the craft race ready, the final moving touches will be saved for later in the season. Suffice it to say after about 4 hours of sanding I got her looking alright again.
Brushed Gelcoat Holding Brush Marks - UGLY!
I also found out how hard it is to sand gelcoat down. I used 100 grit and gradually went up to wet sanding with 400. A chore I would have gladly skipped. But as Biggie Smalls says, "If you don't know, now you know!"
Goodbye Brush Marks - and an Hour of my Life!
It was time to make a big decision: mix white gelcoat with acetone and run it through my sprayer, untested on a 90 degree day? Or go with something safer. The disputes carry on about whether gelcoat bonds to epoxy and its UV resistance. I had discovered Krylon Fusion at a local hardware store and online found it came in different colors. This was the paint I used as a temporary surface when I took the canoe out for a test paddle a couple of weekends back. I had thought it would be easy to wipe off with acetone as the repairs progressed, but it proved very difficult to remove. After reading numerous reviews and finding out it is weather resistant - end engineered to bond to epoxy, I decided to go this route with Fusion paint for plastic. And here she is, a little cosmetically uneven, but race ready.
The GhostHope - Race Ready
Before
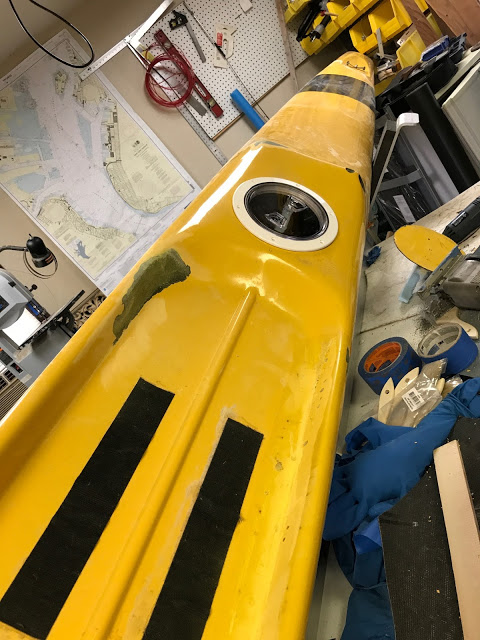
Remember that hole in the bow? Looks like this now.There is some minor fairing to tackle at this point, but it is now time to paddle and retire the sanding skills for a few weeks. See you on the water.
I did a very lazy huli (boat flip) on the Hudson River without thinking through that I had cut an 8" hole in the Puakea Kaku just behind the seat. This was patched in with a deck plate and white silicone. It wasn't until I had righted the craft and paddled back to shore that I realized I should have not only checked the canoe for leaks when it was right side up in the pool but also when it was upside down. About twenty years ago I caulked a 26 story hotel as an apprentice, so I guess you can say it paid off!
Picture Perfect Portal into the Carbon Hull
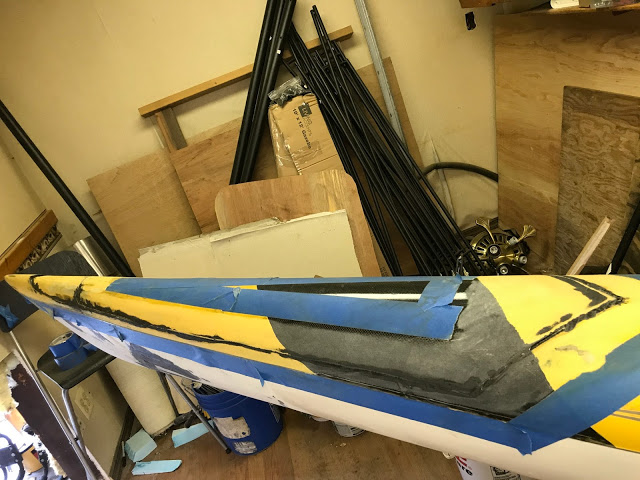
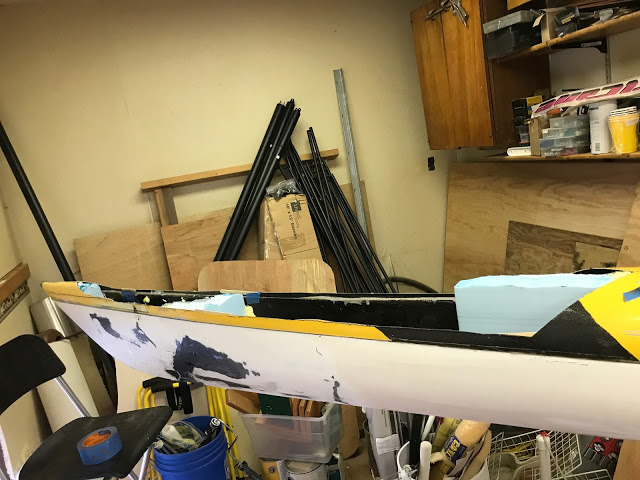
It was time to epoxy the top of the bow back into place. There was concern it might not quite fit the same way, and there did prove to be a minor snarl in the top where the major puncture had contracted during repair. Nothing some fairing compound couldn't cover up later.
Black epoxy used to join carbon seams
It is critical to mate the seams and not get too ambitious with laying carbon on the exterior. If anything budges during curing, you have to cut the nose and start all over.
Black seam epoxy sanded smooth and surface of gelcoat sanded down
Twenty four hours after the seam cured I sanded with a heavy grit (80 and 100) to smooth the epoxy at the seams and also to take down the surface of the gelcoat. At this stage we are only repairing the section above the waterline. NOTE: all critical structural repairs were done from the inside and not the outside. Blue tape was set to mark out 3" for carbon tape.
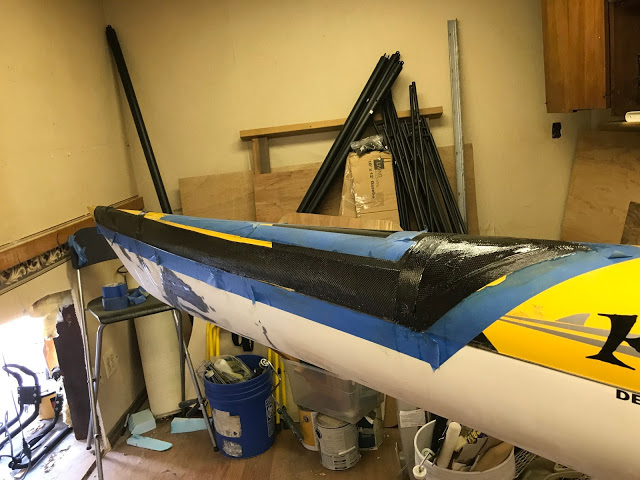
Carbon Fiber Taped Seams
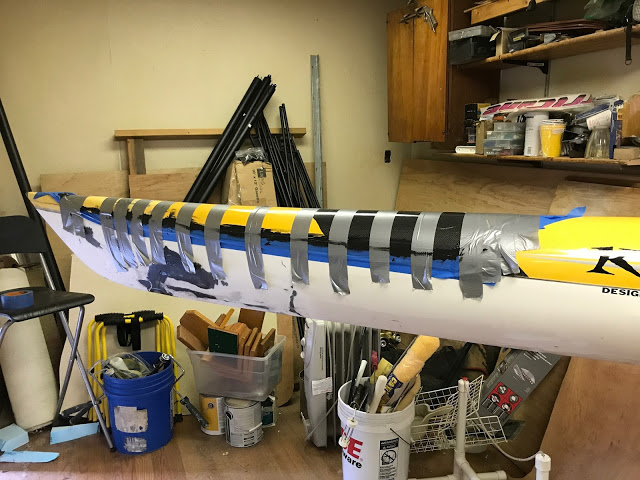
Clear West System epoxy was laid in the marked out area and the carbon tape (which had been precut and dry-fit) was run across joints. Wax paper was taped around the repair and a few sand bags set in place to hold some key areas down.
Wax Paper and Sand Bagged Repair
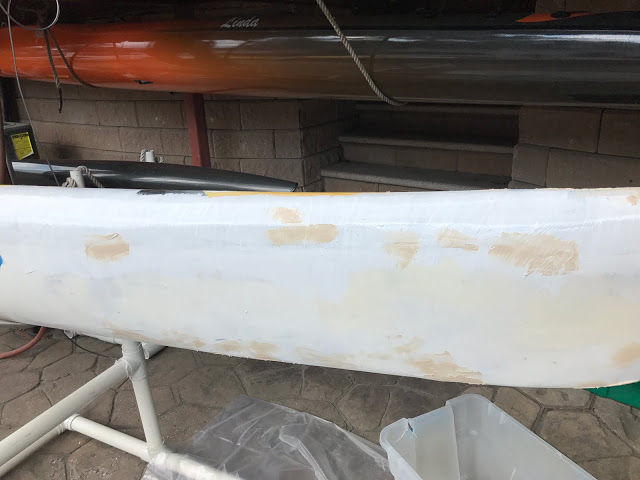
The next day, after successful curing, West System fairing was mixed into the epoxy to peanut butter consistency and troweled over the exposed carbon.
Fairing Compound
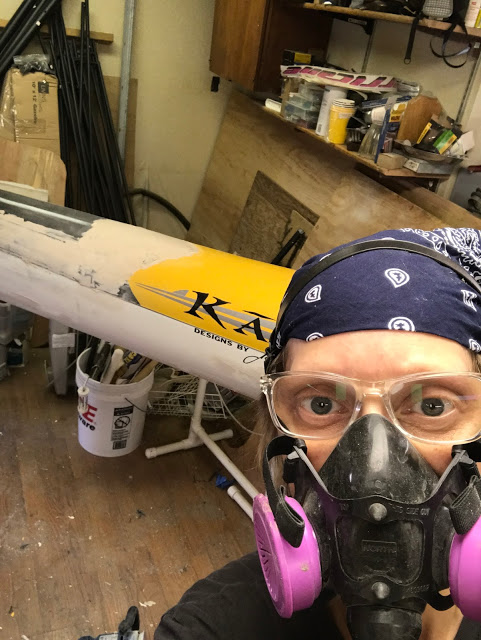
The following day, it was time to sand. Always wear a respirator!
Darth Paddler
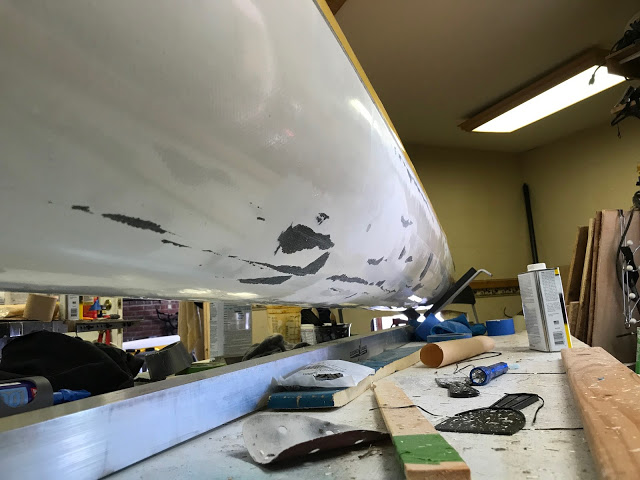
The OC1 was then spot checked across the hull for its numerous gelcoat cracks, which were chased open with a flat razor knife and then also hit with fairing compound. Below is an image of where there were structural fractures which were repaired on the inside with carbon fiber through the 8" hole behind the seat.
Cracks chased open in gelcoat after structural repair
You do not want the gelcoat flaking off, so its imperative you chase the crack until it stops flaking off, then lightly sand the edges of the remaining gelcoat at the perimeter. Take your time.
Pretty
The following day I hit the fairing compound with some 120 and 240 on an orbital sander with a soft backer pad. I hand sanded with 240 and 320 to feather but decided to leave everything a touch high and spray the repair spots with a plastics paint (Krylon Fusion) and give the craft a test spin. This way if anything did not quite work out, I would not have finished the project in remorse.
Three Weeks After First Receiving the Damaged Outrigger Canoe: SEA WORTHY!
In upcoming posts I will cover the headaches associated with understanding gelcoat, the difference between non-laminating and laminating gelcoat, tuning up the steering, rudder mounting and making your own rudder - as well as how to mount a GoPro to your outrigger. STAY TUNED!
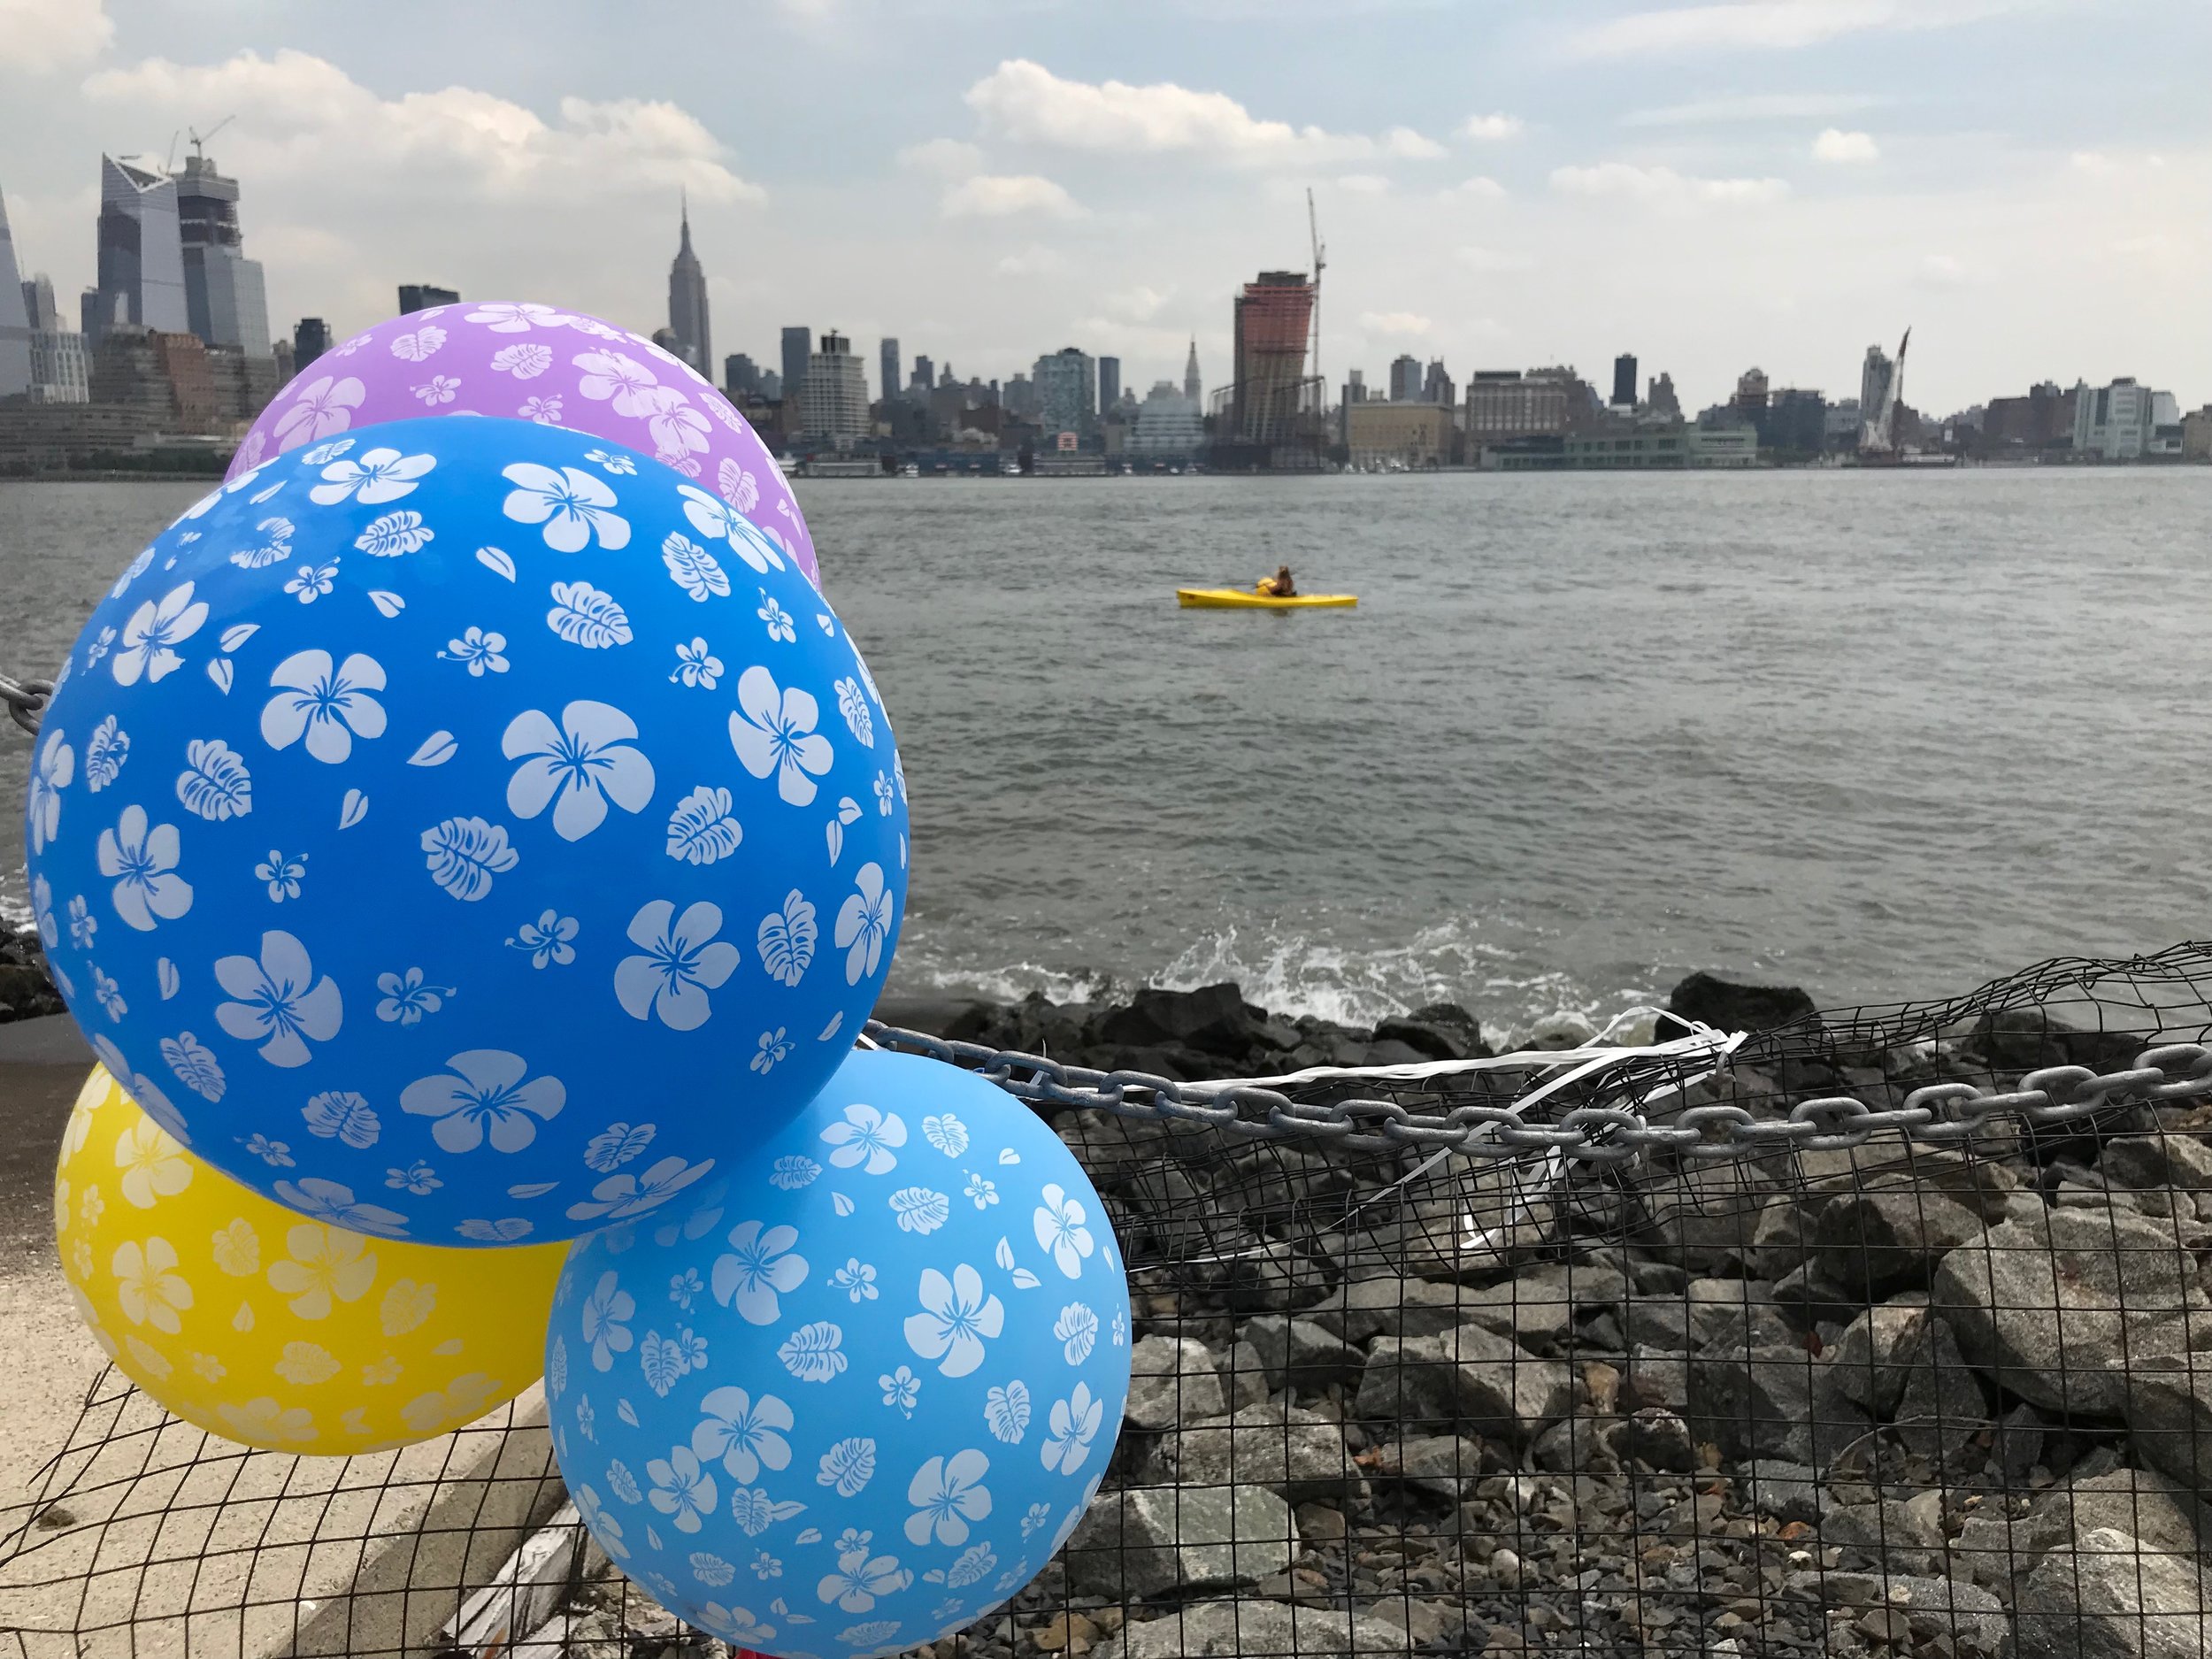
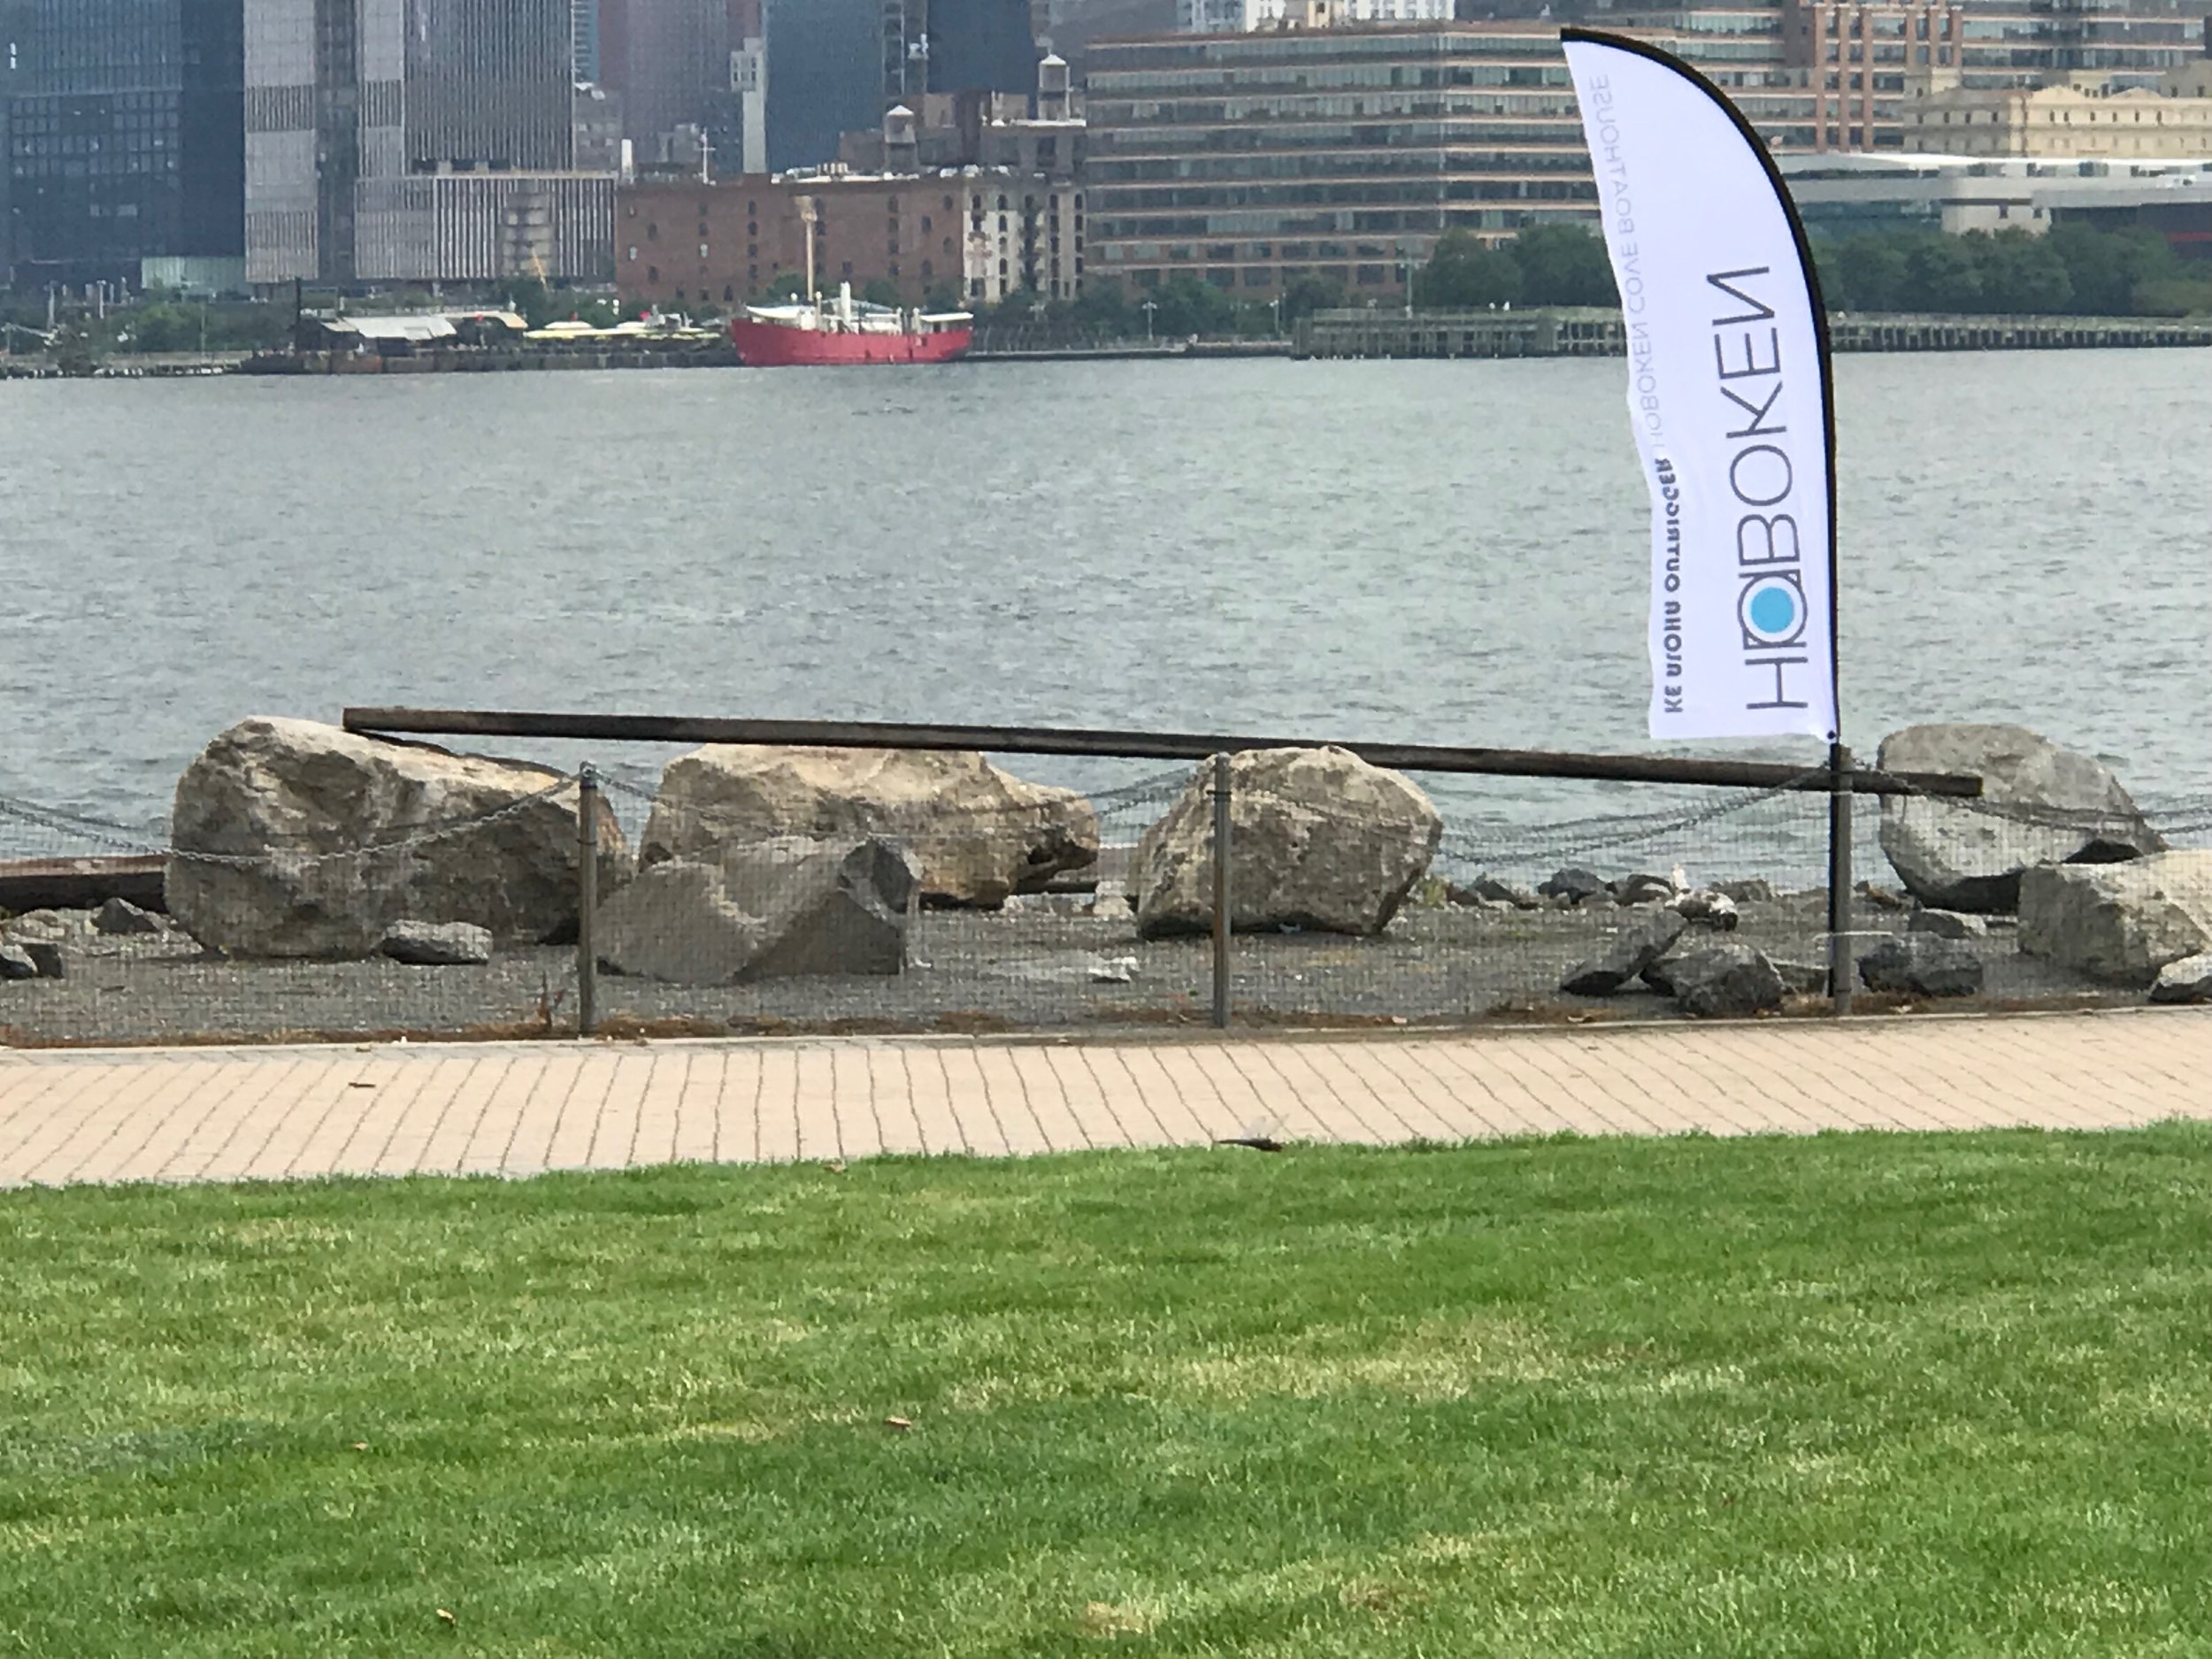
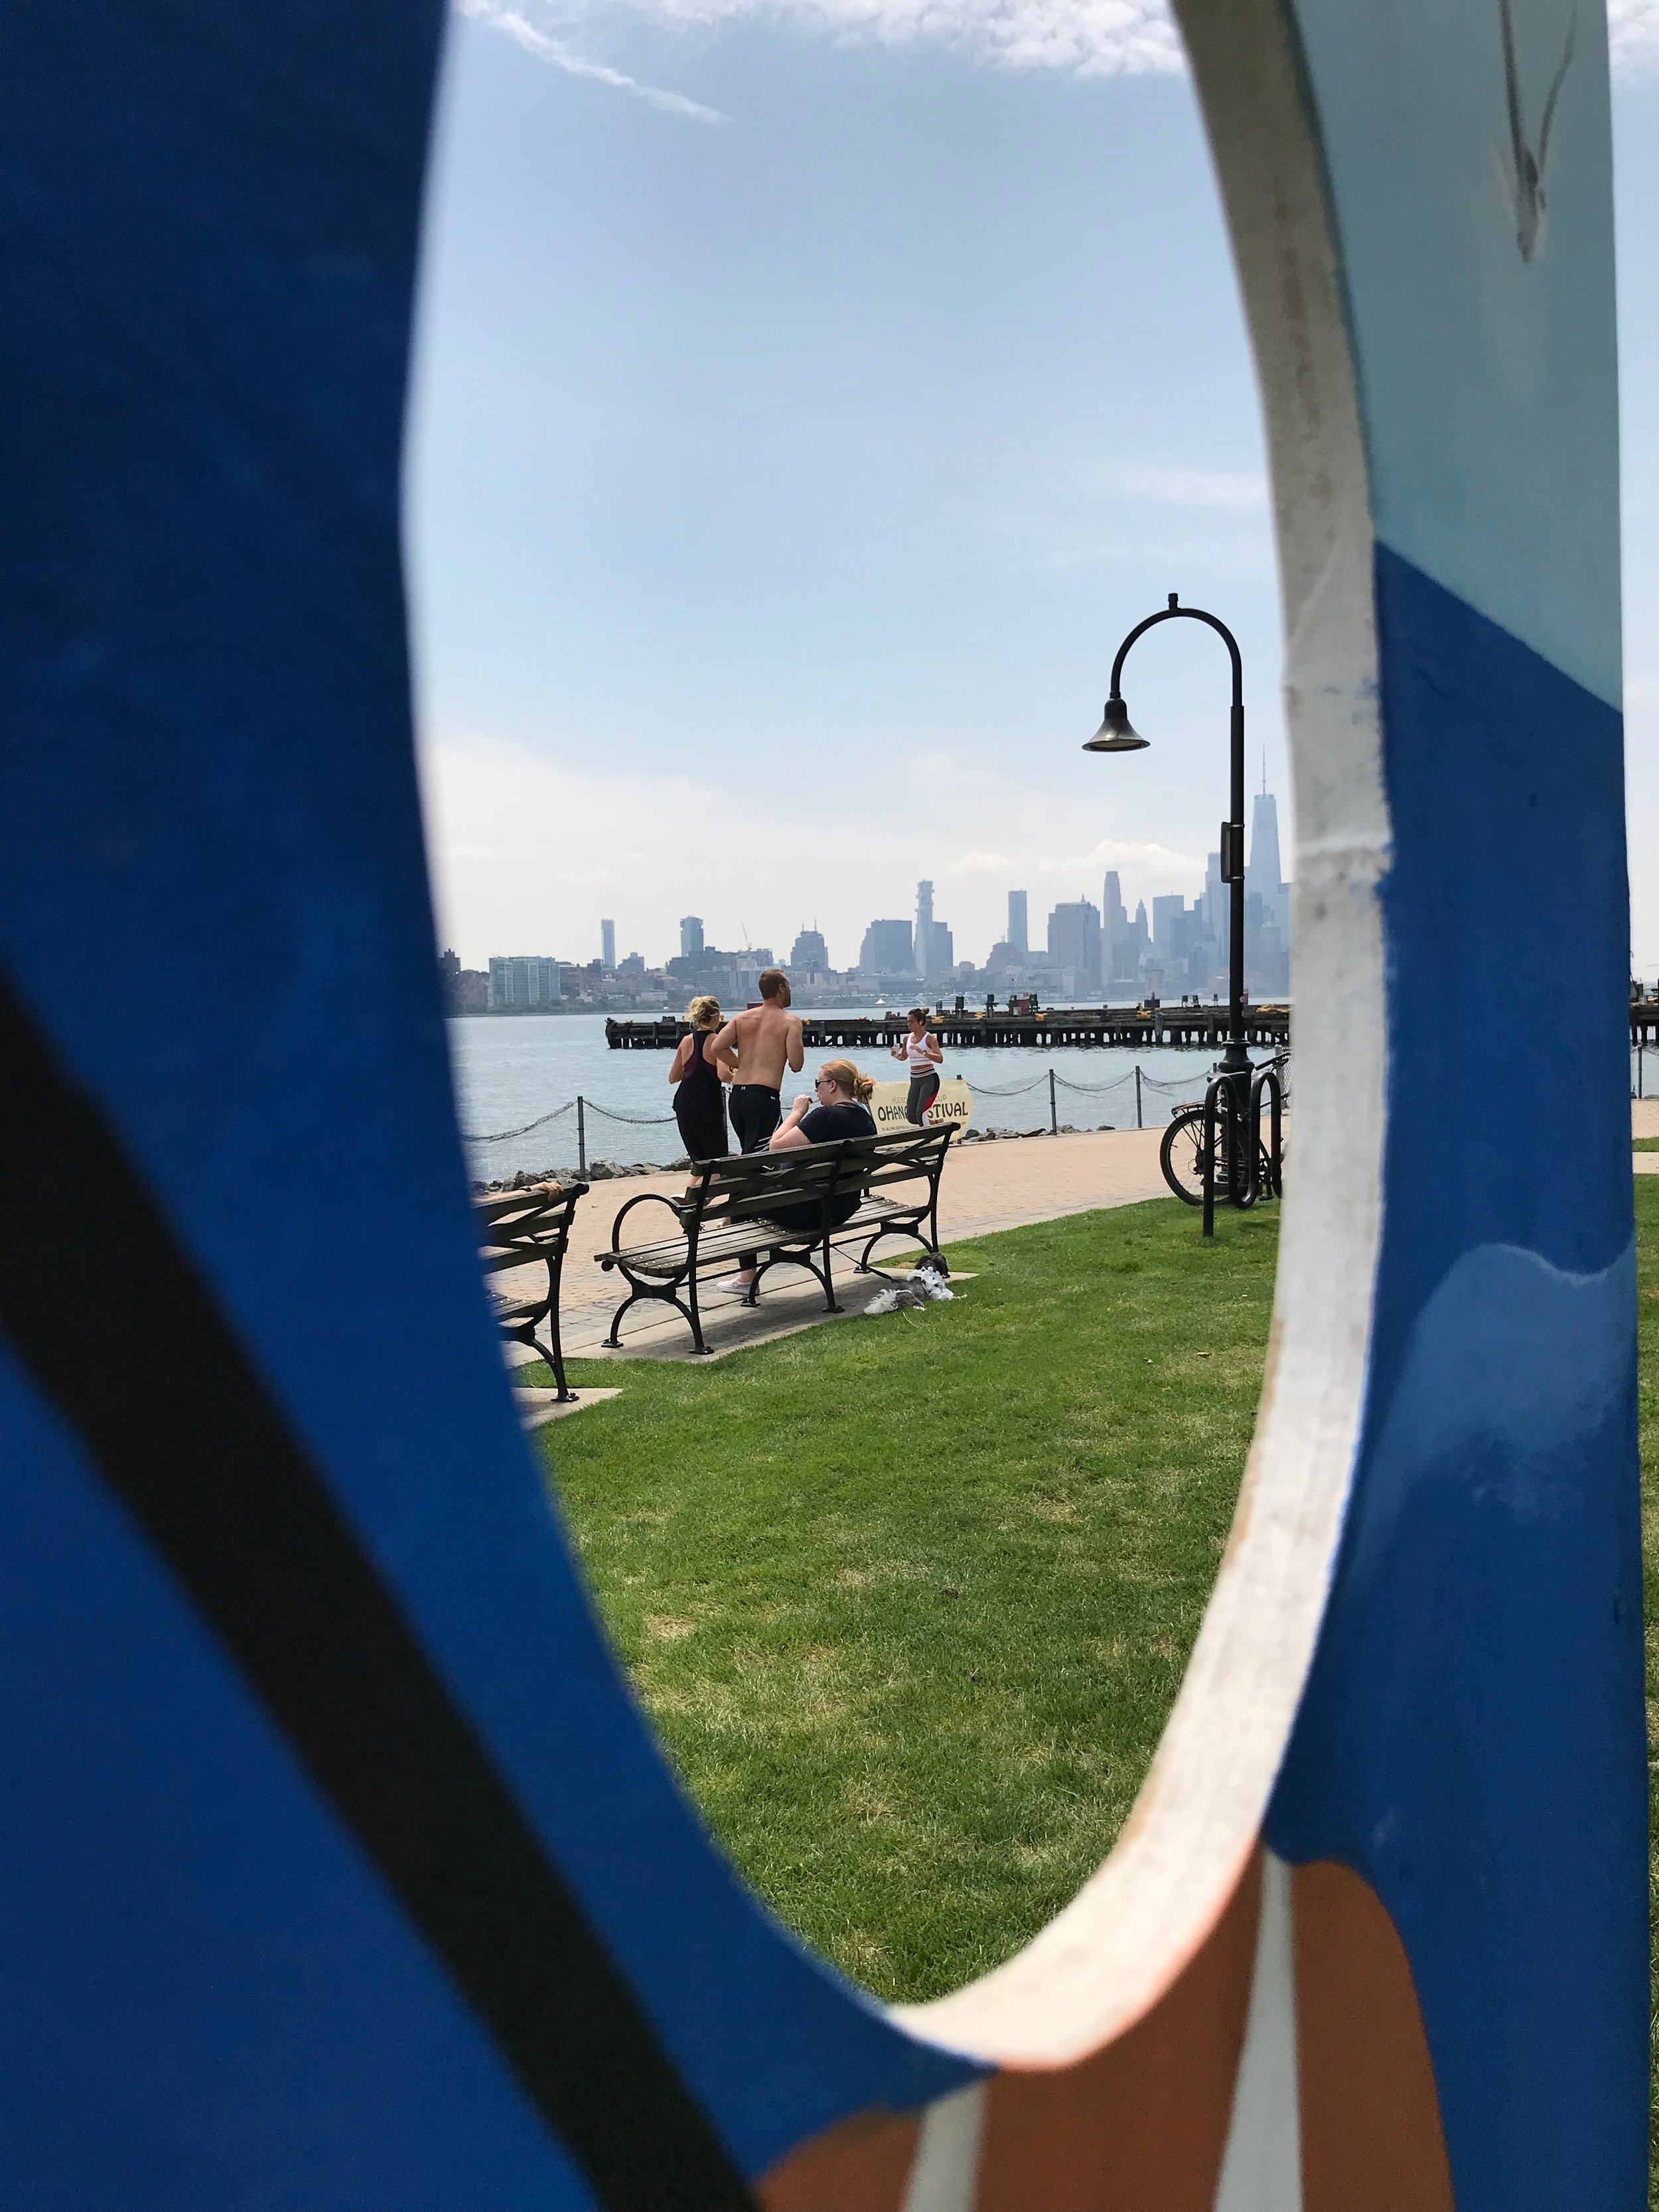
We interrupt this repair blog to give kudos to the Ke Aloha outrigger canoe club of Hoboken, New Jersey, which hosted the first OC6 sprint races on the Hudson River along with OC1 and OC2 races to the Statue of Liberty and back. In addition there was a SUP and kayak race.
Hoboken Cove, Ke Aloha Hudson River Cup
Many thanks to the club for a fantastic blast of a day - and for mother nature who, after cutting loose with torrential rain throughout the morning, whisked the dark clouds away and replaced them with an astonishingly blue sky. Downright cerulean, if you ask me.
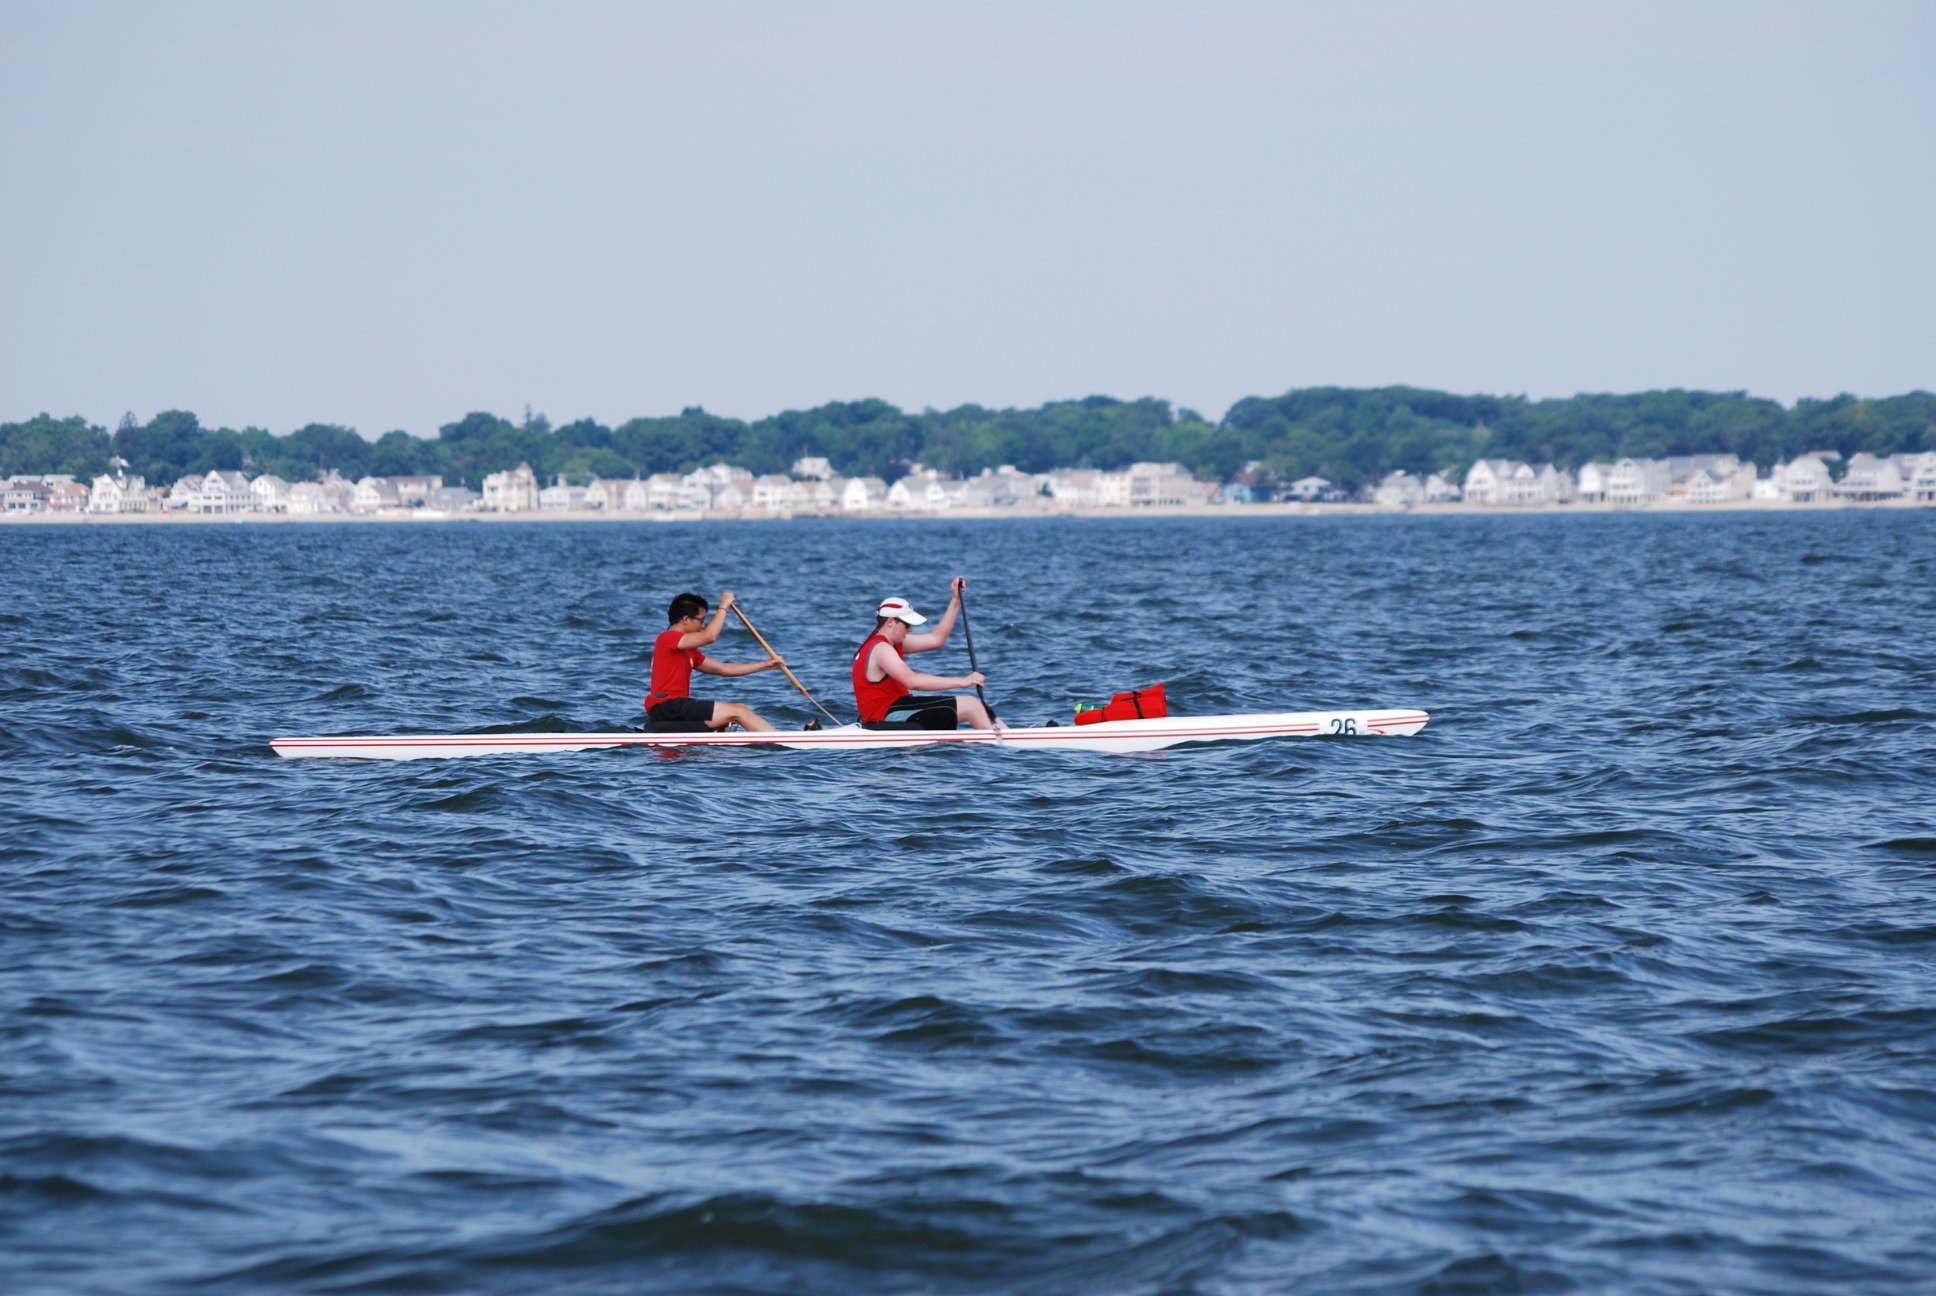
Sprinters Returning from Finals
This event was also an opportunity to give the OC1 I've been repairing a maiden voyage launch, after the recent swimming pool venture baptism. Let's just say I got first place in the Staten Island Swimming Pool Cup and was guaranteed a dead last if not a DNF in the Hudson Cup in case the repairs catastrophically failed. So, I skipped the race and dallied around on the Hudson, soon forgetting the invasive surgery to the craft. 'Cause this boat, which I've named GhostHope, floats! This narrative will soon return to what you're really hungry for: tips on rebuilding a hull, epoxy, gel coats, color matching, etc. In the meantime enjoy the fruits of my labor. If you likewise are faced with major repairs, have faith, buoyancy is right around the bend of bay and swerve of shore to where the river runs! (To paraphrase James Joyce).
First Place Swimming Pool Cup
In closing, here's a glimpse of the GhostHope, named for all of the waters she's seen and the waters to come! (The New York City skyline might be a bit more attractive than my stroke! So, don't mistake this for an instruction video. Especially if you are Johnny Puakea!)
After laying new carbon fiber cloth on both interior sides of the bow, which stiffened the hull and gave it integrity again, it was time to follow through with setting the blue XPS foam. I had tried cutting the foam with a razor knife, a hand saw and even a kitchen knife. Of those three the kitchen knife was easiest to work with to get a clean cut. However, I spent $20 on a hot foam cutter through Amazon and got my best results. None of those little blue styrofoam balls and relatively easy to cut complex curves. You definitely want to wear a respirator. The fumes are nasty.
All in all, I figure I added about 2 ounces of foam to the weight. I left a little gap on other side to ensure I was not spreading the hull and ensure the top would fit.
Hot Foam Cutter
Dry Fitting Foam
Foam Inset by Repaired Crack
Phase 1 of Returning the Top Nose
Since I also needed to repair cracks in the hull under the seat, it was decided to simply add a deck plate with access cover instead of returning the carbon patch. The deck plate cost $15 from West Marine and the hatch will be utilized to attach a small storage bag. The plate is made from ABS plastic, heavier and stiffer than carbon, so I think it will actually stiffen the area of the hole, though it added a few ounces as well.
Since I've lost 4 pounds, we're in good shape!
Stay tuned as we prepare for the Swimming Pool Test.
This post will serve as an introduction to the greater topic of paddling and allow me to meander to thoughts about water, especially salt water, without which there would be no need for outrigger paddling. These thoughts about our planet ocean tie into the repair thread in that I am taking into consideration the force of the collision between the hull and the standing waves of water. I discussed this with my repair mentor Gil, and while it is certainly impossible to calculate where the bow bounces against wave peaks the most, the last thing I want is the hull to crack like an egg against waves or any flotsam.
I am guilty of salvaging a 1966 Chevy Chevelle that had a tree fall on it, but it's hard to sink in an old Chevy. If I get my boat repair wrong and hit a reef, so to speak, this could be life threatening. This hull repair must be brought to 110% integrity. Okay, how?
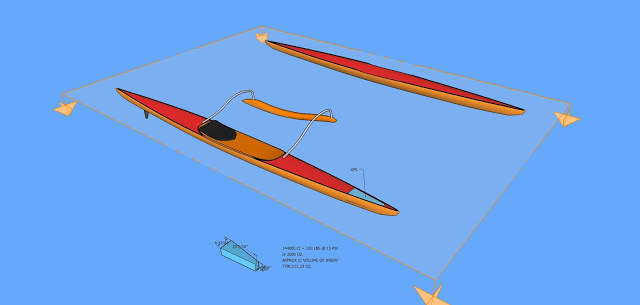
While it was decided that the top of the canoe should be cut open to fix it from the inside, there was concern about the possibility of new damage to the location brought on by new surf stress, which could lead to "catastrophic failure." Yikes. I decided it might be best to insert some XPS insulation in the area to provide strength, and came up with this initial design:
XPS INSULATION SCHEMATIC
Just how hard is water in motion, and what kind of stress can a boat handle? I don't know, but after I came across this post on a craft marooned on a reef, once again, I felt a little better about my prospects.
Much better to add 4 ounces of XPS (fancy name for foam) with a compressive strength of 25 psi (pounds per square inch) to take any future blows than risk cracking the hull. While the foam might add 4 ounces to the canoe, I'll just have to go on a diet to offset it!
The foam brings one more aspect to the hull: it is buoyant.
XPS INSULATION FROM DOW, 25 PSI
If things didn't float on our ocean, there would be no paddling. So, why do boats float? The answer is buoyancy, which is actually a physics term. It means an object will float if it is less dense than the liquid under it. The pressure from the ocean is "upthrust" and is pressure against the object trying to displace it. The shape of a boat, or in this case, canoe, lends itself to buoyancy. This canoe is like a carbon fiber bubble where the length provides even greater stability.
The hull was cut open, and we took a peek under the "hood."
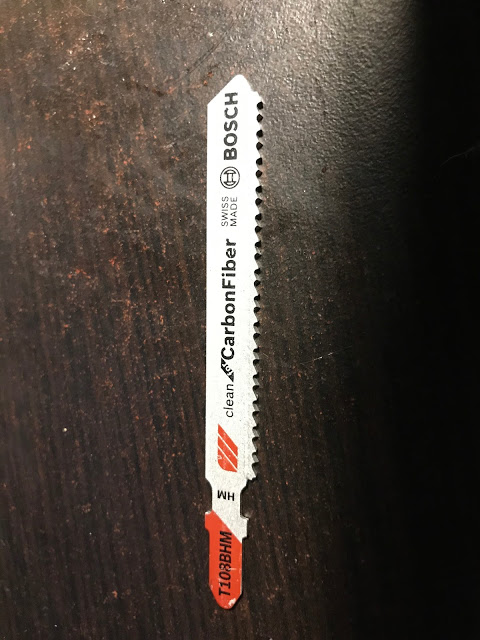
CARBON FIBER JIGSAW BLADE
A Dremel was used to make the first incision, but I decided I'd get a smoother continuous cut from a jigsaw and ordered the Bosch carbon fiber blades online.
SCRIBED CUT LINE AROUND TOP OF BOW
AND LOOK WHAT WE FOUND INSIDE? XPS INSULATION!
The XPS insulation discovered inside the hull seemed to be original to the canoe's creation and likely was meant either to hold things in place while the top was originally glued on or did serve some purpose for cushioning bounce. 4" holes are cut into it like Swiss cheese, presumably to cut down on unnecessary ounces.
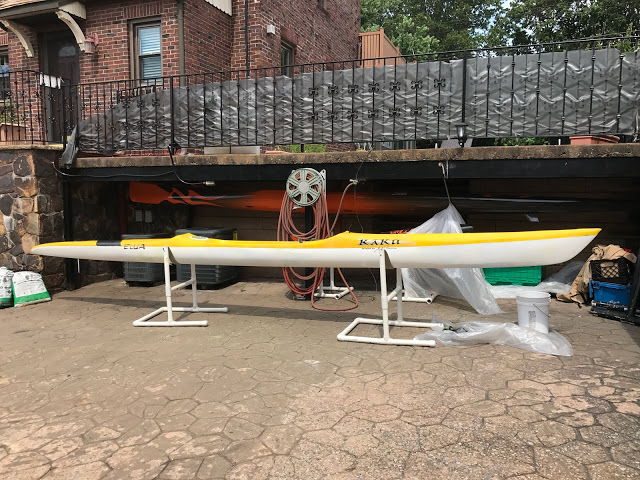
What kind of OC1 costs $175? Well, who knows? But that was the price tag the night I randomly googled for used outrigger canoes. 1: usually the hits are scarce. 2: usually the listings are for OC's almost as expensive as new. 3: usually these OC's are in California or Hawaii.
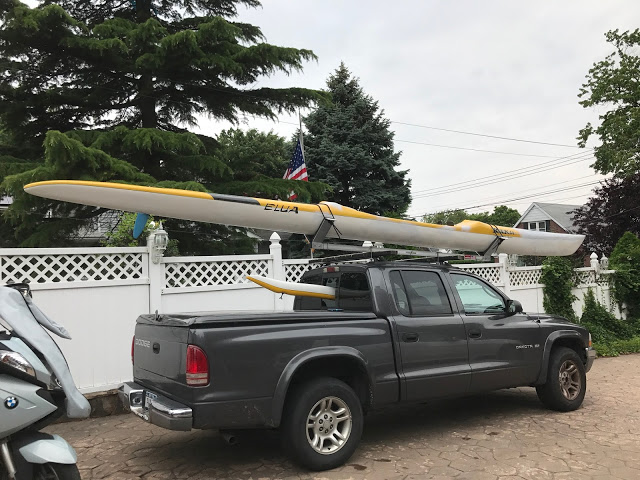
They are never in Lousiana and certainly not on a Louisiana Air Force Base. But there it was, $175 on eBay. It was listed as a fixer upper missing a rudder. Well, since I've thrown away a couple hundred dollar bills on much more foolish things, I gambled and bought it.
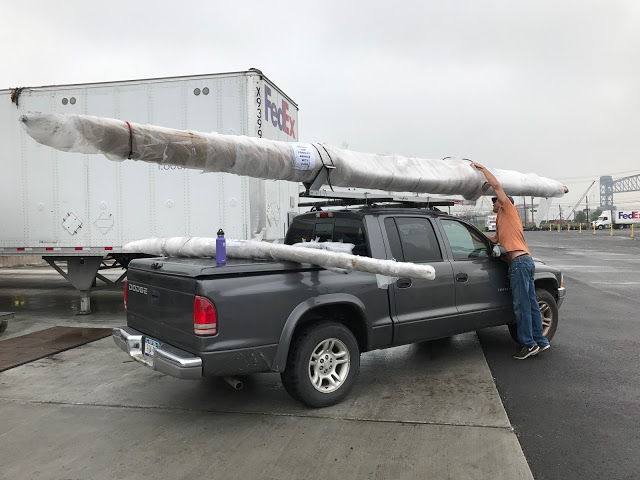
The seller was kind enough to wrap it in its case and bubble wrap the ama and i'aku's as well as the seat. Federal Express was dumb enough to lose the X-shaped PVC cradles it was sitting on.
The Fedex guys who carried it out marveled at how light it was, but I was concerned that the boat had parted ways with the cradles and been rolling around in transit There is no way to insure a used craft like this, so it was all part of the gamble. (*Fedex freight cost $425 to bring it to New York City, where it was retrieved at the Elizabeth Port distribution center in New Jersey.)
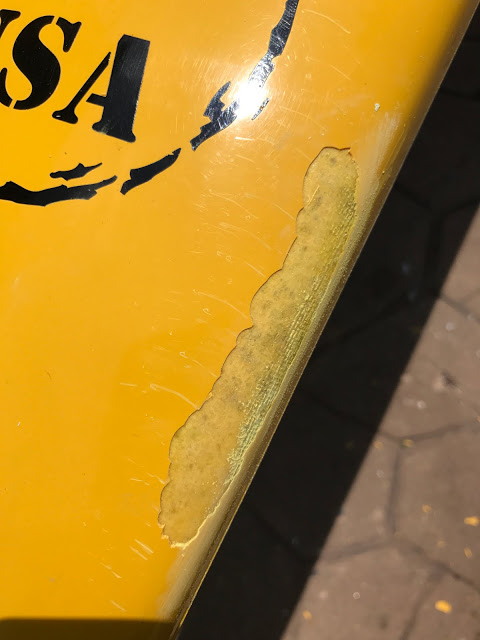
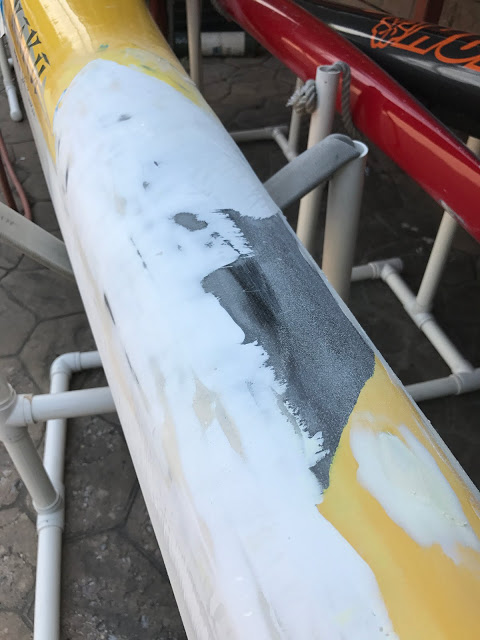
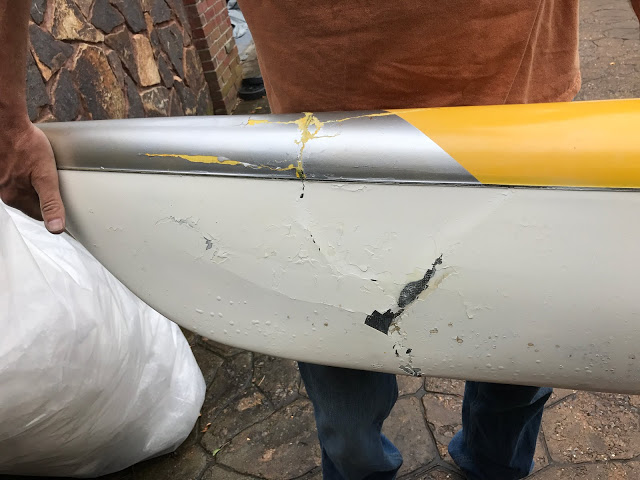
By the time my friend and I picked it up and unwrapped it there was bonus damage: a good hit to the left side of the bow. However this exposed a weakness, for exactly in that location someone else had done a pretty sloppy repair. Naturally the most damaged area was exposed last, and I have to say it made me very nervous. But after my friend ran his hands up and down the hull and itemized each flaw he said cheerfully, "Nothing we can't fix!"
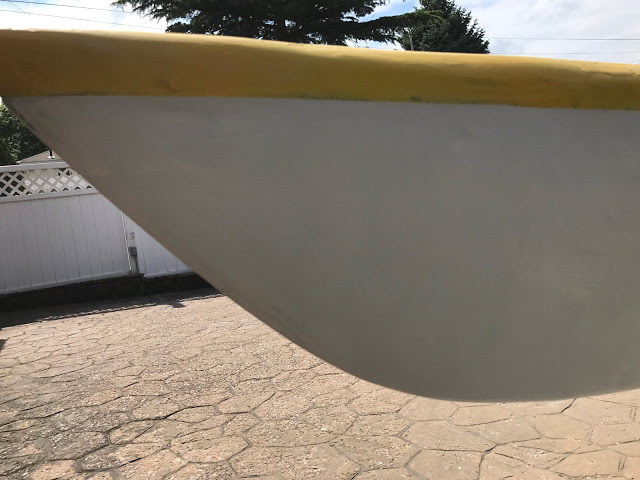
He handed me a sander and 15 minutes later it looked like this:
Should I say I was actually comforted by the fact my friend had crashed his marathon canoe 40 miles into the General Clinton Memorial Day race just a few days prior, which ripped it in half, and he expected to fix even that. So, this was nothing. Or so I hoped!