Apple Watch Review for Paddlers
I was coming up on logging 200 miles of paddling on an OC1, and with a brand new Kahele replacing my vintage Puakea Kaku, I knew I was not going to improve without the better canoe and hard metrics. It was time for a smartwatch. I had spent the last year using a $12.99 knockoff G-Shock. That could tell me how long I had paddled, and I could get a decent idea of my per Km rate, per mile, what have you. What it also told me is that I could paddle comfortably with a watch. The obvious upgrade was a Garmin, and the stars pointed to the Fenix 5.0, top of the line, etc. What had put me off about the Garmin was that it really isn’t for paddlers. It’s a runners watch. Then a mishap at Woo downwind camp in January 2019 really made me rethink the Garmin. This was in fact a failure of the watch band. Witness this great downwind video, with Adam showing off his style; however there is a subplot. Witness that the video starts with him wearing the Garmin watch, but soon it vanishes, never to be seen again. Adam was able to pinpoint the exact video frames showing the failure of the watch band and the watch dropping into the sea, hardly what you want a GoPro for. Goodbye expensive watch!
So, I put serious time into researching watch bands. Due to the numerous Apple watch bands on the market, this placed the Apple watch onto my radar, which I had never entertained because I don’t know any serious paddlers who use it. More research proved that apps had been developed for the Apple watch that were expressly for paddlers, and when I discovered that the Apple watch 4.0 is virtually a standalone PHONE, I took it seriously. That is, after I did a fair amount of research on sport watch bands and apps. A visit to the Apple store involved some hard questions for the salesperson, who showed me how to put apps on the watch, showed me the Nike sport band - which has a similar quick release button that resulted in the failure of Adam’s Garmin. I was also shown the Walkie-Talkie feature and, most critical, the Phone and SOS features. The salesperson advised me to go to Amazon to look for any number of third party watch bands that would suit my purposes. I bought the Apple watch 7.0 44mm (Nike), and let’s just say I’m thrilled.
UPDATE 2022: I upgraded to the Apple watch 7, GPS/Cellular 45mm. The battery life of the 4.0 was still decent (85%), after very hard daily use and over 1000km a year paddling, but my main interest is in the SOS phone option, so it seemed wise to upgrade. In addition the larger face with an ALWAYS ON option makes a difference, especially on the water where a quick glance at the face is all you have before you get hit with a wave.
I chose the Nike face because I want a bright large screen. You’re stuck with the Nike app (which I don’t use) but you can choose the others. I added Waterspeed, weather and at the bottom a stop watch. Choose whatever face you want. You may want to do this via your iPhone.
SUPcase does not stand for stand up paddling. Anyhow this is what I purchased, a SUPcase watch band for around $23 on Amazon. UPDATE 2022: These cases hold up. I am on my third because they do fade and get dirty. I buy the lighter colors for contrast in the water. I wear it all day long, ocean, yardwork, rough activities - and the Apple watch itself remains pristine. Just wish they had more sport, bright colors!
The Apple watch has excellent water resistance. Please know this is not a review for divers but for people like me, who get wet a lot but do not submerge to any depth unless of course we fall in the waves, where a waterproof band is not required. The Apple watch has high water resistance AND a water lock feature, which you can manually turn on OR your water sport app will turn it on. This feature is built into the two apps I will review, Waterspeed and Paddle Logger. I will go into this water lock feature in a little more detail because I didn’t know about it and thought the app was frozen after I first used it.
Credit goes to iDB for this image and you can read more about how to care for your Apple watch here.
When you swipe up from your home watch face (there are many you can choose from), you get the layout on the left. The water drop icon activates water lock and also makes it so you can’t swipe the screen. When you’re on dry land and you want to deactivate the water lock, turn the digital crown per the directions and some mystery function ejects water. Don’t ask me exactly how this works; suffice it to say my Apple watch spends a lot of time in salt water and everything is good. No need for a waterproof model such as is manufactured for divers for us paddlers. The SUPcase I chose protects the edges and face of the watch as a “bump guard.” Most importantly to me it does not have a little quick release button that could fail, and it has a traditional clasp, so it is easy to take on and off. There are no pins where the band connects to the central section snugging the Apple watch proper. I did add a screen protector film as well. I use a cleaning solution such as I use for my electronics once I get off the water. You have to insert the watch in a sequence and it is next to impossible to push it out when you are wearing it. Many competitor watch bands have some negative reviews for failed pins. This one just doesn’t have them at all.
Waterspeed
My first choice app for paddling
Waterspeed bundles a lot of data into their app. You can choose your water sport and go from there. You are best off going to their site to check out all of the features. (UPDATE 2022: The app is constantly upgraded, so that just when you have everything set on your watch, it goes away and you may have to tweak settings all over again. It is a nuisance to reset the watch to keep the APP face active during use. However, it is still a better app for the price. Go to settings, RETURN TO CLOCK and set it for After 1 Hour. This is the max you can show an app on the watch face, which runs the battery low, so it is not a default.)
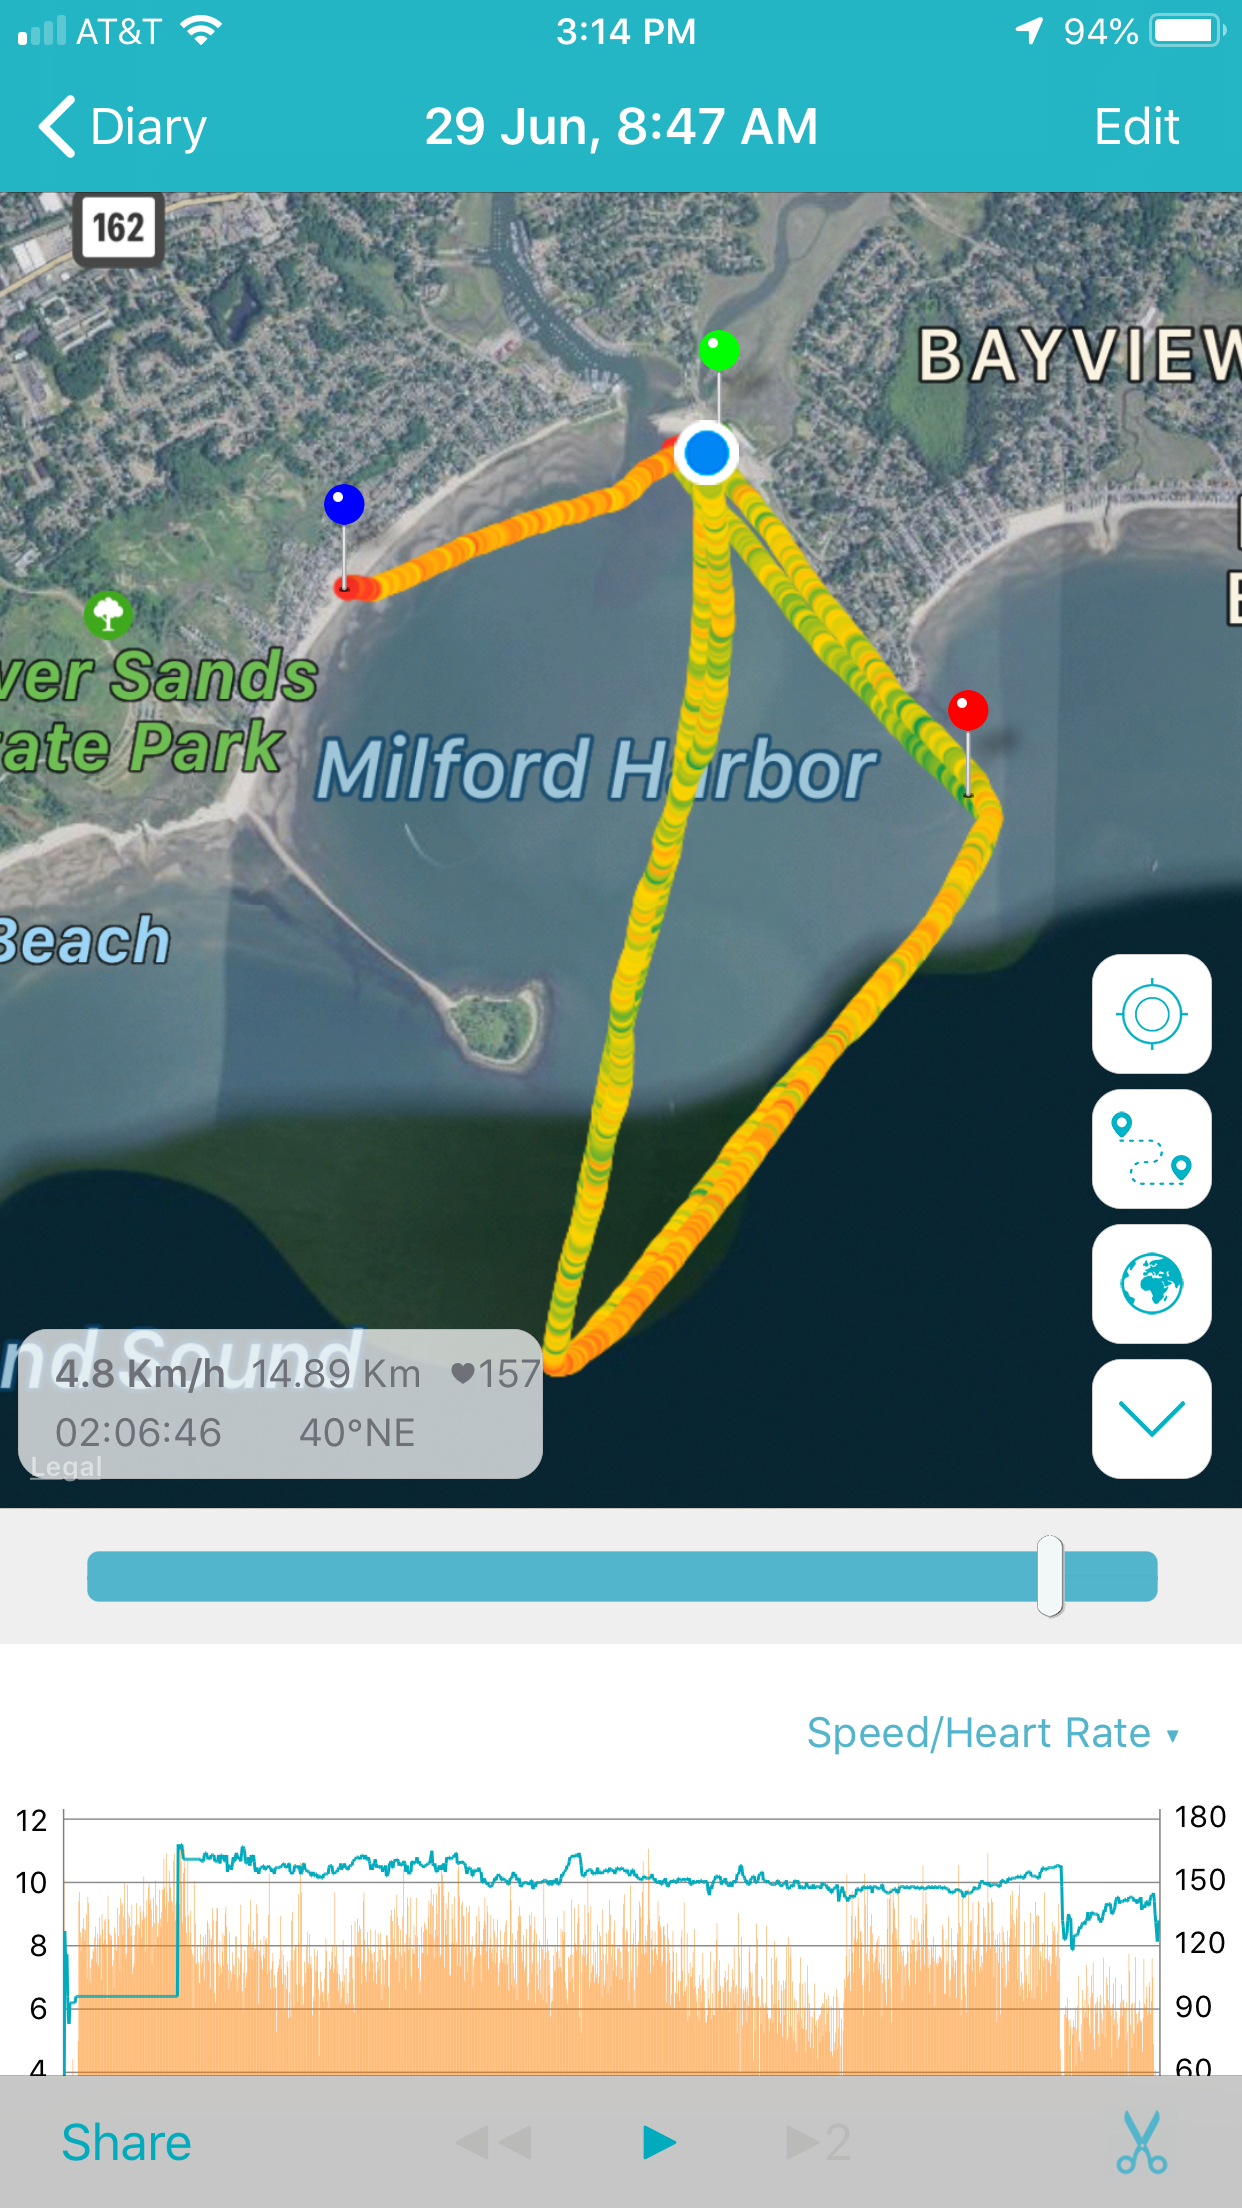
I will summarize why this is great for me: as a novice who is transitioning to intermediate paddler I need to know more than just where I paddled, how long and how far. I elected to review my data in kilometers, mostly because my goal is to train for a 50k open ocean race. I now train in the ocean and practice 1 kilometer sprints and various techniques. Later when I review, Waterspeed breaks the data up into 1 kilometer splits. Heart rate data is included as is some basic wind speed data. You can replay the mapping as a video and you can also edit out the pieces that are not relevant. For example if I forget to turn the app off, and it shows my path walking around the beach - that can be removed. I can edit out my time on the water prior to race or sprint start and edit out the end. Etc. I paid for the pro version, which costs about $4 per quarter. You can see some data on your watch, and when you are paddling you can see your actual speed, distance etc. But for analysis, you want to use your iPhone or iPad to see everything on a bigger screen. So, just sync the app’s diary and it will only take a few moments for the data to appear on your other devices.
UPDATE: I’m not a novice paddler anymore. I use the watch for surfski, SUP and SUP surf. In SUP surf I am in the waves a lot, and the watch holds up just fine. I also paddle all season. In the winter I have to wear the watch over my dry suit, which prohibits some of the tracking features, like heart beat.
I don’t think about my Apple watch at all in any conditions. It just works, and especially well in the SUP case.
The scissors are the edit icon. This is a race log. So the slower parts of this log (waiting for the race to start and a slow paddle afterwards), can be edited out and the actual km/hour rate recalculated. Or you can use the slider button and scroll through the visual data, zoom in and even play it back. Lots of data!
This is an overview. Here you see the play button, which allows you to watch the visual log. Here you also see the export button. Not only can you export images you can export DATA as a CSV file. This is really nitty gritty, and I have not needed to use this data just yet. But it’s there.
This is the editing screen with its options.
Let’s take a look at the other app on the Apple Watch market for paddlers, Paddle Logger. A novice friend of mine uses this, and this fits her needs. She basically just wants to see where she has paddled, how long and how far. I tried this then paid to “unlock” the pro features, which turned out not to include and heart data, no splits, etc. This costs about $3 or $4 per month, and when I really could not find improved data, I emailed the developers, who told me it did not have what I was looking for, so I cancelled the subscription.
Let’s get down to what is really awesome about the Apple Watch 4.0: it really is a phone. Granted you must already have an iPhone and using this as a phone will cost you another $10 per month on your data plan. BUT you do not need to carry both at the same time. I have an iPhone 7 plus which is basically a phablet and way too big to carry in my PFD along with my radio and my emergency beacon. Since I always paddle reasonably close to shore in the US, there’s a good chance I can make a call from out on the water if need be. If friends also have Apple watches, we can use the built in Walkie Talkie feature. Then it comes down to the fact that your contacts, music, etc. are all on it. You can ask Siri to start Waterspeed, order a pizza, talk to Mom, text your boss you’re “sick” because there is an awesome swell - whatever you want and expect from an Apple product. I am beyond sold on the Apple watch. The paddling apps will only get better. In closing I’m going to plug the app that I don’t use for a feature that Waterspeed SHOULD have. This is called PIT - paddler in trouble.
Don’t paddle if you can’t make it back to dry land. If you get into trouble, have a plan. PIT might be one of those plans that works for you.
PIT is a function of this app (yet to be released) which allows you to set a timer for the duration of your expected paddle. If you don’t shut it off before the timer counts down, it will ask you if you’re ok and if it gets no response it will text whomever you have set it up to dial. There are other guardian type apps out their that do this as well. This is a GREAT idea. But greater even still is knowing the weather, knowing where you are paddling, paddling with others and ALWAYS inspecting your gear for possible failure (leg leash, my friends) before you head out. As much as I love this feature I will text a buddy I’m going to be out for an hour than end up paddling for three. So, I’m going to do my final wrap up on this by THANKING PADDLE LOGGER for showing me the workaround. This is the built-in SOS function on the Apple watch. So, if you have an app running and your phone is in water lock mode, how do you make an emergency call? You press the lower button and HOLD IT down. An emergency call will be placed. The short video shows how the SOS feature overrides the Waterspeed app (or Paddle Logger or whatever). The long video is me going over my watch. It’s a little long and tedious, but if you’re going to drop $500, worth the time. I did not find any videos on the Apple Watch for paddlers when I looked, and so I write this entry not to sell watches but to make paddling SAFER and spread the good vibes. This watch not only makes me safer, but I have to say I’m already a minute faster per Km from the data feedback. So there you go. Stay safe people. The water is a blast, but the return to the beach is always our goal so that we can do it all over again.
XOSS G/G+ Speedometer and Strava for Paddlers: an affordable speed coach
A $56 USD speed coach for paddling.
The Xoss G/G+ is an affordable solution for live technical feedback during training. Other options marketed to paddlers tend to cost around $400 and are marketed independently for surfski, SUP and outrigger - meaning if you paddle all three you would have to spend around $1200 for standalone units. I spent $37 USD on the Xoss G/G+ and $19 USD for a standalone cadence sensor, which I can use with all of my vessels.
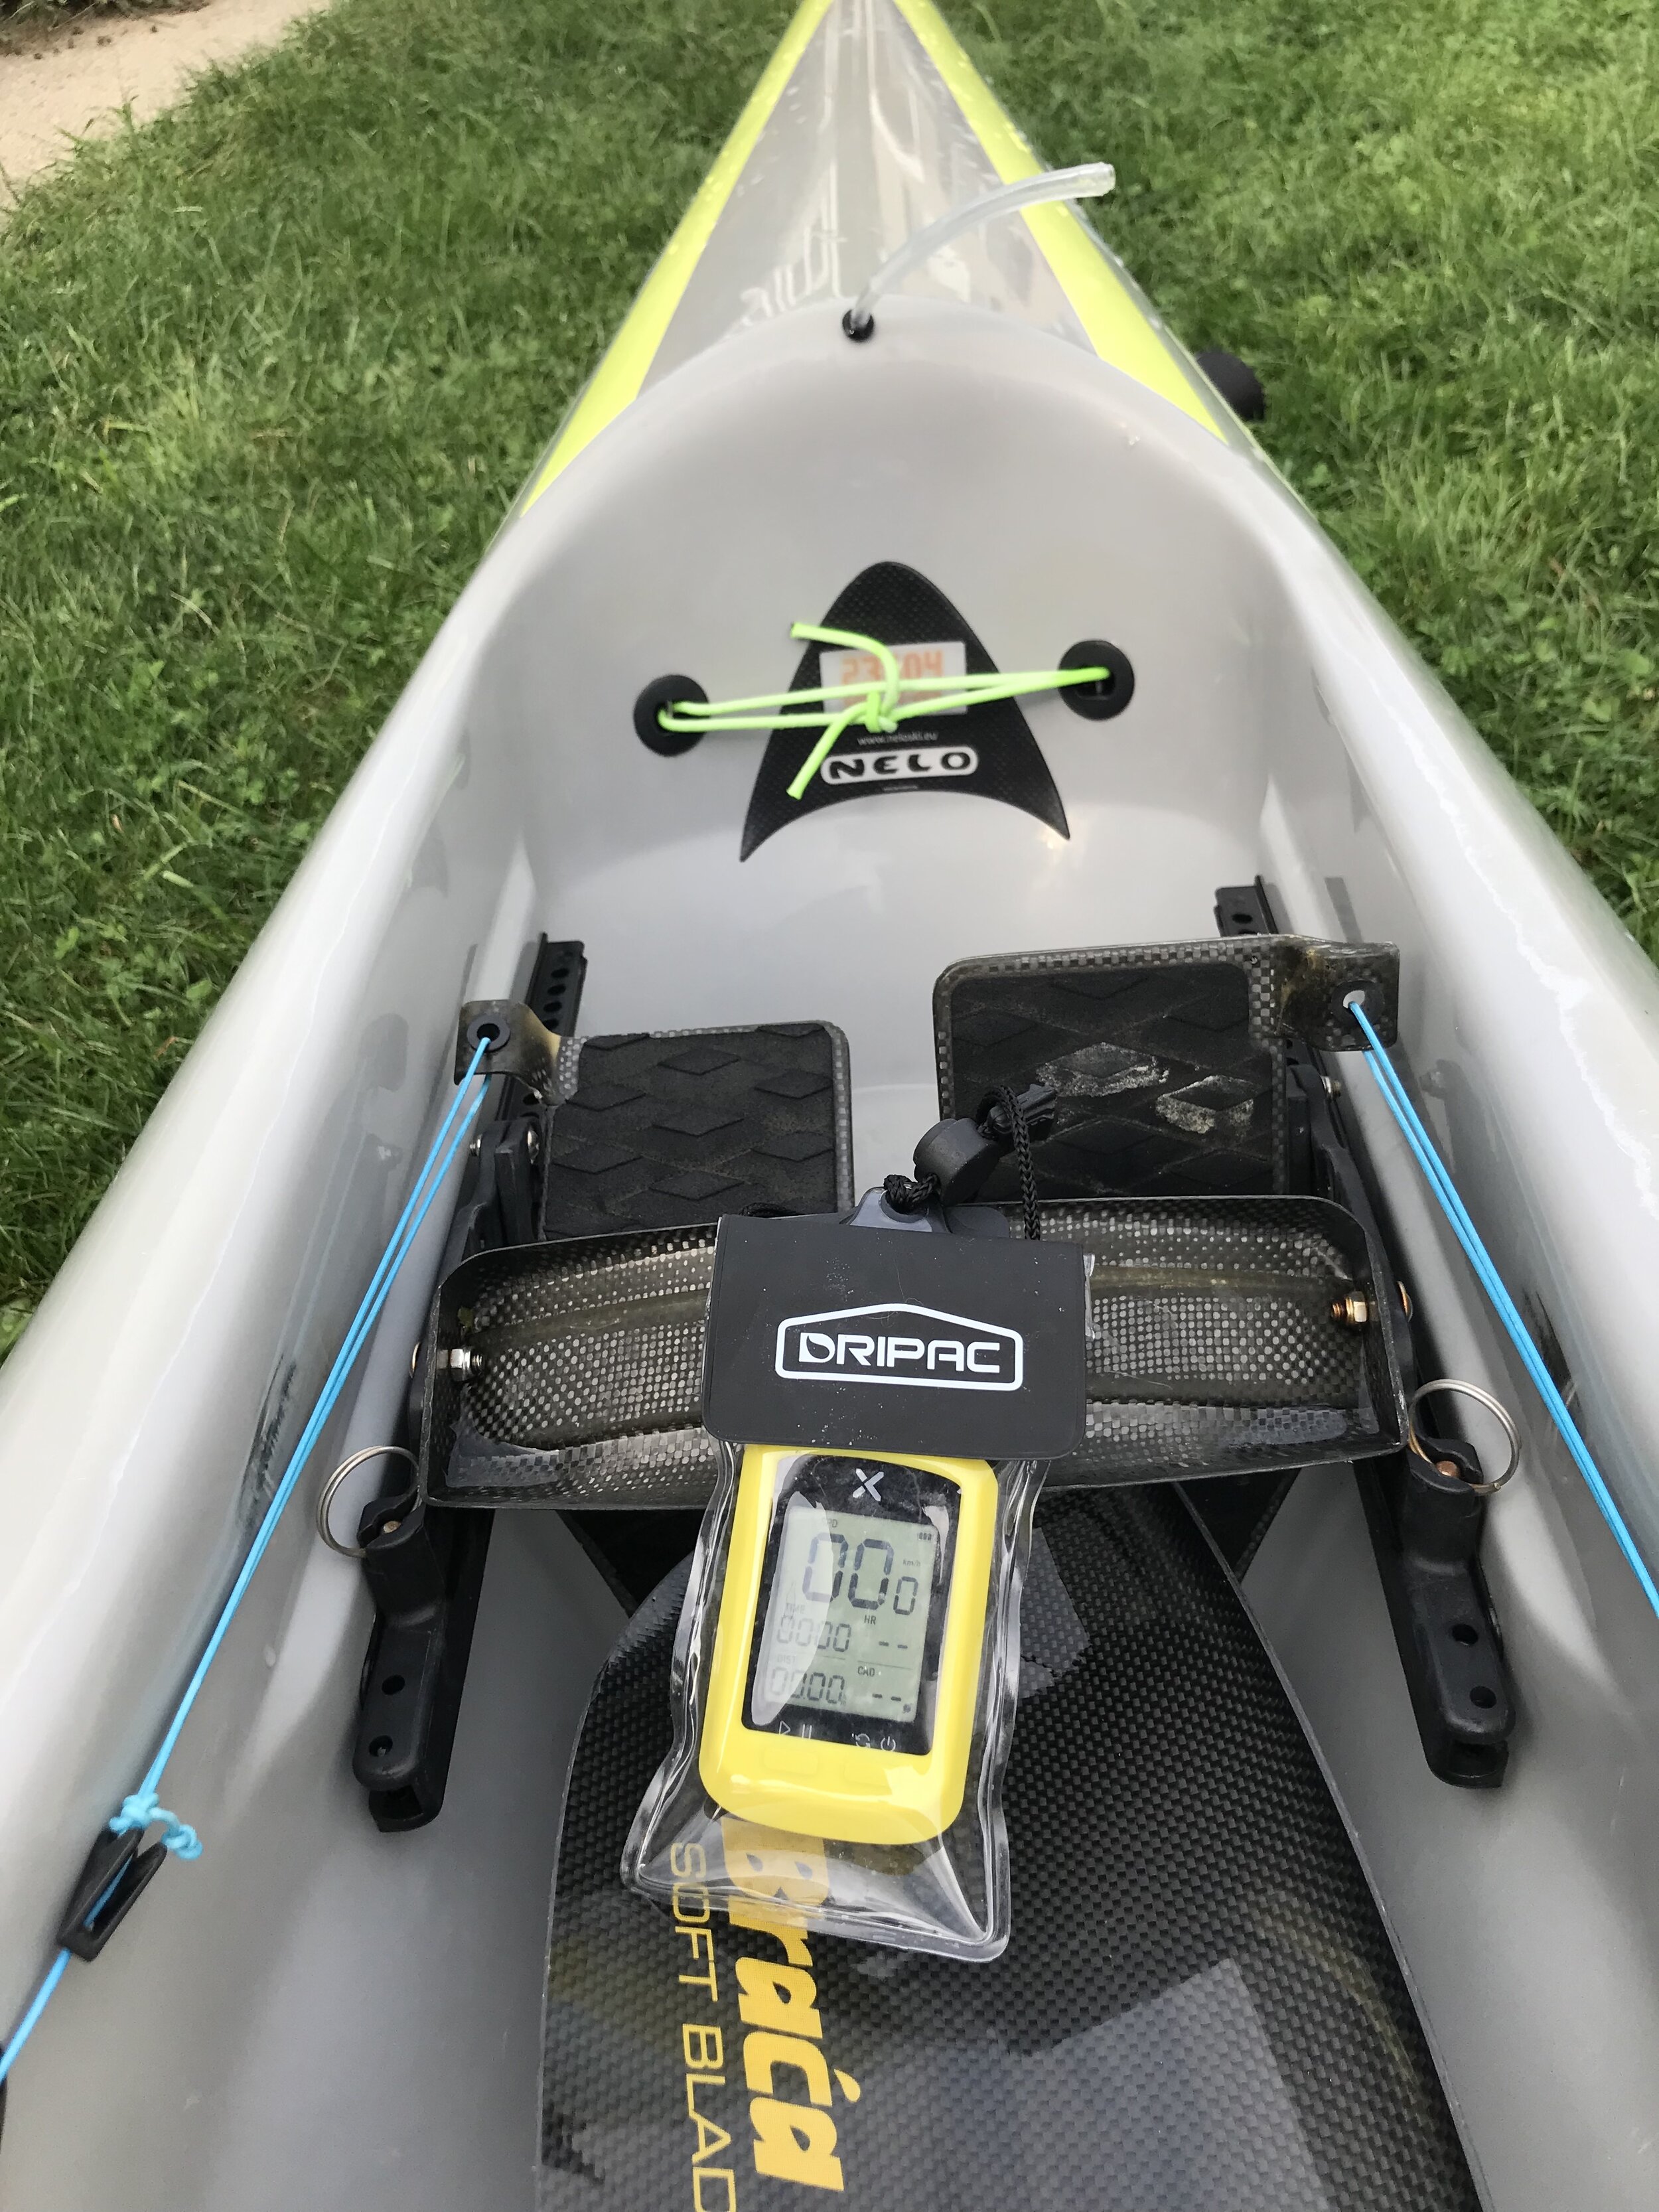
Connected to the foot brace on my Nelo 520.
The XOSS G/G+ is waterproof rated to IPX7, meaning it can withstand heavy water droplets and be submerged to one meter for 30 minutes. I still put it inside a $10 USD Dripac because the rubber plug that covers the USB charger connection could fail. Cheap insurance. (I had this type of USB plug fail on a Standard Horizon marine radio).
The battery life is 25 days with use at 1 hour a day. In other words, take it out for a long paddle and it will last all day.
HOW TO SET IT UP FOR PADDLING:
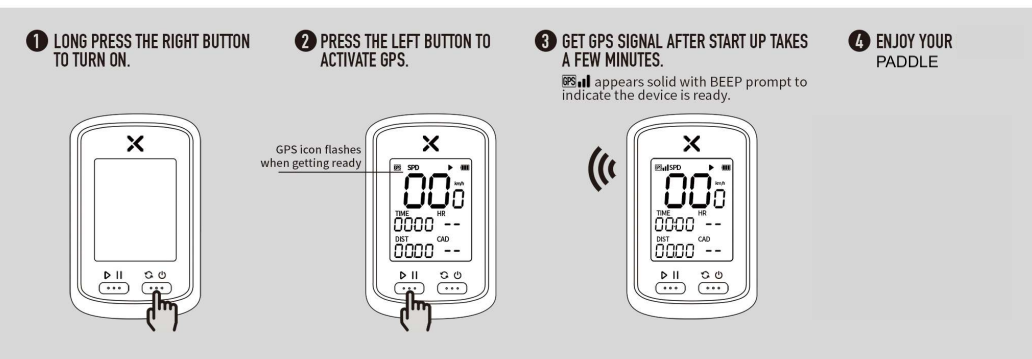
1: Charge the included lithium battery with the USB cord provided.
2: Turn it on with the right button. Wait for the initial screen to come up showing 00:00 in the data fields.
3: Press the left button once. This initiates the GPS, which scans for a satellite signal. You should be under a clear sky. If you try it inside or under a covering, you might not pick up the signal. While it searches it will flash a little GPS icon on the upper left. It will beep when it locks in and the GPS signal will become steady.
4: Go paddling.
Yes, that’s it. That is all there is to using it as a real time speedometer. The speedometer data is the largest data and pretty easy to read. I prefer km for speed and distance, which is the default setting. If you need to change defaults do this before you go out for a paddle. You can get the pdf manual here: Xoss G/G+ manual.
I was able to adjust my surfski stroke for immediate improvements and gain .5km in speed overall very quickly. I’m fairly new to surfski, which is tremendously technical, so figuring out how to position the wing blade and press down in the water as I rotate to gain speed was very satisfying. It was also very satisfying to have only spent $37 USD to get a speedometer. What I did not realize is that Xoss also has its own app which connects to Strava (and other software). If you want to review your data on your smartphone follow these steps:
1: Download the Xoss app. (You can use the QR code that comes with the instructions to connect to it).
2: Download the Strava app.
3: You will need to have a Strava account and a Xoss account confirmed through an email. Once confirmed you are ready to connect the Xoss G/G+ to your phone via Bluetooth.
CONNECTING THE XOSS to your phone and Strava via Bluetooth.
1: Open the Xoss app. Click on your device. (Bluetooth must be on). It will bring up your device. Click on that, and it will load a page where it syncs to the Xoss. Here you also have to connect to Strava. Be patient. It took me a few tries. VERY IMPORTANT: You can’t sync data if the Xoss is still recording. To stop recording LONG PRESS the left button once.
2: It will recognize the data but there is a little button you have to click for the full sync to Strava.
3: Once synced you can click the Workouts icon and it will open the Strava data inside the Xoss app. Here you can review data and also watch a video of your paddle.
After poking around on the internet and looking at the instructions I soon realized there are add-on sensors. The Xoss G/G+ unit is a speed sensor but you can add a cadence sensor to it. This is what you see in the image above. It can be confusing because they are also sold in 2 packs as speed and cadence sensors. These are standalone sensors that can be synced to your phone, if you were just using your phone as the data screen. They are also identical sensors and each sensor can be used for speed or for cadence based on a setting. I only wanted cadence because the Xoss G/G+ is my speed sensor and screen.
If you want a cadence sensor buy a single unit, remove the battery and reinstall. If a blue light comes on it has been switched to cadence sensor. Yes, that is correct, merely by taking out the battery then putting it back in, you change the function of the sensor. You can use the Bluetooth connect screen in Xoss to find the sensor, and if you swing your arm around in a circle it will start registering the “cadence.”
The cadence sensor instructions show you how to mount it on a bicycle pedal. It put mine into another Dripac bag and just clipped it to the center of my Braca paddle. For outrigger I would tape it to the base of the handle. For SUP tape it below your lower hand on the shaft.
Follow the Xoss directions for pairing your sensor to the Xoss G/G+, and in less than a minute you will be able to see your cadence data while you paddle also. The display for this data is small, so I just review it after I paddle on my iPhone.
You may not care why the sensor works just as well for paddling as it does cycling, but I will explain anyway: the same sensor that knows whether your phone is “up” or “sideways” for changing the display is called an accelerometer. These are used for XYZ positioning. The computer program then uses this data to perform the next step. In the case of the cadence sensor it basically takes a rotation and calls it an RPM. As long as the sensor can pick up your paddle rotation, it will log the motion.
Read RPM as stroke per minute. This is surfski stroke data. This will work for any paddling sport.
Ocean conditions change all of the time, so stroke rate varies considerably. Here I tried a high rate upwind and a low rate downwind. I expect to vary my cadence during race conditions and will use the speedomter as my guide during the race.
Have fun, stay safe, and see you on the water!
ARDUINO ADDENDUM: I make small electronics and have all of the parts I need for around $25 USD to make a speed coach type of computer using Arduino programming language. The biggest issue is getting a good readable screen in a watertight housing. Apps are also available for iPhone and Android that accomplish the same thing, but the phone battery life struggles during a long race, and the phone overheats in a waterproof case. If you want to make your own Arduino speed coach, you can link to that kind of project here: Arduino.
Black Project Hydro FlowX: Review
IT CAME FROM MAUI!
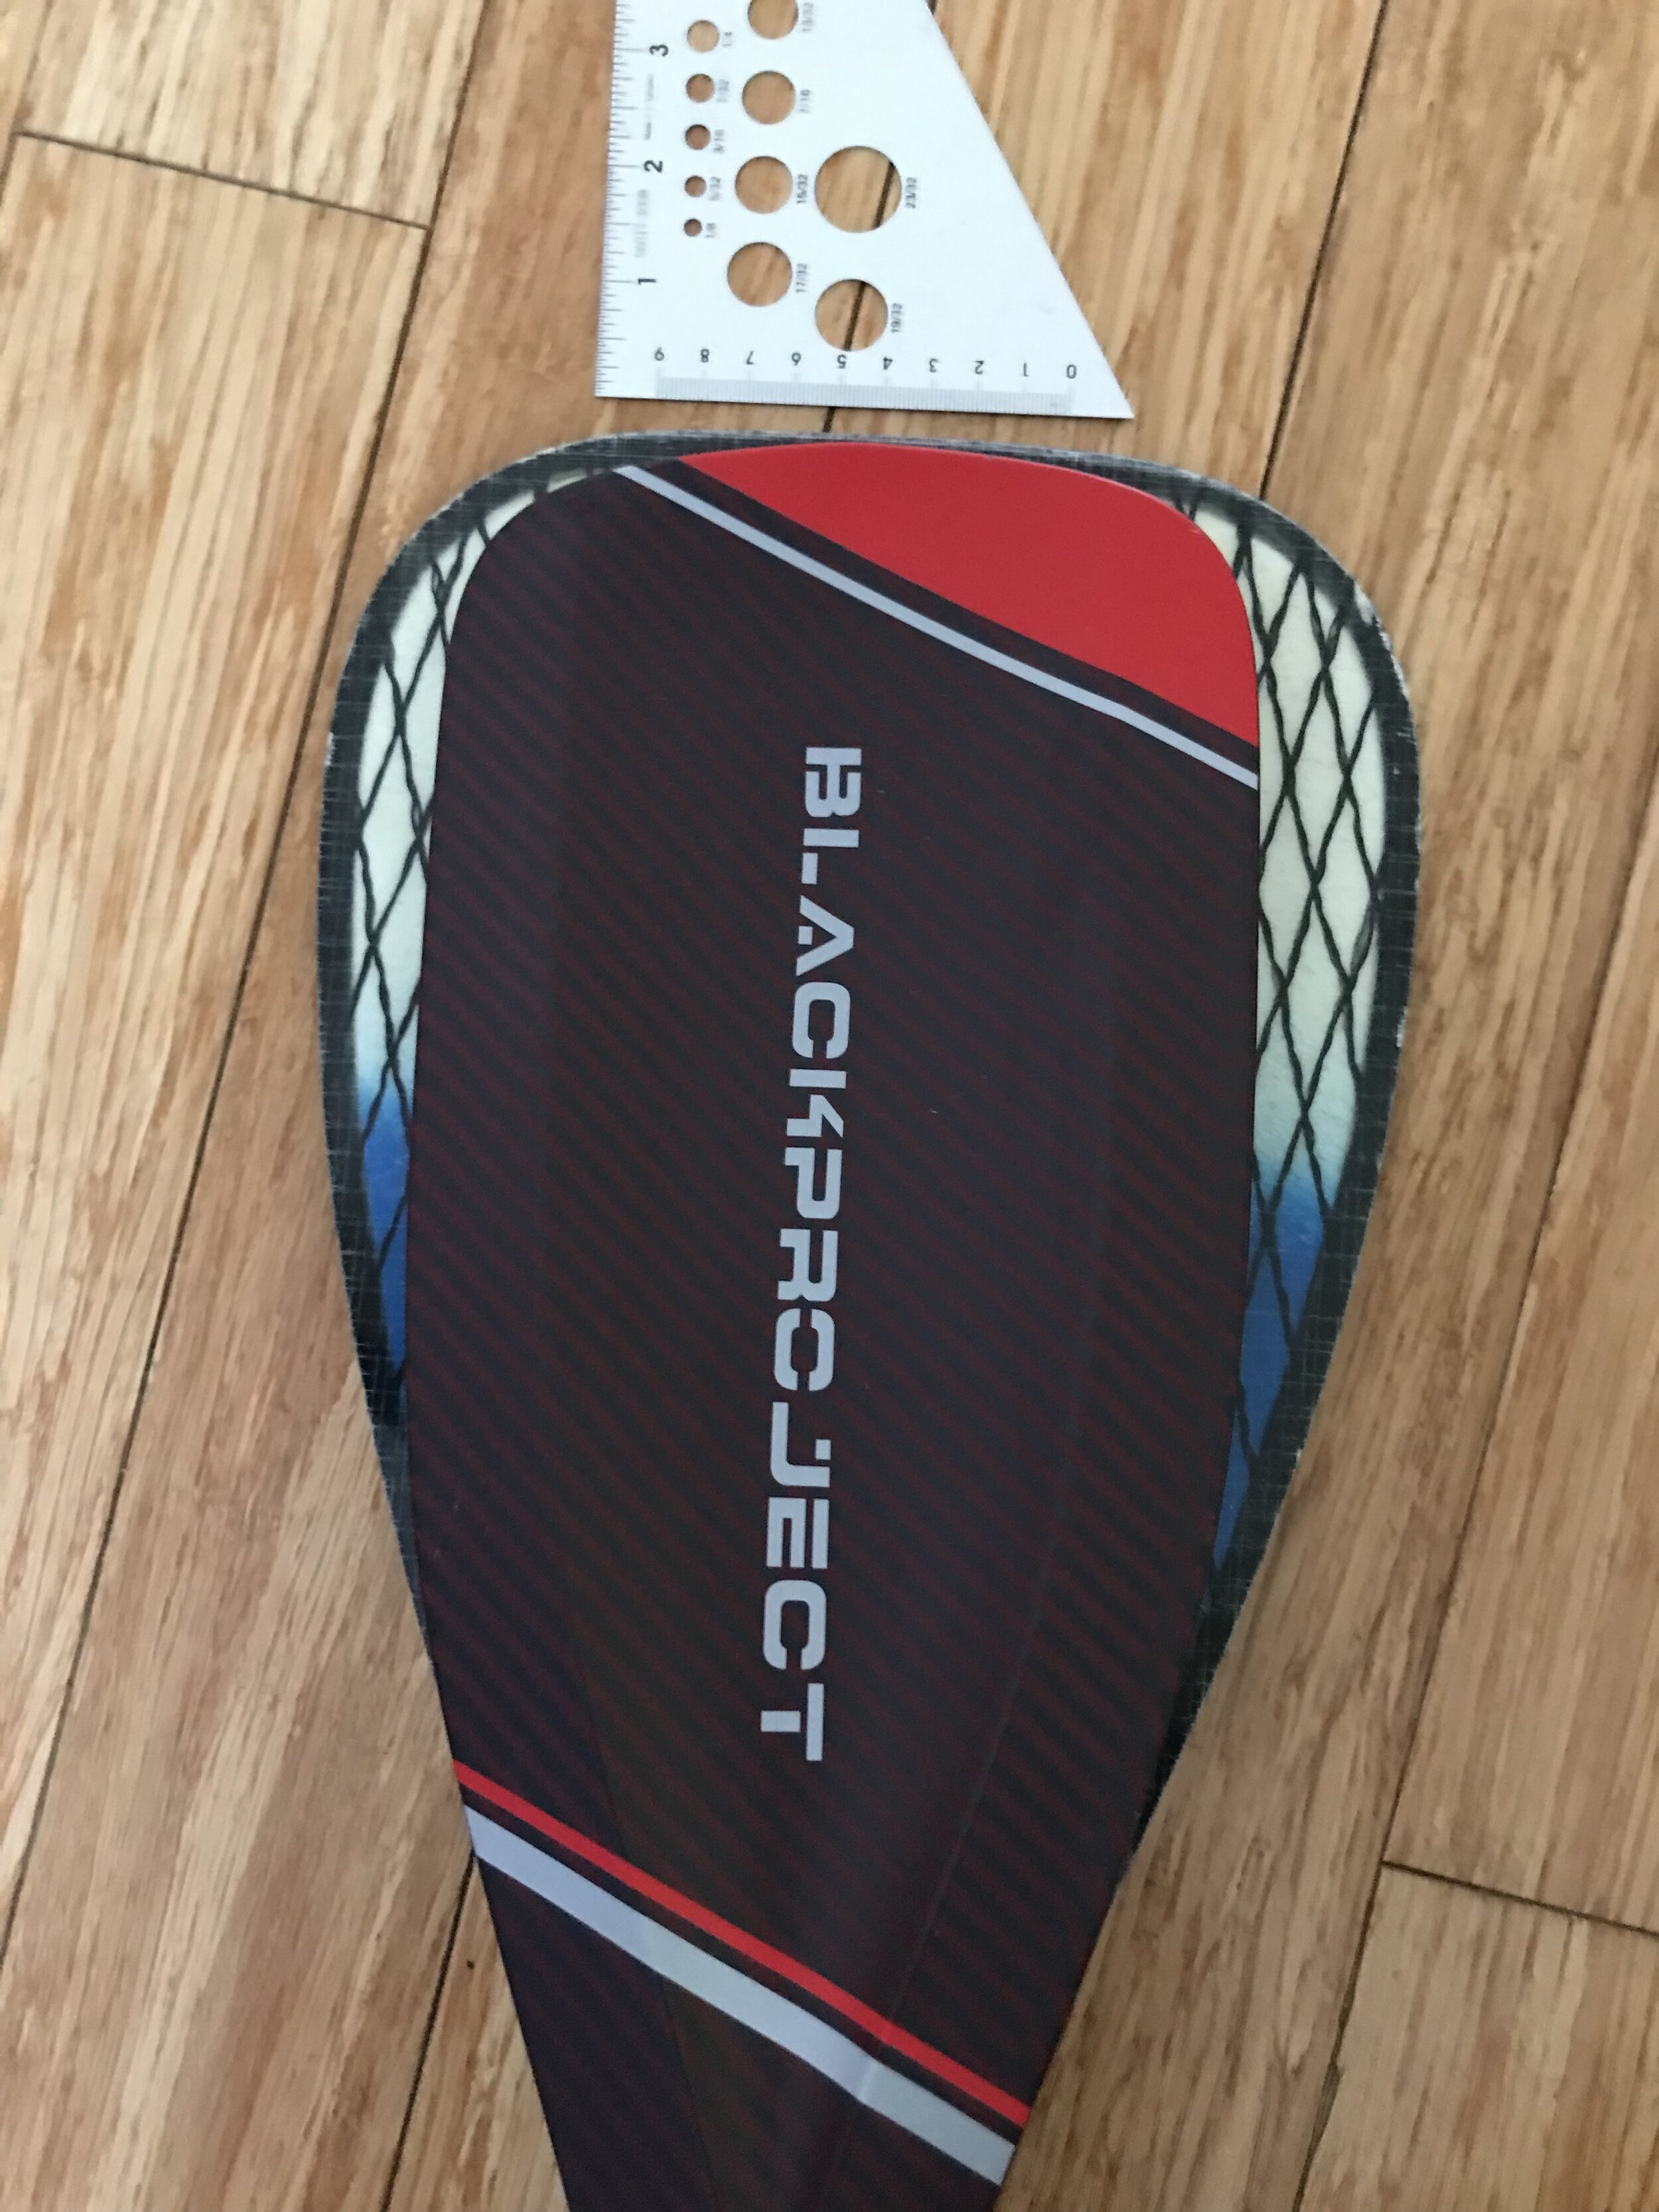
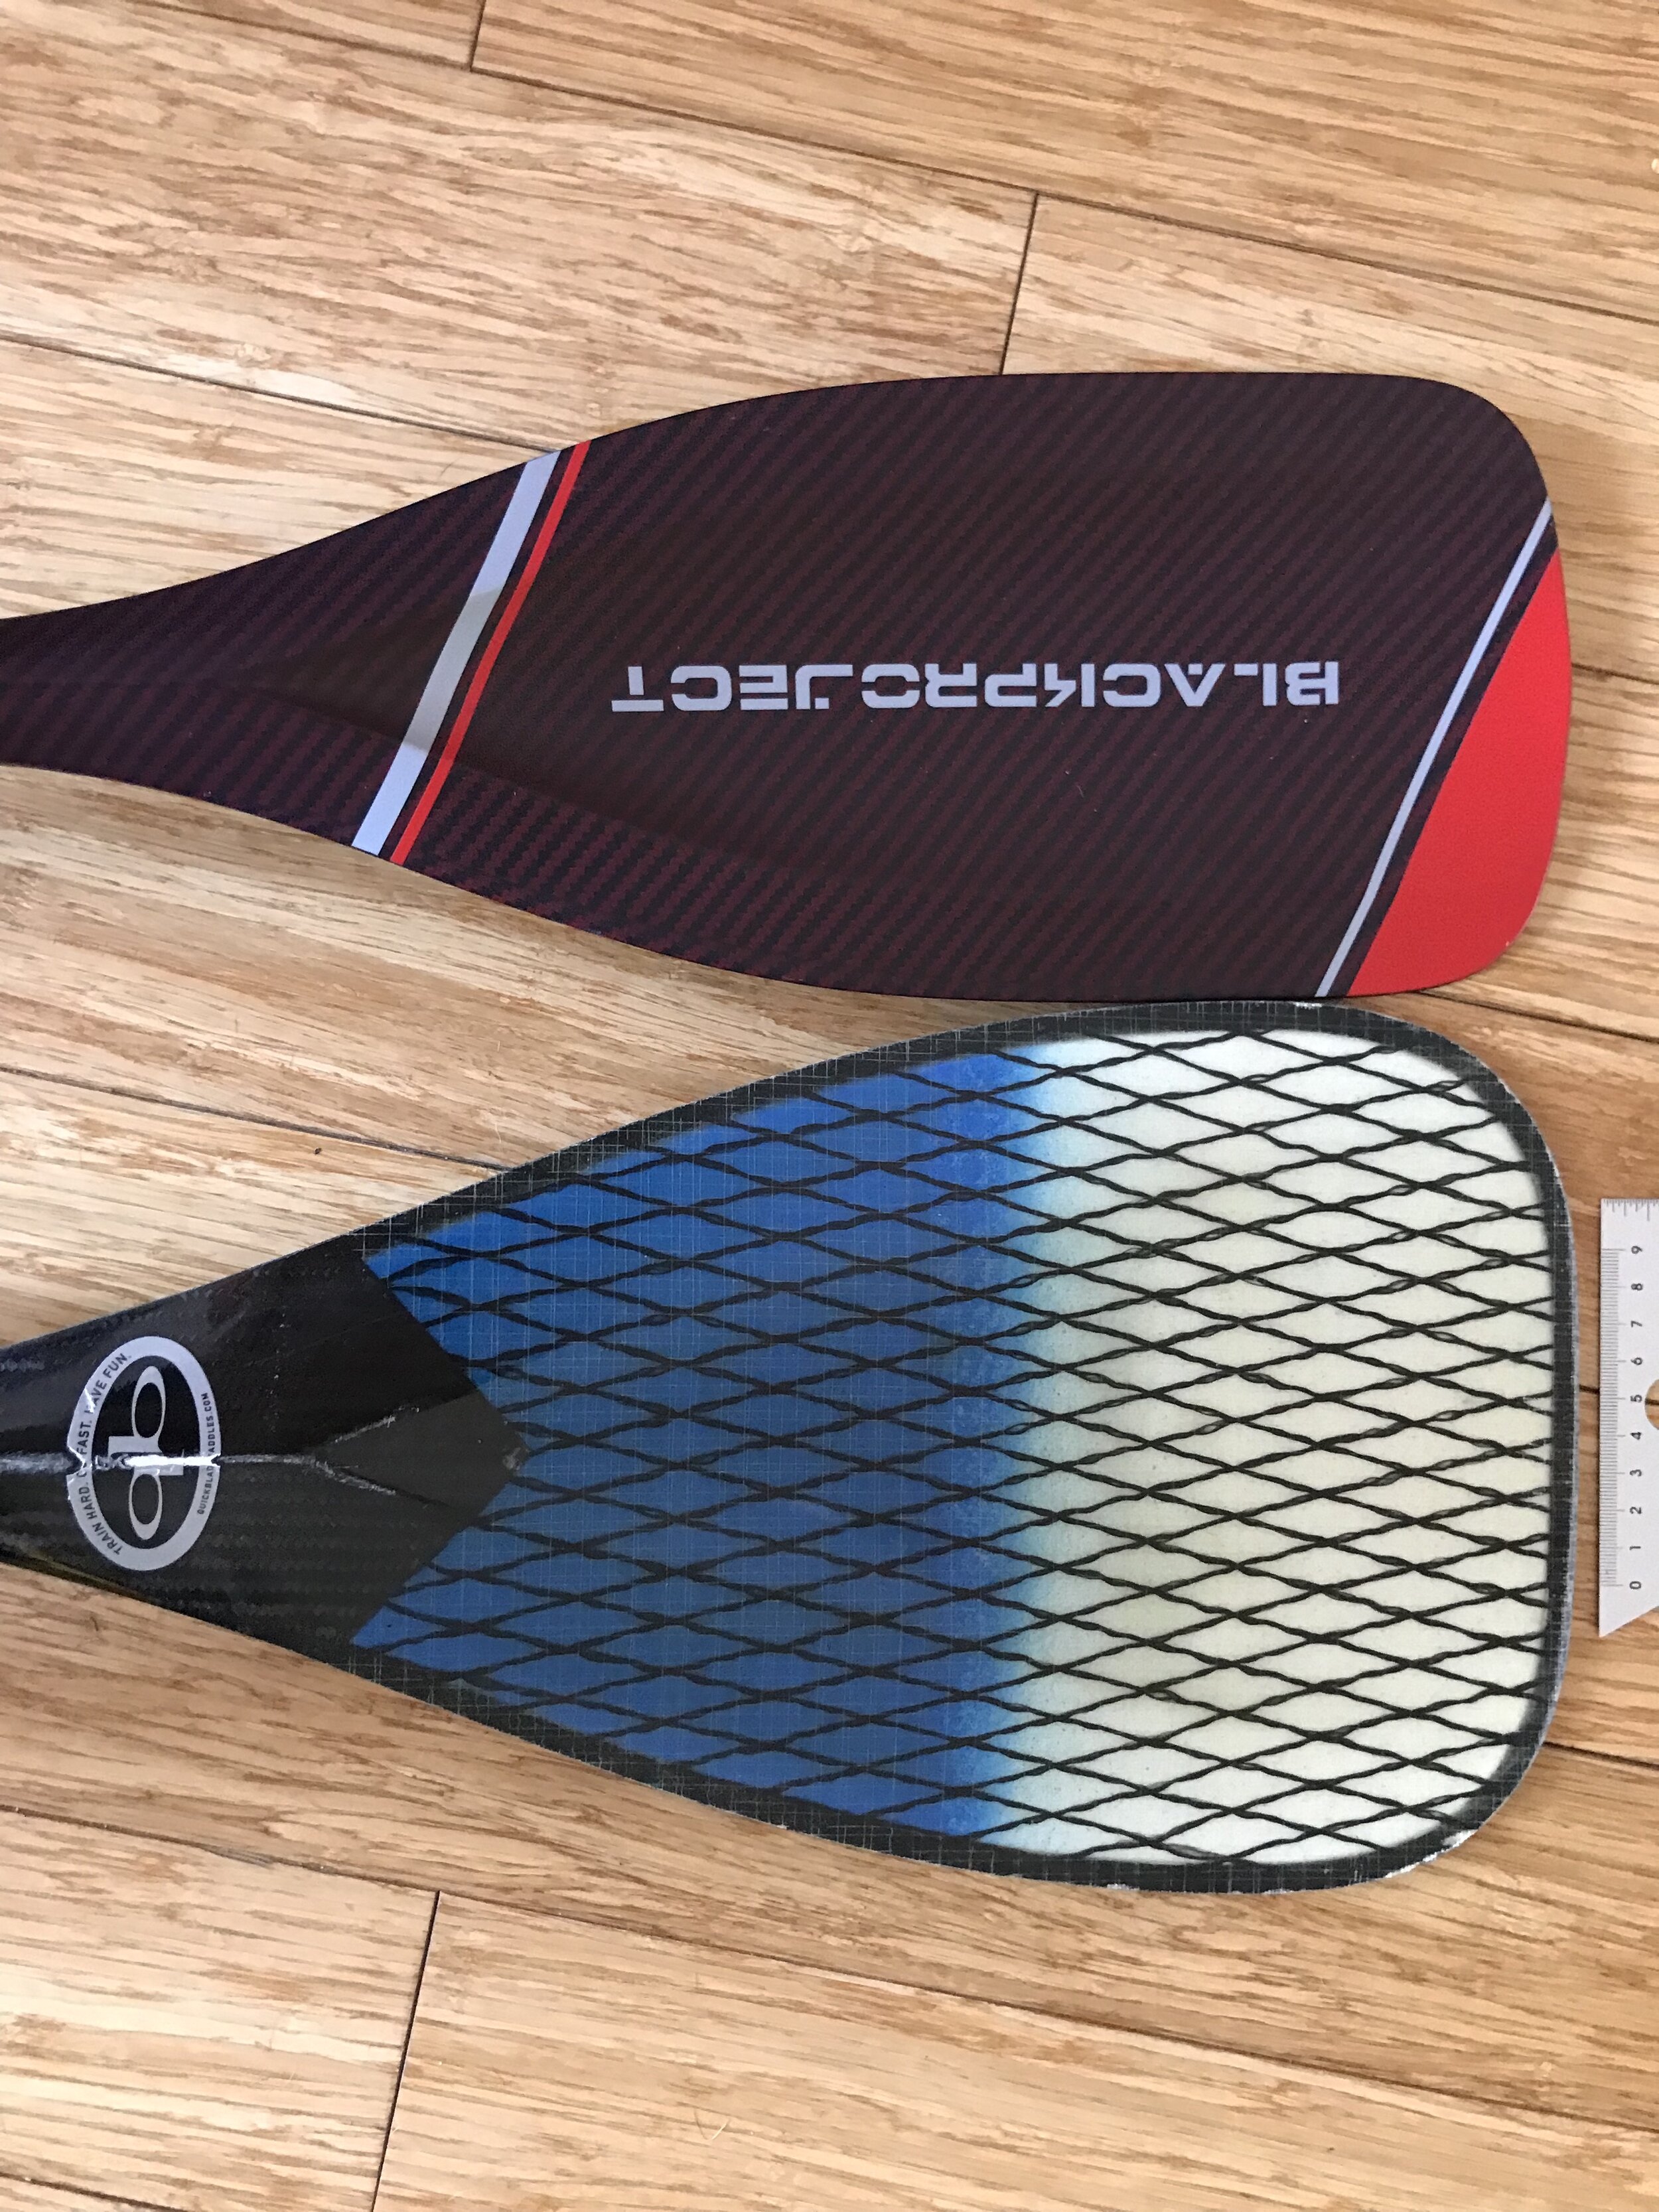
The Black Project Hydro FlowX sounds like a name for rocket fuel. It looks like it fell to the ocean from a rocket launch and also looks like a paddle within a paddle. I had purchased my NSP Sonic SUP last summer as an alternate to spending money on travel during the pandemic, but was only able to purchase a very cheap and very heavy adjustable paddle from a sporting good chain to get me started. I was also spending more time in my Nelo Surfski and my go to Puakea Kahele outrigger canoe, and the SUP was getting neglected. So, I decided to sign up for a clinic with April Zilg at the Cayuga Lake Cup Race in the finger lakes region of upstate New York in August. Nothing like knowing you will spend a couple of hours with a world pro to get a paddler salivating for personal improvement on the water. But was I really going to go with a paddle that weighed as much as my SUP? (At least that’s how it felt to my shoulders).
I downwind paddle as much as possible. I picked up the brace stroke from Oscar Chalupsky for surfski in 2018 and immediately applied it to outrigger paddling. Spending more time on the surfski this year, the brace came automatically, and when I got back on the SUP this summer, I found myself throwing the paddle out to brace in the surf for stability. My NSP Sonic is a downwind board, and usually I paddle against the wind or surf then turn around to zoom back to shore. Not that I have much of an idea what I’m doing, but my local waters do get considerable medium sized surf and breakers, which are fairly optimal for a novice surfer such as myself. This is a long preamble to how I discovered Black Project paddles in the first place.
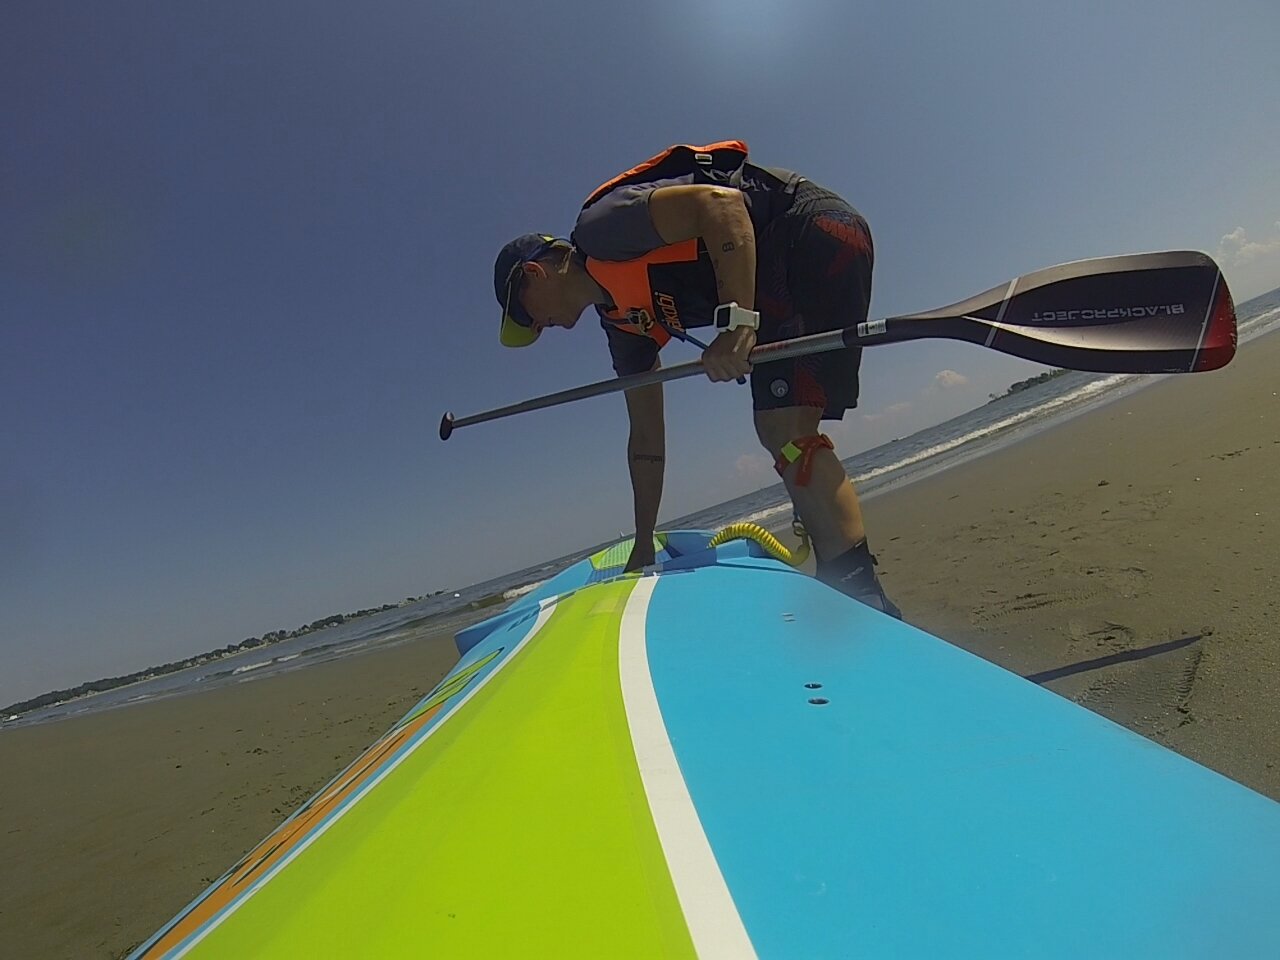
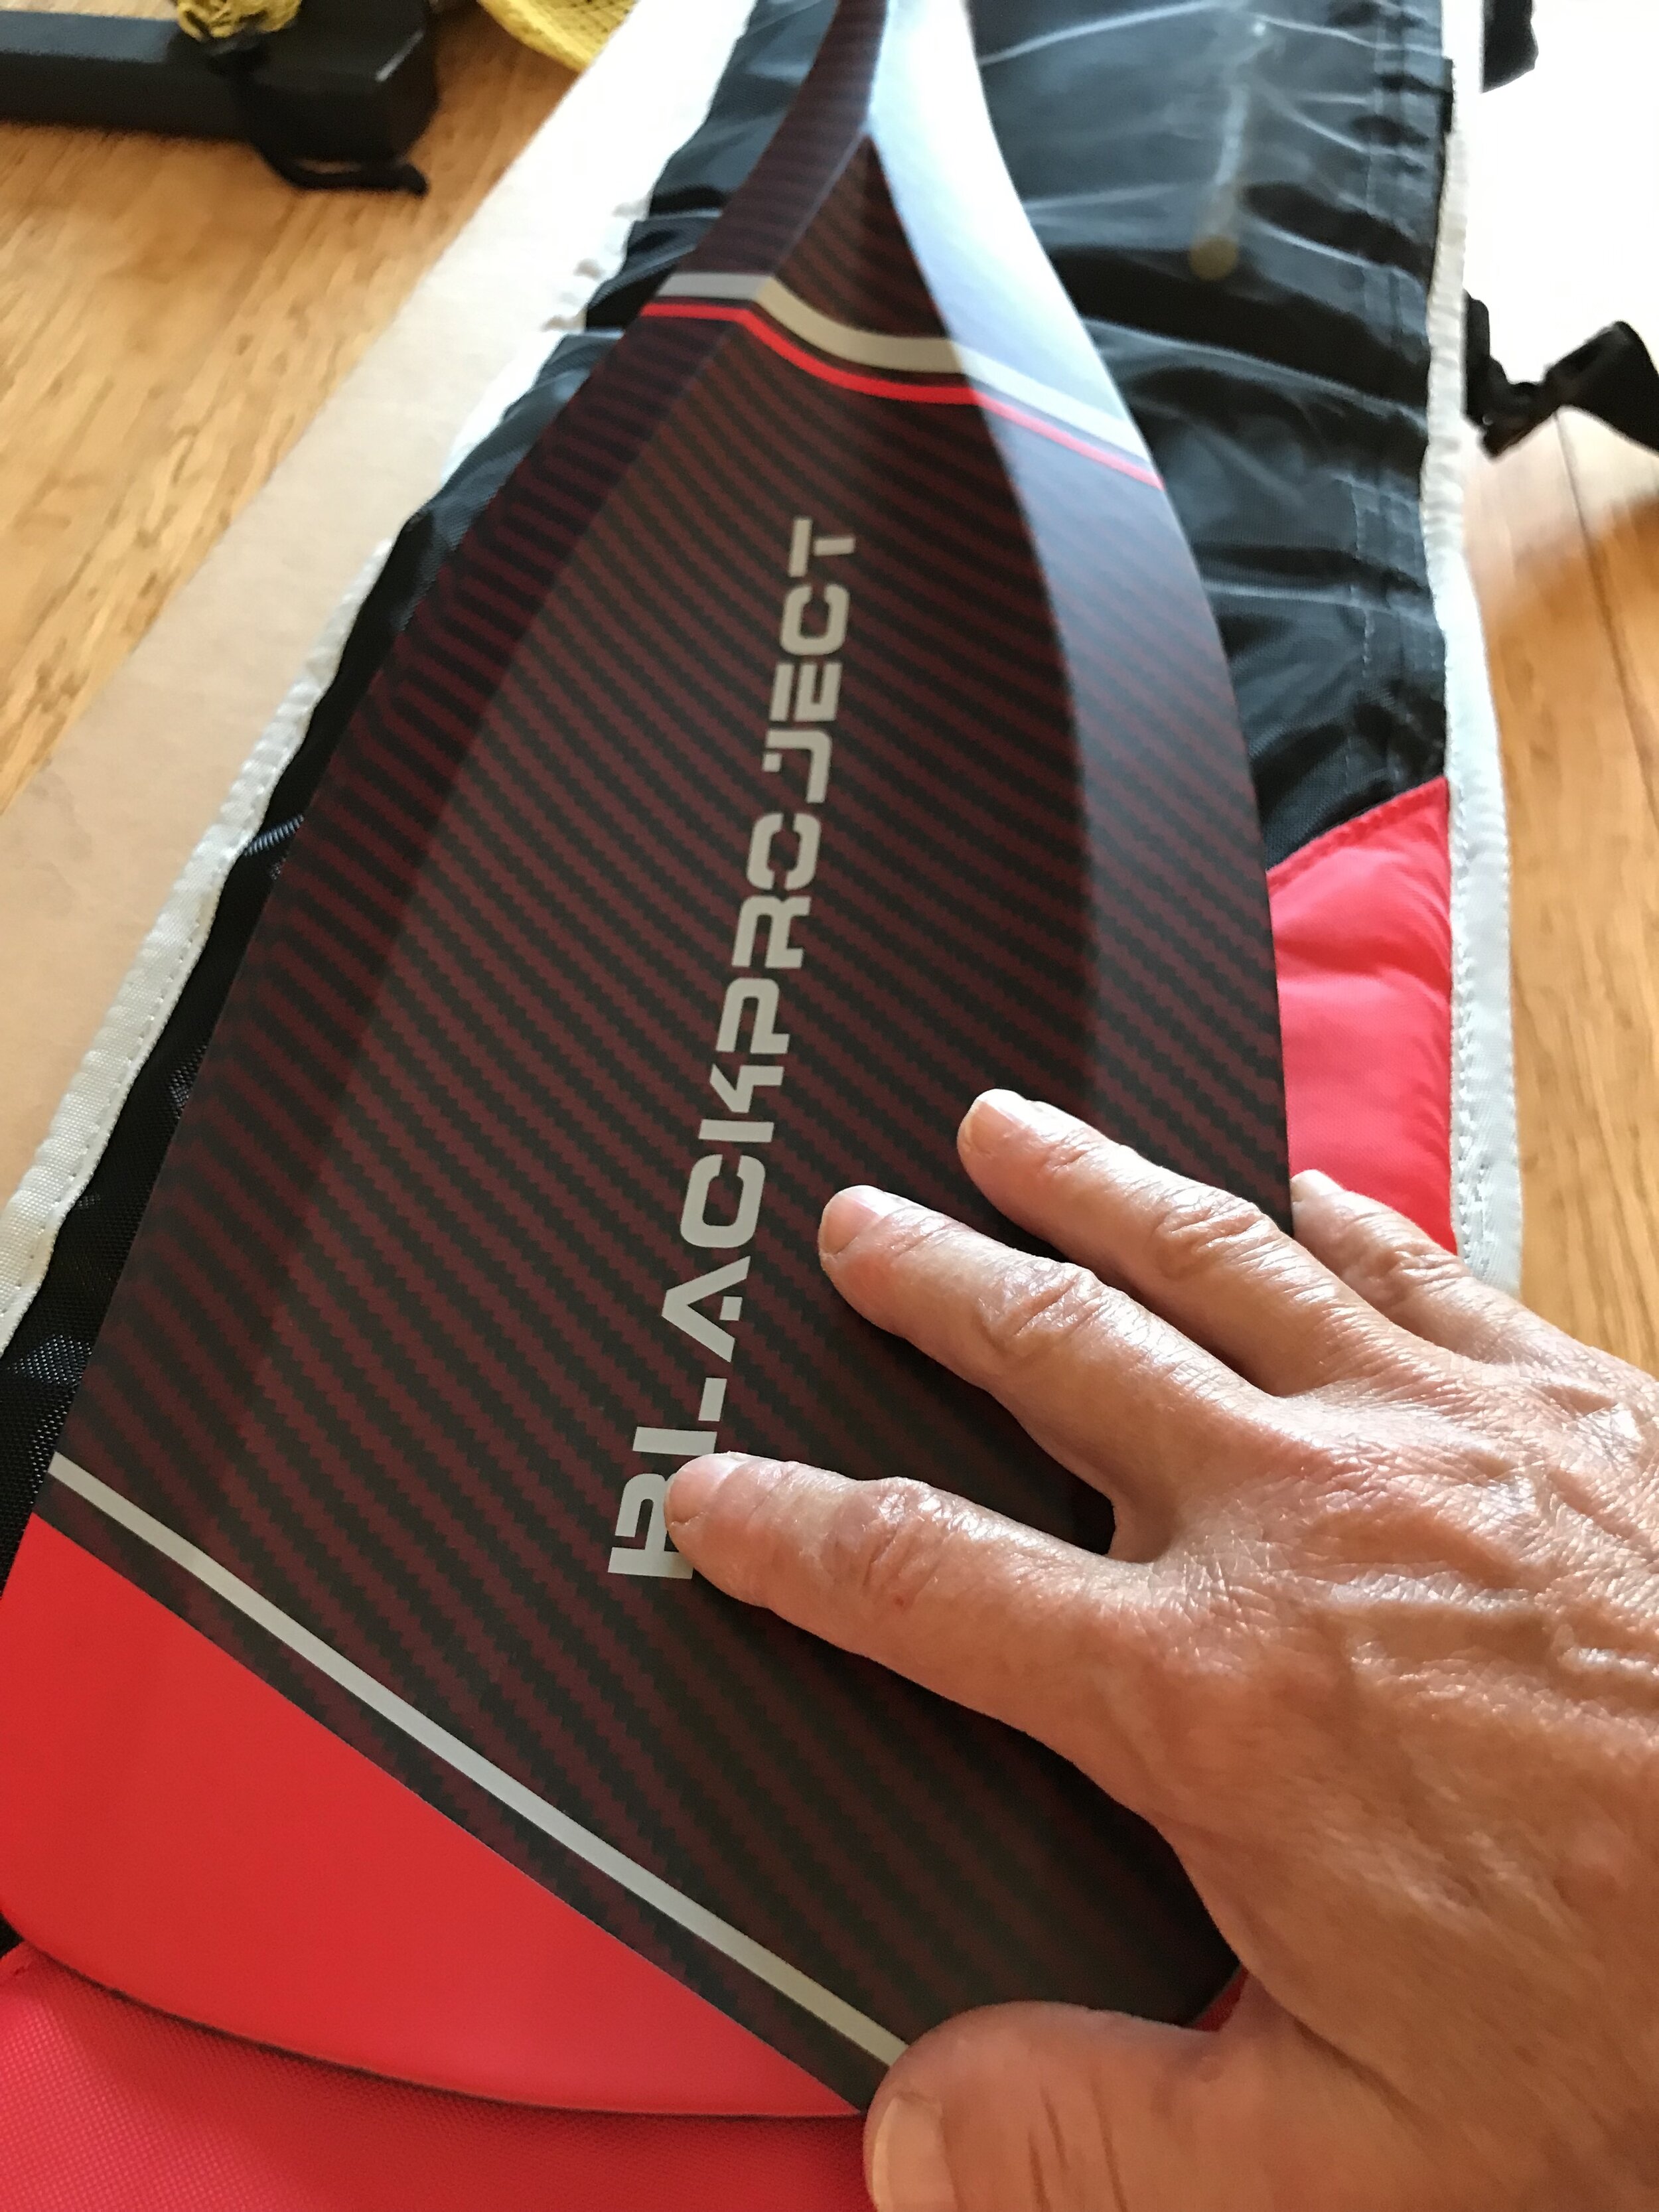
Yes, I’d followed Quickblade’s SUP series and also Hippostick’s, but these are made by crossover athletes who also make outrigger paddles. I own a QuickBlade V111 that I absolutely love, especially for downwind (and upwind). I was also familiar with ZRE’s SUP, and I also own a 10oz ZRE outrigger paddle. But when I searched for SUP surf paddle, I was coming up empty. With all price points at $500 USD, which of these carbon beauties was I going to buy? After a series of searches I came upon some minimalist SUP thread where someone suggested Black Project for surf. Since Black Project does not make paddles for outrigger, the brand was not on my radar. Well, it is now. There isn’t any spectacular footage in the video, it’s just my first time out with it. What a difference. If your eyes are glazing here, and you just want to know if the Hydro FlowX shaved a minute off my paddle time, then the answer is yes. Sure. This paddle feels like it weighs nothing, the side to side transfer is a weightless breeze, the power is incredible, and the steering agility was surprising. Love it.
The rest of this article will get rather technical and speculative. Read on if you dare…
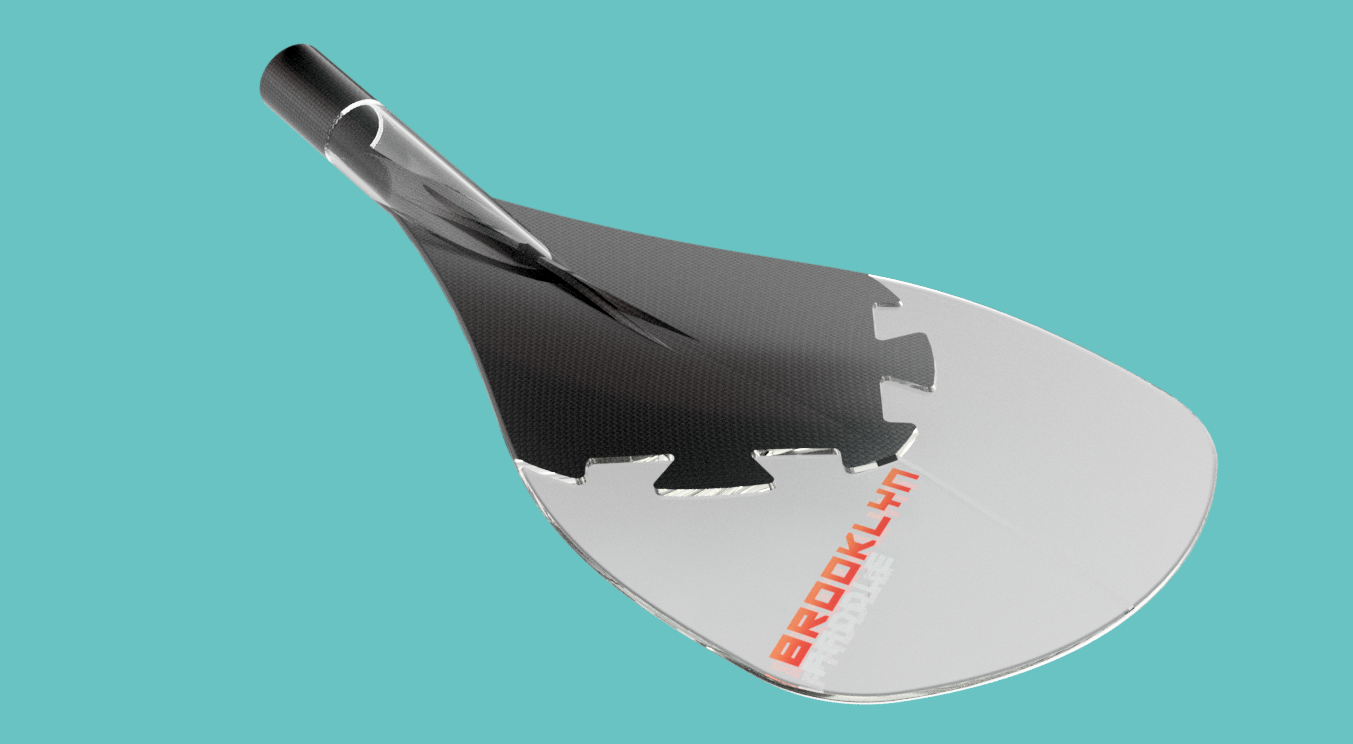
A few years ago I decided to 3D print a paddle blade. Or 1190 days ago according to the internet record on SimScale, where I uploaded a model of my blade design and attempted to simulate what happens to water flow around the paddle blade. I’m a better technician than I am a paddler, and while overthinking water flow can certainly distract from the beauty of paddling in my local ocean, we wouldn’t have rockets if people didn’t overthink how to technically overcome gravity. I had not set out 1190 days ago to invent a rocket paddle. I was actually curious about how much of a spoon shape could be incorporated into a paddle. I was thinking about webbed feet and wondering if a webbed paddle might be a logical solution. I also think the days of carbon lay-up are in the sunset and 3D prototyping and printing on a larger scale will be here faster than you can say “internet.” And I did indeed 3D print my paddle, which was called, 1190 days ago, the Brooklyn Paddle, since I lived in Brooklyn and paddled on the Hudson River and in the New York Harbor.
I spent countless hours learning to model the complex inner and outer curves of a paddle blade (using Fusion360 if you’re interested). And this is where the technical design of a paddle really gets into, let’s call it, flow. As a downwind paddler, I spend a lot of time paddling upwind also, so I need a blade that can really pull the boat (or SUP or surfski) past the blade. The blade must also be very quick in and out of the water on the downwind attacks. (Ducks are no longer my model here because as much as they might upwind, I’ve yet to see one actively surfing). Yet it was the ducky V-indentation on the QuickBlade V111 that first got me interested in that paddle, along with its flatter bottom.
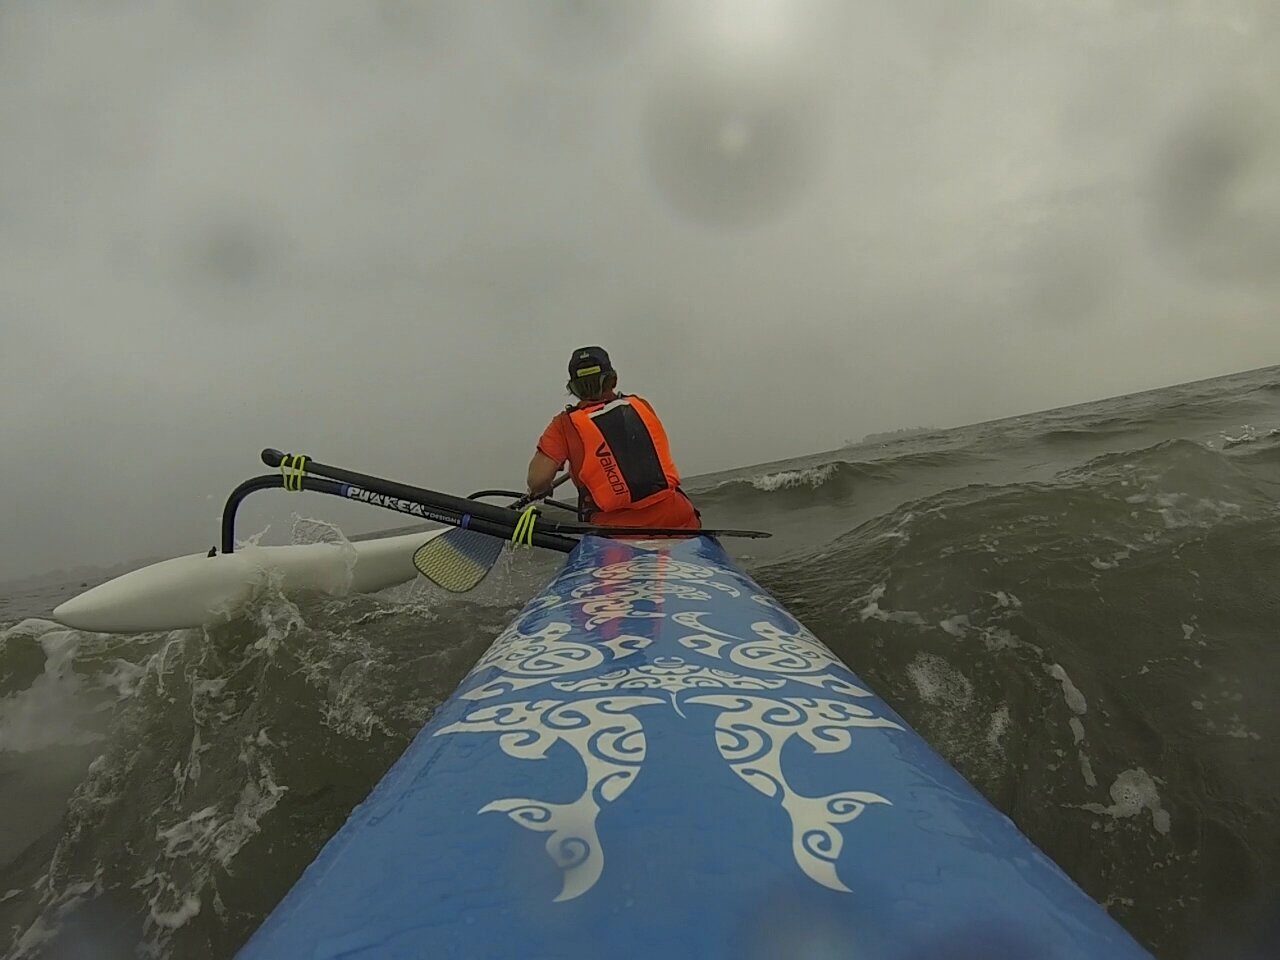
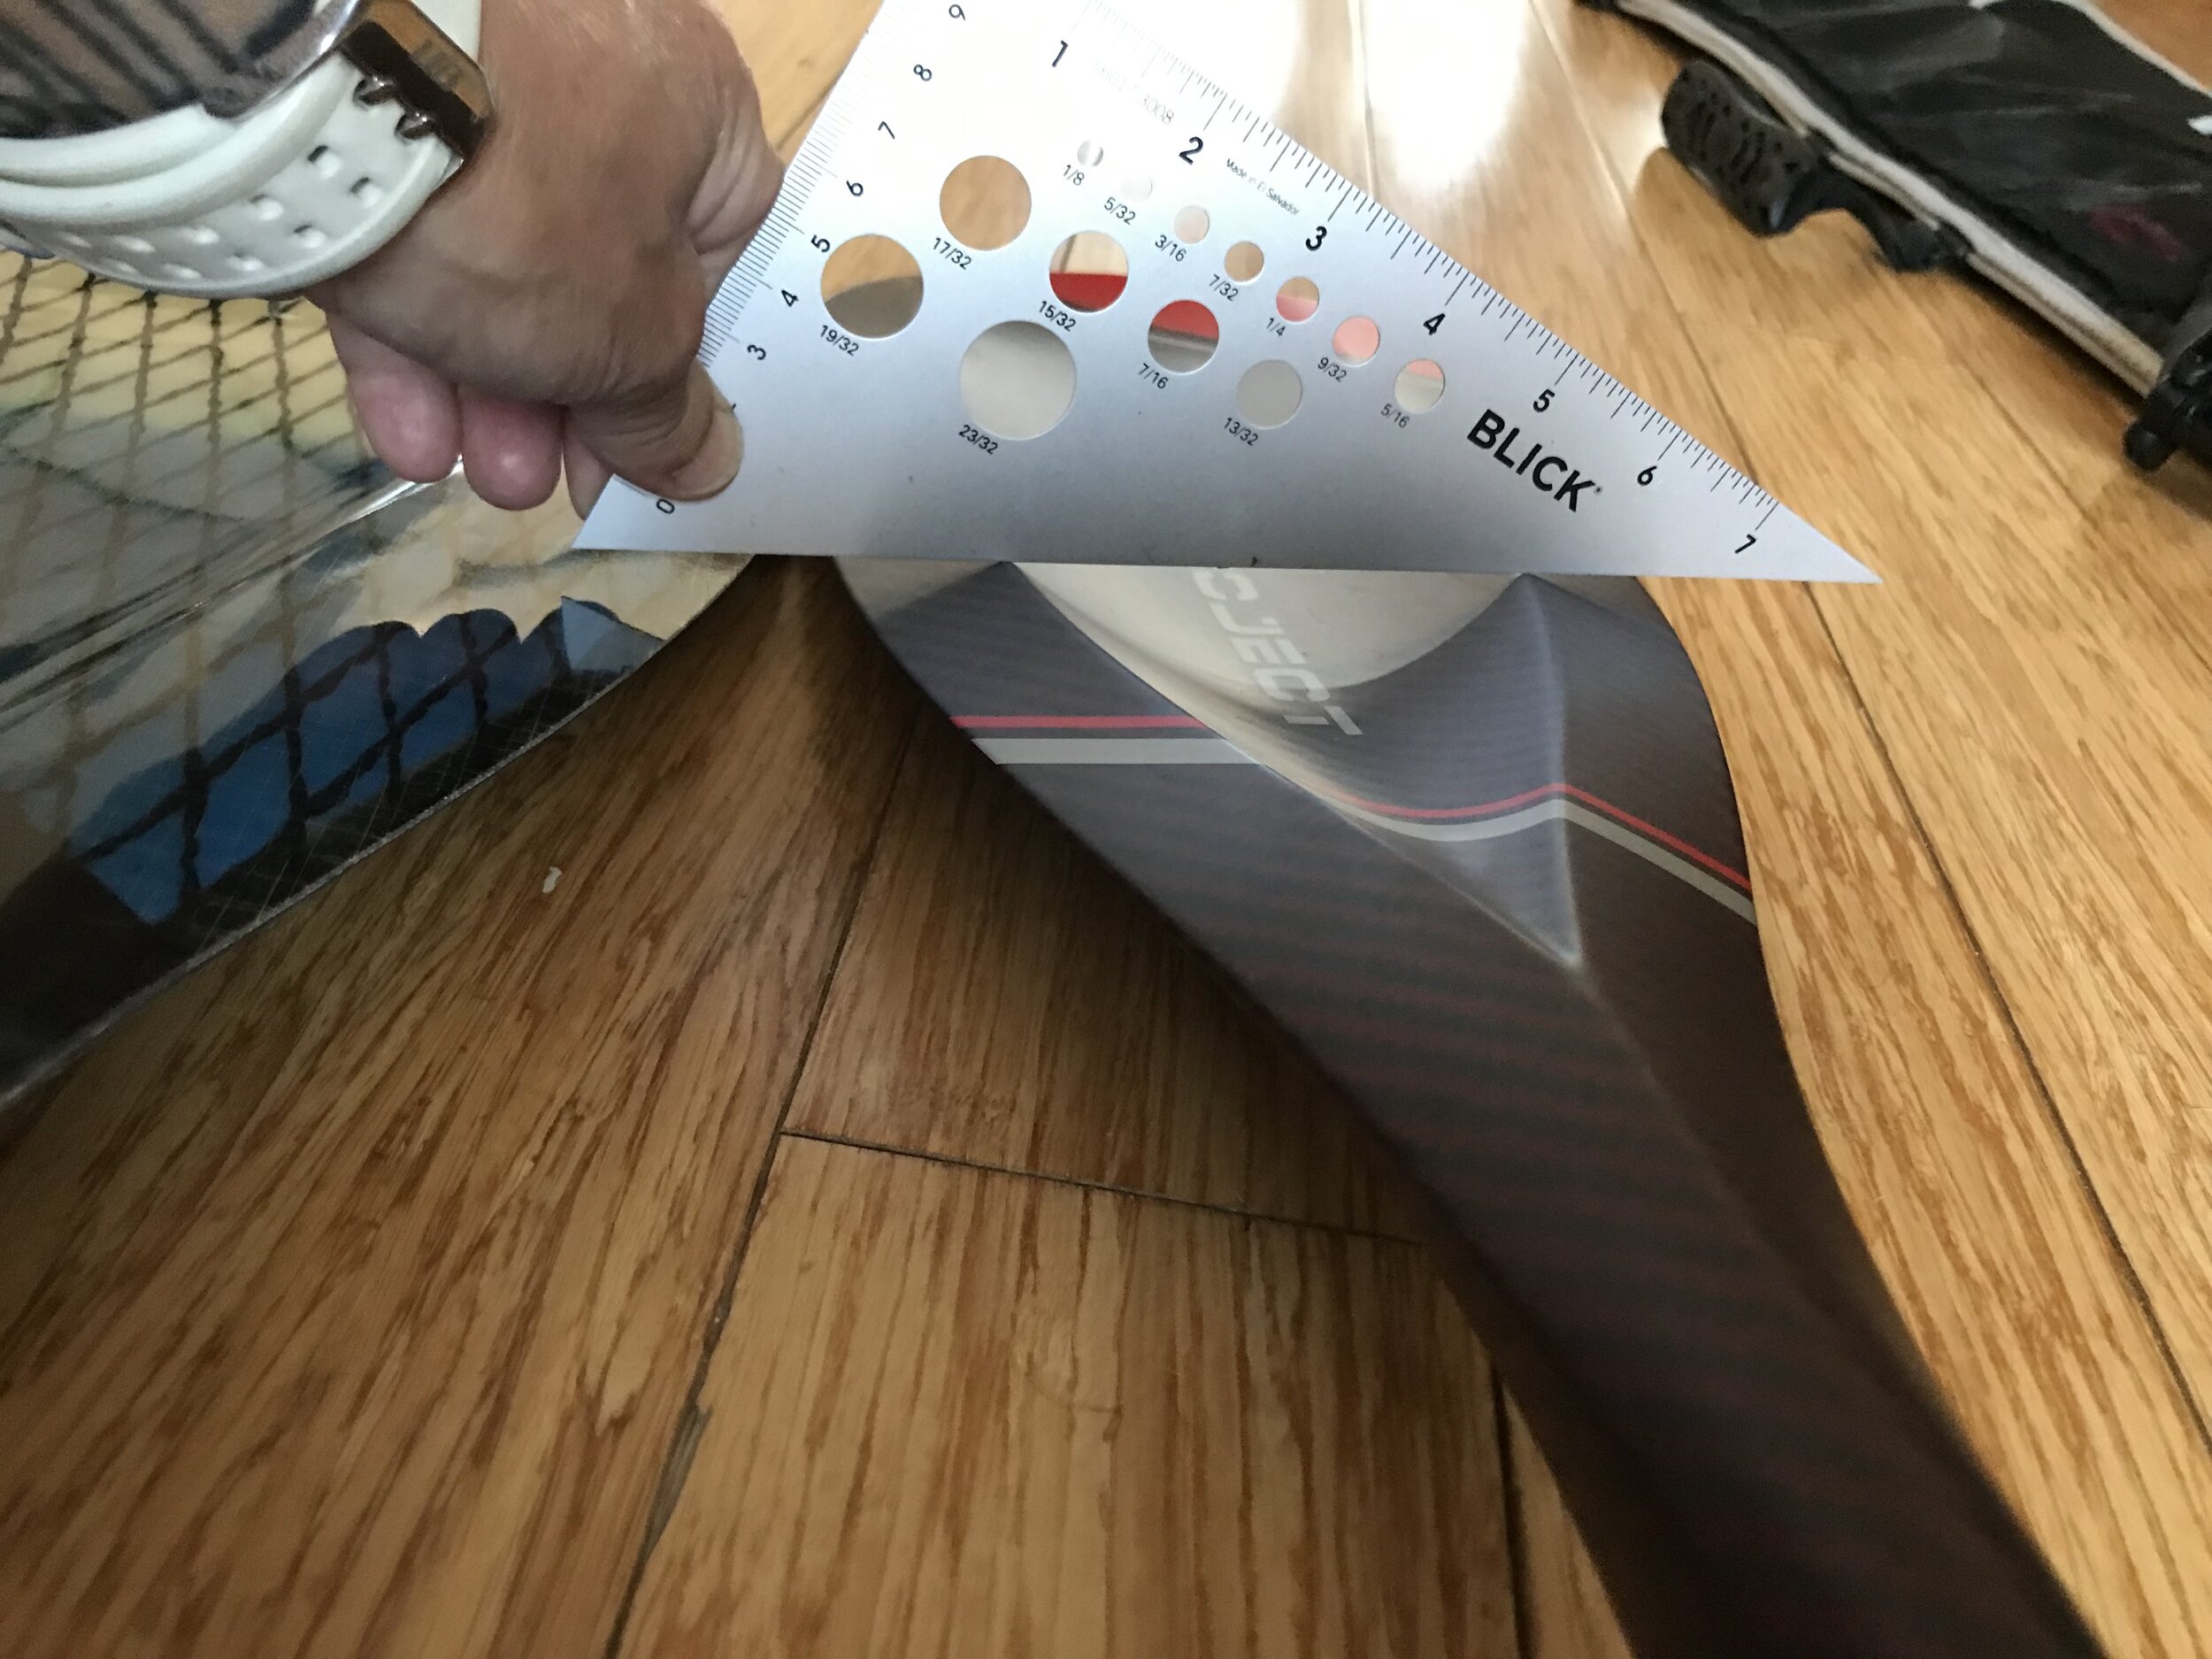
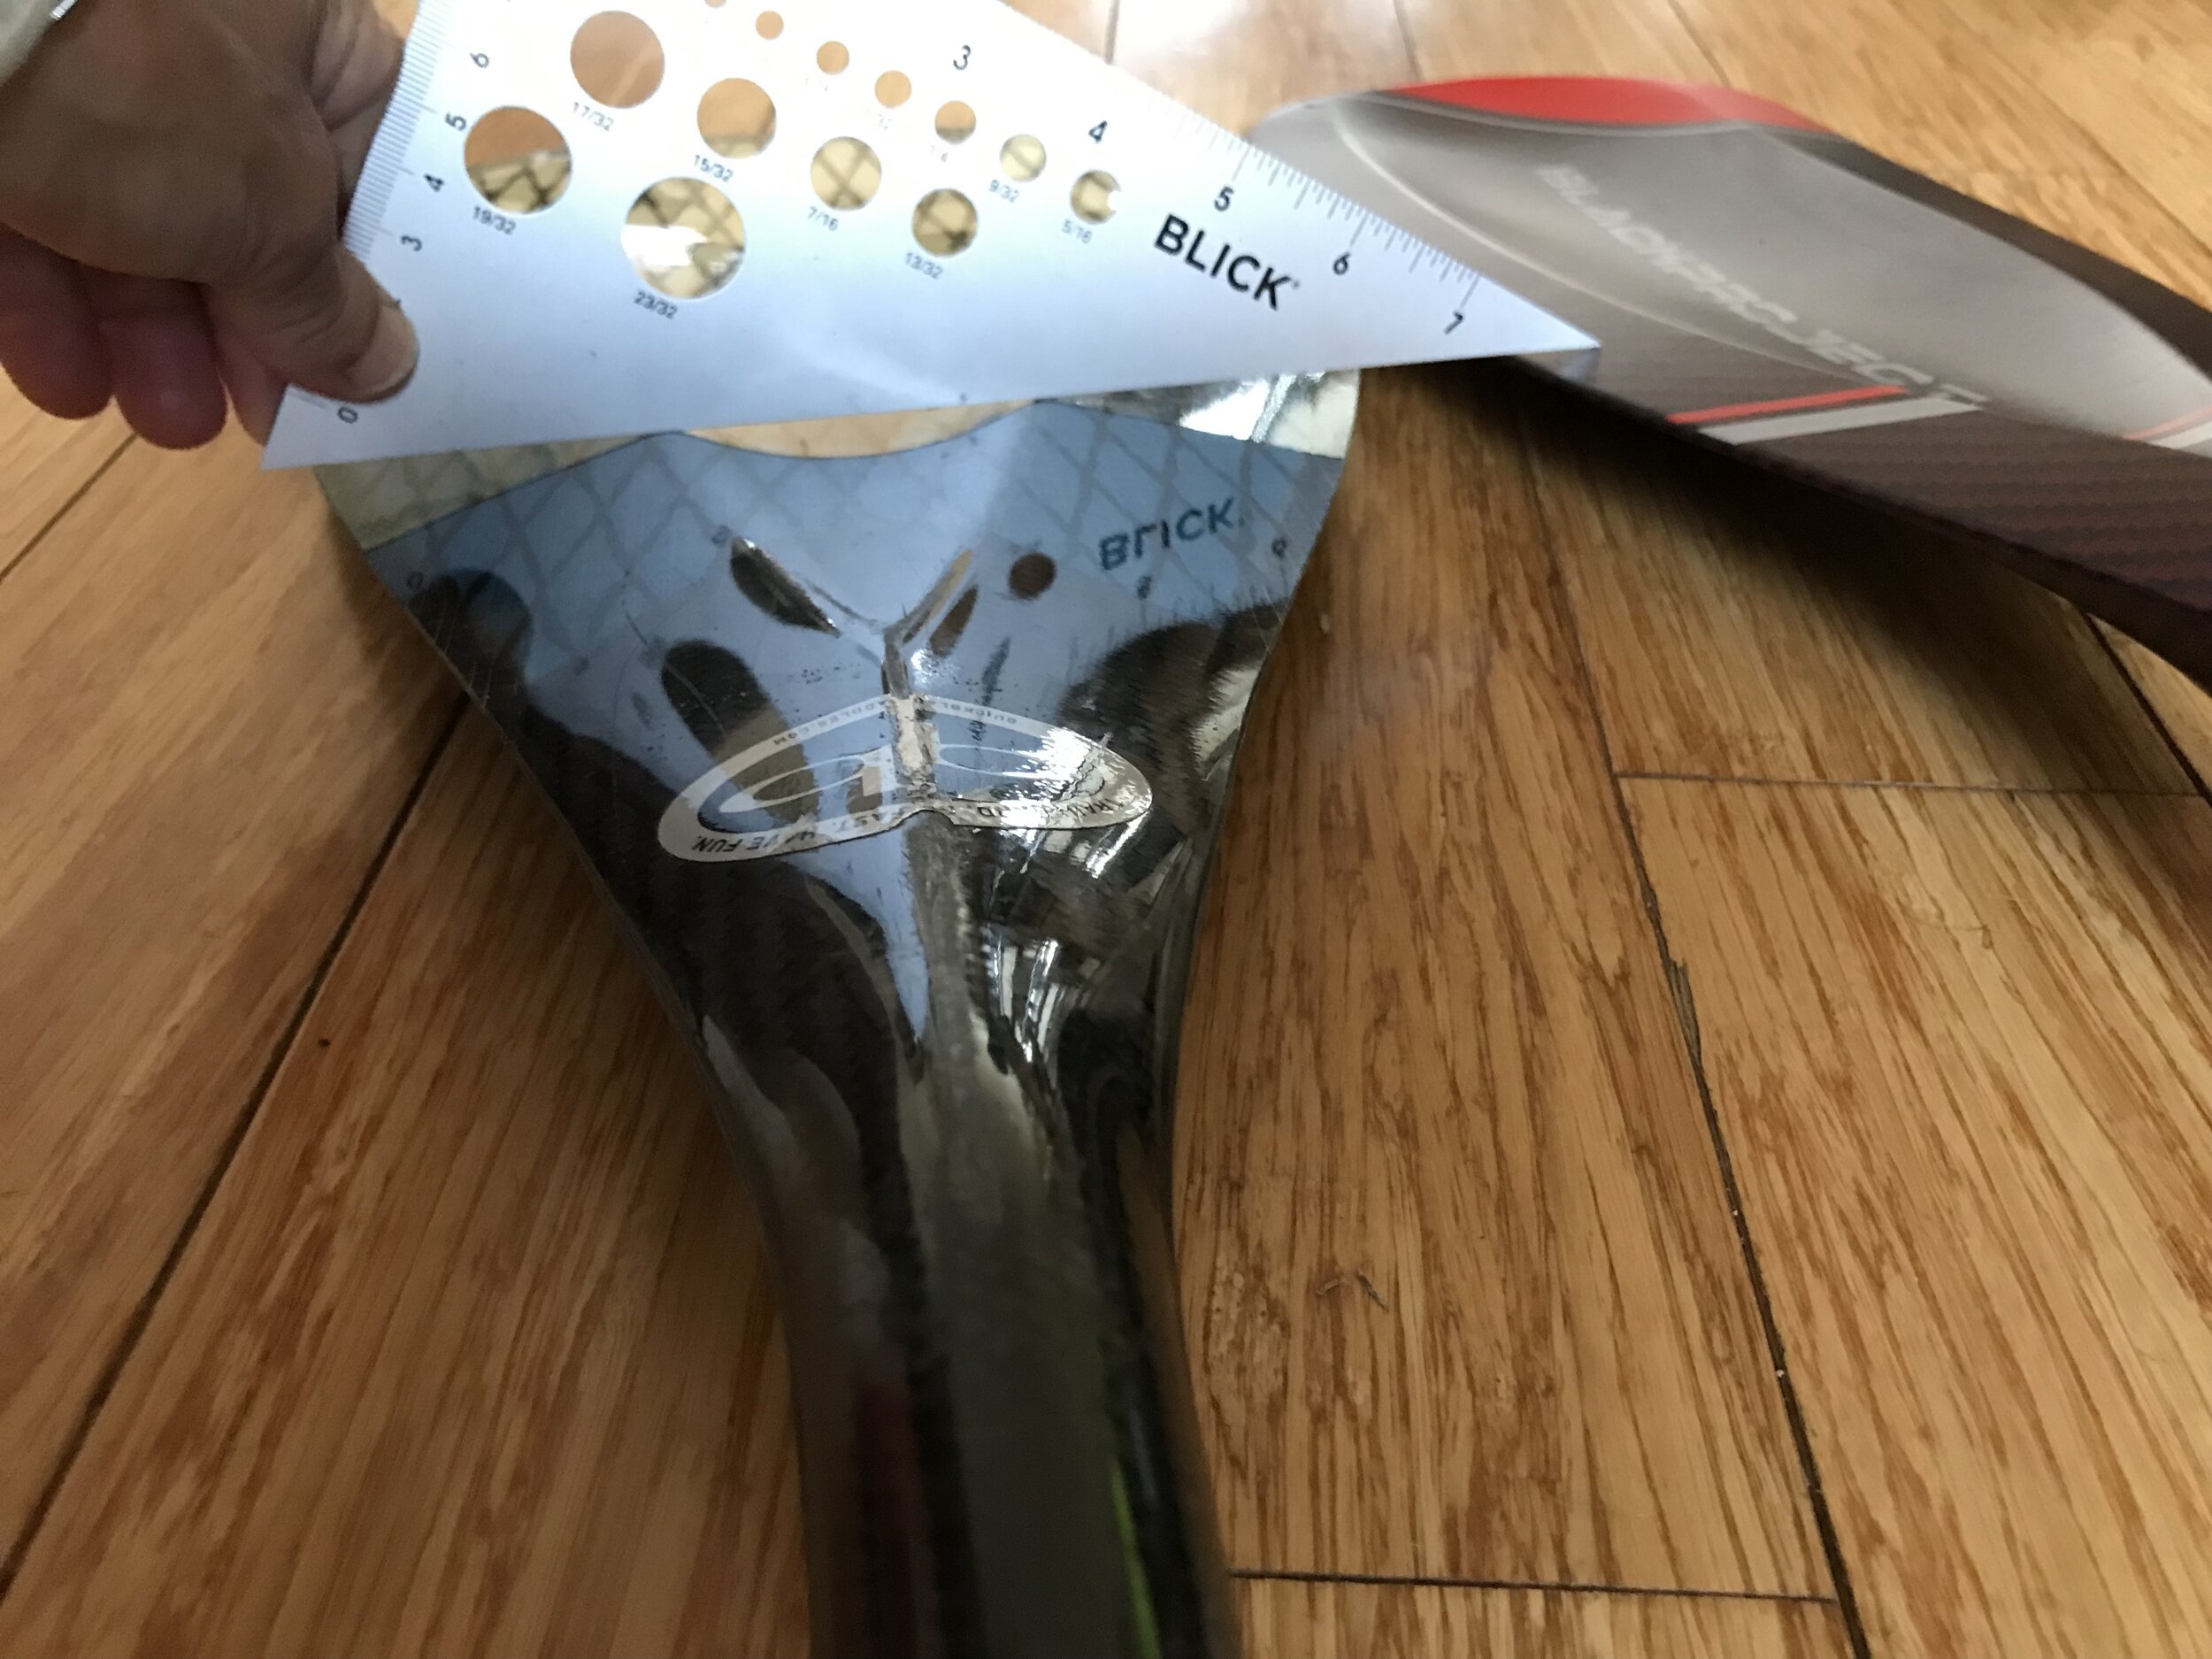
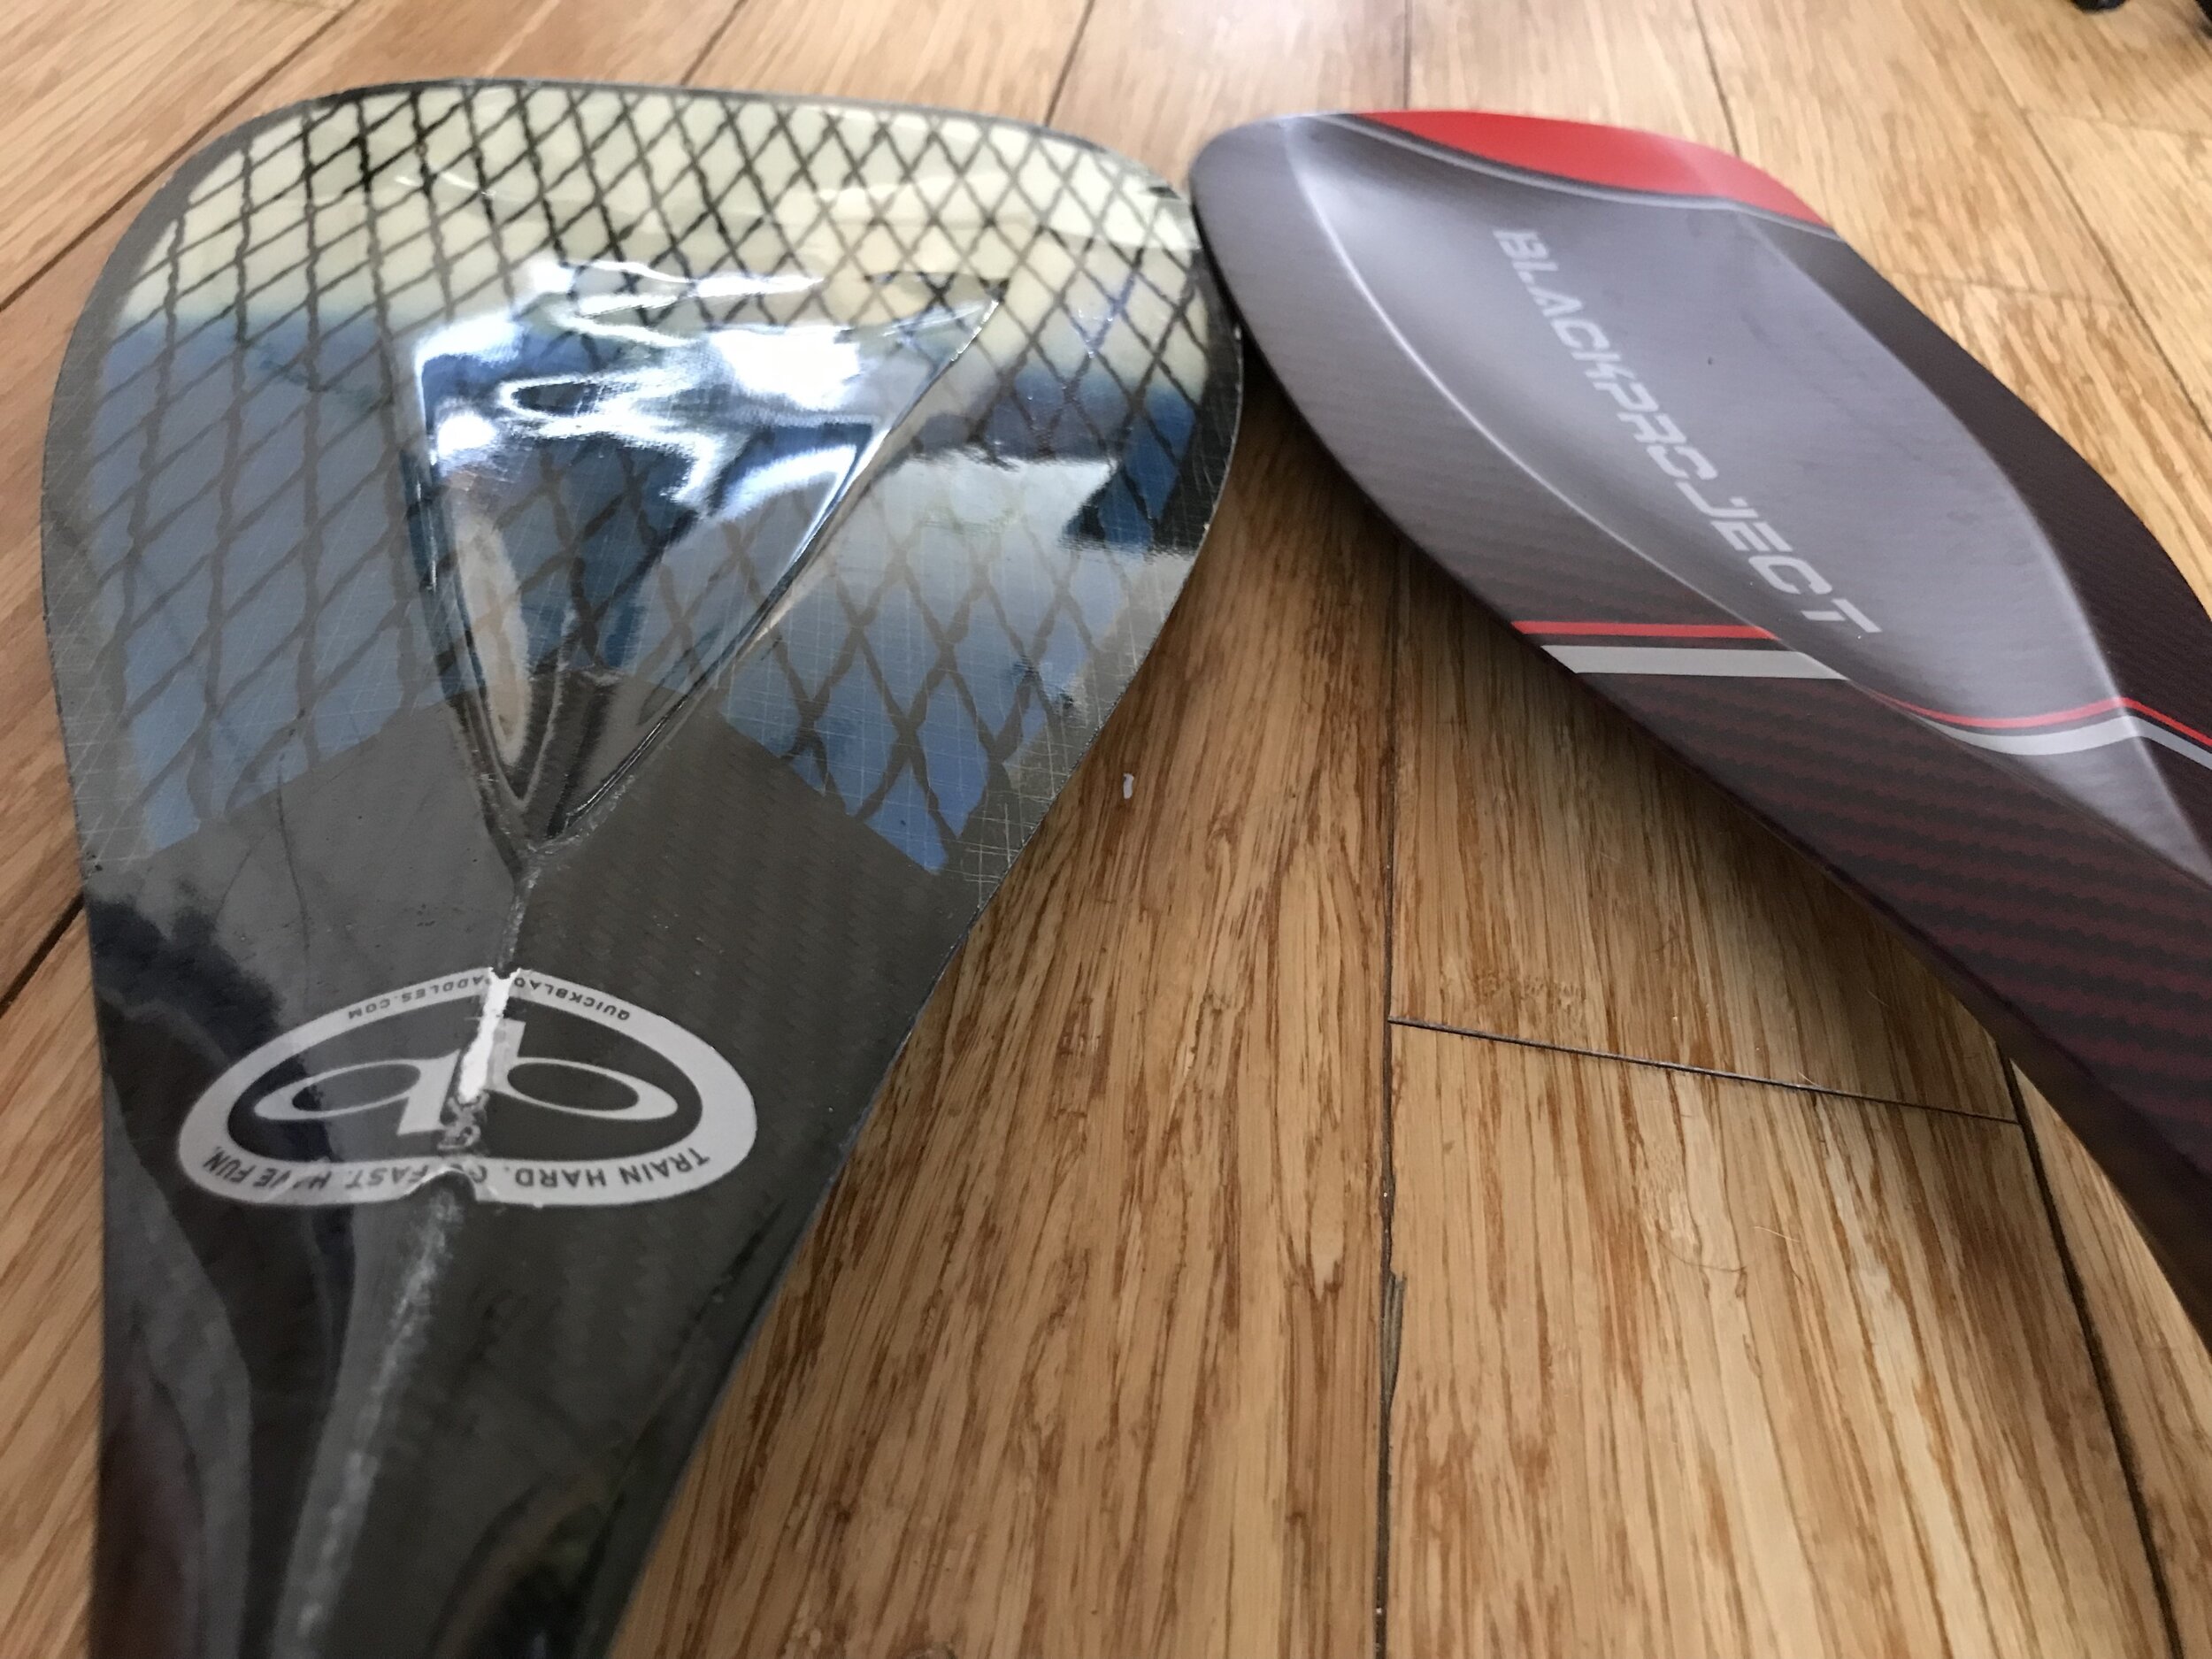
Pictured above are the conditions I love, and the ones I aim to graduate to with my SUP. The indentation in the Hydro FlowX (or DPS “deep power scoop” as Black Project calls it), immediately reminded me of the QB V111 indentation as well as my early attempts to make a paddle with a flatter bottom edge and deeper spoon. But what is really amazing is how small the blade is. How in the world can I be so far from the blade and get so much power out of it? How in the world did I suddenly get a steering paddle in such a small package? Enter the paddling and engineering duo behind Black Project of Chris Freeman and Tom Hammerton. As soon as I landed on their website and was able to scroll through line after line of technical data about the different paddles, I was hooked. I went through their step-by-step how to choose a SUP paddle guide and really felt I had the information I needed for sizing. However, at this point, since SUP is what I spend the least of my paddle time on, I thought I would go with the Lava, an all around paddle with a slightly lower price point. However, the clinic with April Zilg was pending, and I knew I had the option either to relegate SUP to hobby or to take it to where I take the rest of my paddling: the surf!
“Paddle=Board. Both are equal.”
Really, why have a fancy downwind SUP and not go all in with the paddle? The paddle is half the sport isn’t it? I read every single review I could find of the Hydro FlowX (which were maybe two total) and reread them. The more I scrolled through the data on the Black Project website, the more I realized this was a truly engineered project. These were geeks like me, in love with the ocean and willing to apply math and physics to it. Below is an image I got trying to model flow around my 3D paddle concept before I printed it.
You can basically see how the paddle slices into the water and some volume flows up past the blade and over the top. The hole is where the handle connects. If you add the ridge and peak onto the top of the handle, like Black Project did with the Hydro FlowX, that is going to change. The water is both going to flow up and also be held like ice cream in the scoop. Does any of this, stroke by stroke, need to be visualized to make us faster paddlers? Maybe. Like nature we need to be master adapters. If, when we put the blade in the water, our body is more comfortable, we have more power and more steering agility, then the technical analysis pays off.
Black Project hails the Hydro FlowX as the first 3D paddle. Of course all paddles are 3D, but this one has volume, which means the water is getting displaced while the blade slices in, and the water is flowing into the scoop in that instant of forward thrust. And this is great food for thought, but as I ran my credit card through for the Hydro FlowX, I thought it best to send a query to Black Project. After all, what do I know about SUP paddles? I was also anxious that the paddle get to me on time for the clinic with April Zilg. I got a call from Maui not long afterwards, and the next day Chris Freeman and I spoke. He suggested I take a look at his article Smaller, Softer, Shorter, which you can read by clicking on that link. I was already aware that downwinders could benefit from a smaller paddle, and Woo had a small paddle for us to try at downwind camp in 2020, just before everything got shut down due to the pandemic. I think we may have tried this one, which they sell as an emergency paddle. Let’s focus now on smaller. How small could we get?
SMALLER
So how is it that I am so far from the blade on a SUP, yet have so much power with such a small blade? Why are SUP blades smaller? Possibly there remains the mentality that bigger is better. I can definitely state that my coaches are all in principle agreement (that is the ones like Guy Ringrave and, as I’d find out, April Zilg) that a long stroke is not necessary. And yet you hear the chant all the time in outrigger paddling: long and strong! I’ve literally had a SUP paddler call out to me I should try a bigger blade. As I paddle more and more downwind, blessed by conditions from tropical Atlantic Ocean storms, my QuickBlade V111 starts to feel sluggish on the catch. The waves are moving so fast, I can literally feel the canoe slowing down when the blade enters the water. Subsequently I don’t bother trying to bury the blade or even stroke from my toes to my hips. It’s more of a knee to thigh explosion to position the bow at the bottom of the wave trough. This same explosion comes naturally with the Hydro FlowX. For surfski, with its two-blade wing-spoon, a couple of quick powerful grabs are required (and I’ve a long way to go at that!). But the surfski blades are also small. Why is the outrigger blade so big by comparison? All I can say is I wish I had another $500 to gamble and to have Black Project make me a super short, outrigger length version of the Hydro FlowX so I could find out.
Be safe, and see you on the water!
Paddle Board Leashes (and How to Stand Up)
Maiden voyages of NSP Sonic paddle board and VESL prone board with MetaLeash.
Paddle board leashes are essentially the same leash as an outrigger or surfski leash. This means the inexpensive leashes (and even some of the expensive leashes) marketed for boards have most of the same problems as the cheaper leashes on the market: breakage, slippage, UV rot, heaviness, etc. The stand up paddle board (SUP) paddler has some unique issues, mostly having to do with how you fall. When I bought my NSP 24” Sonic surf paddle board, the seller (Vermont Surf and Ski) had hoped to take me out to a river and give me a few lessons near Brattleboro, Vermont, where I had to drive to pick it up. My first thoughts, as a safety geek, were: how deep is the water, how rocky, how fast is the current… But he was limited on his time as NSP boards were in hot demand that day. He bought four MetaLeashes and told me if I fall off my board, to basically dive sideways so I don’t come down on it and crush the carbon hull with the paddle. Obviously, other crushable things are bones… Luckily when I took the board out on my maiden voyage, I ran into this fellow, below, who got me standing up in five minutes.
Most people would not buy a race board before getting cozy on a wider, shorter board first. As an experienced ocean outrigger paddler, my comfort level was high enough to bypass entry level boards. The price was right on this used board, which only had a couple of dings I had to repair. Compared to my outrigger canoe, the NSP Sonic looks really wide, but I am in a sitting position with a low center of gravity in the canoe. Shifting that weight upwards was going to be a challenge. This is how we met that challenge: my stand up coach stood at the back of the board and basically used his hands to steady me. He told me to get into a crouched position and start paddling. So, he walked behind me, and after a minute he told me to come up on one foot and (KEY PART HERE) WHILE TAKING A STROKE come up on the other foot into a standing position. Just like that, I was standing. Let’s cover this again: crouch on your knees, come up on one foot, stick blade in water, stroke, come up to standing position with the other foot.
Aha! A brace stroke! What is a brace stroke you ask? There are variations on it, but basically when you see a paddle board surfer leaning on a wave, on the paddle, they are bracing the paddle. When you see someone flying the ama on an outrigger, they are bracing the paddle. And I am lucky that Oscar Chalupsky taught me the brace stroke for surfski, which is the most important one: the one that keeps you from rolling over. In this case, standing up on a paddle board, the board is more stable because you have the paddle blade planted in the water, momentarily “locking” you into a stable position just like a rudder does, while you mess with gravity.
The fellow continued to hold the rear of the board while I stood and paddled (my legs shaking like mad), and I really have no idea when he let go. So, try this with a friend or family member, and make sure they don’t tell you when you’re on your own. The psychology of BELIEVING someone was stabilizing me, even if they were not, meant my brain could not tell the difference between him being there and when he let go. In fact he made it a point to let me know he would not tell me when he was not holding the board. So, I got my first “downwind” paddle on the Sonic my first day out. And in all subsequent paddles, I did not fall off.
Back to leashes. What happens when I do fall? It is more dramatic than a fall off an outrigger or surfki, where you mostly just roll into the water. Your bouyancy is such that you usually don’t go under. Not a lot of countering forces here. But a plunge? You really don’t want to smack the board, with hands, legs, head… And when you do leap sideways, you will submerge further, which means there will be more stress on the leash.
The first thing I noticed while on my knees on the paddle board, was the cuff of my leash. You have to position the cuff so the attachment to the leash is on the back of the leg, otherwise you will squat on the hardware. Issue number one solved, just position the hardware to the back of your leg. But there are other solutions. I have seen a lot of social media images of stand up paddle board paddlers preferring to connect the leash at the waist. While I do make a belt, on my first day out I just connected my leg cuff to my PFD, similar to what I’ve seen others do. I have been selling more and more of the belts lately, so it is worth considering what is comfortable for you. Link to MetaLeash shop: www.metaleash.com.
A note about prone paddling, foil, surf: the MetaLeash also works well for prone, or for any other board activity like foil. A surf leash is in development with a different set of fall parameters, because falling off a surfboard involves very complex forces, similar to paddle board surfing, with a lot of fancy footwork, and surfers prefer straight leashes. Stay tuned or hit me up with suggestions, comments, feedback, concerns, customizations, you name it, I will leash it for you. metaleash@gmail.com
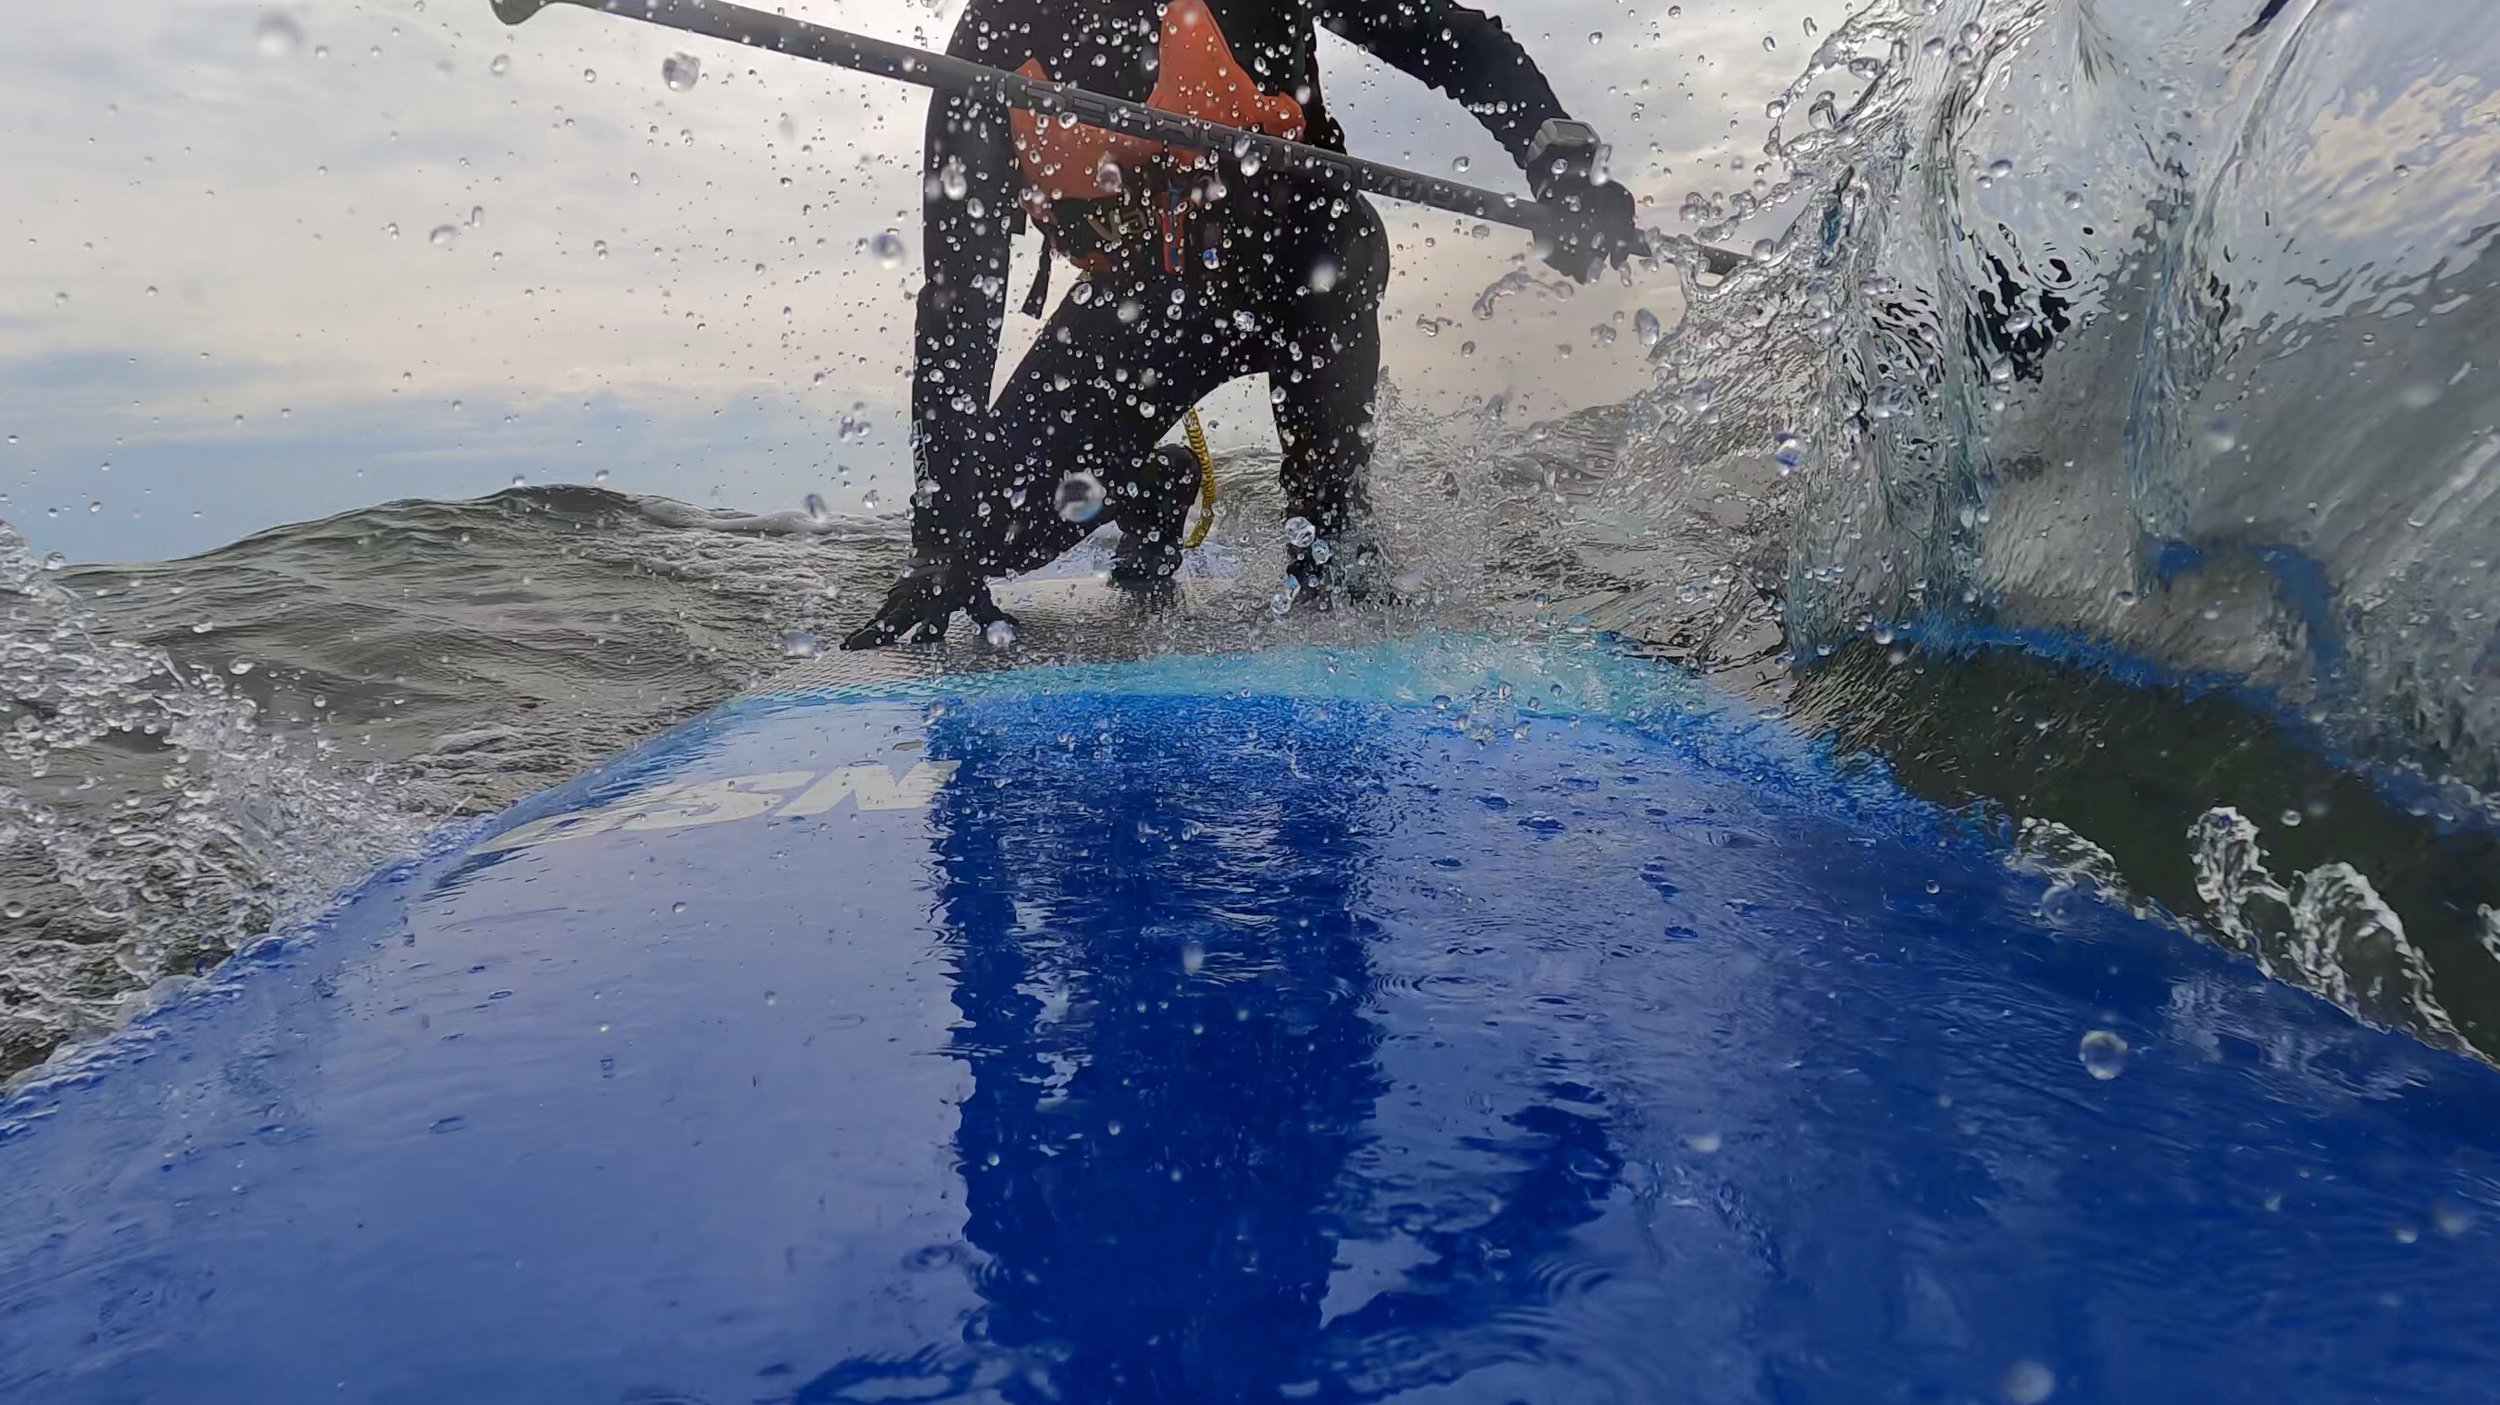
And now for a video of some truly amatuer standup paddle board surfing and some speedy prone paddling. Here we ended up sharing a leash, another upside of a quick release, which is critical for getting out of trouble, possibly critical for a race start or critical if you are sharing! Have fun and stay safe. It is February 28, 2021, 39 degrees F in my local Atlantic Ocean, and that is paddling weather to me. See you on the water!
LIGHTER: at 4.5 ounces weighs half of other leashes, floats
SMALLER: 50% smaller than other leashes but still extends just as long
STRONGER: heavy duty webbing, stitching and YKK buckle system, 1600lb jacketed Samson Dyneema retractable leash, stainless steel clasp system (no hidden mystery hardware or plasticware like other leashes). Can be used with included Dyneema loops, without hardware, for greatest strength.
SAFER: easy to inspect, high contrast (red, orange, hot pink, lime, yellow or black cuff), red, yellow, orange or pink leash, dual quick release/connect for either race start or getting out of tricky situations
SIZING FOR OUTRIGGER, SUP, SURFSKI, FOIL, PRONE: Retractable leash comes in 9’ or 6’ length. Hardware comes in different sizes for conditions or hands.
SIZING FOR FIT ABOVE CALF: Leash cuff is to be worn above the calf or connected to waist strap.
Straight Leash 6’ with Shock Coil and Quick Release (for surf, SUP, foil, your choice!) Comes with yellow or orange rail saver.
Dry Suits: Top Picks for Winter Paddling Gear, a review of Kokatat, NRS and Vaikobi
The ocean as winter wonderland.
I have been researching dry suits for the past two years. Each winter I have opted to spend money on travelling to the tropics instead, usually to downwind camp. This winter, as I stay at home due to the corona virus, I decided it was time to take the polar bear plunge and invest in gear good enough to carry me through a long, socially distant winter, in my local ocean. I do not make the decision lightly, as paddling in cold water drastically increases risk in our sport.
Every time I thought I was heading toward a bona fide review of winter paddling gear, I ended up on one of those websites that is really a shopping channel. After reading every seemingly real paddler’s review on storefront websites and watching the few videos out there, I really had my heart set on a Stohlquist with a built in jacket. Alas, there wasn’t one in my size available anywhere. Inventory is also scarce in this winter of 2020, and there seem to be a lot of newer brands out there I am not familiar with. As much as I looked and looked, I also was not able to find a high-visibility, preferably orange or partially orange suit in my size. Ultimately I defaulted to a color that really is not a good idea in winter water gear - blue - because it was one of the only ones out there in my size and made by the brand I finally decided was my top choice, even beyond Stohlquist. And though I did not prefer blue, the body of the suit is light colored, which is a lot better than black. But it is still sandy colored, so it would be impossible for a rescuer to pick you out of the waves or off the shore in bad conditions.
Kokatat.
UPDATE: Winter of 2022 approaches, which will be winter three in the dry suit. Not only has it held up with frequent winter use (December-April), I also took up SUP surf last winter. This means I submerge every time I go out, as a wipe out in surf is generally guaranteed. The great upshot of the dry suit investment is that the ocean sports do not come to a seasonal end. My fitness level remains high all year round.
I finally rejected the idea of a drysuit with built in jacket, because I can always add layers. I knew that for the freedom to move fully, to rotate through all of my paddling motions, less was going to be more. Stohlquist does not offer a lifetime warranty and Kokatat does. Kokatat also has nice videos on how to maintain and repair your dry suit. The price point on the one I selected was $620 USD and is a Hydrus Swift Entry. When it takes just as long to gear up as you plan to spend on the water, putting gear on can be a bummer. Believe me, it takes longer to put my NRS winter gloves on that it takes to get the Swift Entry suit on. You will be in and out of this in a jiffy.
When I first tried it on, the choking tightness of the latex neck was terrifying. After some internet research, I discovered that Kokatat recommends you just put up with it for your first few paddles. I couldn’t wear it for three minutes let alone three hours, so I defaulted to their other suggestion, which is to use cans to stretch the gaskets in the neck and wrist for 12 hours. I did not need to stretch the wrists, and after an overnight of stretching the neck around a small paint can, the difference was just enough to make the first paddle tolerable. After a few more paddles, the latex remains ever so slightly uncomfortable when I first put it on, then I don’t notice it. TIP: measure your neck then make sure whatever you use to stretch the gasket is a little smaller than your neck, so that you don’t overstretch.
There are considerably more expensive drysuits out there, but as a novice winter gear consumer with a fairly advanced understanding of how much I paddle, under what conditions and also a commitment to taking care of my gear, I figured I would get enough wear and tear out of an entry level priced Kokatat and know enough in 2023-2024 to upgrade if required. But since this suit is repairable, even that may not come into play. But let’s say I wear it 100 times over the next three seasons: that come out to $6.20 per use, which is a far cry from a $620 single use plane ticket to the tropics. Ok, so the reality is, I will use any math to justify my paddling addiction. But in reality that $6.20 is my ticket to a safe paddling in an ocean that would otherwise kill me. Almost every winter someone goes out in my local ocean in blue jeans on a kayak and doesn’t come back. A dry suit is an investment in your life. Never second guess the temperatures. If getting too hot is your worst case scenario (because you literally are sealed inside the suit) then you’re in luck.
The Kokatat Hydrus performs very well while paddling, as it does submerged in water. This suit has built in feet or socks. For me, the key to staying warm is keeping my extremities dry. You will find that air gets trapped in the suit. I realized after a couple of uses I could open up the easy access zipper and bleed out the air, then rezip. I bought “waterproof” socks, which have about a 1mm fleecy neoprene texture and outer seal of some sort. They look like socks and feel like thick socks. Of course you don’t need waterproof socks inside a drysuit, but for me these socks are gear and are not bulky like full neoprene socks. The ones I bought are no-name “Randy Sun” socks I bought on Amazon.
UNDERLAYERS: Look like socks. Feel like thick, cozy socks but waterproof or at least water resistant. Along with Vaikobi cold gear and an NRS hydroskin top.
These are my underlayers: I don’t plan on swimming with these socks, but I can say that after getting out of my drysuit I can walk through puddles into my house and no water is absorbed by the socks. $24-$29 USD. As I already have a hard time with the ankle zippers on my NRS farmer John wetsuit, I figured I needed tapering gear to get into my winter paddle boots, so I bought Vaikobi Vcold Flex tights. My legs don’t tend to get cold, and inside the watertight and airtight drysuit, I don’t think I will need thicker neoprene this winter. These tights are a light neoprene like material with fleece and have the uni-rear end to keep you from chafing on seams. They are pretty much the same thickness and softness as the no-name socks. The NRS hydroskin top has lasted me many seasons and still looks brand new.
OUTER GEAR:: I selected NRS Boundary boots and ordered a size up so I could fit my socks and excess drysuit socks (they run puffy big) into them. These boots are waterproof up to the ankle. It is impossible for me not to get water into them, so when I was done and portaging my Kahale across the beach, I was not happy with the water sloshing inside. Water runs out of regular NRS paddle boots, so no sloshing. But before I discounted them entirely, I decided to try them with my NRS farmer john wetsuit on a warmer day. Water still gets in over the top, but once your body warms up that water, that is the water that stays in your boot. With regular, ankle high paddling boots, cold water is constantly exchanging. So, ultimately, the boundary boot offers a significant advantage in keeping the extremities from getting too cold. Since they are mostly neoprene, they are very flexible and do not get in the way of my leg pushes, which is a major factor in paddling power. I love them. $80-$100 USD.
I have owned the NRS Mavericks for a few years, and my first pair has taken on some small holes. The latest versions are thicker or tougher and were very difficult to get on. But this I suspect is part of their newness. I had never experienced them as waterproof. My hands always seem wet. But once the new liquid seam wrists were sealed over the latex gaskets in my Kokatat dry suit sleeves, my hands were indeed dry. The dampness I felt afterwards is the dampness you will feel from paddling in your drysuit: from sweat. As for headgear, I have a neoprene beanie that always rides up, so I don’t use it anymore. I’m sure I will need a full hood at some point this winter, but for now a skimask will be topped by my neon orange Puakea trucker hat. I would still prefer an orange suit, but I’m staying hi-visability with my neon orange PFDs (Vaikobi for now, my more buoyant and thicker Mocke for the cooler winter), and I have switched to my MetaLeash belt. The MetaLeash cuff still easily fits around a drysuit, but the higher the quick-release is, the less you will have to submerge in cold water if you get into trouble.
Your smartch watch will not pick up your heart rate through the neoprene.
My Apple watch still connects to GPS and gives me my paddling app features, but without heart rate. You can’t have everything! And you can’t use the touch screen etc. But the upshot is, with the right investment, you can paddle all winter long. Please remember to study the weather and do not go out if there is risk. I can comfortably carry my compact Standard Horizon radio and my bulky ACR beacon in my Vaikobi race PFD. I hope I never use them! Be safe and see you on the water,
FASTEN YOUR METABELT!
Introducing the 2024 MetaLeash Belt Leash, perfect for surf, SUP, and all paddle sports. Our upgraded design features bold, brightly colored belts that are two ounces lighter yet just as strong, with a 2800 lbs breaking force. Made of durable seatbelt polyester, the new MetaLeash belt ensures top performance and reliability.
PLEASE NOTE: Belt selection is yellow, lime, pink, orange, red or blue with three large water drops. The small water drop designs are SOLD OUT. We appreciate your patience while we update the inventory photos. The leash colors remain the same.


